Showing posts with label Free Pattern. Show all posts

Simple Two-Color Baby Free Quilt Pattern

Wednesday, March 1, 2023


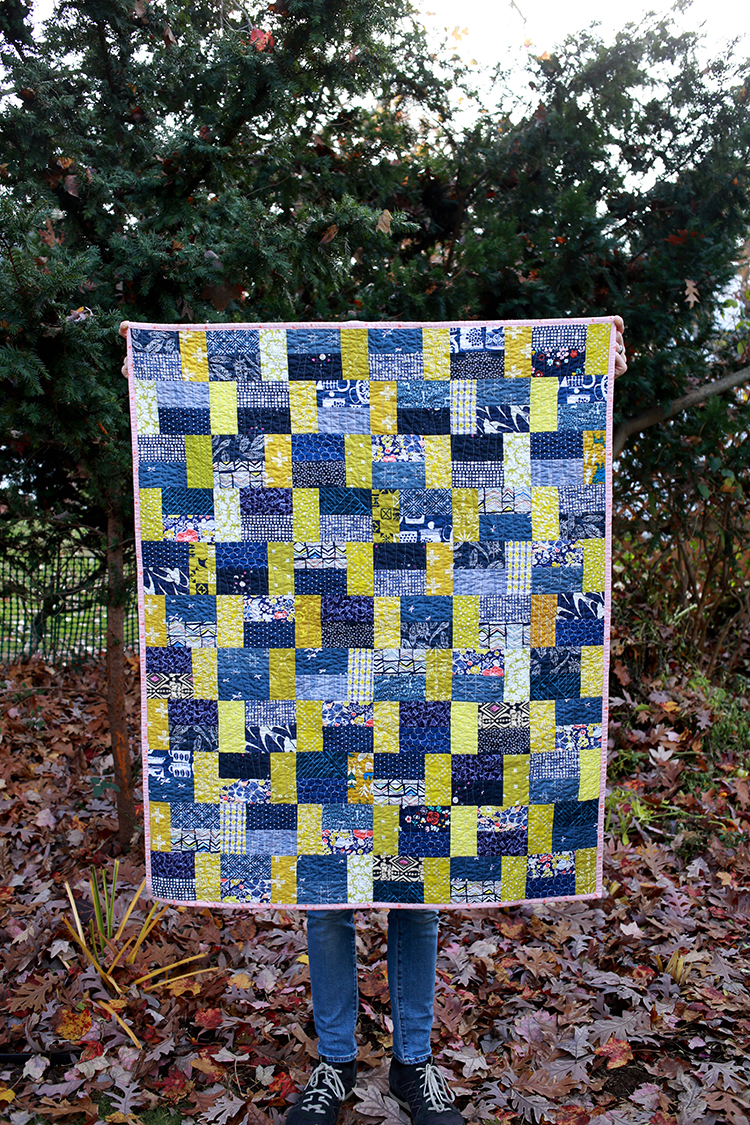
Happy Wednesday! I'm back to share a tutorial for this simple two color baby quilt that I made from my stash last year for one of our friends! First, a little bit about the quilt itself.


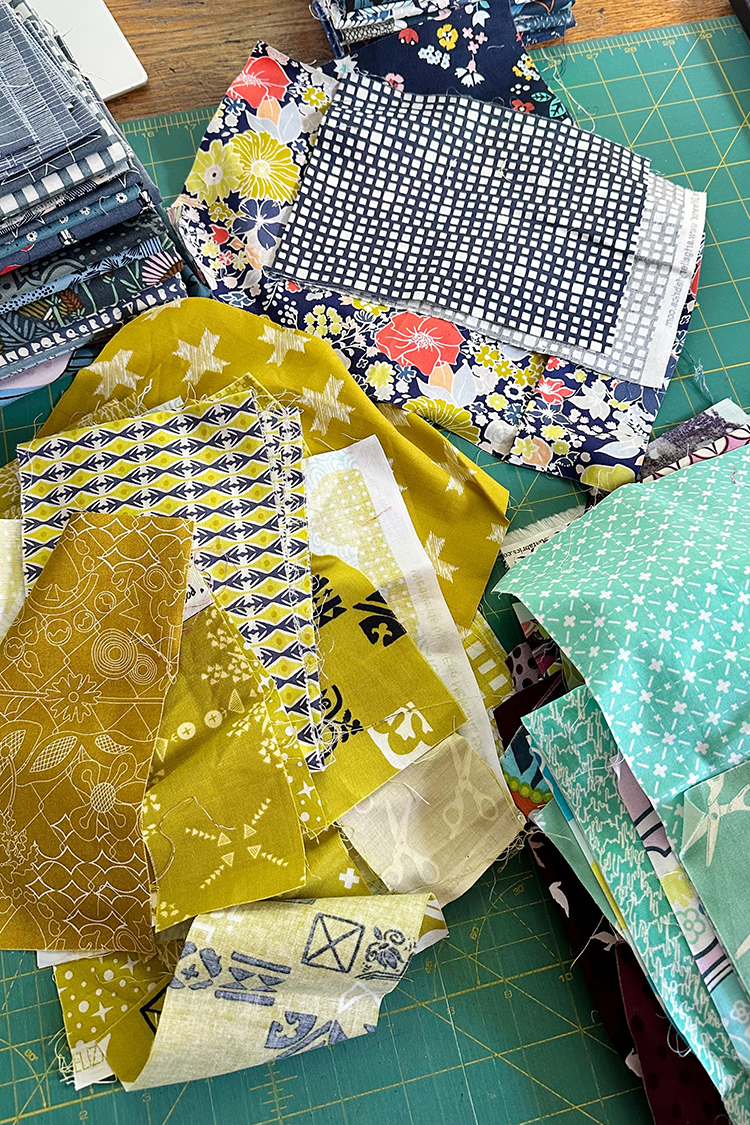
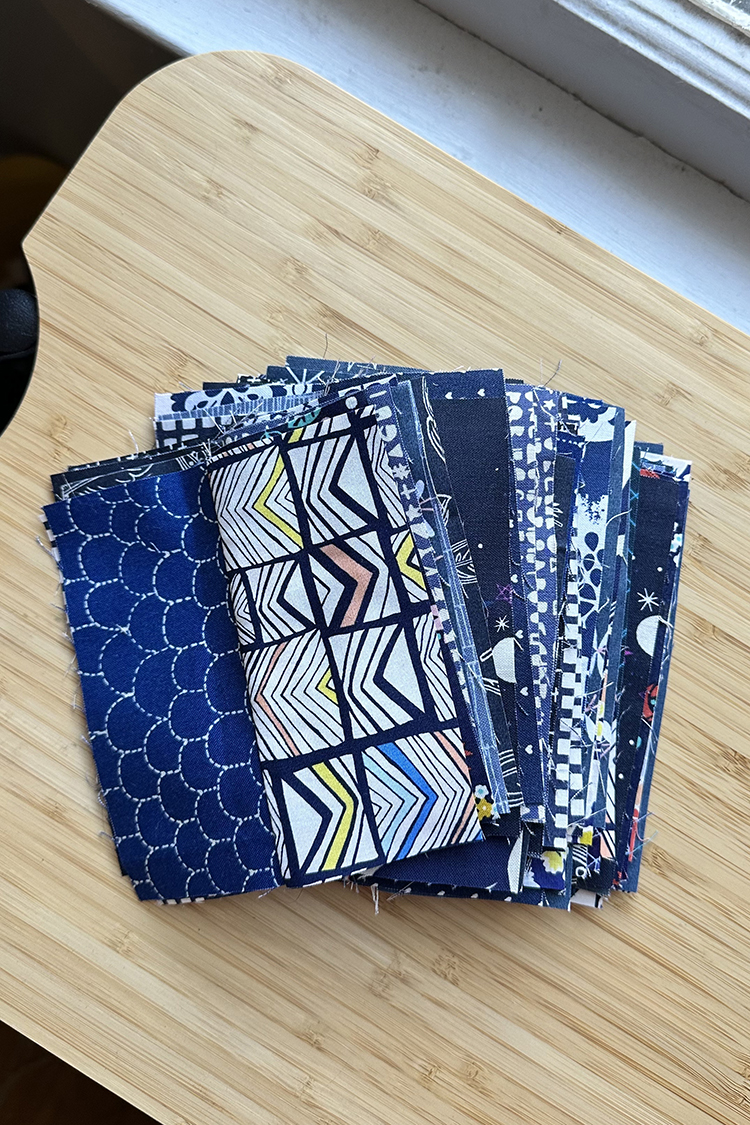
I had such fun making this quilt. I knew from the start that I wanted to make it completely from my stash and that I wanted it to be pretty gender neutral. I personally feel like navy and chartreuse/lime green work well for any gender! I also happen to have a good selection of both of these colors, which worked out well.
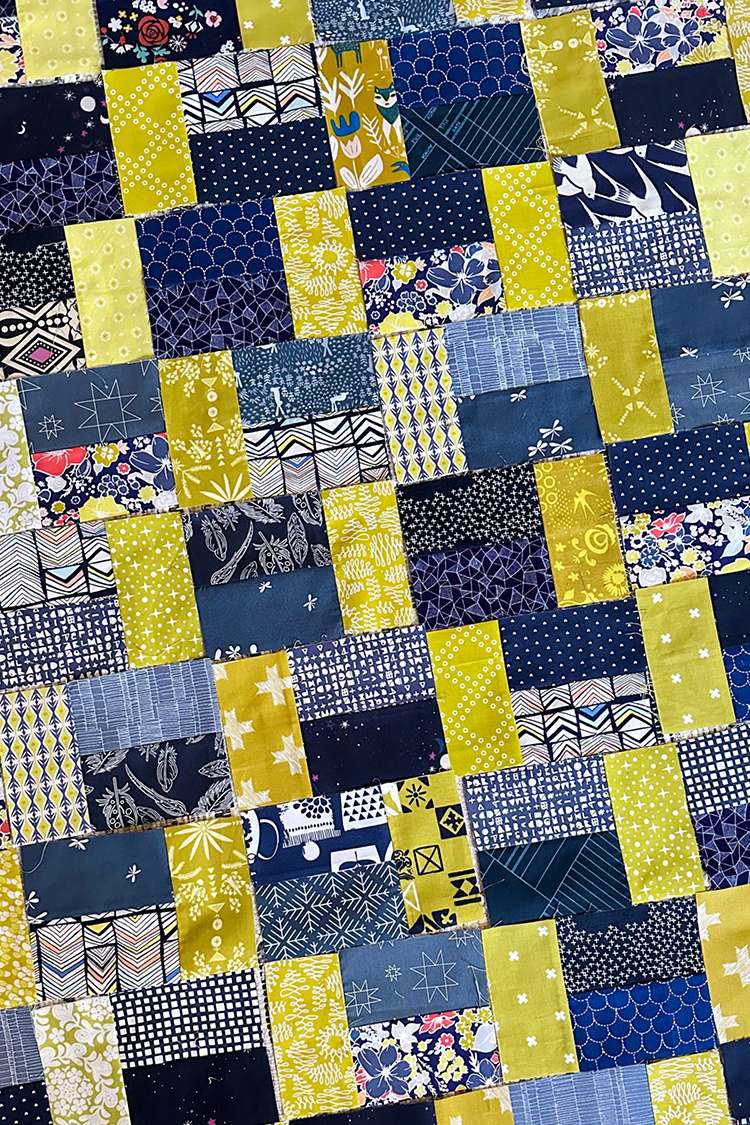

The design of this quilt is really simple, but it has a lot of flexibility. I made it with two colors, using multiple fabrics for each color. There is only one size strip to cut (hooray!), and I cut mine from a combination of scraps and yardage. The great thing about this quilt though is that you could easily cut from scraps, yardage, charm squares, layer cake squares, jelly roll strips or fat quarters. You also don't have to stick to two colors! You could go completely rainbow scrappy, you could use a neutral or single fabric in place of the green (color A) and then use many different fabrics for the navy (color B). Lots of possibilities!
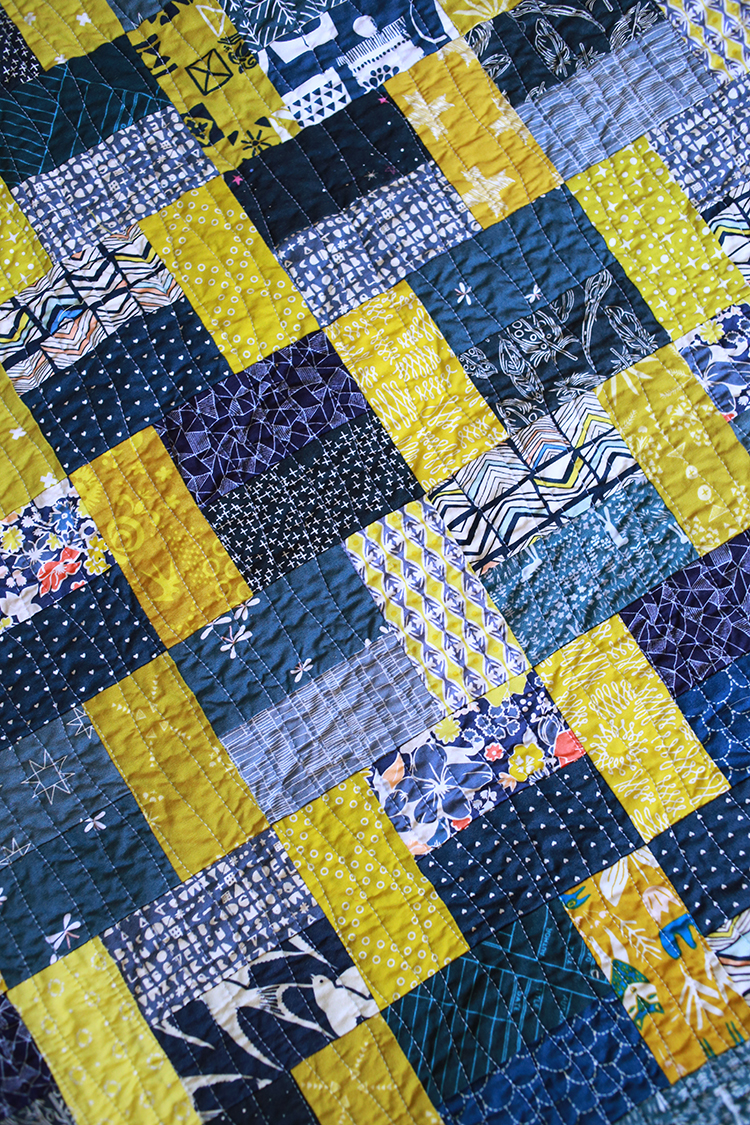

I feel like a broken record, but I did my go-to wavy lines for the quilting. It's just so easy for me to do and make look decent! It's not anything fancy, but it works for me.


For the binding I wanted a pop of color. There are a few prints that have a peachy accent, so I pulled a binding fabric to highlight that. I used one of my custom woven labels to finish it off.


Okay, now onto the tutorial!

Simple Two-Color Baby Quilt Tutorial:
Sewing Level: Beginner Friendly
Finished Size: 36"x44"
Finished Block Size: 6"x4"

Materials:
- 5/8 yard of total yardage or scraps for Color A (Green)
- 1 1/8 yard of total yardage or scraps for Color B (Navy)
- 44"x52" quilt batting
- 1 1/2 yards of backing fabric
- 3/8 yard of binding fabric


Cutting:
From Color A (Green) Fabrics:
- Cut a total of (66) 2.5"x4.5" strips

From Color B (Navy) Fabrics:
- Cut a total of (132) 2.5"x4.5" strips

You can easily cut these pieces from scraps, charm squares, layer cake squares, jelly roll strips, fat quarters or yardage. The table below shows how many 2.5"x4.5" strips you can cut from each type of precut or yardage:

2.5"x4.5" strips
5" charm square 2
10" layer cake square 8
2.5"x42" jelly roll strip 9
1/4 yard cut 27
18"x21" fat quarter 28

Figuring out exactly how much you need for each color is simple. Here is an example:
For Color B I want to use charm squares. I can get 2 strips from each charm square, and I need a total of 132 strips. 132 divided by 2 is 66. So I need 66 charm squares for Color B.

Simple Two-Color Baby Quilt Instructions:
*Use a 1/4” seam allowance unless otherwise noted.*

Block Construction:
1. Each block is made using (2) Color B strips and (1) Color A strip. First we're going to pair up the Color B strips. You could pair them all up intentionally, or pair them up randomly, it's up to you!

Sew two Color B strips together along the long edges. Press seams as desired. Repeat with all Color B strips.


2. Next we're going to pair a Color A strip up with each block unit made in step 1. Again, feel free to pair them up randomly or intentionally.

Sew a Color A strip to one side of the Color B block made in step 1, so that the seams form a "T" shape. Use the photo above as reference. Press seams as desired, repeat with remaining Color A strips and block units. Trim blocks to 6.5"x4.5" if necessary.

Quilt Top Construction:

1. Arrange blocks into 11 rows of 6 blocks each, using the diagram above as a guide. The odd numbered rows will start with a Color A strip, the even numbered rows will start with the Color B strip set.

Sew blocks together in each row. Press seams in one direction, alternating direction every other row. Sew rows together, press as desired. Press top well from the right side.

Quilt Assembly and Finishing:

1. Backing: Press backing fabric well.

2. Basting: Using masking or painter’s tape, tape the backing to a clean, hard surface, right side down. Spread out your batting on top of the backing. Smooth out any wrinkles. Carefully spread out your quilt top on top of the batting, right side up. Pin your top, I like to use curved safety pins, spacing the pins a few inches apart. Make sure that your pins are going through all three layers.

3. Quilting: Quilt as desired, by machine or by hand. Trim away excess batting and backing fabric.

4. Binding: Cut yardage listed for binding into 2.5” strips. Trim off selvedges and sew your strips together to form one long strip, press seams open. Fold in half lengthwise, pressing with your iron as you fold. Attach binding using your preferred method. For a detailed tutorial on attaching your binding to both sides by machine: Machine Quilt Binding Tutorial.


I hope you've enjoyed this tutorial! I have lots of other tutorials for everything from quilts, pillows, bags, and holiday items to informational series and techniques. Find all my tutorials here: Tutorials. My online shop is filled with patterns for quilts and bags. Find my patterns here: Jeni Baker Patterns

Tag me @jenib320 and use my hashtag #jenibaker on instagram if you make something from this tutorial!

Happy Quilting!

Indigo Courthouse Steps Free Quilt Pattern

Wednesday, May 18, 2022


Happy Wednesday! Today I have a finished quilt to share, plus a tutorial for it!


If you’d rather have this tutorial in downloadable form that you can print out (plus other sizes!), check out my Indigo Steps Quilt Pattern. It features five different quilt sizes including: Baby (36"x36"), Small Throw (54"x72"), Square Throw (72"x72"), Large (72"x90"), Extra Large (90"x108")

Find the pattern in my online shop here: Indigo Steps Quilt Pattern.


This quilt has been a few years in the making! I've made a few really simple quilts from my hand-dyed indigo fabrics, but I was craving something with a bit more piecing for this quilt. Most of my hand-dyed fabric stash is fat quarters, so I knew I wanted to come up with a design that would take advantage of fat quarters. I ended up choosing 8 different indigo fat quarters for this quilt, and immediately cut them all up into 2.5" strips.


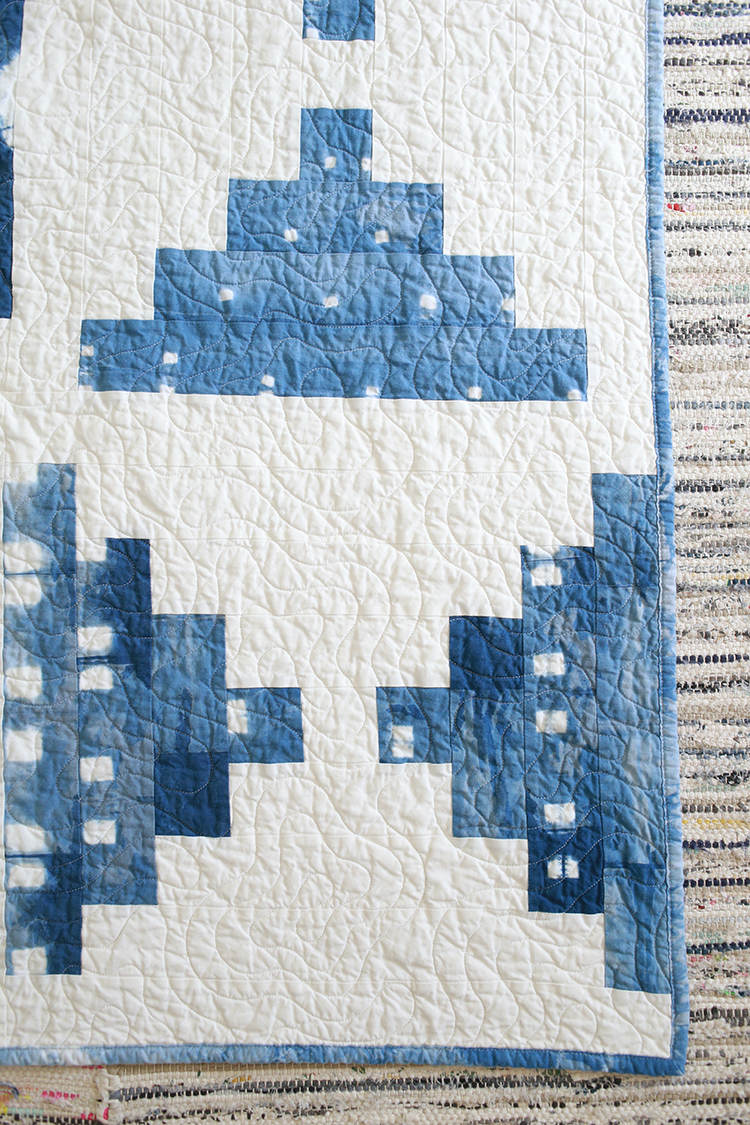
I've never made a courthouse steps quilt before, and I liked the idea of making essentially two color blocks and playing with the arrangement to almost create the look of half-square triangles. Lucky for me, the resulting quilt turned out just as I had envisioned it! I like how even though the fabrics have been cut up, you can still get a sense for the dye pattern within each block.


This entire quilt is made from white Kona Cotton*. The dyed prints were indigo dyed by me over the course of a few summers. For more information on indigo dyeing, check out my Indigo Dyeing Tutorial.


The backing is pieced together with some pieces of white fabric and hand dyed pieces. I repurposed a shower curtain I dyed and made a few years ago. It didn't fit with our new shower here, so I thought it would be more useful to revert it back to fabric!


For the quilting, I sent the quilt to Melissa Kelley of Sew Shabby Quilting. The quilt design is called Malachite. The quilt is bound up in more indgo fabric!

There are so many ways you could customize this design. I kept my quilt really simple, only using a single print and background fabric for each block. You could use as many or as few fabrics as you want for yours! The tutorial is written to be fat quarter friendly, but I think it would look really good done up in scraps. Or you could take advantage of a couple jelly rolls! I've included a table with all the piece totals if you'd rather cut from scraps or other yardage.

Indigo Courthouse Steps Quilt Tutorial by Jeni Baker

Sewing Level: Beginner Friendly
Finished Size: 72"x72"
Finished Block Size: 18" square

Materials:
- 8 print fat quarters
- 3 yards of background fabric
- 80"x80" quilt batting
- 4 1/2 yards of backing fabric
- 5/8 yard of binding fabric

Cutting:
From each print fat quarter:
Cut (7) 2.5"x21" strips


Using the graphic above for reference, subcut the strips into the following:
- (4) 14.5"x2.5" strips
- (4) 6.5"x2.5" strips
- (4) 10.5"x2.5" strips
- (4) 2.5" squares

From background fabric:
Cut (16) 2.5"xWOF strips:
- Subcut each strip into (2) 18.5"x2.5" strips

Cut (8) 2.5"xWOF strips:
- Subcut each strip into (4) 10.5"x2.5" strips

Cut (16) 2.5"xWOF strips:
- Subcut each strip into (2) 14.5"x2.5" strips and (2) 6.5"x2.5" strips

Cut (1) 2.5"xWOF strip:
- Subcut strip into (16) 2.5" squares

Piece Totals
If you'd rather cut from stash or scraps, here is how many of each piece you'll need to make this quilt!

2.5"x2.5" 6.5"x2.5" 10.5"x2.5" 14.5"x2.5" 18.5"x2.5"
Print fabric 32 32 32 32 0
Background fabric 16 32 32 32 32

Indigo Courthouse Steps Quilt Instructions:

*Use a 1/4” seam allowance unless otherwise noted.*

Block Construction:
Each block is made from a single print fabric and background fabric. For a scrappy look, feel free to use a mix of prints in each block.


1. Sew a 2.5" print square to both sides of a 2.5" background square. Press seams away from center.

2. Sew a 6.5"x2.5" background strip to both the top and bottom of the center block. Press seams away from center.


3. Sew a 6.5"x2.5" print strip to both sides of the center block. Press seams away from center.

4. Sew a 10.5"x2.5" background strip to both the top and bottom of the center block. Press seams away from center.


5. Sew a 10.5"x2.5" print strip to both sides of the center block. Press seams away from center.

6. Sew a 14.5"x2.5" background strip to both the top and bottom of the center block. Press seams away from center.


7. Sew a 14.5"x2.5" print strip to both sides of the center block. Press seams away from center.

8. Sew an 18.5"x2.5" background strip to both the top and bottom of the center block. Press seams away from center.

Trim block to 18.5" square if necessary. Repeat steps 1-8 to create a total of 16 blocks.

Quilt Top Construction:

1. Arrange blocks into four rows of four blocks each. Sew blocks together in each row. Press seams in one direction, alternating direction every other row. Sew rows together, press seams open. Press top well from the right side.

Quilt Assembly and Finishing:
1. Making Backing: Cut backing yardage in half. Press. Trim off the selvedge and sew your pieces together lengthwise. Press seam open.

2. Basting: Using masking or painter’s tape, tape the backing to a clean, hard surface, right side down. Spread out your batting on top of the backing. Smooth out any wrinkles. Carefully spread out your quilt top on top of the batting, right side up. Pin your top, I like to use curved safety pins, spacing the pins a few inches apart. Make sure that your pins are going through all three layers.

3. Quilting: Quilt as desired, by machine or by hand. Trim away excess batting and backing fabric.

4. Binding: Cut yardage listed for binding into 2.5” strips. Trim off selvedges and sew your strips together to form one long strip, press seams open. Fold in half lengthwise, pressing with your iron as you fold. Attach binding using your preferred method. For a detailed tutorial on attaching your binding to both sides by machine: Machine Quilt Binding Tutorial.


I hope you've enjoyed this tutorial! I have lots of other tutorials for everything from quilts, pillows, bags, and holiday items to informational series and techniques. Find all my tutorials here: Tutorials. My online shop is filled with patterns for quilts and bags. Find my patterns here: Jeni Baker Patterns

Tag me @jenib320 and use my hashtag #jenibaker on instagram if you make something from this tutorial!


If you’d rather have this tutorial in downloadable form that you can print out (plus other sizes!), check out my Indigo Steps Quilt Pattern. It features five different quilt sizes including: Baby (36"x36"), Small Throw (54"x72"), Square Throw (72"x72"), Large (72"x90"), Extra Large (90"x108")

Find the pattern in my online shop here: Indigo Steps Quilt Pattern.

Happy Quilting!

*Note: Any links marked with an asterisk in this post are affiliate links. This means if you click through and buy something, I make a small commission, at no extra cost to you.

Golden Afternoon Free Half-Square Triangle Quilt Pattern

Thursday, October 28, 2021


Happy Thursday! Today I have a quilt finish and free quilt tutorial to share! This quilt has been seven years in the making, so I'm really excited to have it finished and up on the blog today!


I started this quilt back in 2014! When my sample yardage of Dreamin' Vintage* arrived, it was the first thing I cut out. This isn't a complicated quilt by any means, so I'm not sure why it took me so long to finish it. I cut it out and it sat untouched for many years. Finally in 2020 I pulled it out and was determined to finally finish it.

Dreamin' Vintage was my favorite collection that I designed, but for some reason I don't have any quilts made from it. They've all ended up gifted to someone else! So this one I am for sure keeping for myself. :)


I designed the quilt as a free pattern to go along with the fabric collection, but had always intended on making it available here on my blog too. The design is based on my warm cool half-square triangle quilts (see that quilt along here: Warm Cool HST Quilt Along). I love working with the contrast that warm vs cool colors brings. If you're unsure which colors typically read warm and which read cool, check out my post all about it here: The Art of Choosing: Warm vs. Cool


I took this quilt along with one other home with us this past July to photograph. I usually go home at least twice a year, so quite a few of my quilts are photographed on this white barn at my parent's house. With the pandemic we were unable to go home in 2020, so it felt good to bring quilts home with us this summer! The entire quilt is made from my Dreamin' Vintage* collection that I designed for Art Gallery Fabrics.


Since these fabrics were inspired by vintage sheets that I'd thrifted, it felt like the perfect time to use the "Pyrex Stems" quilting design for this quilt. The quilting was done by Melissa Kelley of Sew Shabby Quilting. This quilting pattern is based on one of my very favorite pieces of vintage pyrex called "Stems". I think it's such a great match for this quilt! See the vintage pyrex piece below:


Now, onto the tutorial! I originally wrote it for using 1/4 yard cuts. I've added options for using fat quarters or for cutting from scraps or random yardage. Since the blocks are pretty big it goes together quick!

Golden Afternoon Quilt Tutorial

Sewing Level: Beginner Friendly
Finished Size: 70"x70"
Finished Block Size: 7" square

Golden Afternoon Quilt Materials:
- (10) 1/4 yard cuts of warm-colored fabrics (or 13 fat quarters*)
- (10) 1/4 yard cuts of cool-colored fabrics (or 13 fat quarters*)
- 4 1/2 yards of backing fabric
- 78"x78" piece of batting
- 1/2 yard of binding fabric

Golden Afternoon Quilt Cutting:
From each warm-colored fabric:
- Cut (5) 8" squares, for a total of 50 squares.

From each cool-colored fabric:
- Cut (5) 8" squares, for a total of 50 squares.

Other Cutting Options:
*If you'd like to use fat quarters:
- Cut a total of (50) 8" warm-colored squares
- Cut a total of (50) 8" cool-colored squares

If you'd like to use scraps or miscellaneous yardage:
- Cut a total of (50) 8" warm-colored squares
- Cut a total of (50) 8" cool-colored squares

Looking for supplies? Check out my Pattern Supplies and Resources post.

Golden Afternoon Quilt Instructions:

*Use a 1/4” seam allowance unless otherwise noted*
1. Make Half-square Triangle Blocks: Using a marking pen or a pencil, draw a diagonal line across the wrong side of all 8” warm-colored square. Place one warm-colored square and one cool-colored square right sides together. Stitch 1/4" on both sides of the marked line. Press and cut apart on the marked line to create two half-square triangles. Press seams open. Repeat with remaining squares to make a total of 100 blocks. Trim half-square triangles to 7.5” square.

2. Construct Quilt Top: Arrange blocks into 10 rows of 10 blocks each, according to the above diagram. Sew together blocks in each row Press seams in one direction, alternating direction every other row. Sew rows together. Press seams open.

3. Making Backing: Cut backing yardage in half. Press. Trim off the selvedge and sew your pieces together lengthwise. Press seam open.

4. Basting: Using masking or painter’s tape, tape the backing to a clean, hard surface, right side down. Spread out your batting on top of the backing. Smooth out any wrinkles. Carefully spread out your quilt top on top of the batting, right side up. Pin your top, I like to use curved safety pins, spacing the pins a few inches apart. Make sure that your pins are going through all three layers.


5. Quilting: Quilt as desired, by machine or by hand. Trim away excess batting and backing fabric.


6. Binding: Cut yardage listed for binding into 2.5” strips. Trim off selvedges and sew your strips together to form one long strip, press seams open. Fold in half lengthwise, pressing with your iron as you fold. Attach binding using your preferred method. For a detailed tutorial on attaching your binding to both sides by machine: Machine Quilt Binding Tutorial.


I hope you've enjoyed this tutorial! I have lots of other tutorials for everything from quilts, pillows, bags, and holiday items to informational series and techniques. Find all my tutorials here: Tutorials. My online shop is filled with patterns for quilts and bags. Find my patterns here: Jeni Baker Patterns

If you make something using one of my tutorials or patterns, I hope you'll tag me @jenib320 and use my hashtag #jenibaker on instagram!

Happy Quilting!

*Note: Any links marked with an asterisk in this post are affiliate links. This means if you click through and buy something, I make a small commission, at no extra cost to you.

Vote Mini Quilt Free Pattern

Wednesday, September 23, 2020


Hello! I have a little tutorial to share today, for this VOTE mini quilt.

I posted about my mini quilt last week on Instagram and there was interest in a tutorial so here we are! This is going to be short and sweet, since I didn't take photos while I made it. It's pretty straight forward though. The cutting instructions are to make a mini just like mine, but feel free to add the "Vote" blocks to anything you'd like! Maybe a tote bag? Could be cool.


We live on a pretty busy street here in Connecticut. It's not a big neighborhood, but a lot of cars cut through it to get from one main road to another. This means a lot of cars drive past our house on a daily basis. This had me thinking a lot lately about how to help get out the vote this election. I ended up going with a mini quilt that I hung on our glass storm door! This way it isn't exposed to the elements, so it doesn't need to be made of waterproof materials or brought in when it rains.

I encourage my fellow Americans to register to vote (or check your registration is still valid) and vote this November 3rd. Our democracy works best when we participate! I'd recommend checking out Vote.org or Vote411.org to start if you're looking for more information on voting.

Finished Size: 17"x19"
Sewing Level: Beginner Friendly

Materials:
- 1.5" wide blue strips (or any color you'd like)
- 1.5" wide white scraps
- 21"x23" piece of batting
- 21"x23" piece of backing fabric
- 1/4 yard of binding fabric

Cutting:
A - 5.5”x1.5”
(3) White
(15) Blue

B - 4.5”x1.5”
(9) White
(9) Blue

C - 3.5“x1.5”
(15) White
(3) Blue

D - 2.5”x1.5”
(9) White
(6) Blue

E - 1.5”x1.5”
(3) White
(6) Blue

Final sashing strips*
(4) 17.5"x1.5"

From binding fabric
(2) 2.5"xWOF strips

*I recommend waiting to cut these until you've finished the "vote" blocks. With all those seams it's likely they won't measure exactly 17.5" (mine didn't!). Waiting to cut means you can cut them to fit your blocks.

Instructions:
*Use a 1/4" seam allowance unless otherwise noted.*


1. Each letter is pieced as it's own block. Use the diagram above for how each block goes together! I pressed all my seams open since the strips are pretty small, but feel free to press your seams however you like.


2. In between each letter block is a sashing strip (A), plus one on either end. Sew blocks and sashing strips into one long strip to complete word. Make three blocks total.


3. Arrange three vote blocks with four final sashing pieces. Sew rows together, press seams however you'd like.

4. Baste, quilt, bind, enjoy!

As I mentioned, I hung my mini quilt on my front door. I used fishing line to attach mine to some screw on the inside of my storm door. Seems to be working pretty well so far!

I hope you enjoyed this tutorial. Share your progress and finished project photos using #jenibaker hashtag on social media, and be sure to tag me @jenib320 too!

Happy Quilting!