All About Nylon Paracord and How to Use it for Drawstring Bags

Wednesday, December 7, 2022


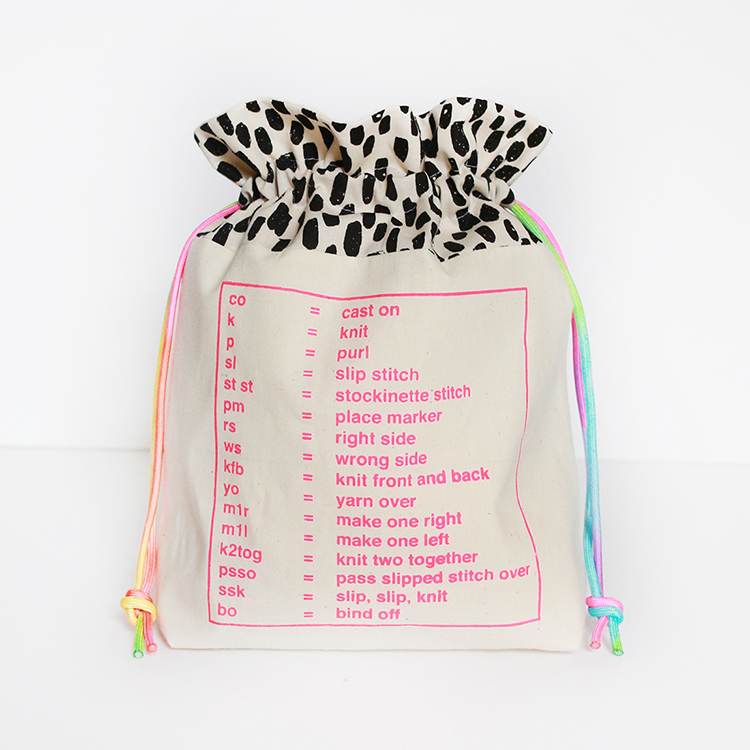
Welcome to the fourth week of the Lined Drawstring Bag Sew Along! Today I'm sharing tips for working with paracord!

I'll be updating the Sew Along Page each week with all the posts so that you can easily catch up or reference these posts after the sew along ends!

I hope you'll sew along with us! Sew from the tutorial or the patterns:
Lined Drawstring Bag Tutorial
Lined Drawstring Bag Pattern
Lined Drawstring Bag Expansion Pattern

Before we dive into today's post, let's quickly chat about our to-do for week 4 of the sew along!

This week's focus is on final touches! Tackle those drawstring casings, make fabric ties or prep twill/paracord ties. Pull ties through the bags and finish them off with a simple knot or some fun beads! A few posts you might find helpful when tackling this:

- Marking the drawstring casings can be time consuming, especially if you're making a lot of bags. I have a video tutorial for an alternative marking technique that is my go-to method. Find it here: Alternative Method for Marking the Drawstring Casing

- If you're like me and you don't have a free-arm on your sewing machine, I have a video tutorial for how to sew the drawstring casings. Find it here: How to Sew a Drawstring Casing Without a Free-Arm Sewing Machine

- Using beads and want to take them to the next level? I have a tutorial all about how to customize unfinished wooden beads. Find it here: How to Customize Wooden Beads with Paint, Stain, and Dye

- You've made your bags and now you're ready to gift them. How about use some reusable gift tags too! I share five different ideas for tagging your bags in this post: Reusable Gift Tag Ideas for Drawstring Bags

- Still need some supplies to finish up your bags? I've got you covered! You can find a variety of cotton twill tape, paracord and wooden beads in my online shop. Find them all here: Shop cotton twill tape, paracord and wooden beads

- Finally, circling back to my post on tips for wrapping gifts in drawstring bags! Find it here: Tips For Using Drawstring Bags to Wrap Gifts

What is Paracord?

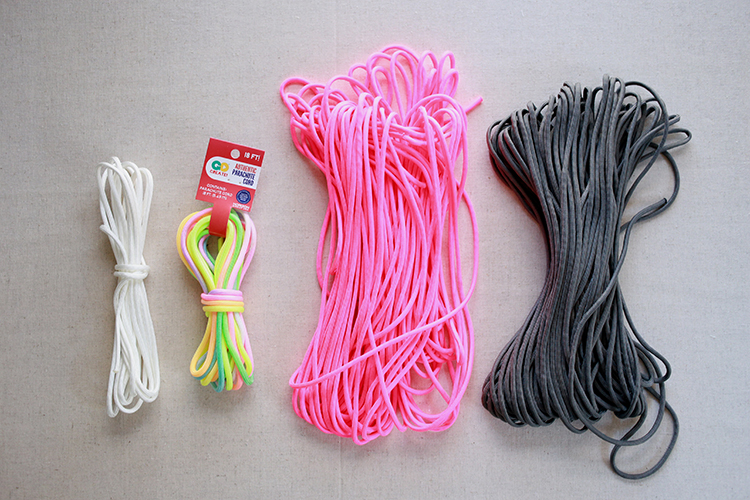
Paracord, or Parachute cord, is a lightweight rope made of nylon. It's called this because it was originally used on parachutes. Today it's primarily used as a general utility cord. Paracord has an inner cord of several strands (the number depends on the type/strength) that are sheathed in more nylon. It's a great material to use for drawstring bag ties! It's relatively easy to find, comes in lots of different colors and is really durable. The most common size of paracord is 550, which is the size I recommend using for drawstring bags.


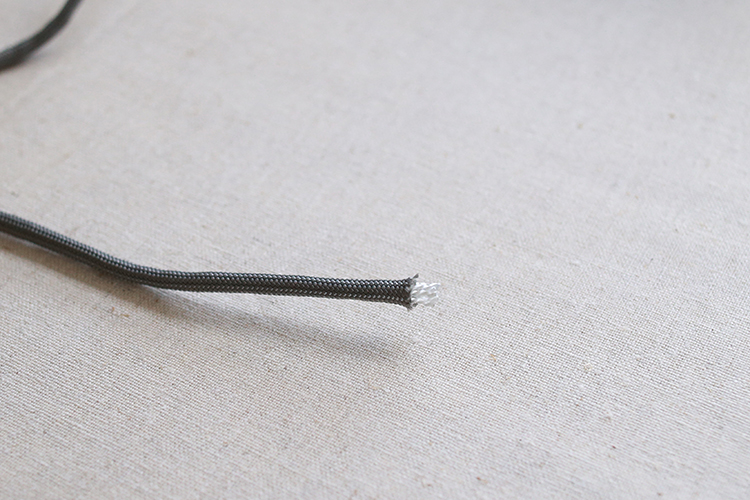
550 Paracord is a Type III cord with a tensile strength of 550 pounds, it's 4mm in diameter and has 7 inner strands. You can see in the above photo the inner strands are typically a translucent white color, while the outer sheath can be lots of different colors.

Where to Buy Paracord

You can find paracord in a limited number of colors at most craft stores. It's often near the bead aisles. I've also found it at big box stores like Walmart too. Or, you can order it online! There are lots of different online shops that specialize in ropes and cords. I carry two colors in my online shop, cream and white, which you can find here. When I want other colors, I usually shop at Bored Paracord* on Etsy.

If you order smaller amounts or buy it in person, it typically comes as a hank.


If you buy larger amounts it may come rolled on a spool.

How to Cut and Finish Paracord

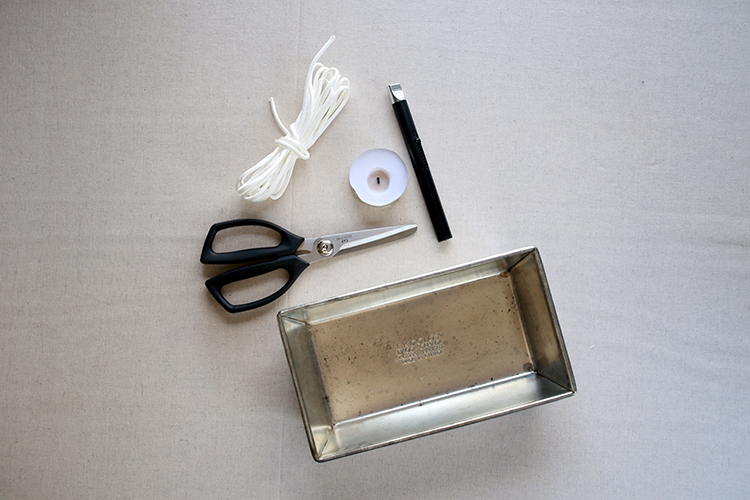
One of the most important things to be aware of when working with paracord, is that after it's cut, the ends need to be finished in order to prevent unraveling. This is typically done by melting the ends. If you're cutting a piece off of a larger hank or spool, you'll need to finish both ends of your cut, preferably as soon as you cut it. This helps keep any of your cord from going to waste! These are the materials you'll need to finish your paracord:

Sharp scissors: Use all-purpose or craft scissors for this, not your good fabric scissors!

A Tea Light Candle: I've tried using a candle in a glass jar, but have found that the flame moves too much. Tea-lights are ideal for this task. A lot of tutorials use a lighter, but I feel more secure using a candle.

Matches or Lighter: Something to light your candle with.

Non-flamable container: I like to set my candle inside of this thrifted metal loaf pan, but any non-flamable container or surface will work. A cookie sheet, a stone cutting board, a spare piece of tile, etc.


Before we proceed, a disclaimer: Please be careful and exercise caution when working around an open flame. Fabric and paracord are flammable, so do this at your own risk. I recommend doing this in a well-ventilated area. Open a window and/or turn on an exhaust fan.

1. Cut your paracord to the desired length. If some of the white inner strands have gotten long while handling, feel free to trim them.


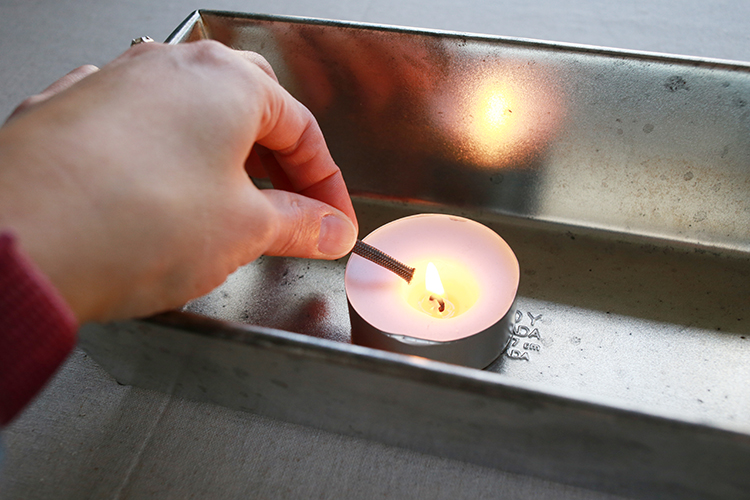
2. Hold the cut end of the paracord approximately 1/4" away from the candle flame. The end of the paracord will slowly melt. Once melted, move away from the candle and let sit to harden for a minute or two, letting the end hang over the edge of your work surface. This will prevent it from sticking to your surface.


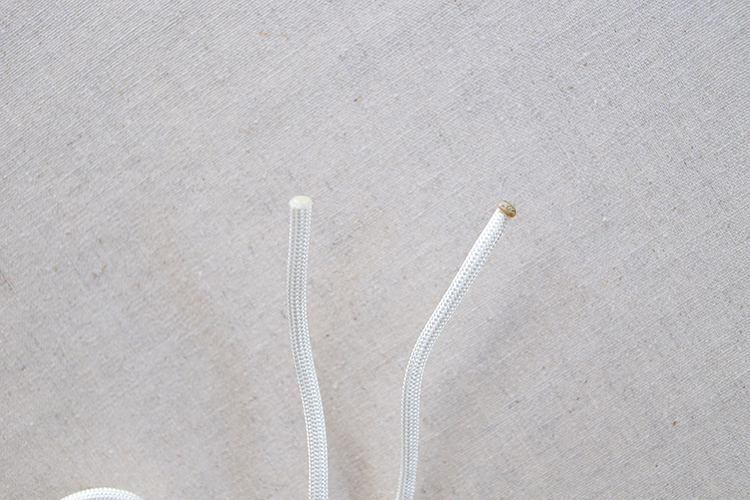
See above two ends of paracord that have melted and cooled. The difference between the two is how close I let the end get to the flame of the candle. On the left is what we're aiming for. It's completely clean and clear, I kept the end an appropriate distance from the flame. On the right is what happens when the end gets too close or touches the candle flame. It's discolored, which is not what we want!

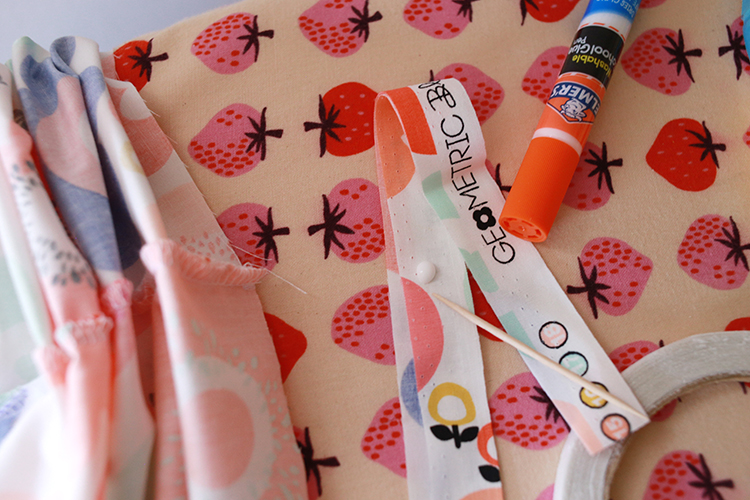
Alternative Finishing Method
If you don't feel comfortable melting the ends of your paracord to finish them, there is another way! Trim the inner strands so that they are flush with the cut edge of the sheath. Seal together by placing a dot of hot glue over the end. Let dry.

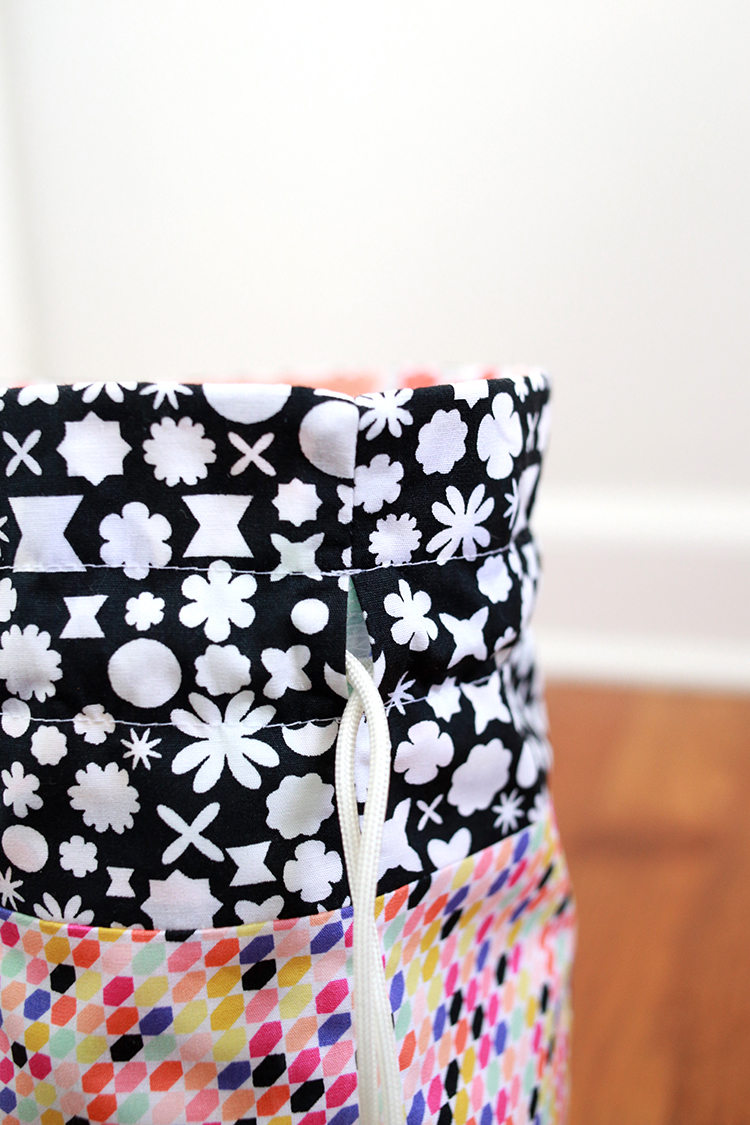
Using Paracord for Drawstrings

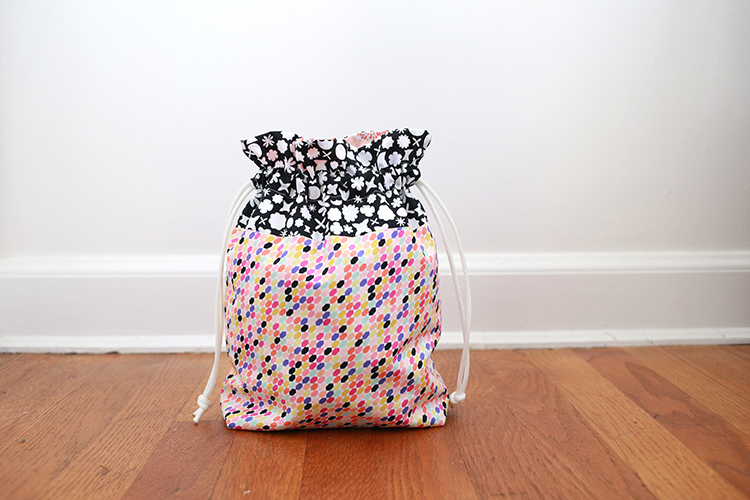
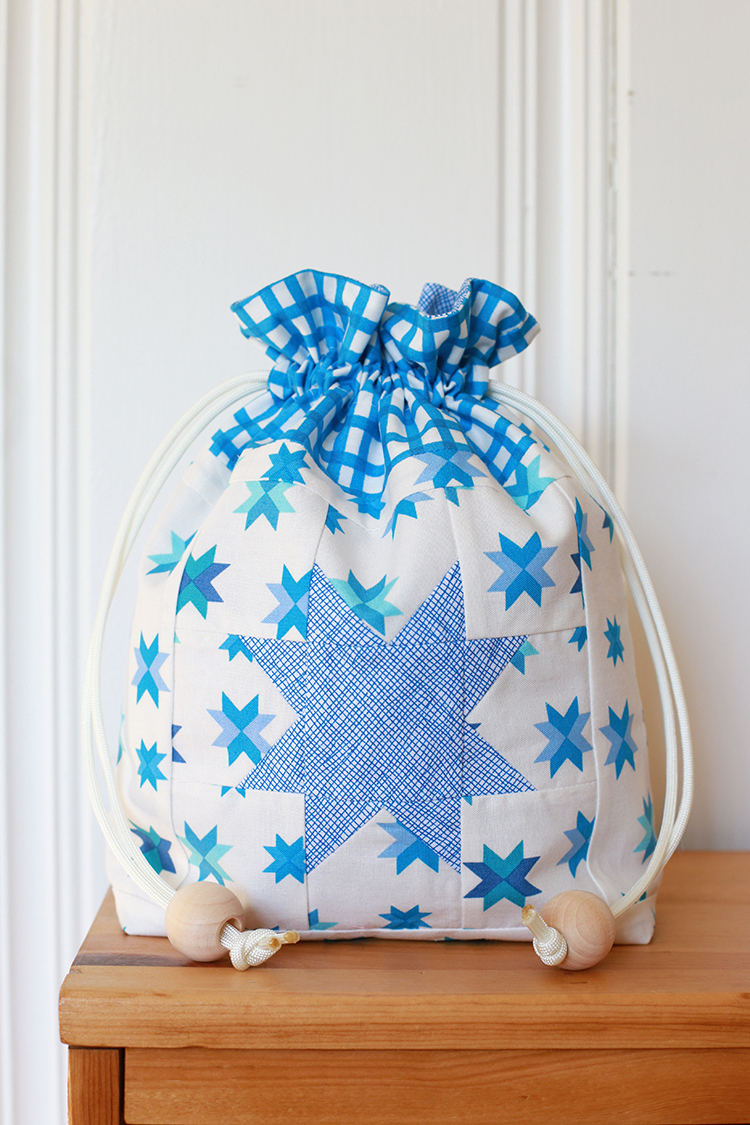
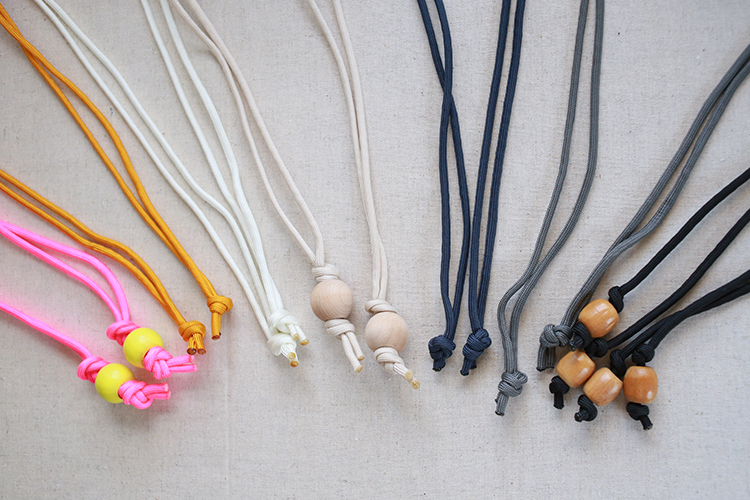
I love to use paracord for drawstrings. It comes in so many fun colors (even some with a slight pattern), and it's super fast! Using it for drawstrings is simple.

1. Cut two lengths of paracord to the required drawstring length. (You may want to add a little extra if you plan to use beads.)

2. Finish paracord ends.

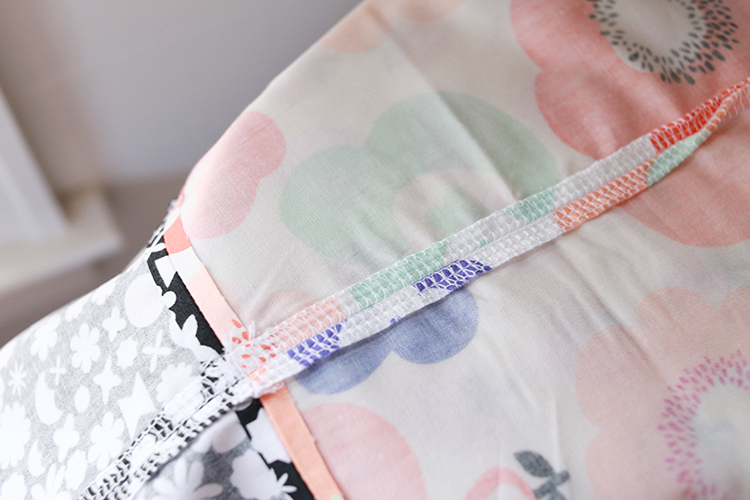
3. Pierce paracord with a large safety pin and thread through the drawstring casings.

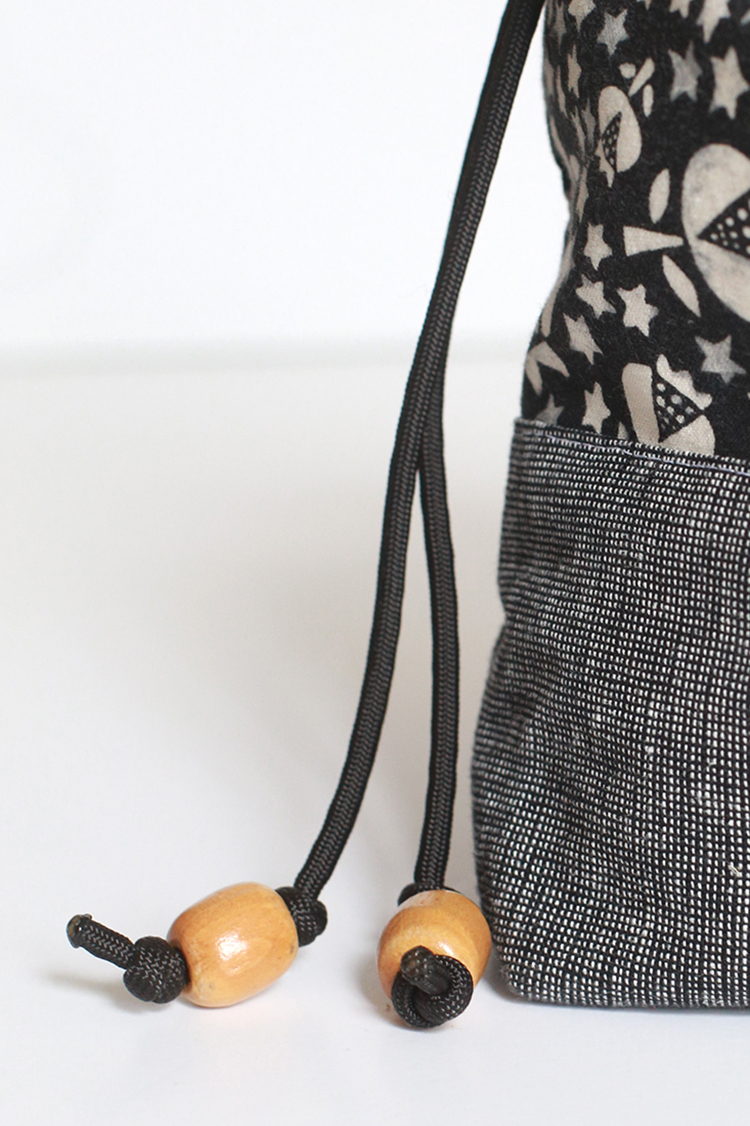
4. Knot each drawstring end, adding beads if desired.

I hope you enjoyed this tutorial! I can't wait to see the bags you make! Please share them with me on instagram @jenib320 + #lineddrawstringbag or via email (jenib320 @ gmail.com).

Happy Sewing!

*Note: Any links marked with an asterisk in this post are affiliate links. This means if you click through and buy something, I make a small commission, at no extra cost to you.

Tips for Tidy Drawstring Casing Openings

Wednesday, November 30, 2022

Welcome to the third week of the Lined Drawstring Bag Sew Along! Today I'm sharing tips for tidy drawstring casing openings!

I'll be updating the Sew Along Page each week with all the posts so that you can easily catch up or reference these posts after the sew along ends!

I hope you'll sew along with us! Sew from the tutorial or the patterns:
Lined Drawstring Bag Tutorial
Lined Drawstring Bag Pattern
Lined Drawstring Bag Expansion Pattern

Before we dive into today's post, let's quickly chat about our to-do for week 3 of the sew along!

This week's task is sewing! Sew your bags through step 10. If you're making a lot of bags and you're short on time, I highly recommend making them assembly line style. This isn't quite as fun, but it's definitely more efficient! A few posts you might find helpful when tackling this:

- Last year I recorded a video tutorial that covers making the bags from start to finish. It's a bit long, but it's meant to be comprehensive! Find it here: Lined Drawstring Bag Video Tutorial

- If you just need a little extra guidance when it comes to the gussets, I have a video for that too! Find it here: How to Put a Gusset on a Bag Video Tutorial


Today I'm sharing two techniques for neater drawstring casing openings. There are raw edges at the openings and those can sometimes pop out and show in the final bag. Personally, this doesn't bother me but it may bother you! I've had a number of questions about this over the years, so I came up with a few ideas for tidying up this part of the bag.

In my sample bag I'm showing two ways to tackle this issue, but feel free to do just one or the other. Bonus points if you decide to do both!

Using a Serger or Zig-Zag Stitch to Finish Edges

For this technique, we're going to finish the edges that will be exposed in the drawstring casing. You can do this with either a serger, or by using a zig-zag stitch on a standard sewing machine.


On the Exterior Accent pieces, zig-zag stitch to finish the two short sides.


On the Interior pieces, zig-zag stitch to finishing the two long sides.

No need to do anything to the Exterior Main pieces.


This will help keep those raw edges from fraying in the final bag. Now you can complete your bag according to the free tutorial or lined drawstring bag pattern. When sewing, be sure to sew with a large enough seam to hide the zig-zag stitching (or serging) in the seams. Or try out the next technique too!

Using Adhesive to Secure Exterior Accent Seams

For this technique, we're going to use an adhesive to secure the seams of the drawstring casing in place. We'll do this after step 5 in the pattern or tutorial.

I recommend leaving the Interior end (where the turning opening will be), unsewn for now to make access to these seams easier.

Carefully ease your partially completed bag around your ironing board. (A sleeve ironing board like this one* is super handy for this.)

Press the side seams of the Exterior Accent open.

I also recommend pressing a few inches of the Interior side seams open too.

Use a small bit of adhesive to secure the opened seams in place, just where the casing opening is. I tried out two options and they both worked well. If you have a roll of 1/4" Steam-a-Seam 2* handy, this was the quickiest/cleanest open. Cut a small strip and sandwich it under each side of the seam. Press when an iron to adhere.


I also tried doing this with a very small amount of glue (I love these elmer's glue pens*), pressing it with the iron to set it. It worked well! I used a toothpick to be able to control how much I applied.


If you left the Interior end of your bag open, go back and sew across it, leaving an opening for turning.

Now you can complete your bag according to the free tutorial or lined drawstring bag pattern.


That's it! I used these two techniques together for this bag and the finished casings are so neat and tidy!

I hope you enjoyed this tutorial! I can't wait to see the bags you make! Please share them with me on instagram @jenib320 + #lineddrawstringbag or via email (jenib320 @ gmail.com).

Happy Sewing!

*Note: Any links marked with an asterisk in this post are affiliate links. This means if you click through and buy something, I make a small commission, at no extra cost to you.

Patchwork Star Lined Drawstring Bag Tutorial

Wednesday, November 23, 2022


Welcome to the second week of the Lined Drawstring Bag Sew Along! Today I'm sharing a tutorial for a patchwork star bag!

I'll be updating the Sew Along Page each week with all the posts so that you can easily catch up or reference these posts after the sew along ends!

I hope you'll sew along with us! Sew from the tutorial or the patterns:
Lined Drawstring Bag Tutorial
Lined Drawstring Bag Pattern
Lined Drawstring Bag Expansion Pattern


Before we dive into today's post, let's quickly chat about our to-do for week 2 of the sew along!

This week's task is cutting! Finalize those fabric choices and cut out all the pieces for your bags. A few posts you might find helpful when tackling this:

- If you missed last week's post about make templates, be sure to check that out! They're great if you don't want to rotary cut, or just want to speed up your cutting process. Find it here: Making Templates for the Lined Drawstring Bag Pattern

- You may be interested in adding a little something extra to your bags, like pom-pom trim or ribbon. I have a post all about embellishing your bags with these. Find it here: How to Use Trim or Ribbon to Embellish Your Drawstring Bags

- If you'd like to add an exterior pocket to your bag, I've got a tutorial for that too! Find it here: Lined Drawstring Bag Tutorial: Adding an Exterior Pocket

- A related post to today's is my present block tutorial from last year's sew along. I think it's super cute! Another option if you want to add a patchwork element to your bags. Find it here: Present Quilt Block Drawstring Bag Tutorial


Back to the star of the show (haha), a patchwork star bag! I made a bag with a star block on it a few years ago when I was in the process of making the expansion pattern, and I thought it would be perfect as a holiday bag.


Sewing Level: Beginner Friendly
Finished size: Approx. 10" tall, 7" wide, 3" deep

Patchwork Star Lined Drawstring Bag Materials:
- 1 Fat quarter for Exterior Main*
- 1 Fat quarter for Exterior Accent
- 1 Fat quarter for Interior
- 1 Fat eighth star fabric
- 2 yards of 1/2" twill tape, nylon paracord or 1/8 yd fabric
- Coordinating thread
- Acrylic ruler
- Large safety pin
- Pencil
- Optional: wooden beads

*This tutorial is written for using a non-directional fabric for the Exterior Main.

Looking for supplies? Check out my Pattern Supplies and Resources post.

Patchwork Star Lined Drawstring Bag Cutting:
From Exterior Main Fabric:
- Cut (1) 9”x10.5” piece
- Cut (8) 2.5"x2.5" block pieces
- Cut (2) 6.5"x2.5" side pieces
- Cut (1) 1"x10.5" top piece
- Cut (1) 2.5"x10.5" bottom piece

From Star Fabric:
- Cut (1) 2.5"x2.5" piece
- Cut (8) 1.5"x1.5" pieces

From Exterior Accent Fabric:
- Cut (1) 4”x21” strip
- Subcut into (2) 4”x10.5” pieces

From Interior Fabric:
- Cut (1) 12.5”x21” strip
- Subcut into (2) 12.5”x10.5” pieces

If using fabric for ties:
- Cut (2) 32”x2” strips

If using twill for ties:
- Cut (2) 32" pieces

Patchwork Star Lined Drawstring Bag Instructions:
*Use a 1/4” seam allowance unless otherwise noted*

Before constructing the bag, we first need to make the pieced Exterior Main piece.


1. Using a pencil, mark a diagonal line across the wrong side of all (8) 1.5" star fabric squares.


Place (1) 1.5" star fabric square in the upper-left corner of a 2.5" exterior main square, right sides together.


Stitch across the corner on the line you marked. Trim off the corner, leaving a 1/4" seam. Press corner up.


2. Place a second 1.5" star fabric square in the upper-right corner of the 2.5" exterior main square, right sides together.


Stitch across the corner on the line you marked. Trim off the corner, leaving a 1/4" seam. Press corner up.

Repeat with remaining pieces to create four total star point units.


3. Arrange star point units, 2.5" exterior main squares, and 2.5" star fabric square in three rows of three units each as shown in the above diagram.


Sew units together in each row. Press top and bottom row seams away from the center. Press middle row seams towards the center.


Sew rows together, matching up seams. Press seams open. Trim block to 6.5" square if necessary.


Now it's time to add the borders to the star block.


4. Sew the two 6.5"x2.5" side exterior main pieces to either side of the star block. Press seams away from block.


5. Sew the 1"x10.5" top side exterior main piece to the top edge of the block. Press seams away from block. Sew the 2.5"x10.5" bottom side exterior main piece to the bottom edge of the block. Press seams away from block. Trim piece to 9"x10.5" if necessary. This is the Exterior Main piece for one side of the bag.

Optional: You may choose to add additional structure to your patchwork with a lightweight interfacing. I would recommend something like SF101 by Pellon, and interfacing both Exterior Main pieces.

For the bag construction, refer back to the free tutorial or the everything size in the lined drawstring bag pattern, start at step 1.


I hope you enjoyed this tutorial! I can't wait to see the bags you make! Please share them with me on instagram @jenib320 + #lineddrawstringbag or via email (jenib320 @ gmail.com).

Happy Sewing!

Friday Favorites 45 (Thanksgiving Edition)

Friday, November 18, 2022


Happy Friday! It's a special Friday Favorites for Thanksgiving, I'm sharing some of our favorite recipes and traditions. For the next few weeks Friday Favorites will be on hiatus, while I focus on the Lined Drawstring Bag Sew Along. Catch up on previous posts here: Friday Favorites Archives

- This dish is the center of our thanksgiving. It's SO good. The fresh green beans don't get mushy and the crispy onions are unreal: Green Bean Casserole with Crispy Onions

- My go-to recipe for roasting a chicken, as recommended by my friend Deedrie years ago: Perfect Roast Chicken from the Barefoot Contessa Cookbook*

- I love scalloped corn, and grew up eating the frozen corn souffle by Stouffers. This is even better (in my opinion!) and from scratch: Scalloped Corn (I reduce the sugar to 1 T.)


- My favorite cranberry salad is from Krogers, which we don't have here in CT. So I make this copycat recipe every year: Cranberry Celebration Salad (I use cherry jell-o powder instead of raspberry.)

- Michael loves to have macaroni and cheese on Thanksgiving, and this is our favorite recipe: 3-Ingredient Stovetop Mac and Cheese (We add 1 tsp dijon mustard.)

- For most of the last 10 years, Michael and I have spent this holiday alone. It used to make me really sad, but now we have lots of traditions that make it special for just the two of us. One thing we always do is binge watch all three Lord of the Rings movies, starting on Thursday evening when we eat the first round of leftovers!


- I haven't decided if I'm going to make homemade rolls this year, but if I do it's going to be the Milk Bread Rolls from Mooncakes and Milk Bread*

- I've made this a few years and it's a favorite. Why choose between pie and cheesecake when you can have both? Can easily be made gluten-free by using cinnamon chex for more of a graham cracker crust: Cheesecake-marbled Pumpkin Slab Pie

- Some year I want to make the Cinnamon Icecream from The Perfect Scoop* to go with a pumpkin pie. It's our favorite homemade icecream recipe. I add vanilla so it's like cinnamon roll icing flavor. YUM.


- We like to pick up a special treat for our pets. I used to buy George bunny a brussel sprout. We're thinking about getting Dusty some salmon. We hang our outdoor birdfeeders this week too. We like to make sure the whole family gets treats.

Have a Great Weekend, and Happy Thanksgiving!

*Note: Any links marked with an asterisk in this post are affiliate links. This means if you click through and buy something, I make a small commission, at no extra cost to you.