Ideas for Storing and Organizing Sewing Notions

Wednesday, March 30, 2022


Happy Wednesday! It's Spring, which means it's time to add to the Sewing Room Organization Series with some new posts. I highly recommend checking out the other posts from this series, we've covered a lot of topics over the last few years! This post is a big one, I'm sharing ideas for storing notions. This includes storage ideas for zippers, buttons, needles, trims, machine accessories, pins, thread, hardware and more. I hope you'll find some ideas that can help improve the organization of your space!

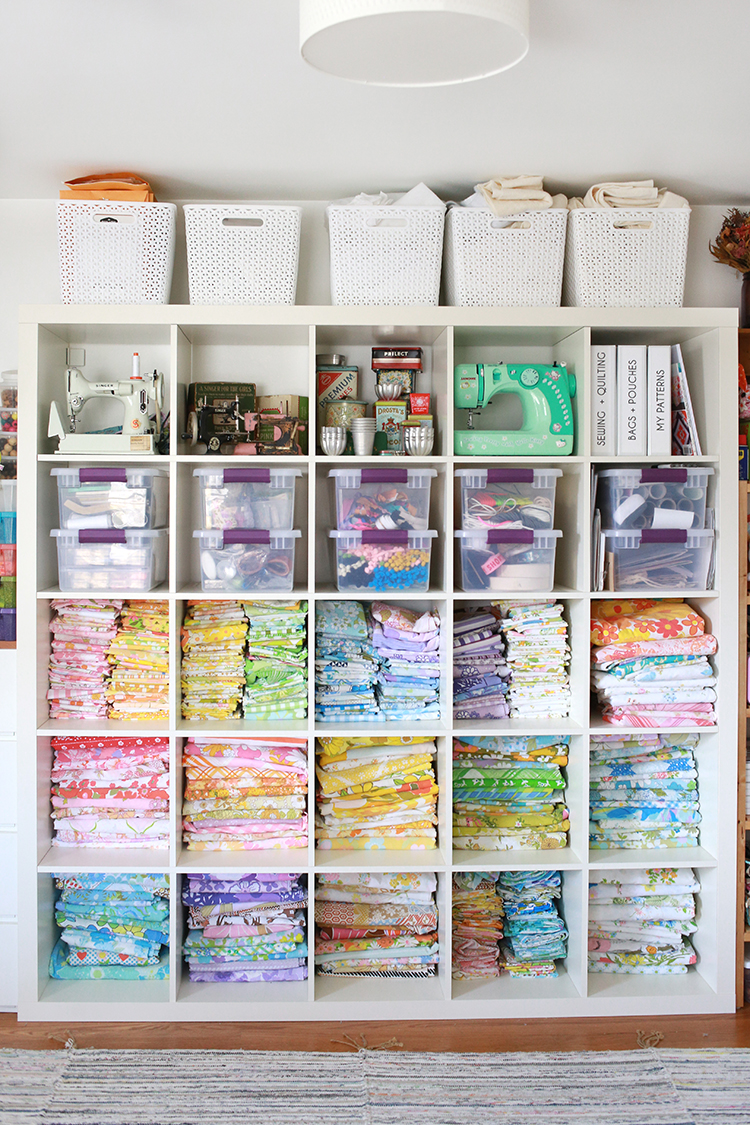
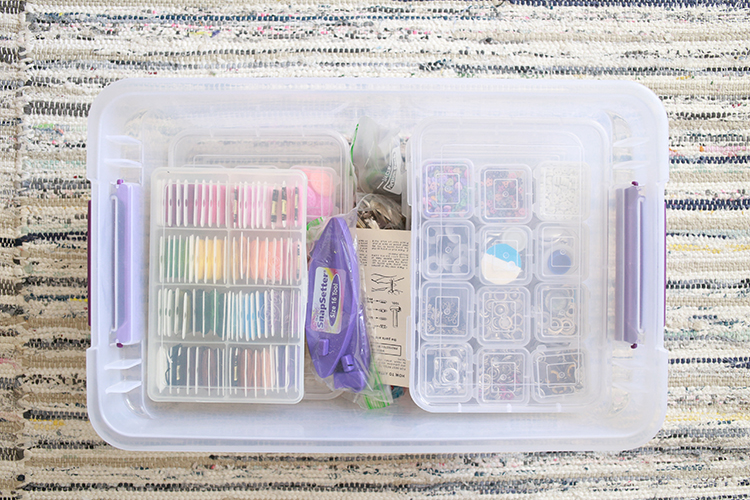
We're going to start by diving into the bins you see in the above photo! I keep the majority of my notions in these clear storage containers.


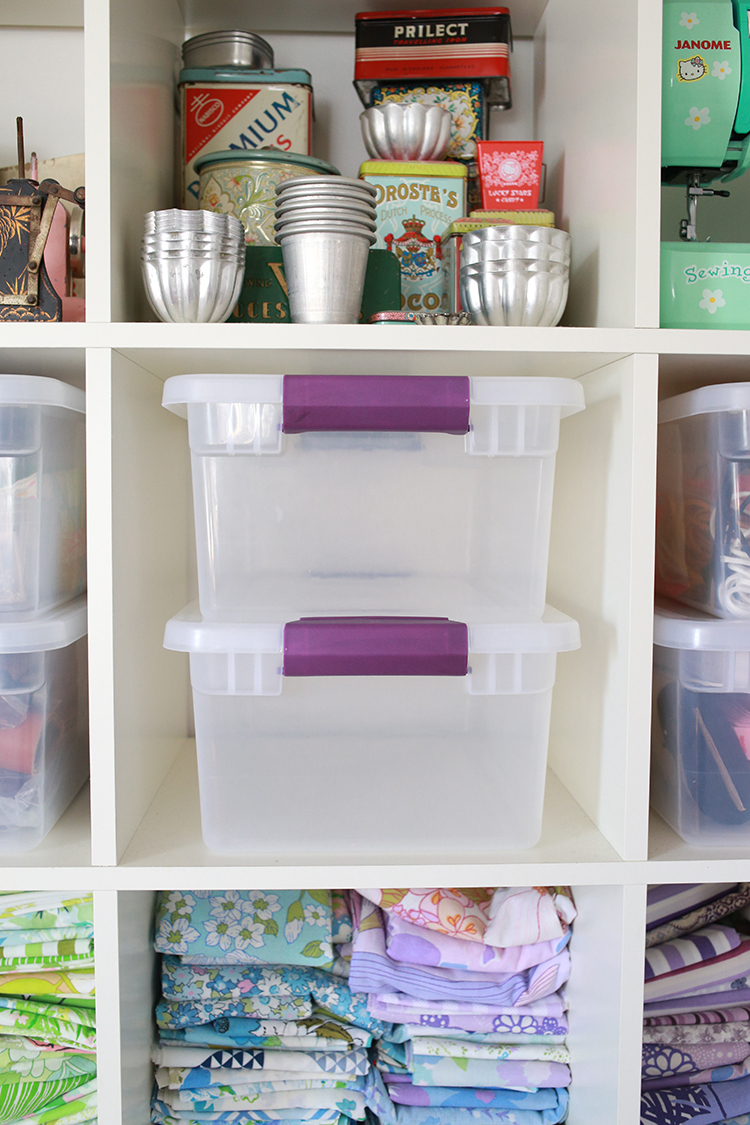
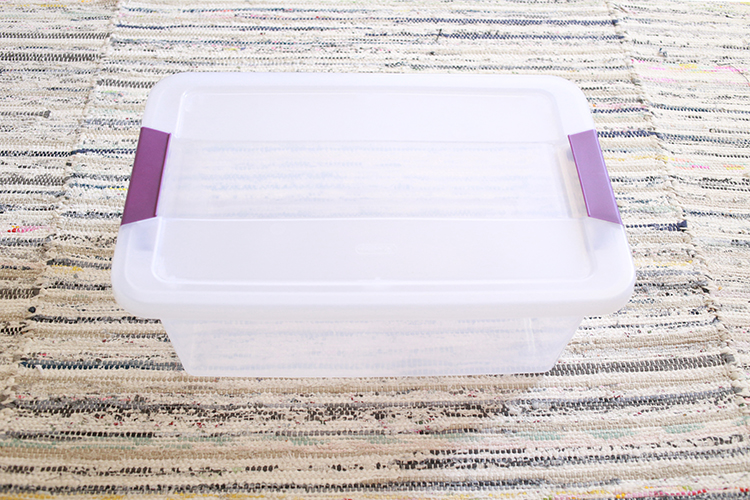
One quick thing before we look inside my bins. I always get asked what they are and where to find them. These are the Sterilite 15qt Clear View Storage Bins*. Two fit perfectly in my cube storage unit from Ikea (Expedit/Kallax). They stack on top of each other easily and they've held up really well. Some of these bins I've had for almost 10 years now! I buy mine from Target.

Okay, now that we've got that bit out of the way, let's look inside the bins and chat about a few different ways I store notions.

Zipper Storage

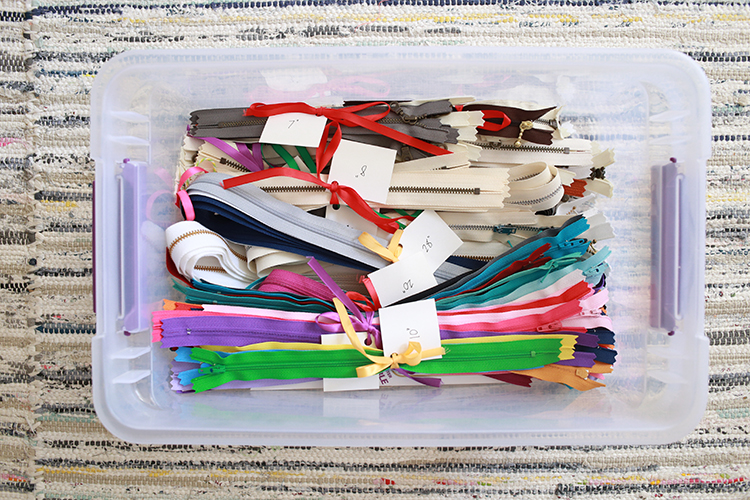
My zipper bin is overflowing with color! My storage solution here is really simple, but it has worked well for me for years. The key is, it's easy to keep up with!


I cut up some index cards and punched a hole in the corner of each piece. The zipper length is then written on the card. A simple length of ribbon or twine holds all the zippers in place with the label attached. Each time I add zippers from the bin, I can find the size, untie the ribbon and add them in.

Machine Accessory Storage

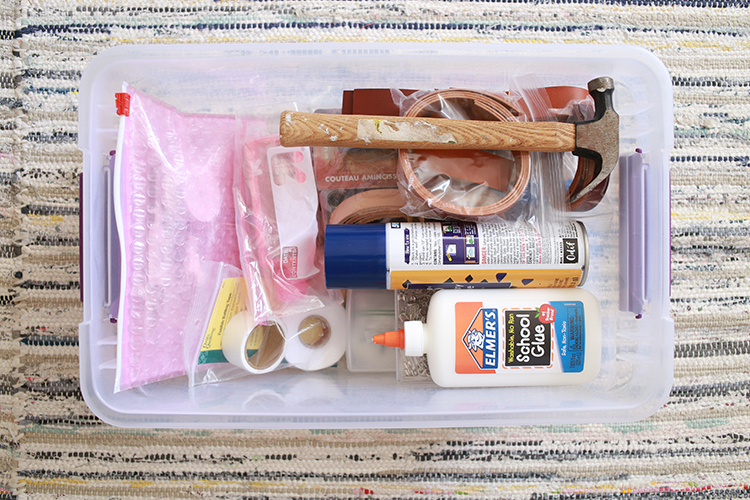
This bin is a bit random, but the common thread is that I don't grab for these groups of items very often. It holds my leather supplies, serger accessories, accessories for my backup sewing machine, plus extra glue, basting spray and basting pins.


For my sewing machine and serger accessories, I like to store them separately so they are easy to grab when I need them for a specific machine. I've used a plastic container that came with the machine and reused a padded zip bag for the other.


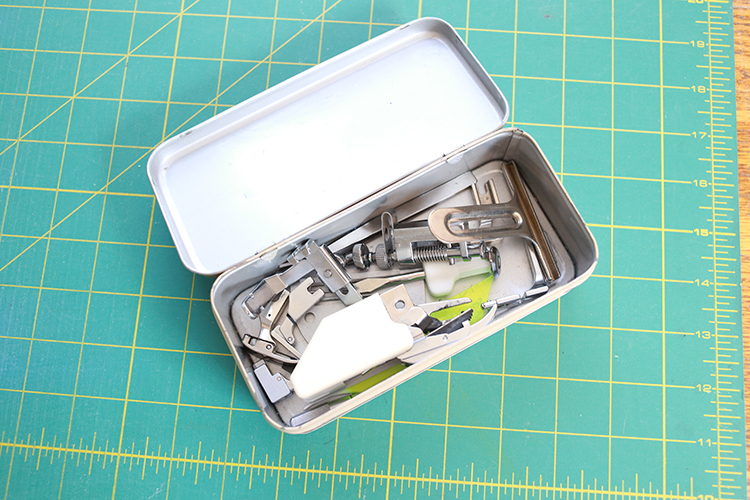
For my main machine, I keep all the feet in a tin that sits on the shelves above my machine. It's nice to have everything within reach of the machine! I try to keep bobbins and other notions out of here, to keep it neat.

Tool, Rotary Blade and Glue Storage

This is my tool bin. I've used a variety of containers here to keep things organized.


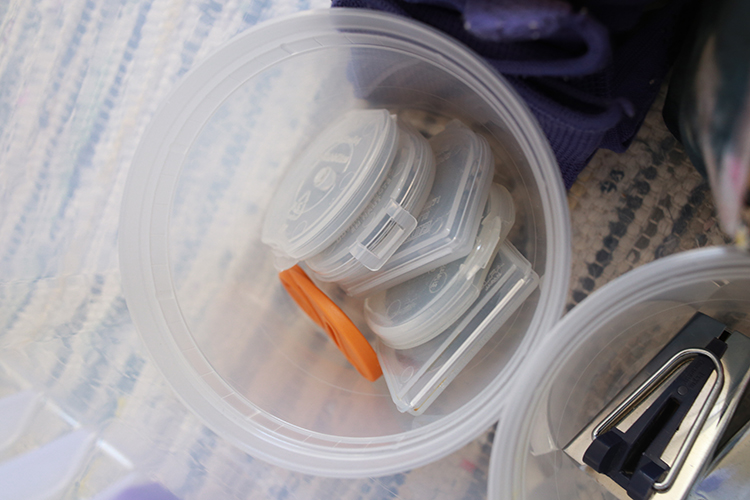
Take-out containers hold rotary cutter blades, binding tools, and extra pins.


A handmade storage bucket holds glues and iron cleaner.


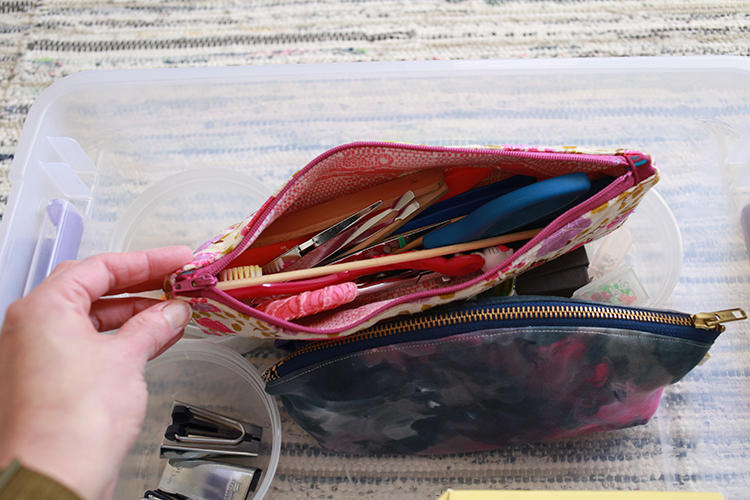
Zipper pouches hold extra scissors, tweezers, marking tools and hand-sewing needles.

Buttons, Hardware, and Floss Storage

This bin holds a ton of different small notions, hardware, and my button collection. This is probably one of the most organized areas in my entire sewing room!


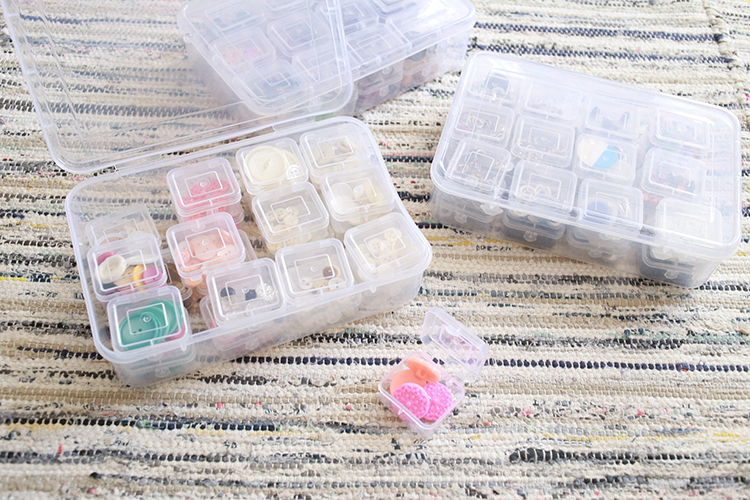
These little storage boxes from Harbor Freight do most of the work in this bin. Each box has 25 little boxes that fit inside. I have buttons separated by color and type. Another box has all my snaps, eyelets, and other similar sized notions. This has made it extremely easy to find what I need quickly.


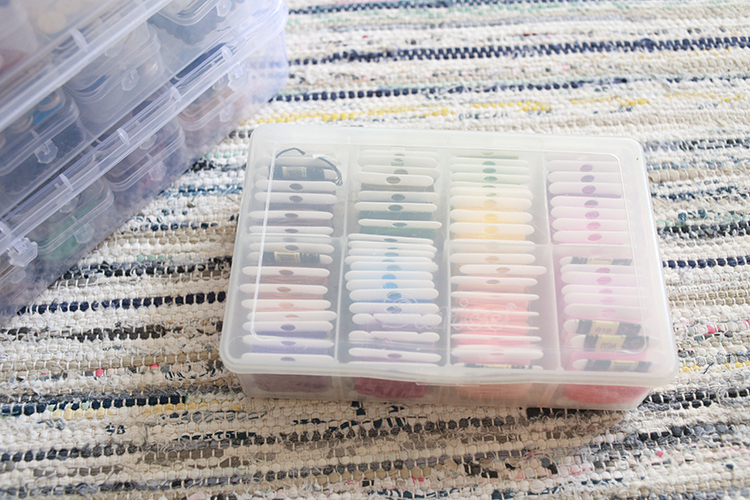
My embroidery floss is all wound up on spools and stored in a clear storage container. I bought my container at a craft store many years ago, but don't forget to check the storage section of your local hardware store or even a fishing section of a sporting goods store for lots of container options!

Trims, Ribbon, and Webbing Storage

I have a bunch of bins dedicated to trims, ribbons and elastics. This particular bin holds pom-pom trim, cording, hand quilting thread, and elastic. I've reused some ziploc bags here to keep things somewhat organized!


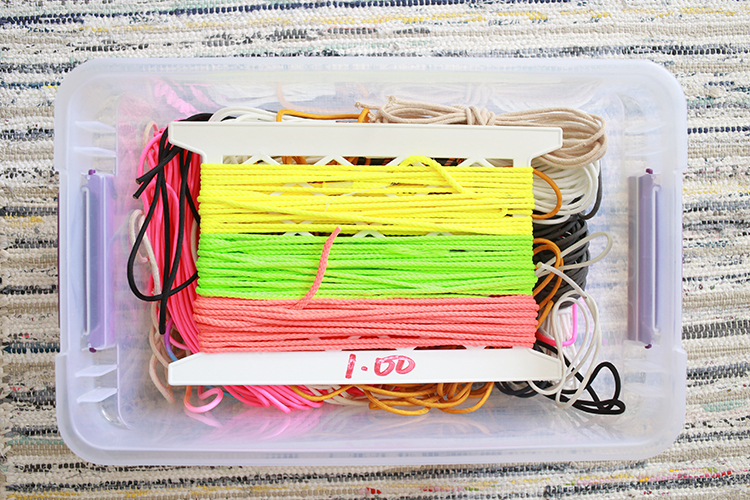
Another trim bin holds nylon paracord. Not super organized, could improve this one for sure!


The last bin of trims holds webbing, twill tape, and some ribbons. Some lengths of webbing are simply tied together with some twill. Others have been wrapped around a piece of cardboard and pinned in place.
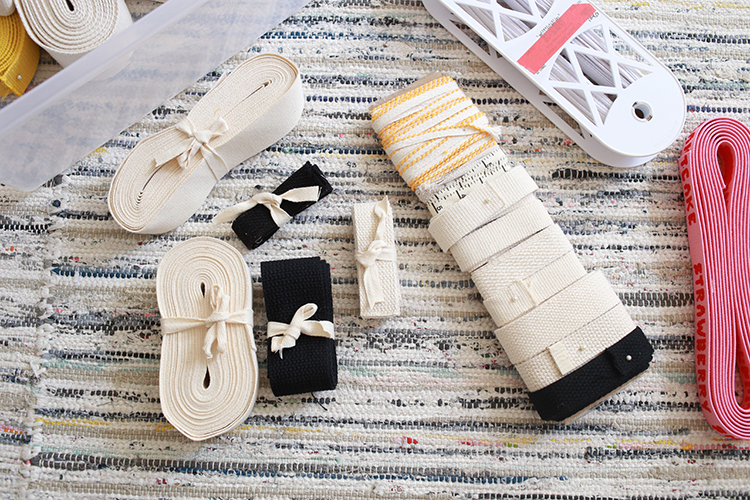
Twill Tape Storage

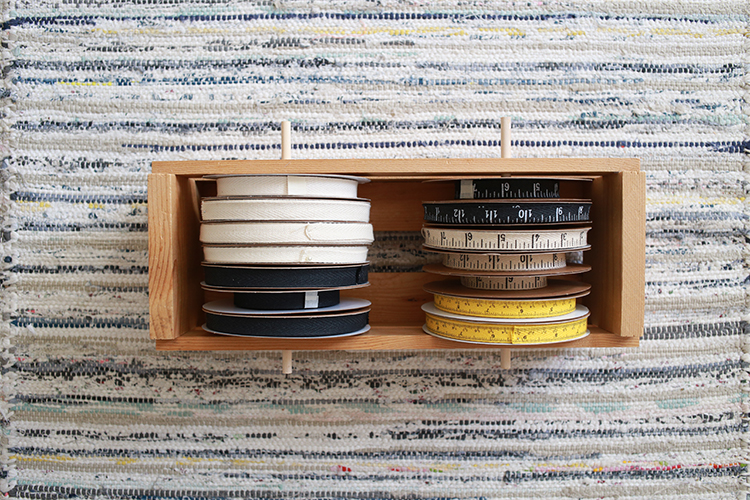
Speaking of twill tape, this is how I store tapes I'm currently cutting off of for sale in my shop! Since they're on a dowel, they can easily spin as I pull lengths off.

Thread and Bobbin Storage

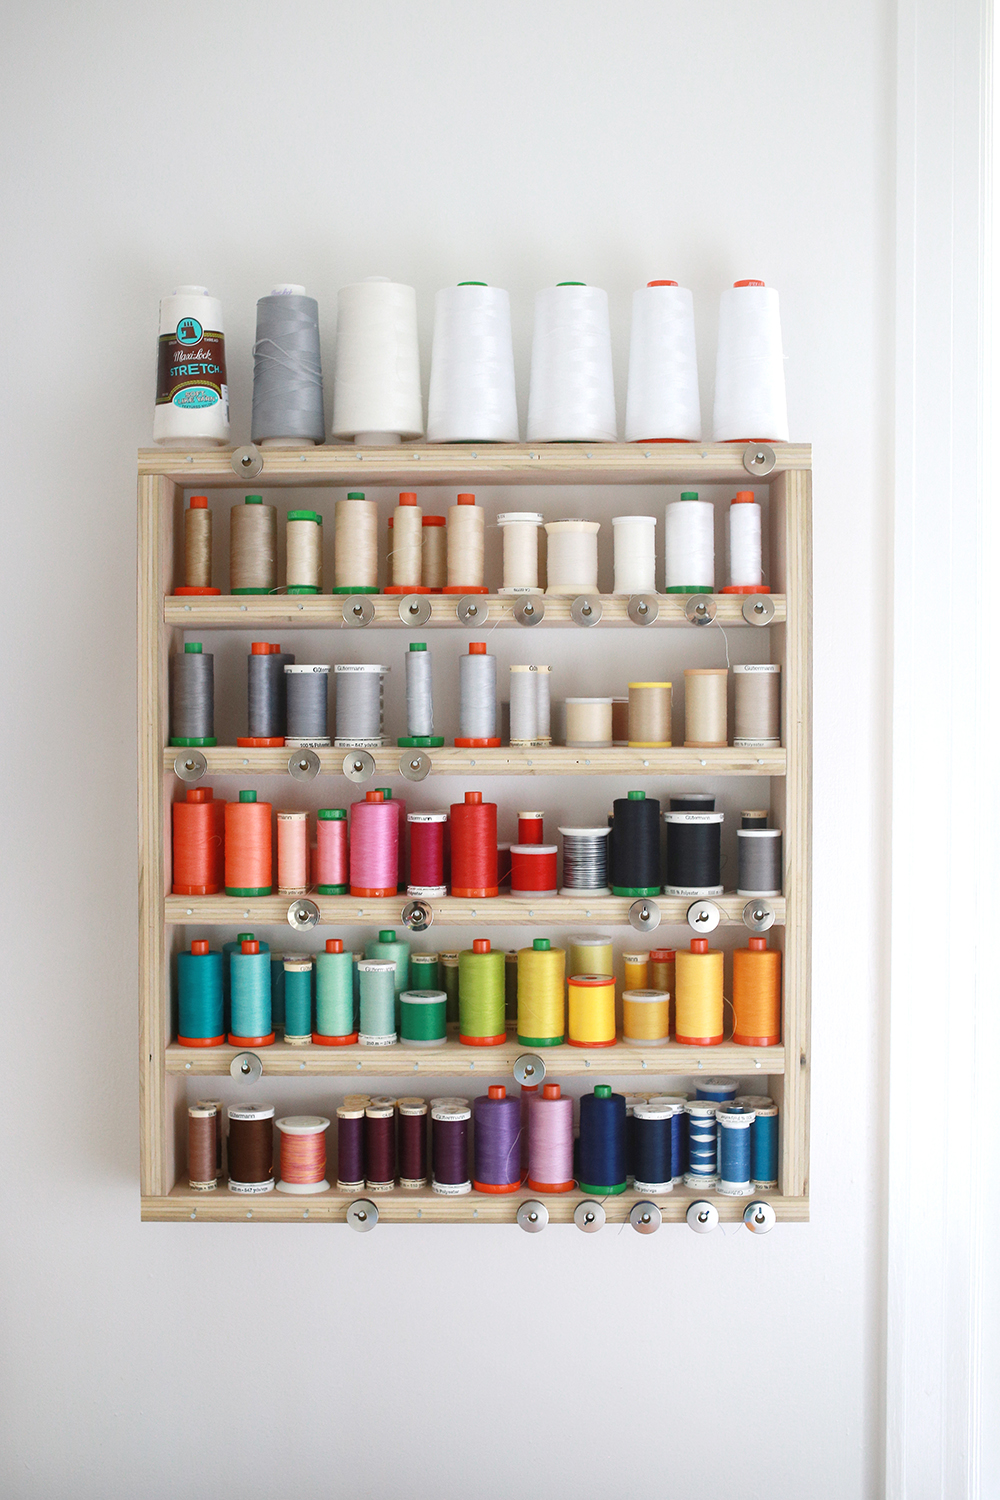
My personal preference for thread storage is to have it on the wall! You can of course use a ready-made thread holder for this, but I built my own a few years ago and still am loving it. I added nails along each shelf to hold bobbins which has been extra nice. Want to make your own? Check out my tutorial for it here: DIY Thread Storage Shelf

Sewing Machine Needle Storage


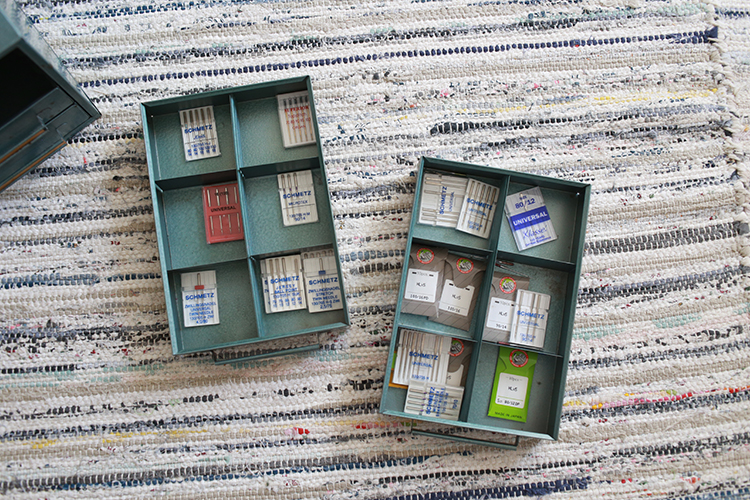
For needle storage, again I like to keep things within reach of my machine. I used this little chest of drawers to store mine, separating by needle size. It's great to be able to quickly grab what I need and keep an eye on what sizes I'm running low on.


I made a long scrappy pincushion (and a tutorial for it too), to hold my lightly used sewing machine needles and sits right in front of my sewing machine. It's empty in this photo, but is full of needles as I write this post. Find the tutorial here: Long Scrappy Pincushion Tutorial

Clip and Basting Pins Storage

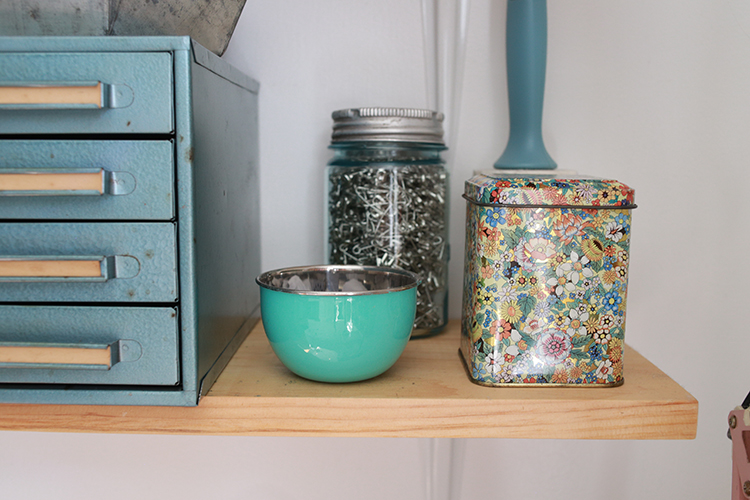
For wonder clips and basting bins, I prefer jars and tins to store them. They look cute sitting on my shelf, and I like that I can easily grab them to travel with if I need to.

Miscellaneous Notion Storage

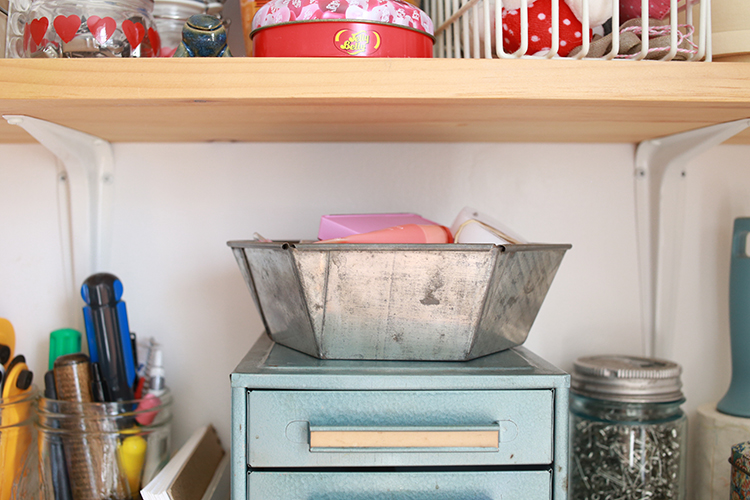
I like to have a place within easy reach where I can keep a few random items. I use this metal baking dish to hold batting tape, lip balm, extra pins, chalk, extra tape measures, glue, etc. Any small notion that I want to be able to get to quickly!

I hope this post has given you some ideas for how to store and organize your sewing notions! My biggest advice for organizing in general is to start with that you already have on hand. Look through your recycling bin, throughout the rest of your home (or apartment or room), or even consider sewing some storage containers! I find I need to buy much less when I look for solutions I already own first. Better for my wallet and for the planet, so a double bonus!

I'd love to hear how you store any of these items in your space. Let mehttps://www.incolororder.com/2022/03/ideas-for-storing-and-organizing-sewing.html know in the comments if you have a storage idea or storage product that you're loving!

Happy Sewing!

*Note: Any links marked with an asterisk in this post are affiliate links. This means if you click through and buy something, I make a small commission, at no extra cost to you.

Friday Favorites 12

Friday, March 25, 2022


Happy Friday! It's time for another Friday Favorites post.

- It was so nice and bright for a few days, and I was really appreciating this view in our bedroom! This vintage display rack has traveled with us quite a bit. I bought it for our wedding in Ohio, it moved with us to Wisconsin, and now it lives here in our home in Connecticut. A well loved piece.

- This indigo quilt by Allie McCathren is making me really excited to do some more indigo dyeing this summer!

- It was my birthday this past Saturday and my parents came out to visit! One of the things they brought with them was homemade maple syrup! I gave my Dad a maple tapping kit* for Christmas this year. He tapped a few trees and they made a bunch of syrup. It's so tasty!

- I'm really excited to do this puzzle* with Michael this coming weekend. He picked it out for my birthday :)

- I love the look of these cozy these built-in bookcases by Hannah Carpenter. I feel inspired to re-style our bookshelves.


- I've been working away on my scrap quilt! Realy enjoying it so far. I'm working on a block pattern for this design, hopefully it will be ready next week!

- We have become obsessed with these snacks*. They aren't wasabi flavor, they're just plain, which I like!

- We finally watched the new spiderman movie this week, Spiderman: No Way Home. It was really cool. We rewatched all the different spiderman franchises to preparation with the help of the library, which really helped!

- How clever is this trick for measuring honey? I am definitely going to try this next time I bake something with honey!

- A new instagram follow for me this week is textile artist Jessie Cutts @cuttsandsons. Beautiful work.


- Dusty all curled up on my lap!

Have a Great Weekend!

*Note: Any links marked with an asterisk in this post are affiliate links. This means if you click through and buy something, I make a small commission, at no extra cost to you.

Fruity Drawstring Bag + New Wooden Beads

Wednesday, March 23, 2022

bags bow
Happy Wednesday! Today I have a couple new drawstring bags to share and a new product to launch!


beads on twill
First up, I have a new bead style stocked in my shop! Let me introduce you to Beehive Wooden Beads! I think these beads are so fun and cute, and look adorable paired with all kinds of fabrics. They come in two sizes, 3/4" and 1". Both have a 5/16" hole, so they still work great with lots of drawstring bag tie options! Here you can see them on 1/2" cotton twill tape.

You can find both bead sizes in my shop here: Beehive Wooden Beads

apple bag
apple bag close-up
I have been waiting to use this cute apple fabric for a while now! I thought something sweet would pair nicely with the new beehive beads! This is the project size bag from my Lined Drawstring Bag Pattern. I pulled fabrics for the rest of the bag around the apple print from Smol by Kimberly Kight*, using a print from Carkai* for the accent, and a print from Daisy Chain* for the lining. It's finished off with antique ruler twill tape and 1" beehive beads.

bee bag
bee bag closeup
This fabric has been in my stash for YEARS. So many years. It's a fun bee/honeycomb print from Echino by Kokka*. This is the everything size bag from my free tutorial (and pattern). I used another long stashed print from Katie Jump Rope* for the accent, and some plain muslin for the lining. It's finished off with 1/2" natural twill tape and 3/4" beehive beads.

bags
I love how both of these bags turned out, I think they are pretty adorable! I'm excited about having a new bead shape to adorn my bags with.

closeup bow
Pattern: Lined Drawstring Bag Pattern
Notions: Cotton Twill Tape, Beehive Wooden Beads
Fabrics: Smol*, Carkai*, Daisy Chain*, Echino by Kokka*, Katie Jump Rope*.

Happy Sewing!

*Note: Any links marked with an asterisk in this post are affiliate links. This means if you click through and buy something, I make a small commission, at no extra cost to you.

Friday Favorites 11

Friday, March 18, 2022


Happy Friday! It's time for another Friday Favorites post.

- It's almost Spring, hooray! The Hellebore that I planted last year is starting to come up! I got lucky this year and was able to get one from Trader Joes for only $10! I planted it this week, pretty close to my first one.

- I love seeing other people's workspaces, especially when they're lived in. Lucie Summers shared hers here.

- Thrifted another puzzle* this week. I can't wait to do this one, the colors are so pretty and fresh!


- I'm continuing on my mission to update old blog posts. This week I refreshed this post, to hopefully make it a bit more useful!

- S and S Handcrafted have some adorable moon themed lined drawstring bag kits* available in their Etsy shop!

- My next woodworking project is all lined up: an overhead camera rig. This will allow me to more easily take overhead shots and hopefully shoot some more video tutorials too!


- I picked up this book* from the library this week, and I've got a bunch of recipes bookmarked already. I need a few new cookies to add to my rotation of go-tos. I've already tried the chocolate hazelnut thumbprints, they're good. Super chocolatey!

- We tried the double freeze-thaw preparation for tofu as outlined in this recipe. It gave it such an interesting texture! We'll definitely be doing this again.

- A few weeks ago I picked up this little counter sweep* on a whim at my local hardware store. I've been loving it!! I really dislike sweeping up counter crumbs with a sponge, this little thing is a bit silly but has been making a task I dislike more enjoyable.


- Dusty enjoying the sun.

Have a Great Weekend!

*Note: Any links marked with an asterisk in this post are affiliate links. This means if you click through and buy something, I make a small commission, at no extra cost to you.

DIY Abstract Fabric Artwork

Wednesday, March 16, 2022

styled-horiz
Happy Wednesday! Today I have a piece of fabric artwork to share. This project has been on my to-do list for years at this point, pretty much ever since I finished my first piece of fabric art back in 2019. It was also on my crafty goals list for 2022, so I'm really happy to check this project off the list!

For more on my first piece of fabric art see this post: Improv Pieced Wall Art

floating
A bit of backstory first. I have wanted a large piece of artwork to go over our mantle pretty much ever since we moved in. I knew I didnt want a mirror there, but I couldn't decide on any artwork to put there. It needed to be big, so I knew it would be expensive (as it should!). I thought about doing a large framed photo or print, but again just couldn't make up my mind on what! Fast forward to making my own pieced artwork in 2019. It turned out better than I expected it to, except that I made it too big! It just didn't look right over the mantle, so I ended up putting it in our dining room, and I love it there.

fabric-stack
I meant to go ahead and make a new piece right away, but I didn't. Finally last week I decided to at least pull some colors for it. After pulling the fabrics, I just ended up starting! One thing led to another and a put together the entire piece and hung it all in one day!

close-up
close-up 2 I went with much more saturated colors this time, and just randomly pieced in a log cabin quilt style. The colors I pulled from the two rugs we have in this main living space. I thought about ordering some other solid colors, but I'm glad I used what I had instead. Feels much more satisfying!

frame This time I remembered to take a photo of the frame before I added fabric! I used mitered corners this time, which is so convienient for the math. The side and top pieces are the same size as the finished frame. My frame is 24" tall x 36" wide. I put the whole thing together with 1x2 lumber, wood glue, and brad nails. I got lucky and it was a beautifully sunny day when I was making this, so I put the frame together on our deck. I'm so happy the weather is improving.

Edited to add: If you don't want to make a completely DIY frame, you could buy canvas stretcher bar kits like these*, which assemble without power tools.

seams
When it came time to attach the pieced quilt top to the frame, I first cut a piece of white Kona cotton* the same size as the quilt top. I used this as a backing so that the frame won't show through to the front. Not sure this is 100% necessary, but it's an easy step so it feels worth the extra work to me. I stapled the fabric to the back of the frame using my new cordless stapler* and then cut away the excess fabric.

scraps I'm really happy with how it turned out! I'd like to try making some smaller pieces at some point. It's such a fun way to use up fabric scraps, and make something totally unique. I love how cheap it is for making large pieces too. Is it weird that I kind of want to make some seasonal pieces to rotate in and out of this spot?

styled-vert
Here is a look at the whole fireplace area! The pillows are from my Bear Paw Pillows Pattern. The garland is by Erika Bea. The print is was a postcard by Lisa Congdon.

Happy Sewing!

*Note: Any links marked with an asterisk in this post are affiliate links. This means if you click through and buy something, I make a small commission, at no extra cost to you.