Friday Favorites 54

Friday, March 31, 2023


Happy Friday! It's time for another Friday Favorites post! Catch up on previous posts here: Friday Favorites Archives

- This stack of ice-dyed towels get SO much use in our house. We use them for everything, and it's nice to have a healthy stack to pull from. I used cotton flour sack towels* for dyeing.

- Love this all black quilt by Chris Austin. Not something you see everyday!

- Inspired by this handmade outfit by Jane Richmond.

- Such a cheerful group of blocks by Tara Faughnan.


- I've been enjoying working through the Spring Bucket List from Pinch of Yum. I made the strawberry white chocolate cookies last week. They were tasty! I froze most of the dough balls for cookie emergencies!

- I was finally able to order my favorite brand of a favorite snack, these shiitake mushroom chips*. We discovered them at our local asian grocery store a few years ago but they carried them only briefly.

- I had a chance to check out the Marimekko x Ikea collaboration this week and picked up a few goodies! It's such a cute collection.


- The tulips I planted in crates this past fall are coming up! I'm so excited to have tulips to cut this spring. I fashioned a ridiculous cage to put around them, I'm determined to keep the squirrels/chipmunks off them.

- How cute are these little handmade bee cups for making sure our bee friends have access to water?


- One of Dusty's better naps recently. :)

Have a Great Weekend!

*Note: Any links marked with an asterisk in this post are affiliate links. This means if you click through and buy something, I make a small commission, at no extra cost to you.

2023 First Quarter Report

Wednesday, March 29, 2023


Happy Wednesday! Instead of doing monthly reports this year I've decided to mix it up and do quarterly reports! Now that March is almost over, it's time to look back on the first quarter of 2023. See past monthly reports here.


I made some adjustments that allowed me to finish the arcs for my double wedding ring quilt (finally!). Next I need to choose background and cornerstone fabrics, which is no small task! You'd think after all this time I'd know what I wanted, but a do not. I also need to make a small tester, because my curved piecing experience is very limited.


This month I picked up the Hinterland Dress pattern by Sew Liberated and last weekend I got my muslin cut and sewn. I'm not sure how much I'll wear it, as the fabric didn't drape the way I expected it to (I used a vintage sheet!). I still need to choose a fabric for my next one, we'll see if I have something on hand.


It still needs photographing, but I finished my all lawn indigo quilt! I sent it off for longarm quilting in early 2023 and got it bound this month. I'm excited to have another large all lawn quilt around for Summer so that Michael and I both have one we can use when it gets a bit warmer. I still love this voile one I made years ago: Little Folks Voile Summer Quilt. It's so lightweight and has the most amazing drape.


I started the year by finishing up my tea advent calendar, made with tiny lined drawstring bags! I had grand intentions to finish it in time to use last December, but that didn't quite happen. Regardless, I'm happy with how it turned out! And thankfully it's not holiday-themed so I can use it anytime I want. Read more about that project here: Rainbow Drawstring Bag Advent Calendar


I also made a Valentine's themed drawstring bag last month, with a fun heart appliqué detail. This was a fun experiment, and a good excuse to just play around with different techniques. Read more about that project here: What I'm Working on Right Now


My one scrappy project this quarter was making these two pincushions. I used leftover blocks and scraps.


I've been having fun doing some just for fun crafting this year. I have made a few things with a kit from Concrete Geometric (paired with this mold set from Michael's). So far I've made a couple of ring dishes and some lidded boxes.


I am finally using my stash of dried strawflowers to make a few wreaths. I have been growing strawflowers and saving my blooms for 4 years I think? Can't wait to grow more this year!


To keep myself accountable for my stash goals, I track my yardage for fabric and yarn. Read more about how I track here. Here is how I did in the first quarter of 2023:

First Quarter Fabric
Used up: 20.25 yard
Brought in: 0 yards
Net: -20.25 yards
Year to date: -20.25 yards

First Quarter Yarn
Used up: 0 yards
Brought in: 0 yards
Net: 0 yards
Year to date: 0 yards

Checking in with my crafty goals, here is how I'm doing in 2023 so far:
- Haven't purchased any fabric or yarn this year, so I'm meeting my stash goals at the moment.
- I finished all the arcs for my double wedding ring quilt!
- Finished one color work mitten.


It hasn't been a very productive start to the year in terms of making to be honest. During these first few months of the year I have spent more time focusing on things in my life outside of sewing/knitting. That is probably how the rest of the year will be as well, and that's okay. Some years I've made tons of things and other years hav been slower. Just trying to give myself grace and not feel too guilty about that.

Happy Making!

Friday Favorites 53

Friday, March 17, 2023

Happy Friday! It's time for another Friday Favorites post! Catch up on previous posts here: Friday Favorites Archives

- Follow up from last week, I made the Lofthouse-Style Frosted Sugar Cookies by Serious Eats! They're tasty, soft, and have great flavor.

- I really love the contrast and colors in this pineapple quilt by Steffi Troy of Quiltwerke.

- I ordered the Hinterland Dress Pattern by Sew Liberated this week and I'm excited to try it out! Thinking of making a tester out of a vintage sheet.

- I want to try this float mounting technique shared by Emily Newman.


- Thrift find of the week was this New Era x Takashi Murakami hat that I found for $6, lucky for me I recognized the art right away. He collaborated with Lewis Hamilton last year, I loved his helmet design.

- If you're looking for a new water bottle, specifically one that keeps things cold, I've been loving this one*. It's been my go-to for 6+ months and it's pretty affordable!

- We've been watching the miniseries Station Eleven, and we've only got a couple episodes left. It's totally unlike anything we've watched before!

- This crochet pillow (with free pattern) caught my eye on Pinterest. So cute!

- Speaking of cats, this sticker* cracks me up!


- Dusty enjoys napping in her basket that's in front of a heating vent.

Have a Great Weekend!

*Note: Any links marked with an asterisk in this post are affiliate links. This means if you click through and buy something, I make a small commission, at no extra cost to you.

Triplicate Baby Quilt

Wednesday, March 15, 2023


Happy Wednesday! I have another recently finished baby quilt to share this week!


I made this quilt top back in 2015, as a sample for a class I taught at QuiltCon in February 2016. Feels like so long ago! It sat untouched until late last year, but I finally pulled it out and got it finished up. I'm really trying to finish up my works in progress, and this is one of the last quilt tops left that are related to my book. Feels good to get it completed!

The colors on this old photo are a little off, but I had to include it because of the violets you can see growing in the grass in the upper right corner! I took this at our Madison apartment, brings back good memories!


This quilt is made of blocks from the Triplicate Quilt, which is in the Patchwork chapter of the book. You can read more about that quilt here: Triplicate Quilt. I still have signed copies of my book available in my online shop, here: Patchwork Essentials: The Half-Square Triangle


This baby quilt uses 16 of these fun patchwork half-square triangle blocks. For the fabrics, I used only prints that I designed! All cool colored prints from my collections including Color Me Retro*, Dreamin' Vintage* and Geometric Bliss*. I'm tempted to make a warm colored version of this. Maybe one day!


I feel like a broken record whenever I talk about the actual quilting, I really don't have a lot variety in the quilting that I do. I went with wavy lines that I quilted with my walking foot. I did use a fun thread color though, a bright turquoise! It's not super visible in the photos, but is a nice pop of color in person.


The quilt is backed in one of my prints from Geometric Bliss and bound in my favorite print I designed from Dreamin' Vintage. I used one of my custom woven labels to finish it off.


Pattern: Triplicate Quilt from Patchwork Essentials: The Half-Square Triangle
Fabrics: Color Me Retro*, Dreamin' Vintage* and Geometric Bliss*

Happy Quilting!

*Note: Any links marked with an asterisk in this post are affiliate links. This means if you click through and buy something, I make a small commission, at no extra cost to you.

Friday Favorites 52

Friday, March 10, 2023


Happy Friday! It's time for another Friday Favorites post! Catch up on previous posts here: Friday Favorites Archives

- I love the pom-pom trim binding on this quilt by Summer Sage! So fun and happy!

- This recent quilt finish by my friend Erika makes me want to play with my scraps.

- I know that clothes made from vintage quilts aren't something everyone feels comfortable with, but I love seeing how Psychic Outlaw sources the materials for their products. Check out this behind the scenes video they made of their process.

- I love stamps, so this free poster download of 'A History of Love Stamps' caught my eye immediately. This year's love stamps are adorable! I'm wishing I'd bought a sheet or two of the 2011 ones, so good!!

- A recent instagram follow for me is the artist Elyssia Ward (@expressiveforest). Their handmade ceramic jewelery charms are so sweet.


- It's the official start to the gardening season for me, I started my first seeds for the year this past week! Growing four different colors of strawflowers this year. Three from seed packets I already had, and one new-to-me variety. (I finally made some wreaths with mine using this tutorial.)

- Continuing last week's kitchen gadget share, I've been using these silicone bowl covers* for nearly four years now and they're so handy. The two largest sizes fit my two different sized kitchenaid mixer bowls, so they get a lot of use.

- I made my go-to chocolate chip cookies this week, but swapped in colorful M&M's for the chocolate chips. I also refridgerated the dough for 24 hours, which I think really boosted the flavor!

- I'm tempted to make the winning recipe in The Pancake Princess's Lofthouse Cookie Bake Off.


- Dusty has rediscovered the back of the couch as a nap spot. :)

Have a Great Weekend!

*Note: Any links marked with an asterisk in this post are affiliate links. This means if you click through and buy something, I make a small commission, at no extra cost to you.

Vintage Bear Paw Baby Quilt + Pillow

Wednesday, March 8, 2023


Happy Wednesday! I finally took photos of my vintage bear paw baby quilt that I made back in October, so that's what I'm sharing today!


This was a quilt I never actually intended to make. When I picked up my vintage bear paw blocks last year, I ended up having a marathon cutting session and cut way too many blocks. I used 30 blocks to make my throw quilt, see my post about that quilt here: Vintage Bear Paw Quilt. After that I had 10 blocks left, so I decided to use 9 for a baby quilt and then also make a pillow!


The main colors I cut too many of were green and pink! So this baby quilt has a lot of green and pink in it. Some of these blocks don't have a lot of contrast, so it doesn't photograph the greatest, but it's really soft in person. It's also soft to the touch of course, because of the vintage sheets.


I had a just the right size cut of this green vintage sheet to use as the backing. It's one of my favorites. You can see the quilting best from the back, I did something a little different. A twist on my usual wavy quilting, I quilted a wavy crosshatch! I think it really goes well with the retro design of the backing fabric.


For the binding, I used the same fabric as the backing. I was so pleased, I was able to cut all the binding strips from the wide top hem of the sheet! Felt extra thrifty. Also I kind of love using the same fabric for the backing and binding on a quilt. It's a look!


Used one of my custom woven labels again. I've been really consistent with labeling my quilts lately!


Please forgive these photos, I clearly need to find a slightly smaller pillow form for this pillow cover! But this was what I had, so that's why it's looking a bit over-stuffed. I took the final extra block and just added a simple border on all four sides. I also pulled out this chevron sheet for the back, which I think is a perfect match for this very green and yellow pillow!


It's quilted pretty simply, just some straight lines. It gets the job done though!


I really should get a photo of all three vintage bear paw projects together. For now here's one more shot of the baby quilt. If you're interested in making a quilt like this (or like the throw), I have a pattern available, details are below.

Pattern: Vintage Bear Paw Quilt Pattern (by me!)
Fabrics: Reclaimed vintage sheets

Happy Quilting!

Friday Favorites 51

Friday, March 3, 2023


Happy Friday! It's time for another Friday Favorites post! Catch up on previous posts here: Friday Favorites Archives

Thank you to everyone who reached out last month when I stopped posting. All is well now, but I had to have an emergency surgery and then while I was recovered from that, I ended up catching a cold. So I didn't feel like doing a whole lot! I'm feeling more like myself now and hope to keep up with posting regularly again.

- I have done a little crafting lately, including playing around with a kit from Concrete Geometric. I used it with a couple molds I picked up at a local craft store.

- Starting to gear up for Spring and I am considering adding one of these to our driveway garden. Have any of you tried something like this? I'd love to hear if it worked for you!

- Love this colorful I Can Fly Quilt by Jen Carlton-Bailly.

- This delicious quilt by Ashley is what pink and yellow vintage dreams are made of!


- Speaking vintage dreams, I scored a pair of vintage sheets at the thrift store this week! I am really excited about the multi-colored stripe. I had it in my shop years ago and sold most of it. It makes such a good binding, I'm happy to have it in my stash again!

- This froggy video is so cute.

- I am so excited about this yeast measuring spoon I just ordered from KAB. I was restocking the non-diastic malt powder I use in my bagels and happened to see this.

- We made swedish style pancakes last week and used a new-to-us ligonberry jam* that we really liked! Previously I had purchased some at ikea, but found this one at our local grocery. It's less sugary and more convenient to pick up on a regular grocery run.

- I'm tempted to try out this recipe for homemade twix bars.


- Dusty loved all the time I spent on the couch in February. She took full advantage with lots of snuggle time.

Have a Great Weekend!

*Note: Any links marked with an asterisk in this post are affiliate links. This means if you click through and buy something, I make a small commission, at no extra cost to you.

Simple Two-Color Baby Free Quilt Pattern

Wednesday, March 1, 2023


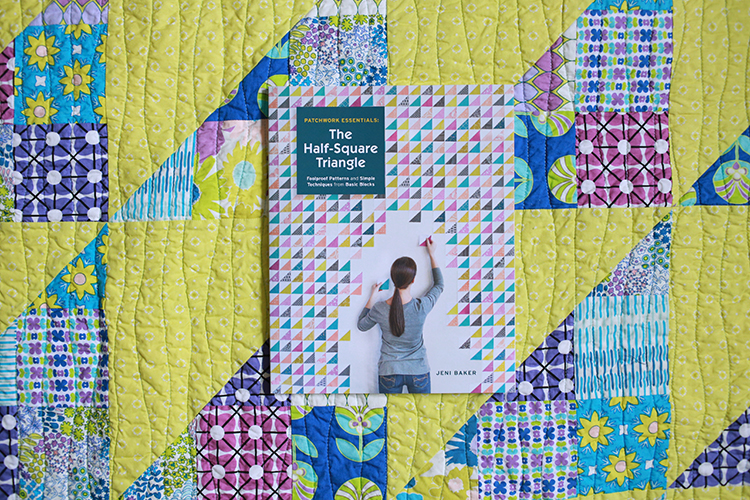
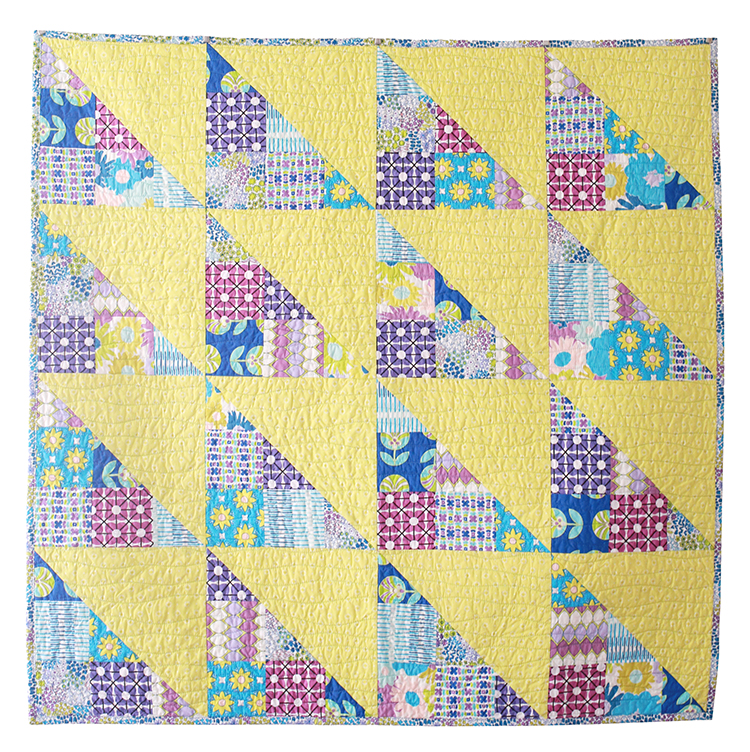
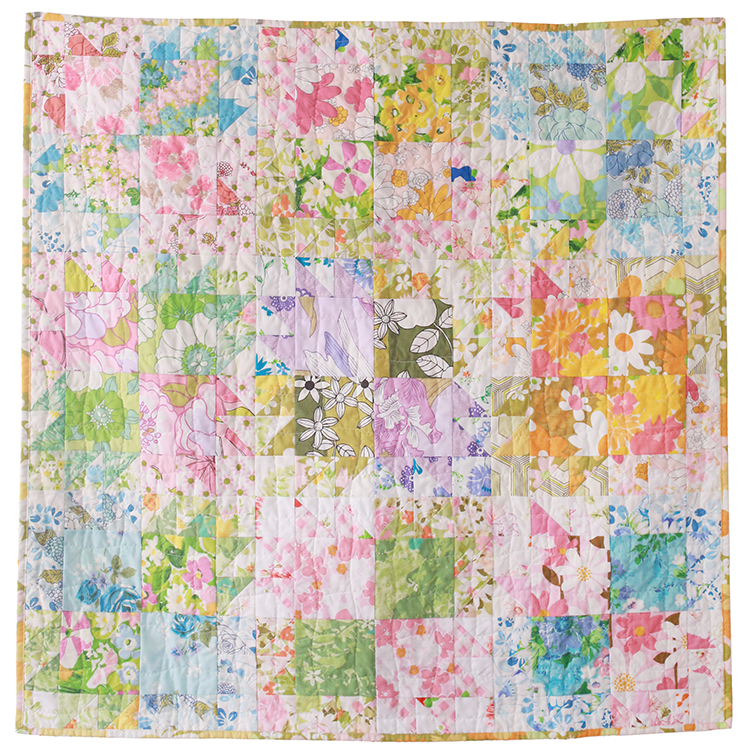
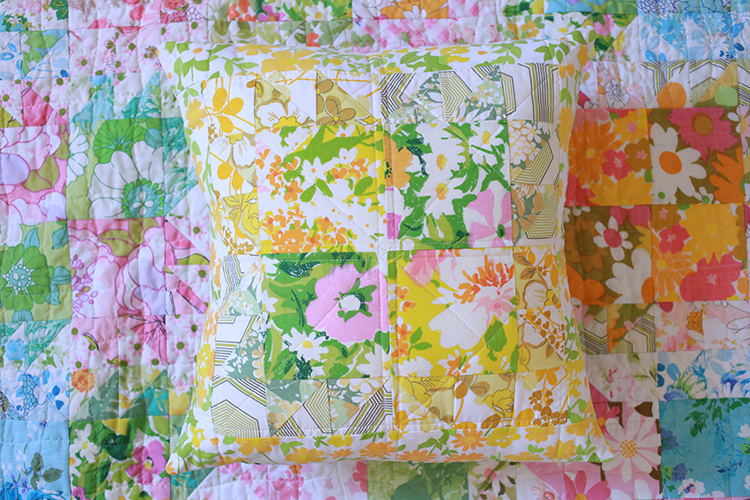
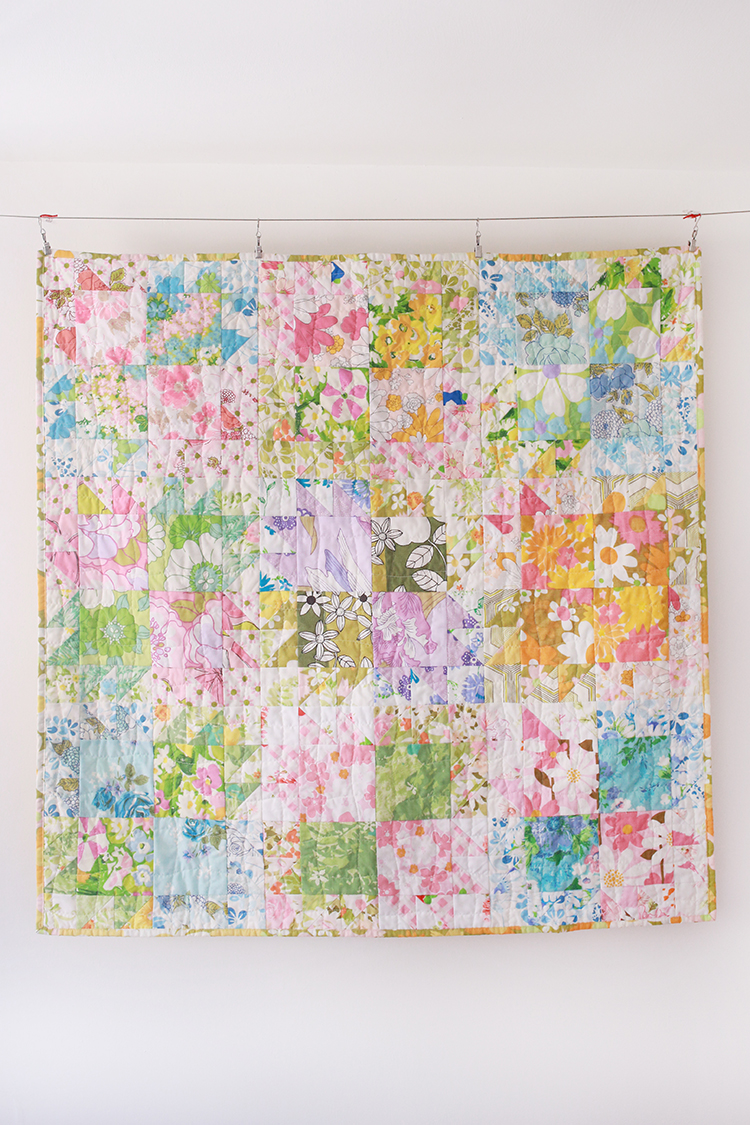
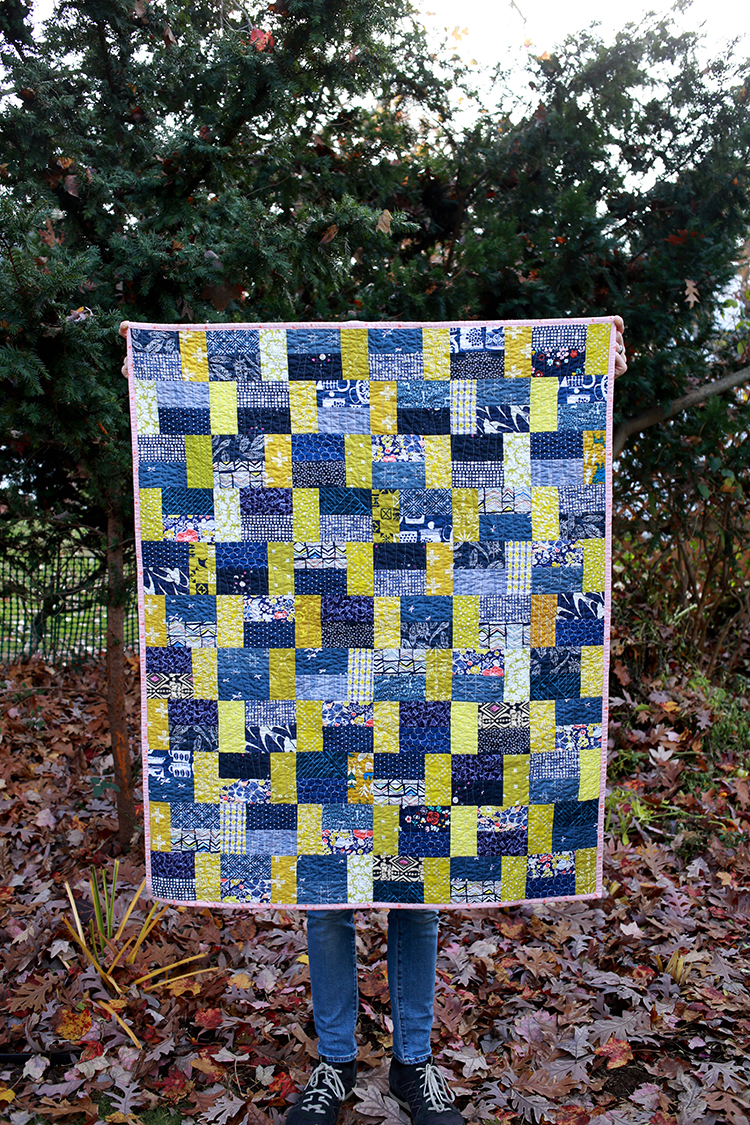
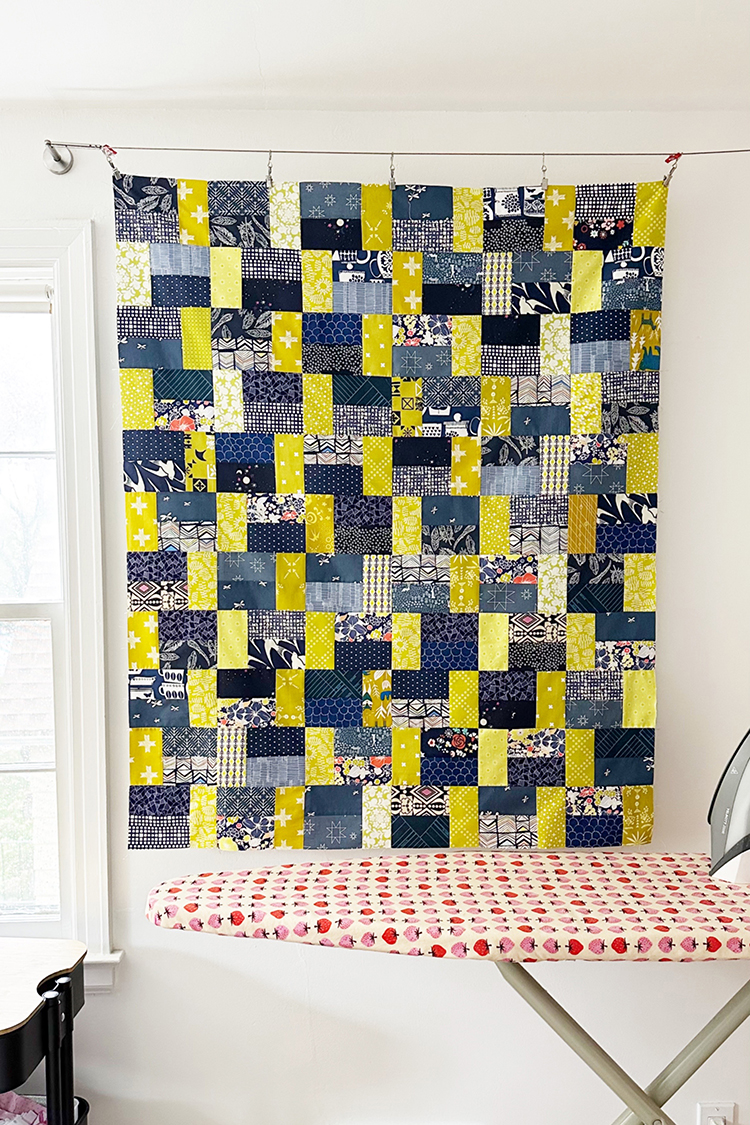
Happy Wednesday! I'm back to share a tutorial for this simple two color baby quilt that I made from my stash last year for one of our friends! First, a little bit about the quilt itself.


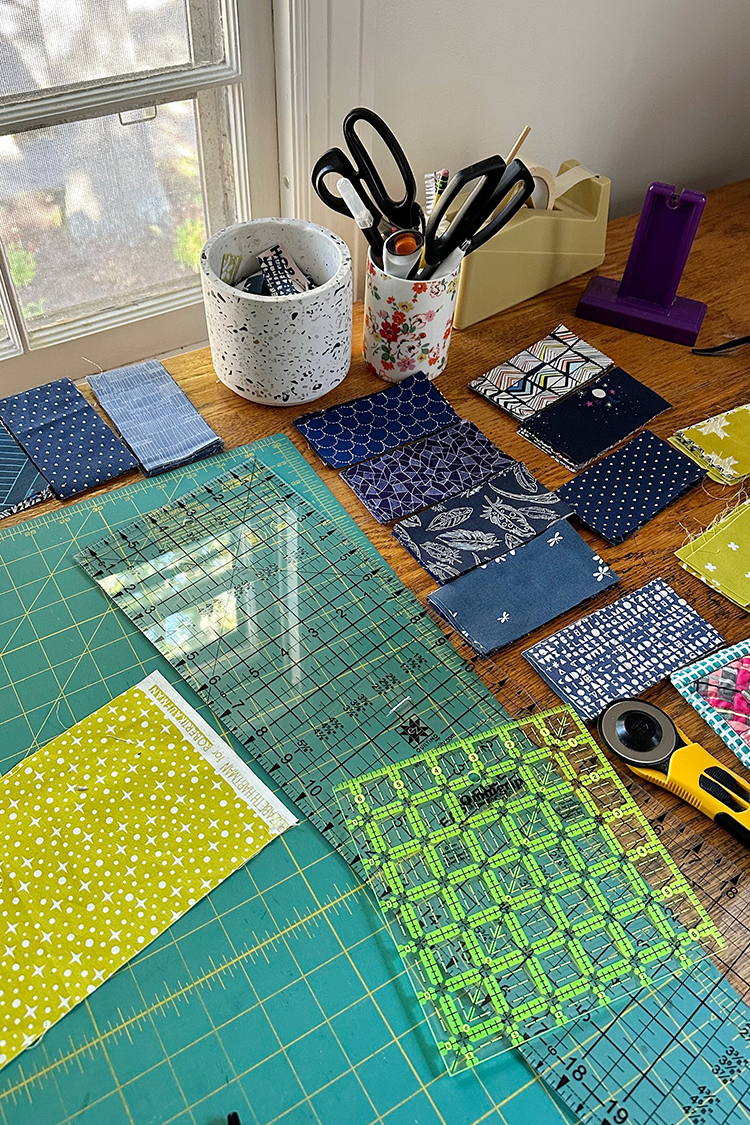
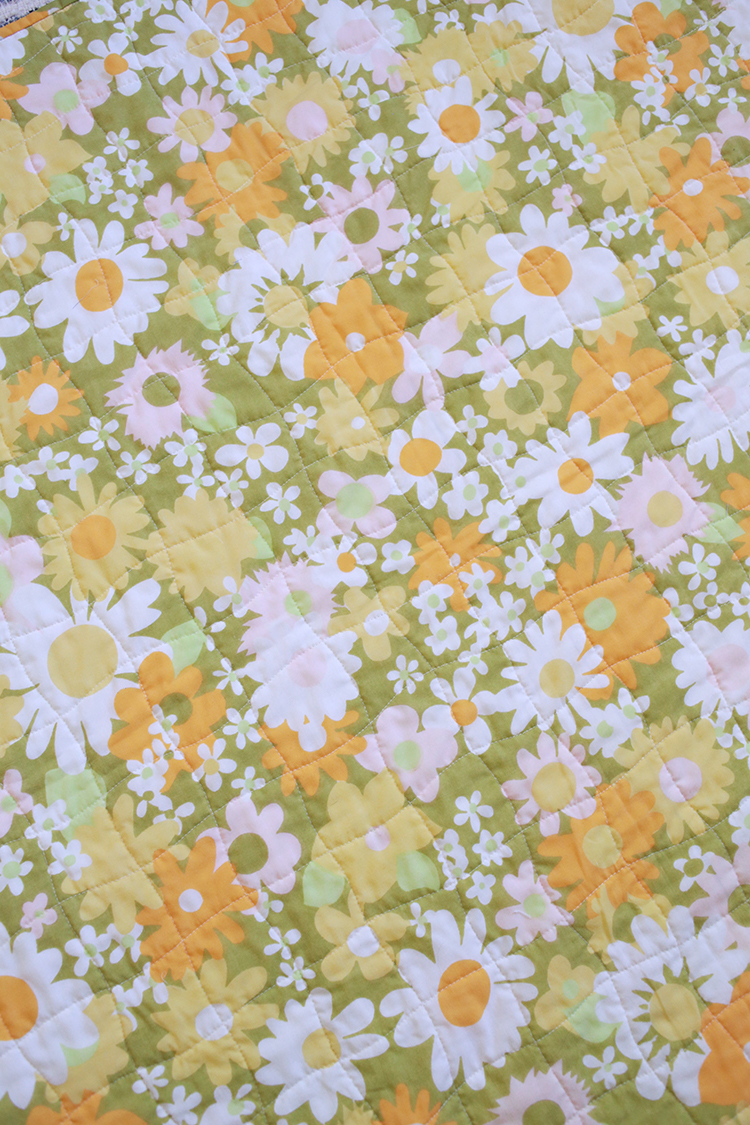
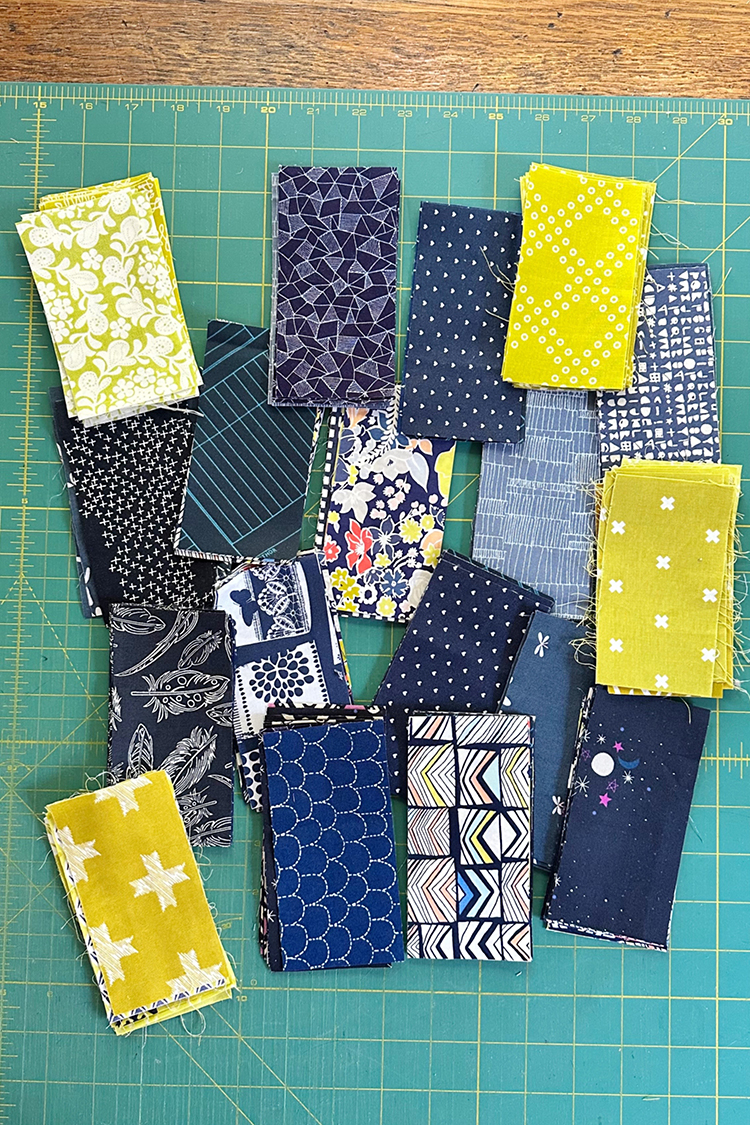
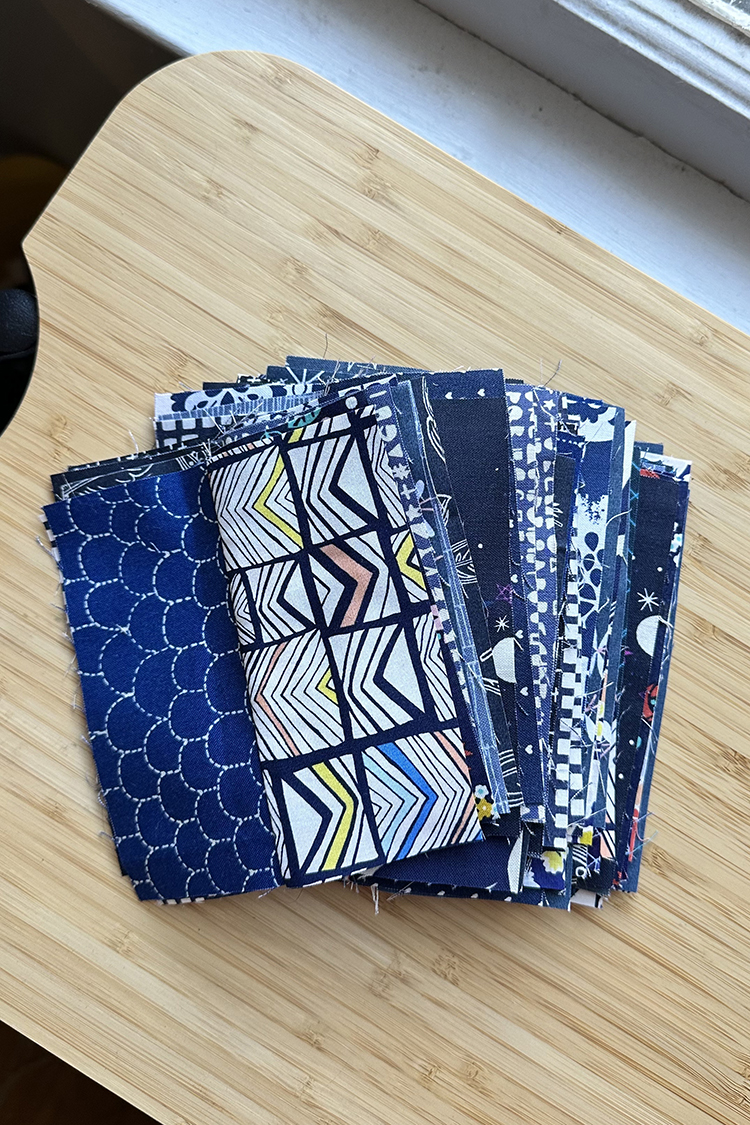
I had such fun making this quilt. I knew from the start that I wanted to make it completely from my stash and that I wanted it to be pretty gender neutral. I personally feel like navy and chartreuse/lime green work well for any gender! I also happen to have a good selection of both of these colors, which worked out well.


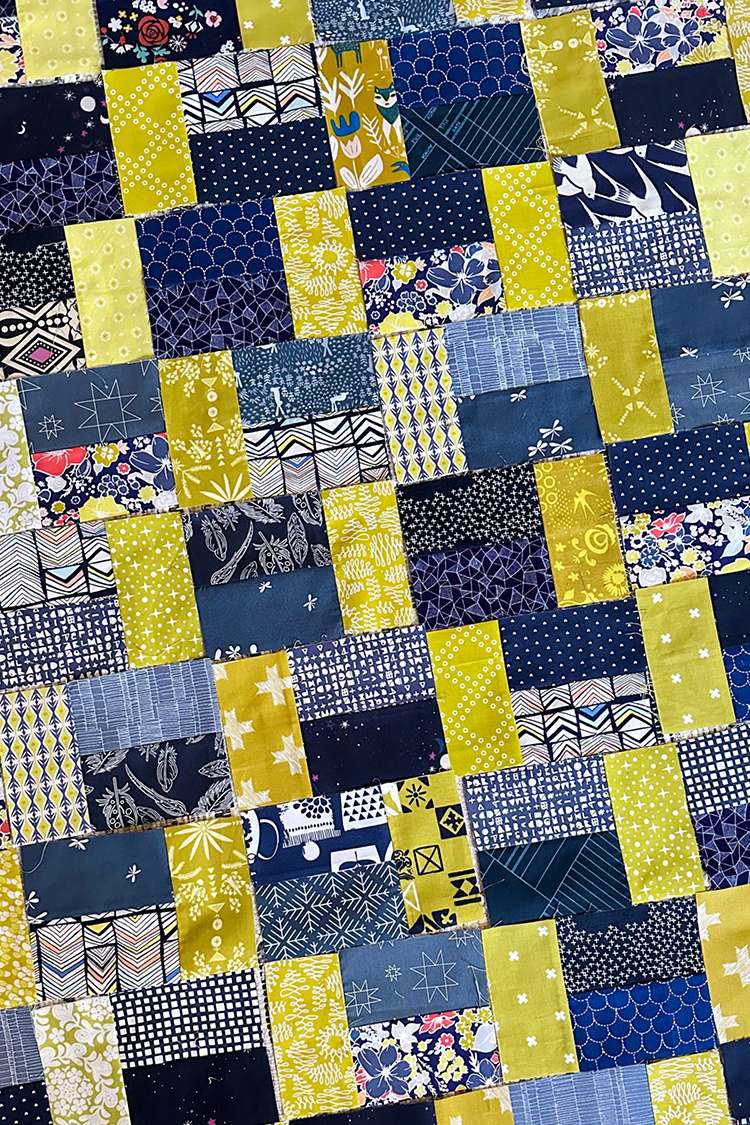
The design of this quilt is really simple, but it has a lot of flexibility. I made it with two colors, using multiple fabrics for each color. There is only one size strip to cut (hooray!), and I cut mine from a combination of scraps and yardage. The great thing about this quilt though is that you could easily cut from scraps, yardage, charm squares, layer cake squares, jelly roll strips or fat quarters. You also don't have to stick to two colors! You could go completely rainbow scrappy, you could use a neutral or single fabric in place of the green (color A) and then use many different fabrics for the navy (color B). Lots of possibilities!


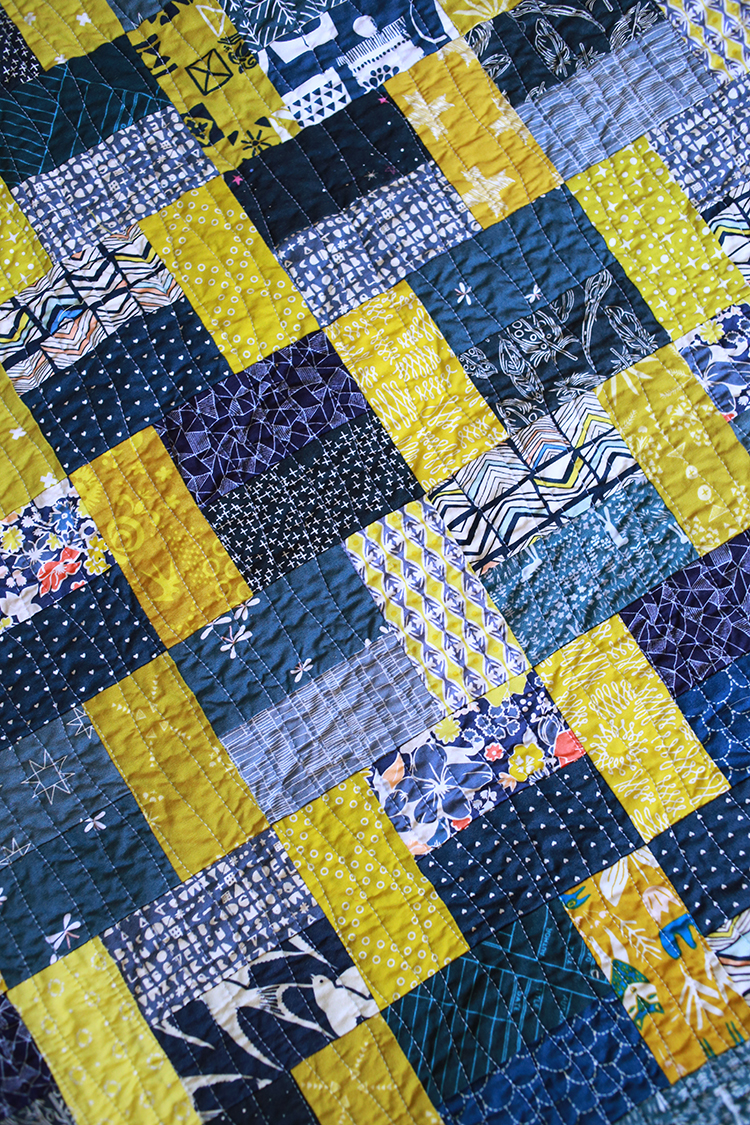
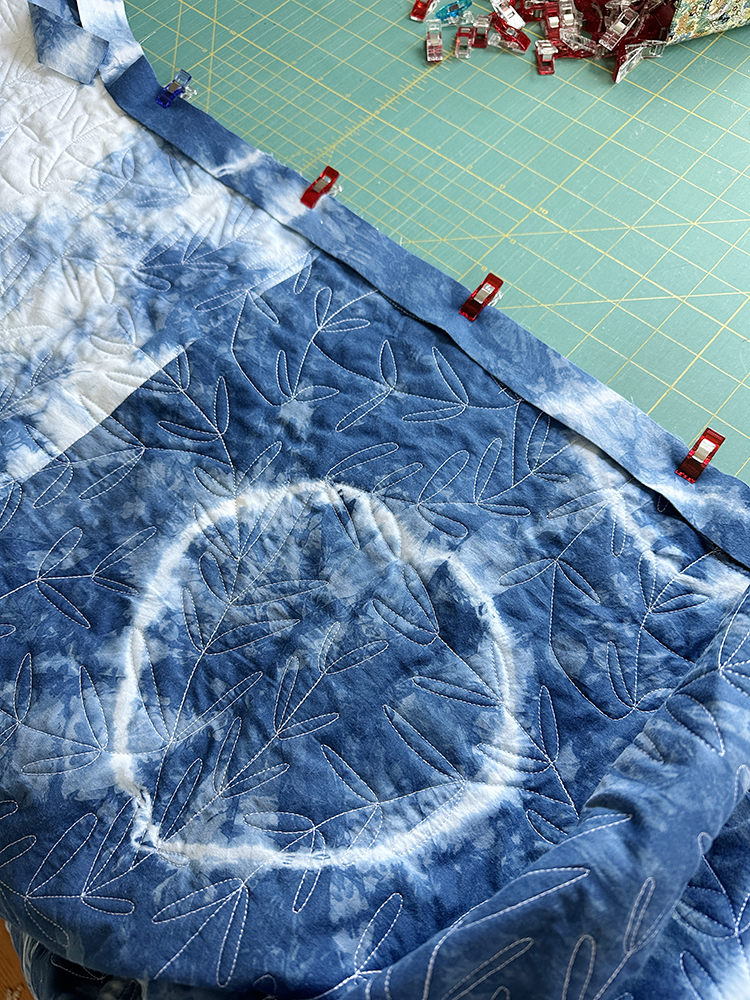
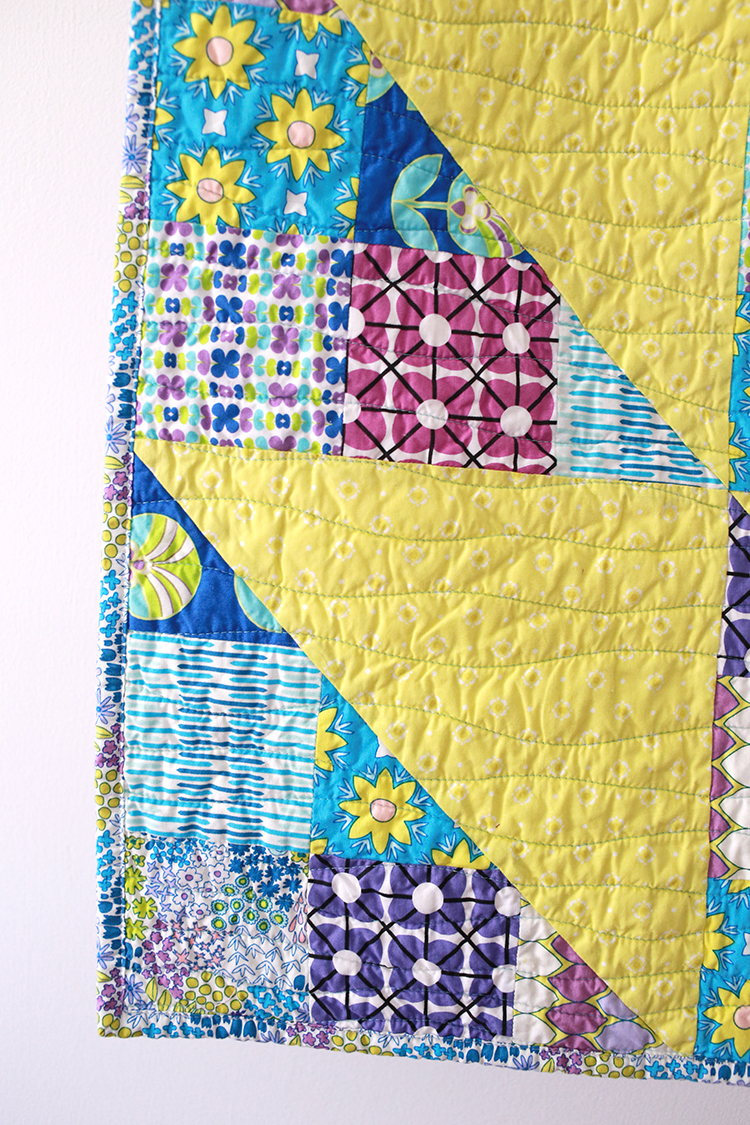
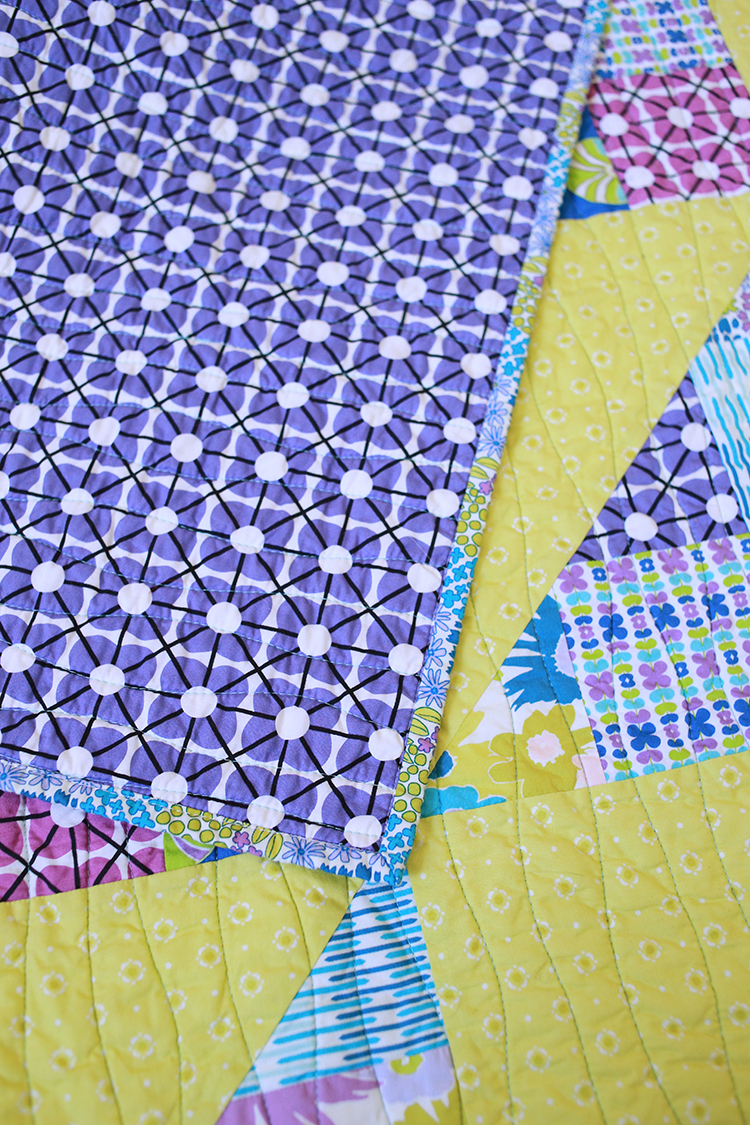
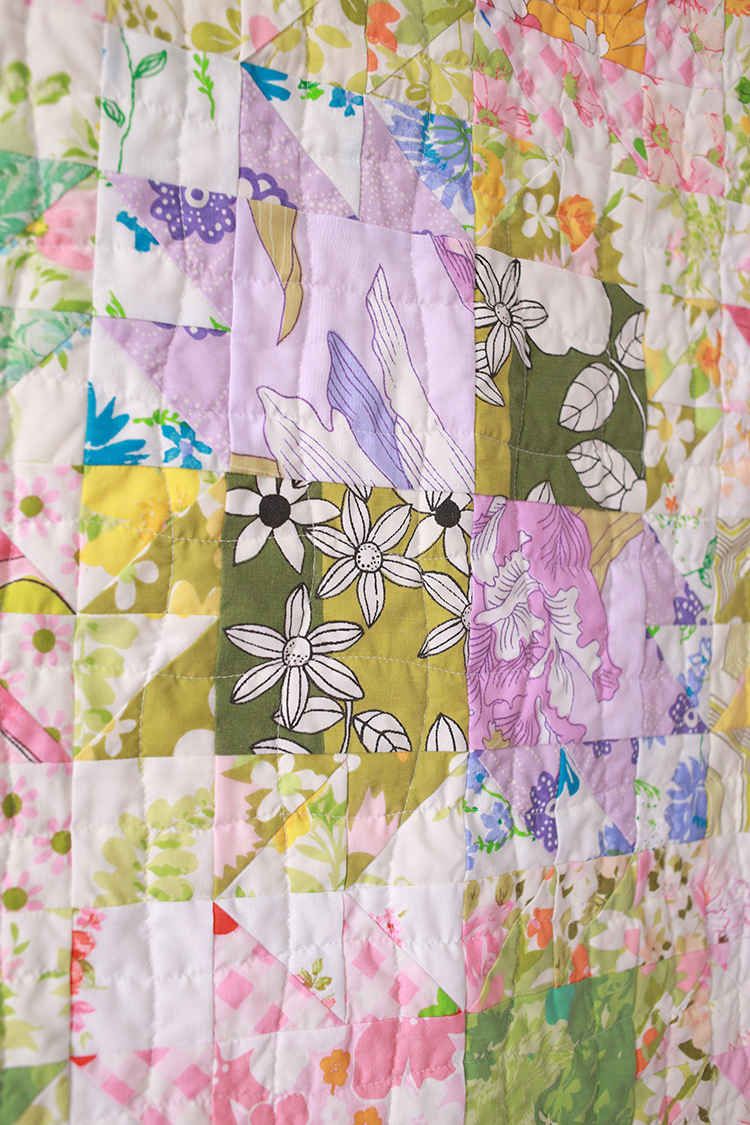
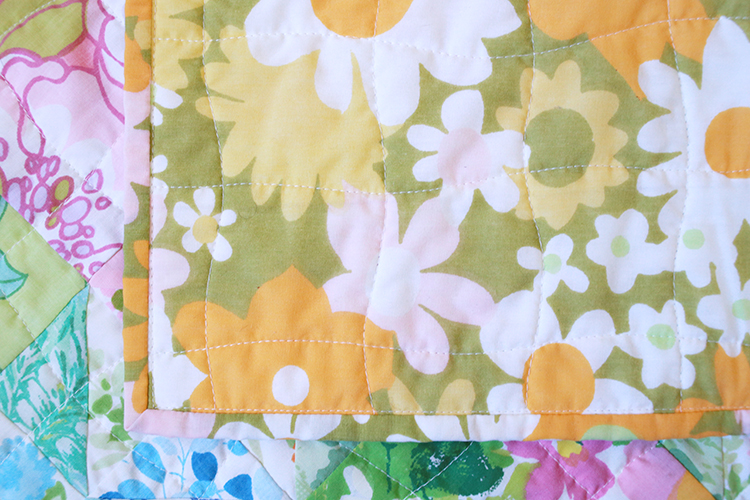
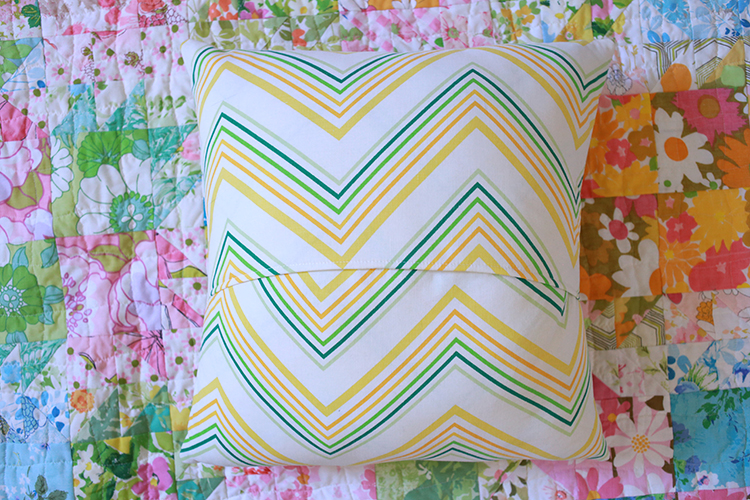
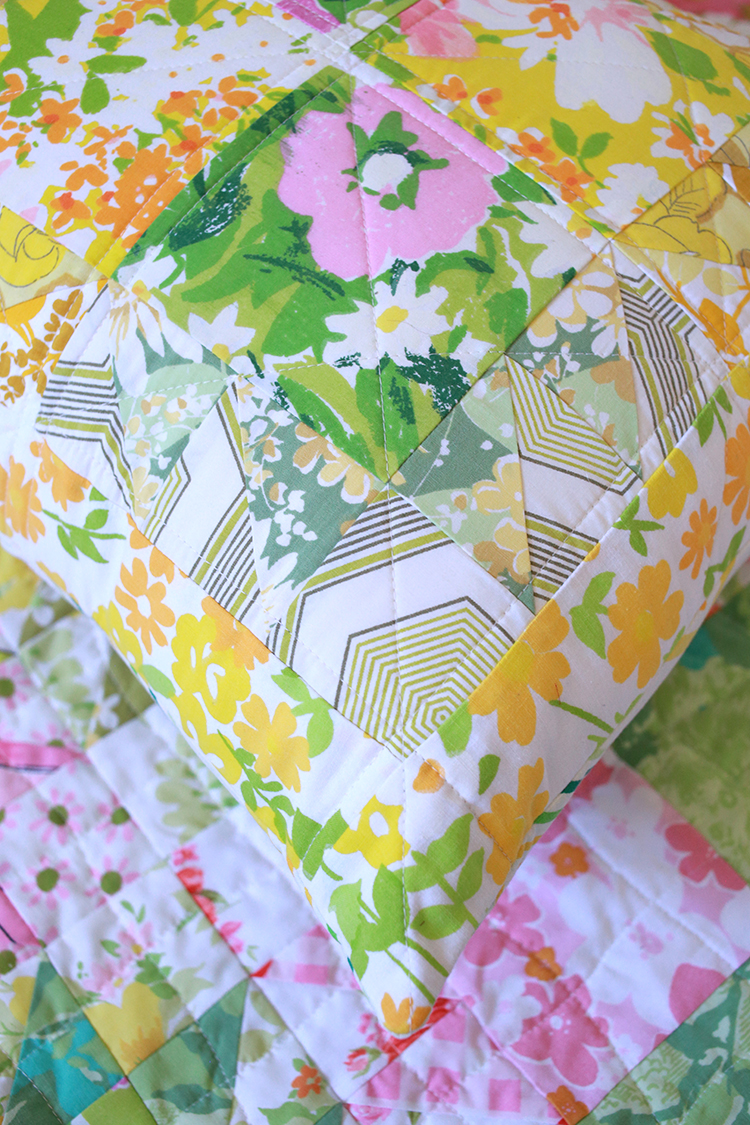
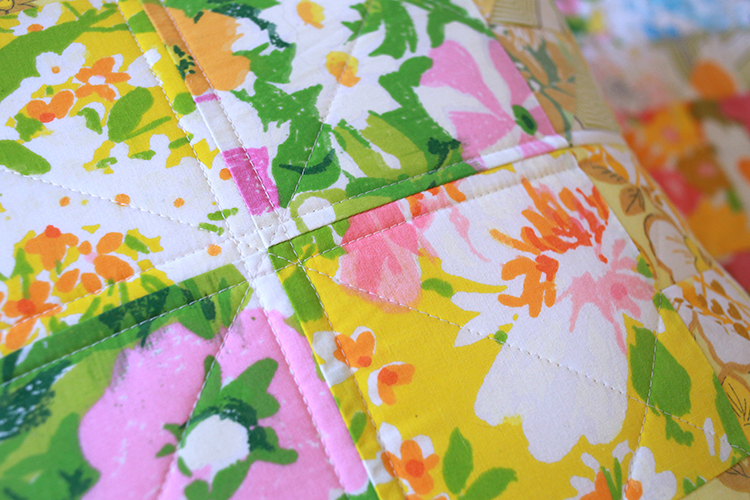
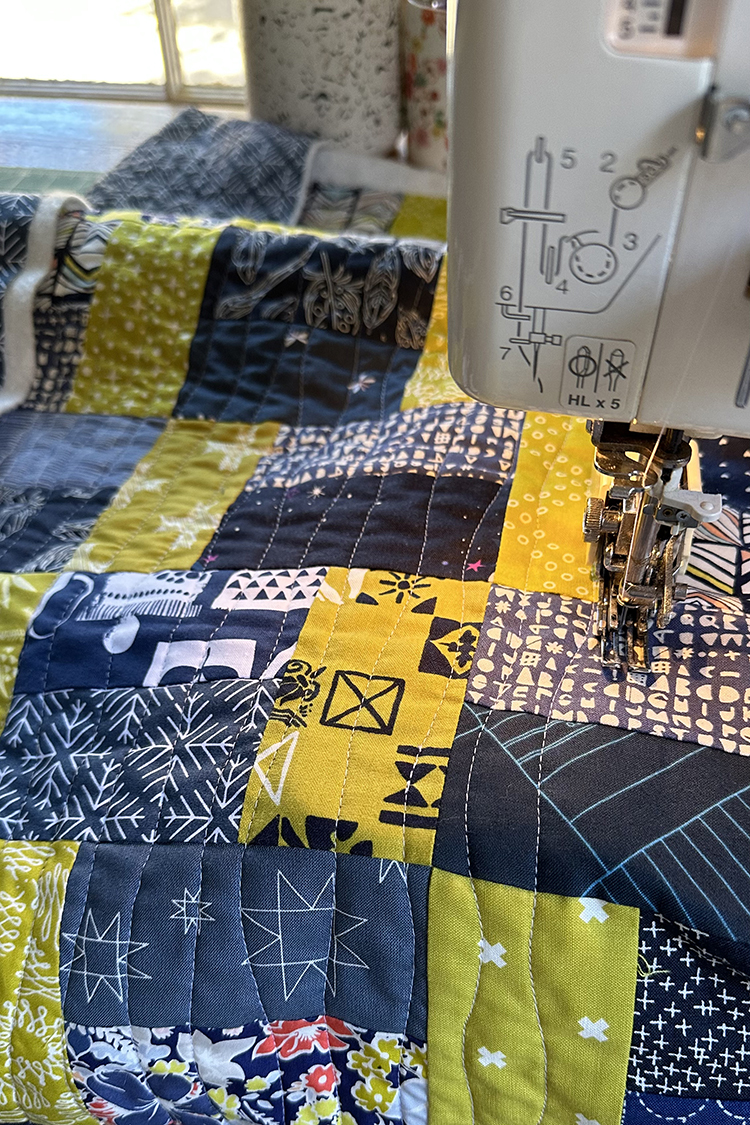
I feel like a broken record, but I did my go-to wavy lines for the quilting. It's just so easy for me to do and make look decent! It's not anything fancy, but it works for me.


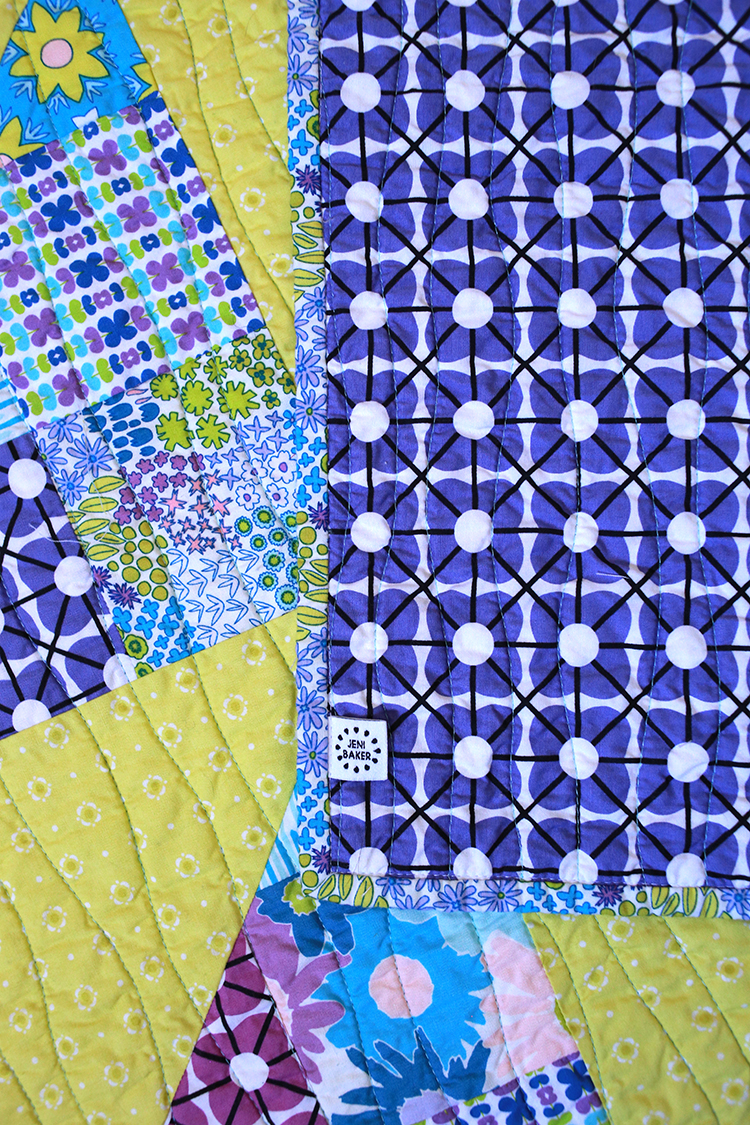
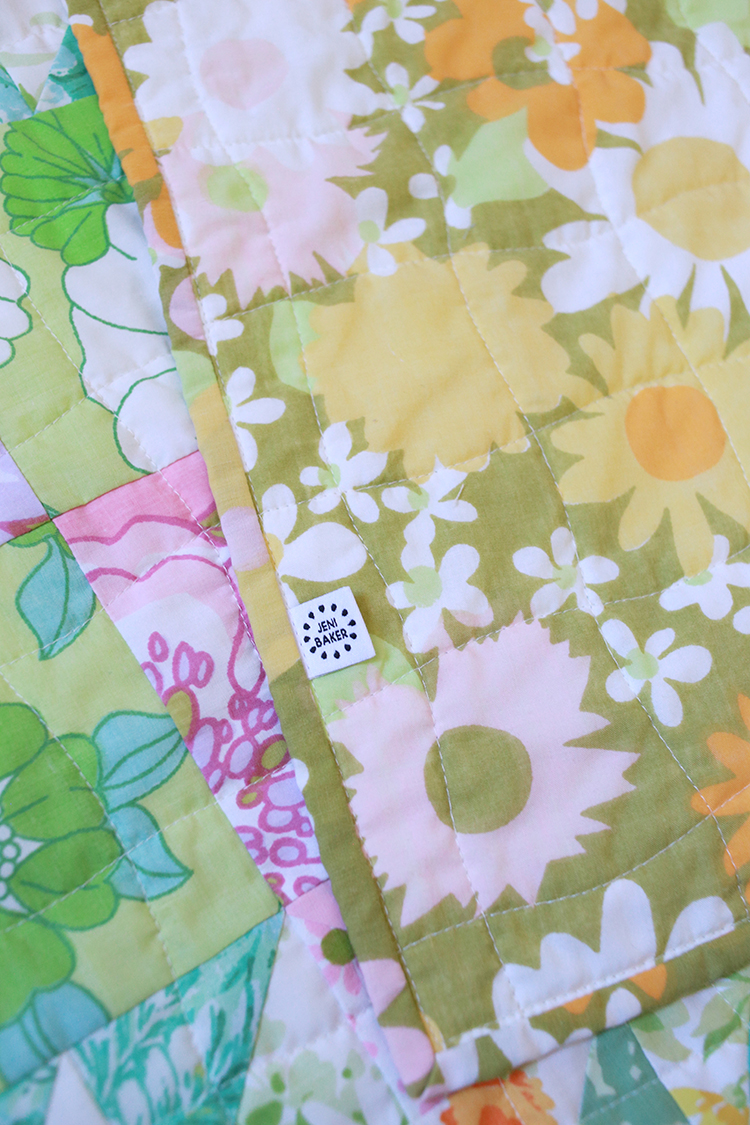
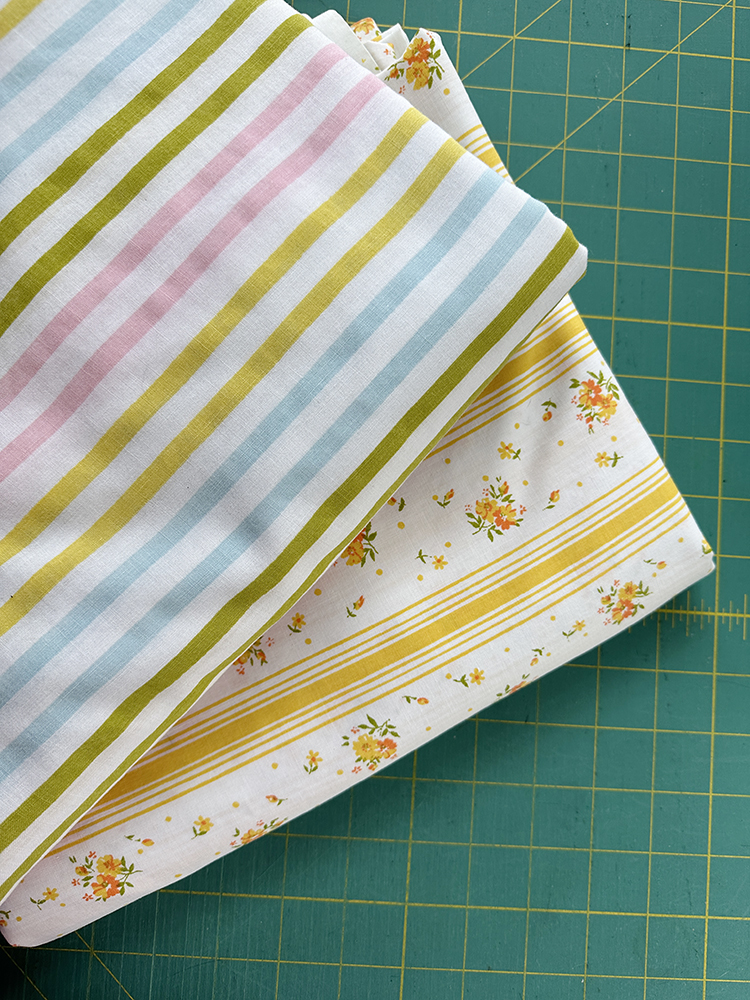
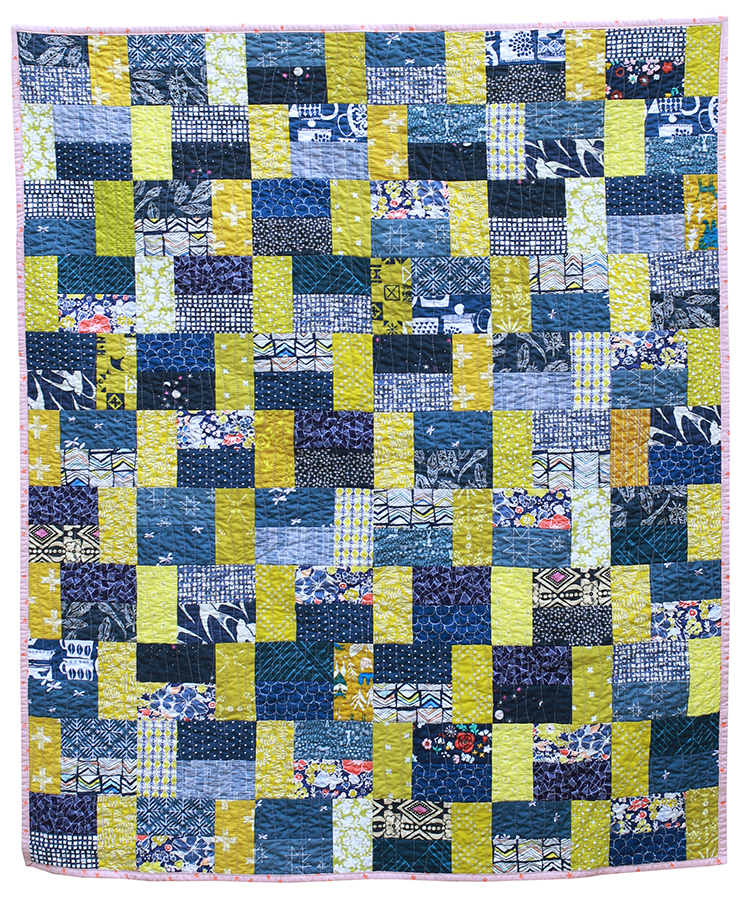
For the binding I wanted a pop of color. There are a few prints that have a peachy accent, so I pulled a binding fabric to highlight that. I used one of my custom woven labels to finish it off.


Okay, now onto the tutorial!

Simple Two-Color Baby Quilt Tutorial:

Sewing Level: Beginner Friendly
Finished Size: 36"x44"
Finished Block Size: 6"x4"

Materials:
- 5/8 yard of total yardage or scraps for Color A (Green)
- 1 1/8 yard of total yardage or scraps for Color B (Navy)
- 44"x52" quilt batting
- 1 1/2 yards of backing fabric
- 3/8 yard of binding fabric


Cutting:
From Color A (Green) Fabrics:
- Cut a total of (66) 2.5"x4.5" strips

From Color B (Navy) Fabrics:
- Cut a total of (132) 2.5"x4.5" strips

You can easily cut these pieces from scraps, charm squares, layer cake squares, jelly roll strips, fat quarters or yardage. The table below shows how many 2.5"x4.5" strips you can cut from each type of precut or yardage:

2.5"x4.5" strips
5" charm square 2
10" layer cake square 8
2.5"x42" jelly roll strip 9
1/4 yard cut 27
18"x21" fat quarter 28

Figuring out exactly how much you need for each color is simple. Here is an example:
For Color B I want to use charm squares. I can get 2 strips from each charm square, and I need a total of 132 strips. 132 divided by 2 is 66. So I need 66 charm squares for Color B.

Simple Two-Color Baby Quilt Instructions:
*Use a 1/4” seam allowance unless otherwise noted.*

Block Construction:

1. Each block is made using (2) Color B strips and (1) Color A strip. First we're going to pair up the Color B strips. You could pair them all up intentionally, or pair them up randomly, it's up to you!

Sew two Color B strips together along the long edges. Press seams as desired. Repeat with all Color B strips.


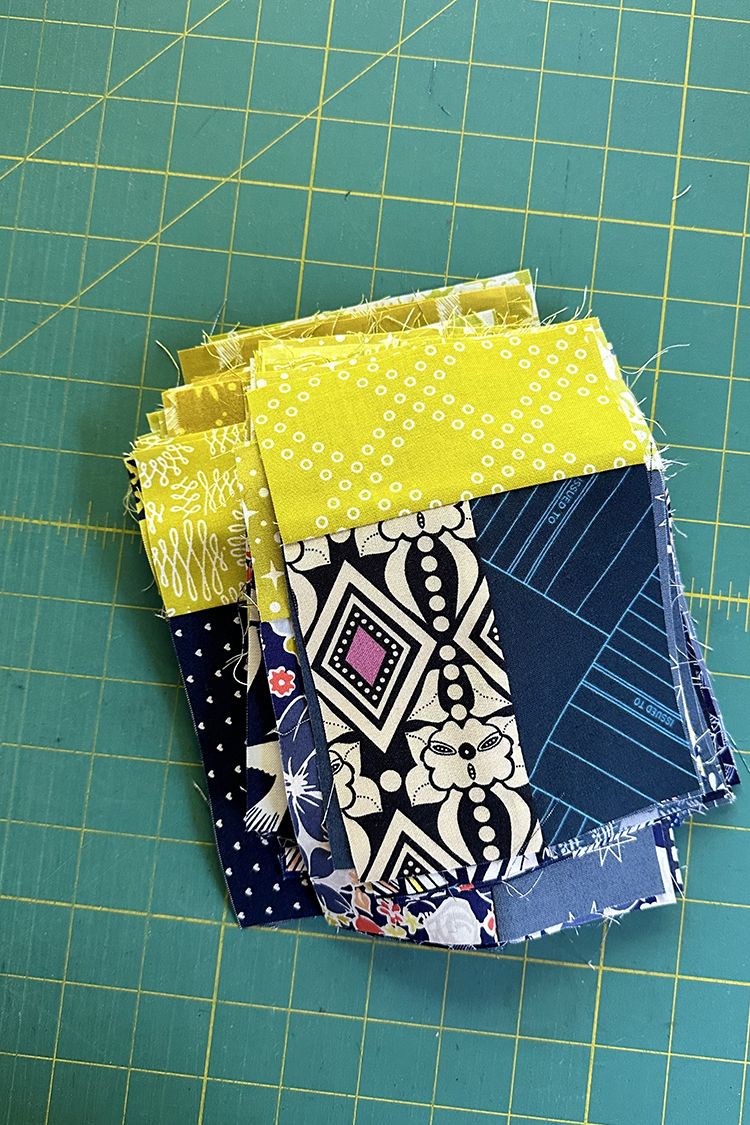
2. Next we're going to pair a Color A strip up with each block unit made in step 1. Again, feel free to pair them up randomly or intentionally.

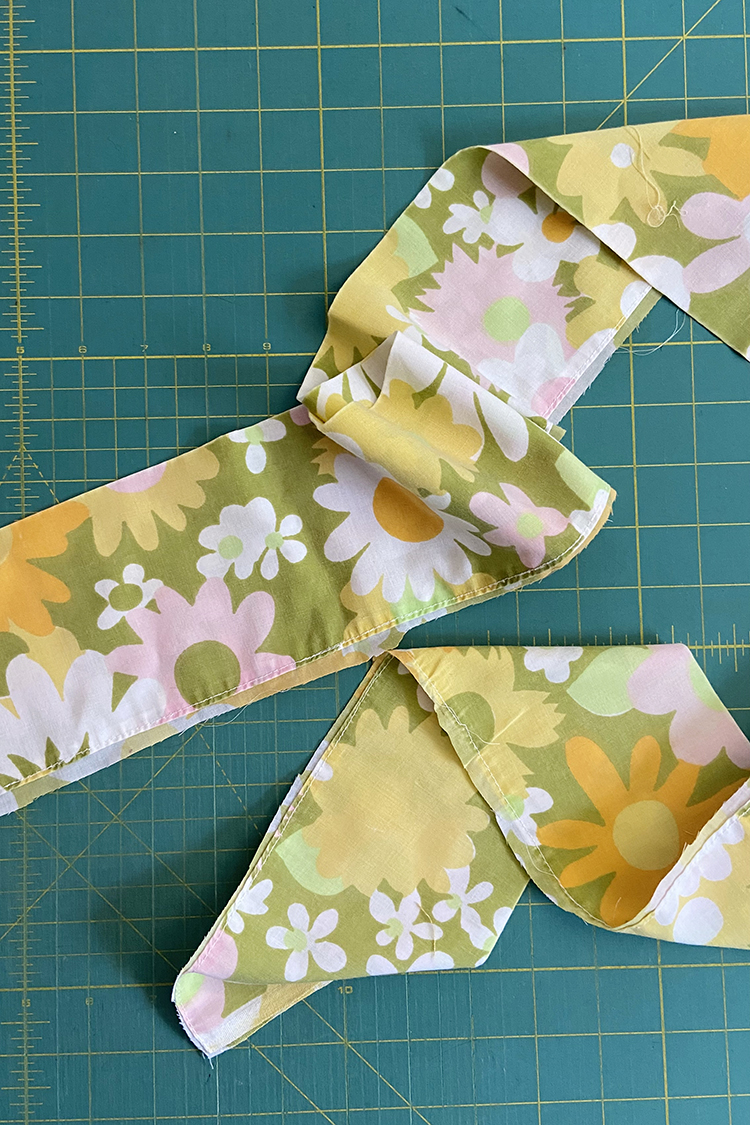
Sew a Color A strip to one side of the Color B block made in step 1, so that the seams form a "T" shape. Use the photo above as reference. Press seams as desired, repeat with remaining Color A strips and block units. Trim blocks to 6.5"x4.5" if necessary.

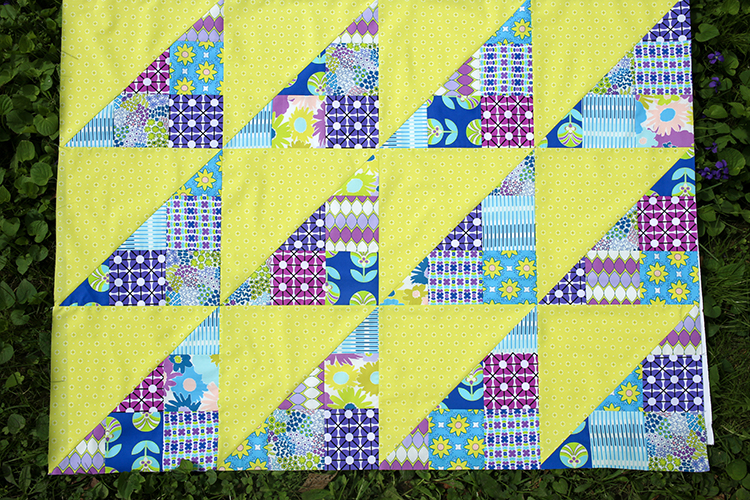
Quilt Top Construction:

1. Arrange blocks into 11 rows of 6 blocks each, using the diagram above as a guide. The odd numbered rows will start with a Color A strip, the even numbered rows will start with the Color B strip set.

Sew blocks together in each row. Press seams in one direction, alternating direction every other row. Sew rows together, press as desired. Press top well from the right side.

Quilt Assembly and Finishing:

1. Backing: Press backing fabric well.

2. Basting: Using masking or painter’s tape, tape the backing to a clean, hard surface, right side down. Spread out your batting on top of the backing. Smooth out any wrinkles. Carefully spread out your quilt top on top of the batting, right side up. Pin your top, I like to use curved safety pins, spacing the pins a few inches apart. Make sure that your pins are going through all three layers.

3. Quilting: Quilt as desired, by machine or by hand. Trim away excess batting and backing fabric.

4. Binding: Cut yardage listed for binding into 2.5” strips. Trim off selvedges and sew your strips together to form one long strip, press seams open. Fold in half lengthwise, pressing with your iron as you fold. Attach binding using your preferred method. For a detailed tutorial on attaching your binding to both sides by machine: Machine Quilt Binding Tutorial.


I hope you've enjoyed this tutorial! I have lots of other tutorials for everything from quilts, pillows, bags, and holiday items to informational series and techniques. Find all my tutorials here: Tutorials. My online shop is filled with patterns for quilts and bags. Find my patterns here: Jeni Baker Patterns

Tag me @jenib320 and use my hashtag #jenibaker on instagram if you make something from this tutorial!

Happy Quilting!