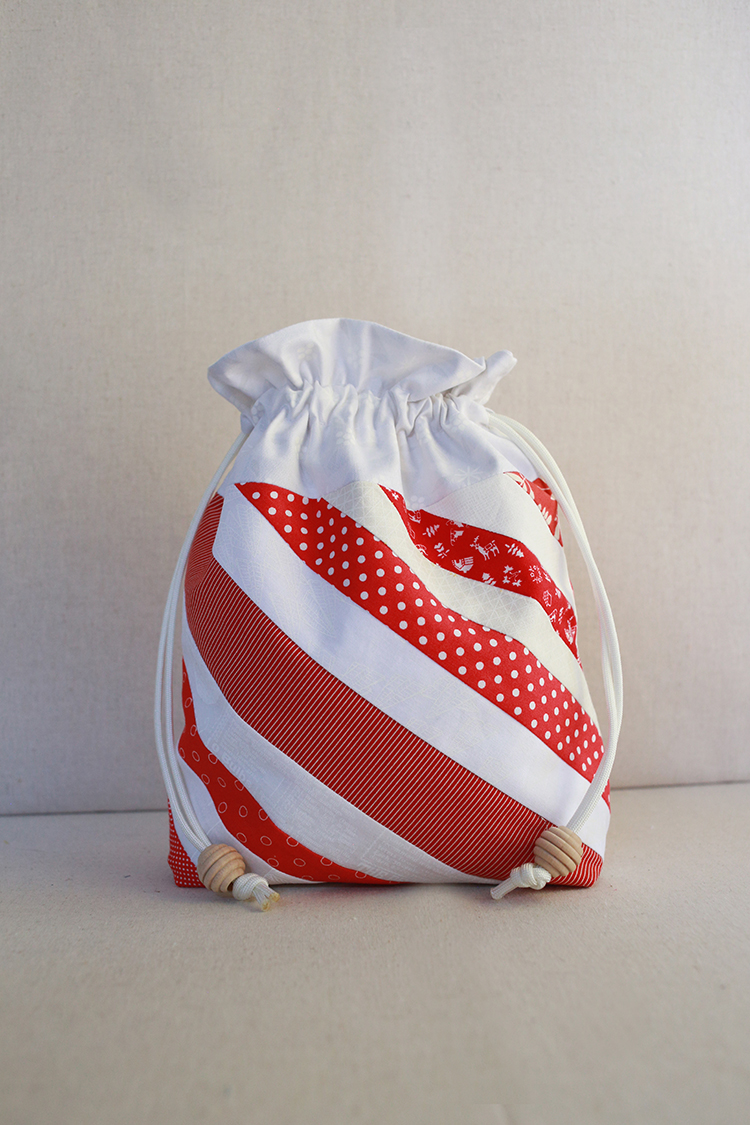
Peppermint Stripe Lined Drawstring Bag Tutorial

Wednesday, November 29, 2023


Welcome to the second week of the Lined Drawstring Bag Sew Along! Today I'm sharing a tutorial for a peppermint stripe bag!

I'll be updating the Sew Along Page each week with all the posts so that you can easily catch up or reference these posts after the sew along ends!

I hope you'll sew along with us! Sew from the tutorial or the patterns:
Lined Drawstring Bag Tutorial
Lined Drawstring Bag Pattern
Lined Drawstring Bag Expansion Pattern

Before we dive into today's post, let's quickly chat about our to-do for week 2 of the sew along!


This week's task is cutting! Finalize those fabric choices and cut out all the pieces for your bags. A few posts you might find helpful when tackling this:

- If you missed last year's post about make templates, be sure to check that out! They're great if you don't want to rotary cut, or just want to speed up your cutting process. Find it here: Making Templates for the Lined Drawstring Bag Pattern

- You may be interested in adding a little something extra to your bags, like pom-pom trim or ribbon. I have a post all about embellishing your bags with these. Find it here: How to Use Trim or Ribbon to Embellish Your Drawstring Bags

- If you'd like to add an exterior pocket to your bag, I've got a tutorial for that too! Find it here: Lined Drawstring Bag Tutorial: Adding an Exterior Pocket


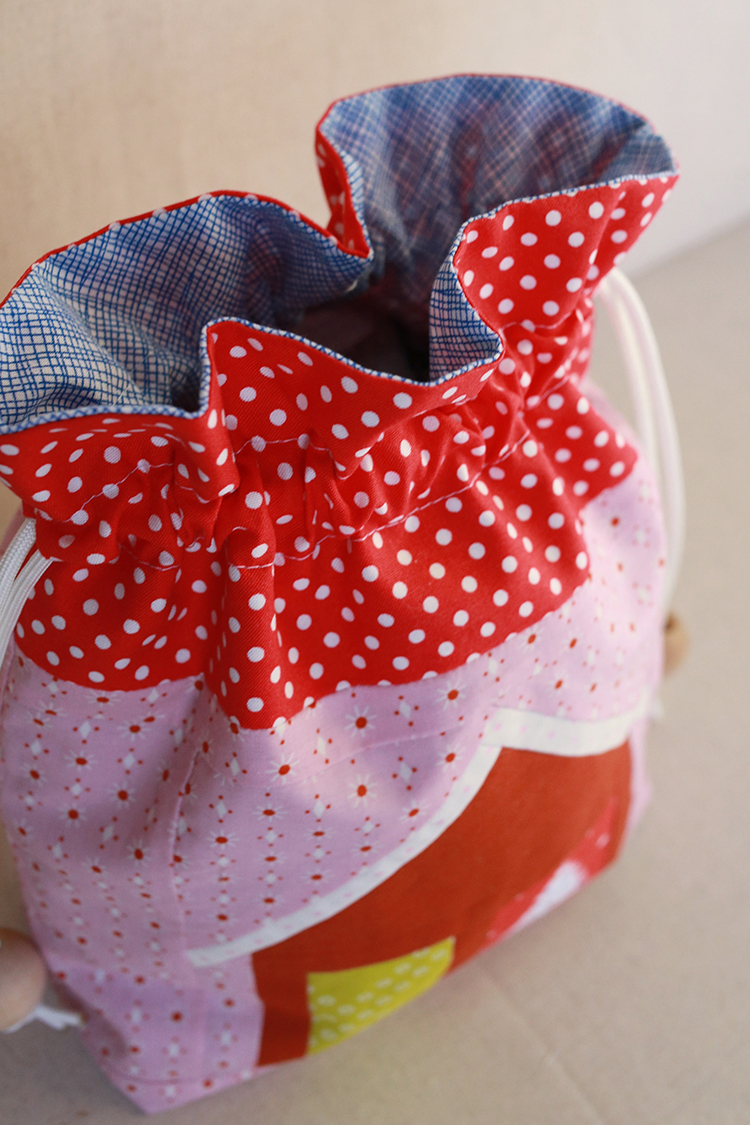
When I was brainstorming tutorial ideas for this year's sew along, I knew I wanted to make a bag that was candy inspired! I thought about a pieced candy block (maybe next year!), but then got the idea for a peppermint candy bag! I was thinking of the peppermint starlight mints that are wrapped in cellophane. The ruffle at the top of these drawstring bags reminds me of the way these candies are wrapped! I used red and white strips to mimic that look, but feel free to use any colors you want!

To make this bag, you'll need to piece two strip blocks for the Exterior Main. They're foundation paper pieced.


Sewing Level: Intermediate
Finished size: Approx. 10" tall, 7" wide, 3" deep

Peppermint Stripe Lined Drawstring Bag Materials:
- Strip scraps in a variety of widths (a few at least 12" long) for Exterior Main*
- 1 Fat quarter for Exterior Accent
- 1 Fat quarter for Interior
- 2 yards of 1/2" twill tape, nylon paracord or 1/8 yd fabric
- Coordinating thread
- (2) pieces of scrap paper at least 9"x10.5"*
- Washable glue stick*
- Acrylic ruler
- Large safety pin
- Pencil

*I used one piece of scrapbook paper cut down the size and then realized that brown kraft paper from a package worked just as well!

Looking for supplies? Check out my Pattern Supplies and Resources post.

Peppermint Stripe Cutting:
From Exterior Accent Fabric:
- Cut (1) 4”x21” strip
- Subcut into (2) 4”x10.5” pieces

From Interior Fabric:
- Cut (1) 12.5”x21” strip
- Subcut into (2) 12.5”x10.5” pieces

If using fabric for ties:
- Cut (2) 32”x2” strips

If using twill for ties:
- Cut (2) 32" pieces

Peppermint Stripe Lined Drawstring Bag Instructions:
*Use a 1/4” seam allowance unless otherwise noted*


1. Using a tiny bit of glue from a glue stick, attach a long strip, right sides up, centered on the diagonal of the paper. You want the ends of the strip to be longer than the paper.


2. Grab your next strip, and place it right sides down on your center strip. Again, make sure the ends of the strip go off the edges of the paper.


3. Shorten your stitch length to 1.8, and stitch along the edge of your strips (and through the paper too) using a 1/4" seam allowance. Open your strips up and press with an iron (avoid using steam!), or your fingers.


4. Continue adding strips until you've covered the entire half of the paper.


5. Now flip your work around and do the same to fill up the other half of the paper.


6. Once the paper is covered entirely, press well and flip it over to the wrong side. Using the paper as a guide, trim away the excess fabric. Piece should measure 9"x10.5".


7. Finally, tear off the paper carefully from the back starting at a corner. Press well. Repeat for the second exterior piece!

Optional: You may choose to add additional structure to your patchwork with a lightweight interfacing. I would recommend something like SF101 by Pellon, and interfacing both Exterior Main pieces.


For the bag construction, refer back to the free tutorial or the everything size in the lined drawstring bag pattern, start at step 1.

I hope you've enjoyed this tutorial! I can't wait to see your bags! Please share them with me on instagram @jenib320 + #lineddrawstringbag or via email (jenib320 @ gmail.com)!

Don't forget to pin this post to your Pinterest for future reference!

Happy Sewing!

Gingerbread House Lined Drawstring Bag Tutorial

Wednesday, November 22, 2023


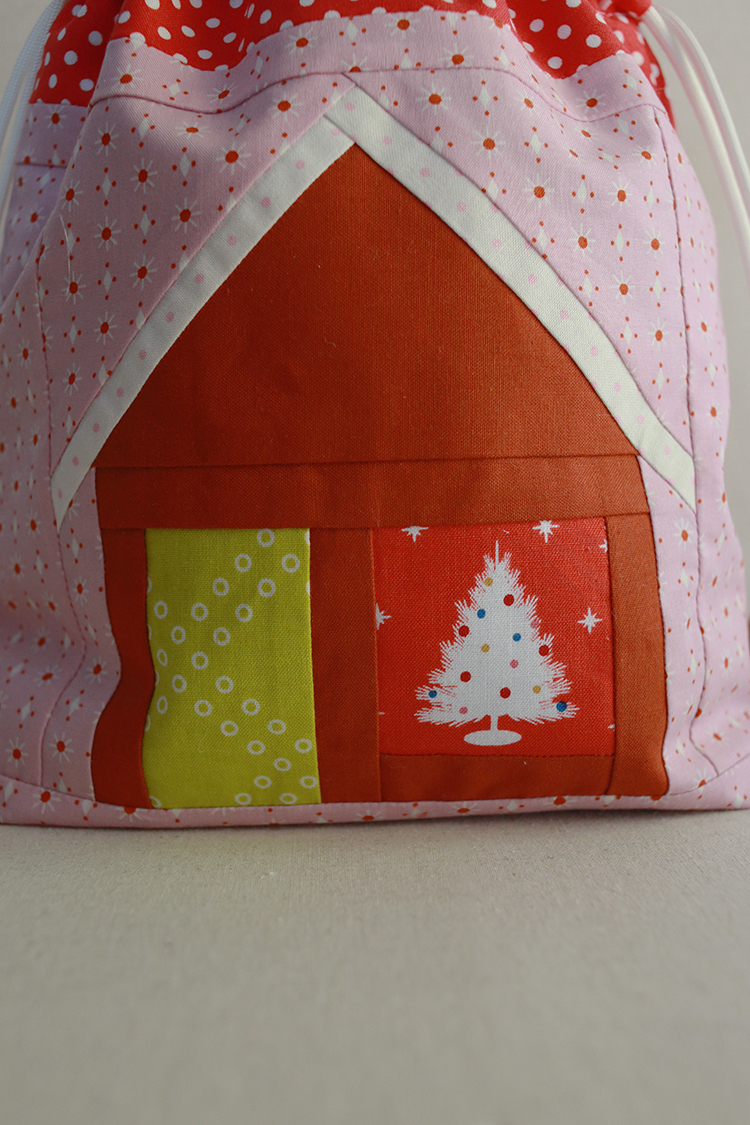
Welcome to the first post of the 2023 Lined Drawstring Bag Sew Along! We're kicking things off with this cute Gingerbread House Bag!

I'll be updating the Sew Along Page each week with all the posts so that you can easily catch up or reference these posts after the sew along ends!

I hope you'll sew along with us! Sew from the tutorial or the patterns:
Lined Drawstring Bag Tutorial
Lined Drawstring Bag Pattern
Lined Drawstring Bag Expansion Pattern


Here are a few to-do items for week 1 of the sew along!

This week's task is to plan your bags! It's time to decide how many bags you'd like to make, what sizes, and pick out fabrics. A few things you might find helpful when tackling this:

- I've got a post full of tips for choosing fabrics, specifically for drawstring bags. It includes a bunch of sample fabric pulls too. Find it here: Tips for Choosing Fabrics for Drawstring Bags

- This post is specifically about making drawstring bags for wrapping gifts. I've got some gift ideas for each size, to give you an idea of what would fit in all the different sizes: Tips For Using Drawstring Bags to Wrap Gifts

- Still looking for fabric combination ideas? I'd recommend checking out my Lined Drawstring Bag Pinterest Board and well as the #lineddrawstringbag hashtag on Instagram. You'll find lots of finished bags to take inspiration from!


Today I am sharing a tutorial for making this gingerbread house bag! The block itself is paper pieced, and is perfect for fussy cutting! I put a christmas tree in the picture window! You could put a figure, or animal (or something else) in the doorway! If you're looking for some other pieced bag options, you can find tutorials from the last two years here:

Patchwork Star Lined Drawstring Bag Tutorial
Present Quilt Block Lined Drawstring Bag Tutorial


Sewing Level: Intermediate
Finished size: Approx. 10" tall, 7" wide, 3" deep

Gingerbread House Lined Drawstring Bag Materials:
- 1 Fat quarter for Exterior Main*
- 1 Fat quarter for Exterior Accent
- 1 Fat quarter for Interior
- Scraps for paper pieced block
- Gingerbread House Paper Pieced Block Pattern
- 2 yards of 1/2" twill tape, nylon paracord or 1/8 yd fabric
- Coordinating thread
- Acrylic ruler
- Large safety pin
- Pencil

*I would recommend using a non-directional fabric for the exterior main, which also serves as the background in the gingerbread house block.

Looking for supplies? Check out my Pattern Supplies and Resources post.

Gingerbread House Block Cutting:
Gingerbread House Color:
- Cut (1) 2.5"x1.5" piece for spot 2
- Cut (3) 3.5"x1.5" pieces for spots 3,4,6
- Cut (1) 5.75"x1.5" piece for spot 7
- Cut (1) 6"x3.25" piece for spot 10

Picture Window:
- Cut (1) 3" square for spot 1

Door:
- Cut (1) 2.25"x3.25" piece for spot 5

Roof:
- Cut (1) 5"x1.25" piece for spot 11
- Cut (1) 6"x1.25" piece for spot 12

Background (Exterior Main):
- Cut (2) 4"x1.5" pieces for spots 8, 9
- Cut (1) 4.5" square and cut in half on the diagonal for spots 13,14

Gingerbread House Lined Drawstring Bag Cutting:
From Exterior Main Fabric:
- Cut (1) 9”x10.5” piece
- Cut (2) 6.5"x2.5" side pieces
- Cut (1) 1"x10.5" top piece
- Cut (1) 2.5"x10.5" bottom piece

From Exterior Accent Fabric:
- Cut (1) 4”x21” strip
- Subcut into (2) 4”x10.5” pieces

From Interior Fabric:
- Cut (1) 12.5”x21” strip
- Subcut into (2) 12.5”x10.5” pieces

If using fabric for ties:
- Cut (2) 32”x2” strips

If using twill for ties:
- Cut (2) 32" pieces

Gingerbread House Lined Drawstring Bag Instructions:

*Use a 1/4” seam allowance unless otherwise noted*

1. Before constructing the bag, we first need to make the Gingerbread House Block. The block is paper pieced, you can download the free block pattern here: Gingerbread House Paper Pieced Block Pattern

If you're new to paper piecing, be sure to check out my paper piecing tutorial.

2. Remove papers from block and trim to 6.5" square. Press well.


Now it's time to add the borders to the Gingerbread House Block.


3. Sew the two 6.5"x2.5" side exterior main pieces to either side of the star block. Press seams away from block.

4. Sew the 1"x10.5" top side exterior main piece to the top edge of the block. Press seams away from block. Sew the 2.5"x10.5" bottom side exterior main piece to the bottom edge of the block. Press seams away from block. Trim piece to 9"x10.5" if necessary. This is the Exterior Main piece for one side of the bag.

Optional: You may choose to add additional structure to your patchwork with a lightweight interfacing. I would recommend something like SF101 by Pellon, and interfacing both Exterior Main pieces.


For the bag construction, refer back to the free tutorial or the everything size in the lined drawstring bag pattern, start at step 1.

I hope you've enjoyed this tutorial! I can't wait to see your bags! Please share them with me on instagram @jenib320 + #lineddrawstringbag or via email (jenib320 @ gmail.com)!

Don't forget to pin this post to your Pinterest for future reference!

Happy Sewing!

Extra Easy Puppy Chow Recipe

Monday, November 20, 2023


Happy Monday! I wanted to share my version of Puppy Chow (or Muddy Buddies) today! I love to make this sweet snack, but really dislike how most recipes leave you with a couple cups of cereal leftover. Last time I made it, I adjusted the basic recipe to accomodate an entire 12ish ounce box of Rice Chex cereal and also a full 12 ounce bag of chocolate chips! My version is a little extra chocolately than the original, but I think it turned out really good! I also call for a bit extra powdered sugar, because I like there to be plenty!

This treat is for humans only, do not feed to dogs.

Ingredients:
- (1) 12.8oz box of Rice Chex cereal (approximately 12 cups)
- (1) 12oz bag of semi-sweet chocolate chips
- 2 cups (256 grams) smooth peanut butter
- 6 Tablespoons butter
- 1 1/2 teaspoons vanilla extract (optional)
- 3 cups (360 grams) powdered sugar
- Jumbo plastic zip bag, 2+ gallon. (These are my favorite*)

Instructions:
1. Measure cereal into a large bowl.

2. In a medium glass bowl combine chocolate chips, peanut butter, and butter. Microwave on high for 1 minute, stir. Microwave for 30 seconds, stir. Continue to microwave for 30 seconds at a time until mixture is fully melted. Stir in vanilla if using. (If you don't have a microwave, melt mixture by placing glass bowl over a small pot of lightly boiling water.)

3. Pour melted chocolate mixture over cereal, stir until evenly coated. Let mixture sit for 1-2 minutes to cool slightly.

4. Pour coated cereal into a the plastic bag.

5. Add powdered sugar to bag, seal. Shake until well coated.

6. Optionally, freeze or put in fridge to form delicious clumps, and cool faster!

Enjoy!

Don't forget to pin this post to your Pinterest for future reference!

Happy Making!

*Note: Any links marked with an asterisk in this post are affiliate links. This means if you click through and buy something, I make a small commission, at no extra cost to you.

2023 Lined Drawstring Bag Sew Along Schedule

Friday, November 17, 2023


This year's Lined Drawstring Bag Sew Along is less than a week away! I wanted to share the schedule for the sew along so that you know what posts you can expect from me starting Wednesday, November 22nd! If you'd like to break up your bag making across the sew along, I'm also sharing a schedule for making that you can choose to use if you'd like! I'll also be sharing my progress on my personal bags throughout the sew along! Here are the posts I have planned for each week:

Week 1
Tutorial post: Gingerbread House Lined Drawstring Bag Tutorial
To do: Plan your bags! This week your task is to decide how many bags you'd like to make, what sizes, and pick out fabrics.

Week 2
Tutorial post: Peppermint Stripe Lined Drawstring Bag Tutorial
To do: Cutting! Now's the time to finalize your fabric choices and cut out all the pieces for your bags.

Week 3
Tutorial post: Exposed Gusset Lined Drawstring Bag Tutorial
To do: Sewing! Sew your bags through step 10. If you're making a lot of bags and you're short on time, I highly recommend making them assembly line style. This isn't quite as fun, but it's definitely more efficient!

Week 4
Tutorial post: All About Cotton Twill Tape and How to Use it for Drawstring Bags
To do: Final touches! Tackle those drawstring casings, make fabric ties or prep twill/paracord ties. Pull ties through the bags and finish them off with a simple knot or some fun beads!

Each week's post will go up on Wednesday! I'll update this post and the Sew Along page with the links as we go. You can find all of the previous year's sew along posts on that page too!

Participating is easy, we'll be using the #lineddrawstringbag hashtag on Instagram to share our progress. Not on Instagram? That's okay! Feel free to sew along and if you'd like, share your bags with me via email!


Sew from the free tutorial, the pattern or the expansion pattern! Both patterns are on sale, 20% off through 11/24/23. Prices are already marked down. Shop here:

Lined Drawstring Bag Pattern
Lined Drawstring Bag Expansion Pattern

Don't forget to pick up some supplies too!
Cotton Twill Tape
Nylon Paracord
Round Wooden Beads
Beehive Wooden Beads

Happy Sewing!

Sewing Projects for Baby P

Wednesday, November 15, 2023


Today I want to share some of the things I've sewn (and dyed) for Baby P! It's been fun being able to sew things to use with and for her. It was also nice to not be limited by the available patterns and fabrics of ready-made baby items. I have already made a few more things for her, and will continue to! Will share more projects in the months to come.

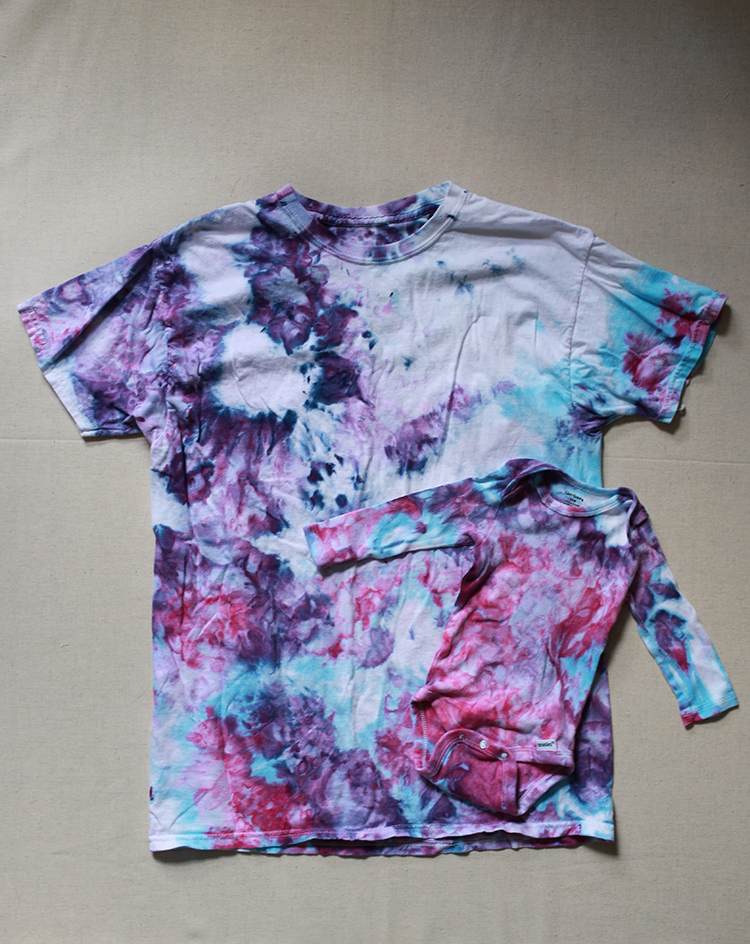
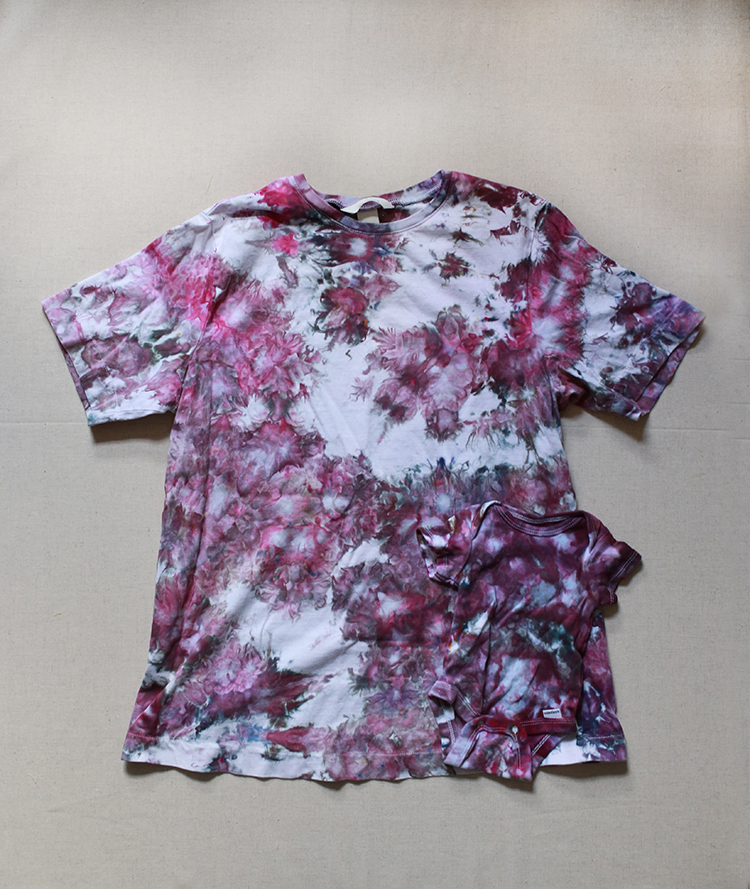
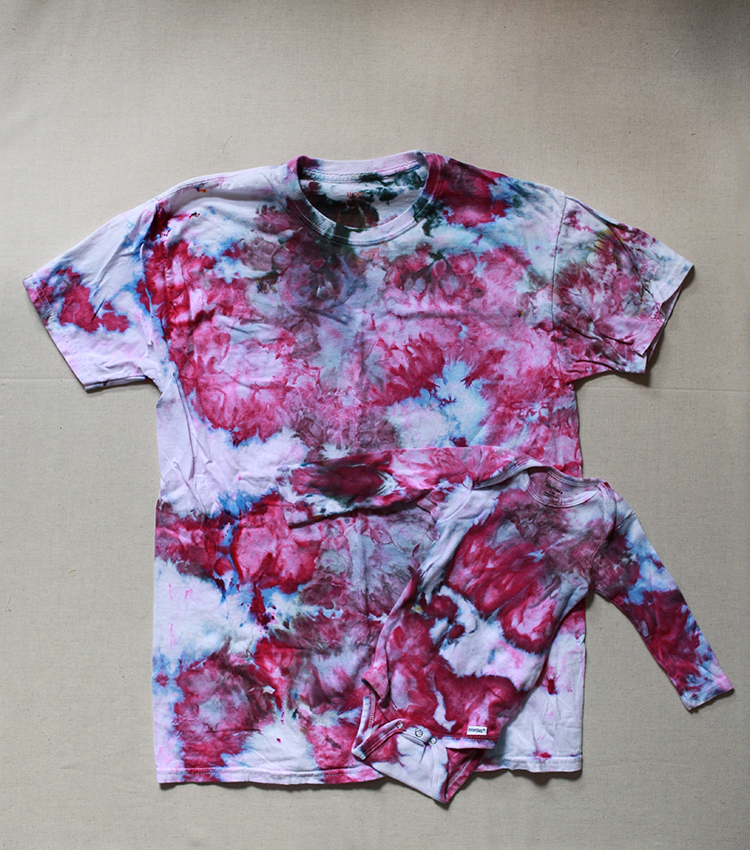
One of the first things I did was dye some onesies! I just used my regular Fiber Reactive Procion Dye from Dharma Trading with Gerber brand all cotton onesies*.


I've ice dyed a few Mommy & Me shirts for us! Some of these I wore before she was born, and others I wear now! Not all of these turned out quite how I wanted, but that's okay. It's been fun to be matching!


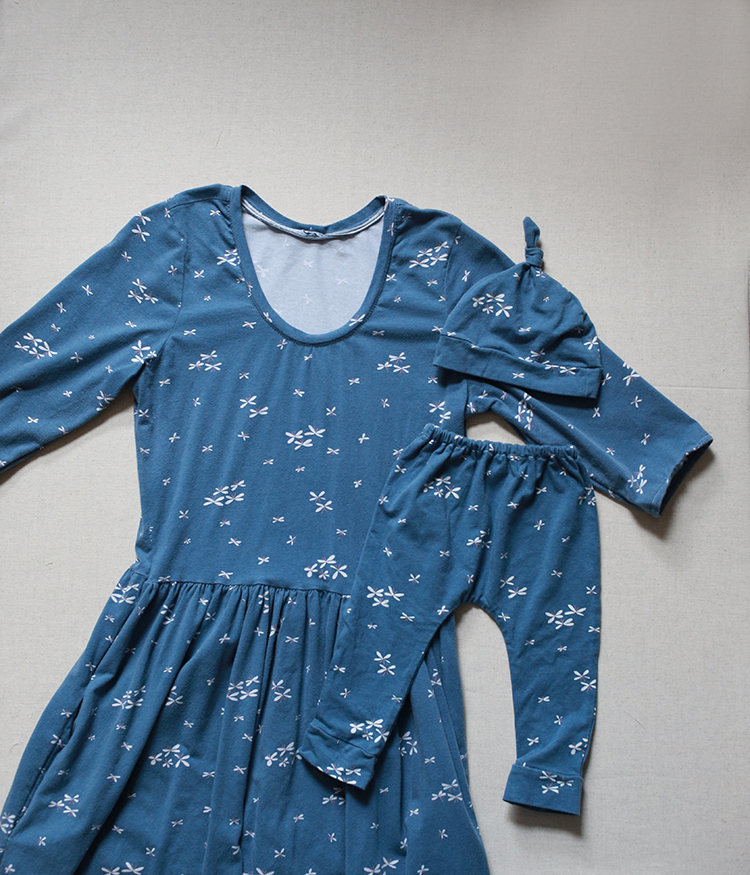
I made myself an Out and About Dress (pattern by Sew Caroline) this spring out of one of my knit prints from Curiosities*. From the scraps I made a pair of matching leggings using the Knit Baby Leggings Tutorial by Made by Rae and a little hat with the Knit Baby Hat Tutorial by Pin Cut Sew Studio.


I thrifted most of my maternity clothes, including a bunch of dresses to wear once the weather got warm. This one was too long on me, so I chopping about 1' off of the bottom and used the scraps to make a pair of DIY Baby Pants by Early Morning Mom and a hat with the Knit Baby Hat Tutorial by Pin Cut Sew Studio.


I actually ordered a fabric cover for the changing pads that we bought and ended up returning it. The fabric was not nice and the fit was terrible. I ended up deciding to make some covers, so I made four using the Contoured Changing Pad Cover Tutorial by E Tells Tales. I used some cheerful vintage sheets for these and I love how they fit right into our home.


Speaking of changing pads, I made this travel changing pad using the Travel Changing Pad Tutorial by Sew Very Lovely. The back is a thrifted towel! I was able to use up a bunch of binding scraps on this project.


I bought a nursing pillow without a cover, so of course I made a couple covers. I took advntage of my stash of vintage sheets for these too. I used the Nursing Pillow Cover Tutorial by Made by Rae.


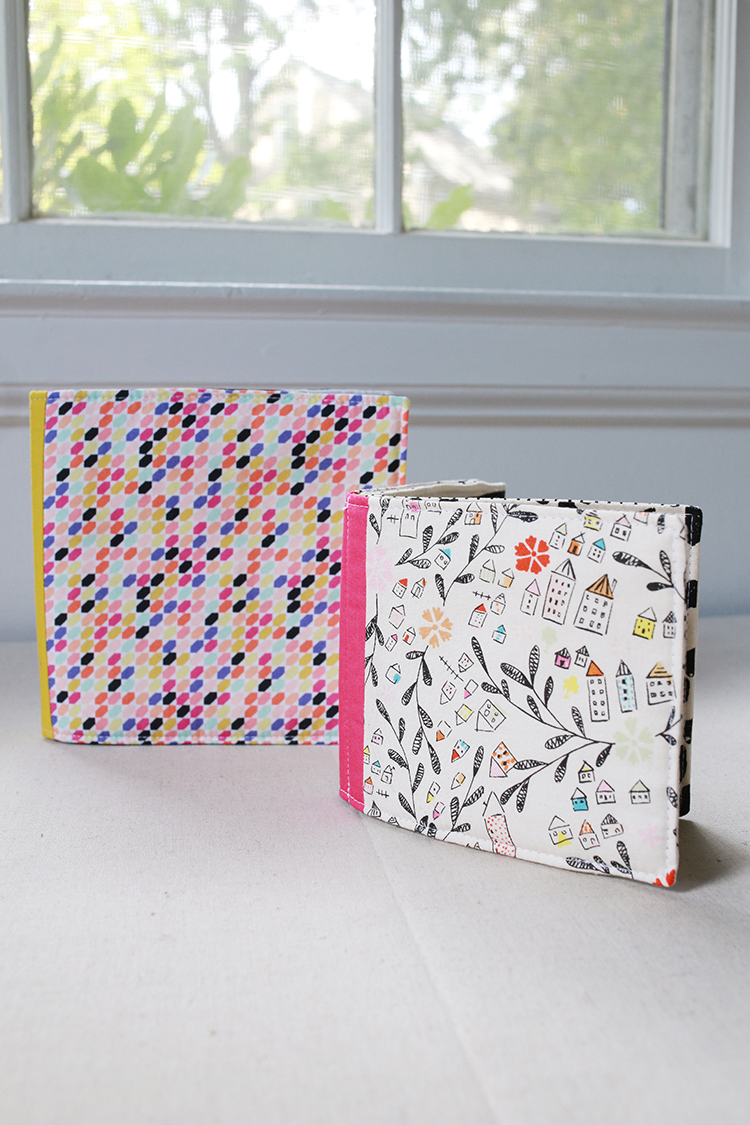
A project I already shared is the high contrast baby books I made. I also wrote a tutorial for them which you can find here: High Contrast Fabric Baby Book Sewing Tutorial


Last but not least, I've recently made a bunch of tag toys! She is really loving these, so I made a bunch so that we can have them in a few different spots. They all have crinkle paper* in them. I have very few ribbons in my stash, hence all the Hello Kitty ones!

That's it for now! I will continue to share more projects as I make new things for her.

Have a Great Day!

*Note: Any links marked with an asterisk in this post are affiliate links. This means if you click through and buy something, I make a small commission, at no extra cost to you.

Announcing the 2023 Lined Drawstring Bag Sew Along!

Wednesday, November 8, 2023


It's time for our annual Lined Drawstring Bag Sew Along! This is the fourth year of this sew along and I hope you'll join in! It's my favorite way to wrap gifts and with the holiday season upon us, it's a great time to build up a stash of gift bags. These bags will help you reduce the amount of single-use wrapping paper you need, and you'll be able to pull them out year after year.

When:
The Lined Drawstring Bag Sew Along will officially kick off on Wednesday, November 22nd and will run for four weeks! I'm really excited about the posts I have in store for this year's sew along!

Where:
Each week of the sew along I'll publish a blog post with a new tutorial. There is a dedicated sew along page, which I'll update as we go along. It's a great place to find all the posts from each sew along, there is so much good information and inspiration there, so be sure to check it out.

How to Participate:
Just like in years past, this sew along is going to be casual and no-stress. Participating is easy, we'll be using the #lineddrawstringbag hashtag on Instagram to share our progress. Not on Instagram? That's okay! Feel free to sew along and if you'd like, share your bags with me via email!

Patterns & Tutorial:
Sew from the free tutorial, the pattern or the expansion pattern! Both patterns are 20% off today through 11/24/23. Prices are already marked down.

Shop Patterns:
Lined Drawstring Bag Pattern
Lined Drawstring Bag Expansion Pattern

Shop Notions:

Don't forget to pick up some supplies while you're at it! The shop is stocked with lots of different cotton twill tape options, nylon paracord and wooden beads.

Cotton Twill Tape
Nylon Paracord
Round Wooden Beads
Beehive Wooden Beads

Thank you for your continued support. Can't wait to sew bags together!

Happy Sewing!

October Favorites

Wednesday, November 1, 2023


Happy Wednesday! It's time for another Favorites post! I'm transitioning Friday Favorites to monthly favorites! Today's post is extra long, since it's been a while. Catch up on previous posts here: Friday Favorites Archives

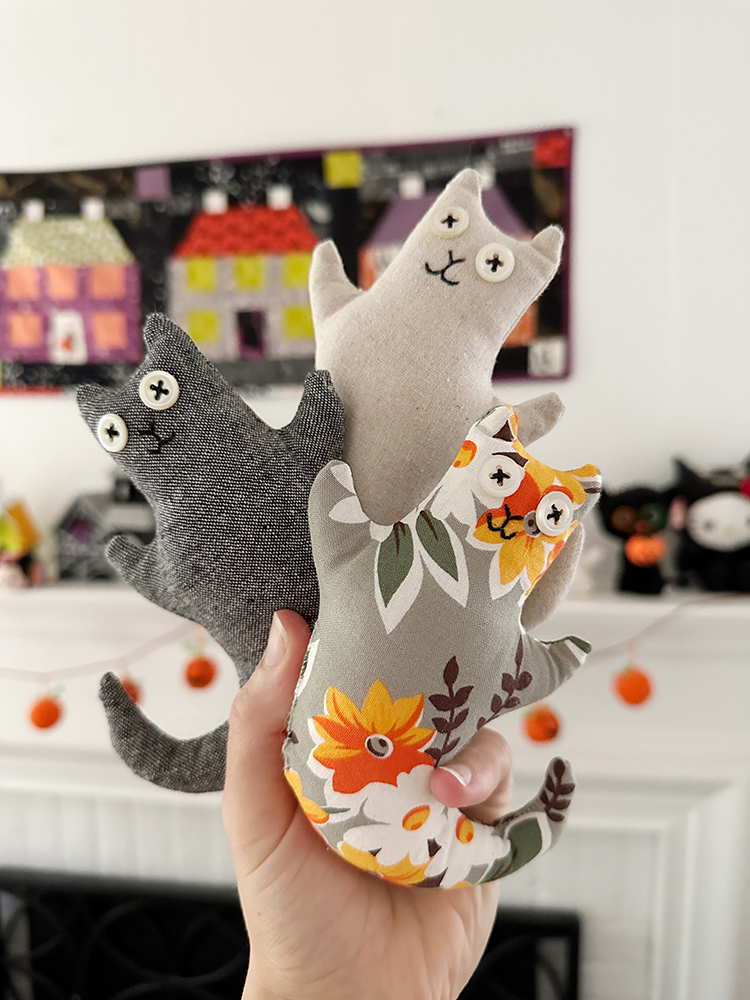
- I loved making these sweet stuffed kitties using the new Ghost Kitties Tutorial by Ann Wood Handmade. I made one to look like Dusty and the other two to look like my Mom's cats!

- My next crochet project is these Christmas Amigurumi by Lalylala, and I'm so excited! There is another set too.

- Love the colors in these pillows by Brooke.

- This scrappy quilt by Dana is so cheerful!

- How cute is this new Bunny Bunch pattern by Elizabeth Hartman?

- I made myself a patchwork coat this summer (that still needs photographing) and would like to make more patchwork garments. This dress by Ersa Fibers caught my eye!


- I made two cakes this summer/fall, the first is this Flourless Chocolate Wave Cake. It is now my go-to chocolate cake! It's from the book Dessert Person by Claire Saffitz*.

- The other cake we made was the Big Apple Crumb Cake by Smitten Kitchen. It was a great way to use some of the apples we got in our CSA. We liked it so well we made it twice!

- We discovered this delicious Couscous Lentil Greek Salad recipe and made it a bunch of times with cherry tomatoes from our garden this summer, it's from the book I Dream of Dinner by Ali Slagle*.

- I couldn't resist this card from Trader Joes, it was just too perfect! It was designed by Design House.

- There are so many cute stamps available right now. I ordered these Thinking of You stamps, these Winter Woodland stamps and these Tomie dePaola stamps.

- We recently discovered (and binged!) the show All Things Great and Small. It's just the kind of lighthearted show we need at the moment!

- We also watched The Electrical Life of Louis Wain. It was really sweet!

- I bought my first CD in many years, The New Abnormal by The Strokes*. I still have a CD player in my car, and I really wanted something new to play!


- Dusty has been enjoying using my crochet scrap basket as a bed, haha!

Have a Great Weekend!

*Note: Any links marked with an asterisk in this post are affiliate links. This means if you click through and buy something, I make a small commission, at no extra cost to you.