Showing posts with label sewing room. Show all posts

New Sewing Room Tour

Wednesday, March 18, 2026


I'm excited to share a look into my new sewing room! We moved into a 70s split level home in November and I've been slowly building out a space for crafting. The room is part of the main living area of the house, which makes it really convenient to pop in and out of all day. I believe the previous owners used it as a formal living room. For us, it has become a room that we spend a lot of time in, especially my daughter and I. Either sewing, crafting, coloring or just playing; we are in here all day! I'm sure it will continue to evolve as we settle in, but I wanted to share how we've arranged the space for now!

See tours of my previous sewing room here: 2019 Sewing Room Tour, Big Sewing Room Changes


This room is quite a bit larger than my previous sewing room, so I've been working on adding a few more pieces of furniture. I have been able to find two great pieces for this room from a local thrift store called Centre Peace. Lucky for us, they deliver! And they have a great mission, it's a win-win. My most recent acquisition is this wood dresser! It's holding most of my art and craft supplies: paper, paint, stickers, washi tape, stamps, etc. There is a lot crammed in there!!


My fabric cabinet moved just fine and I got my quilting cotton all organized by color again. To be honest, I'd love to replace this cabinet at some point with something wood. For now though, it's what I've got! I'm really making it a priority to buy furniture that we need secondhand, which just means being patient and always having a list! I am happy to have room for my yellow vintage store display stand again. It was stored in our attic the last few years. Right now it has mostly vintage pillowcases and scraps in it!


Another thrifted piece of furniture for office supplies and pattern shop inventory. I believe this was a dresser originally, but I'm using it as more of a credenza or sideboard. A little feed-n-wax brought this piece back to life and it's been working great at containing my online shop stuff!


My two wooden schoolhouse tables fit perfectly under this big bank of windows. I immediately filled the window sill with plants and set up a cat bed for Dusty. Definitely still need to work on this corner a bit, but it's coming along!


Machine is up and running! I set up my sewing machine in a pretty similar orientation as my last space. I am missing my wall shelves behind it though, it was nice to keep the table space behind it open. We'll see if I do anything to change that in future. I am using this wooden organizer from ikea to store tools and notions for now. It was a relief to get my ruler storage pegboard up! It needs a fresh coat of paint, but I can't decide on the color!


Ironing set up is pretty basic, just my board and an ikea cart to hold my iron and water.


The previous owners left lots of ceiling hooks near the windows, so of course I had to take advantage of that right away! I ended up making all the hangers from thrifted materials or stuff I already had. They're all a bit different. They're made from colanders, plastic pots, baskets, and tins. I've never had space for hanging plants before, so this is fun for me! I used nylon paracord for the hanging part.


We repurposed the table from our office/library in our last home as a coloring table for our daughter! I swapped in adjustable legs and set them to the lowest height. We keep a sheet of paper on it all the time so she can color anytime she wants. It's been great having a dedicated space for her to play in here too.


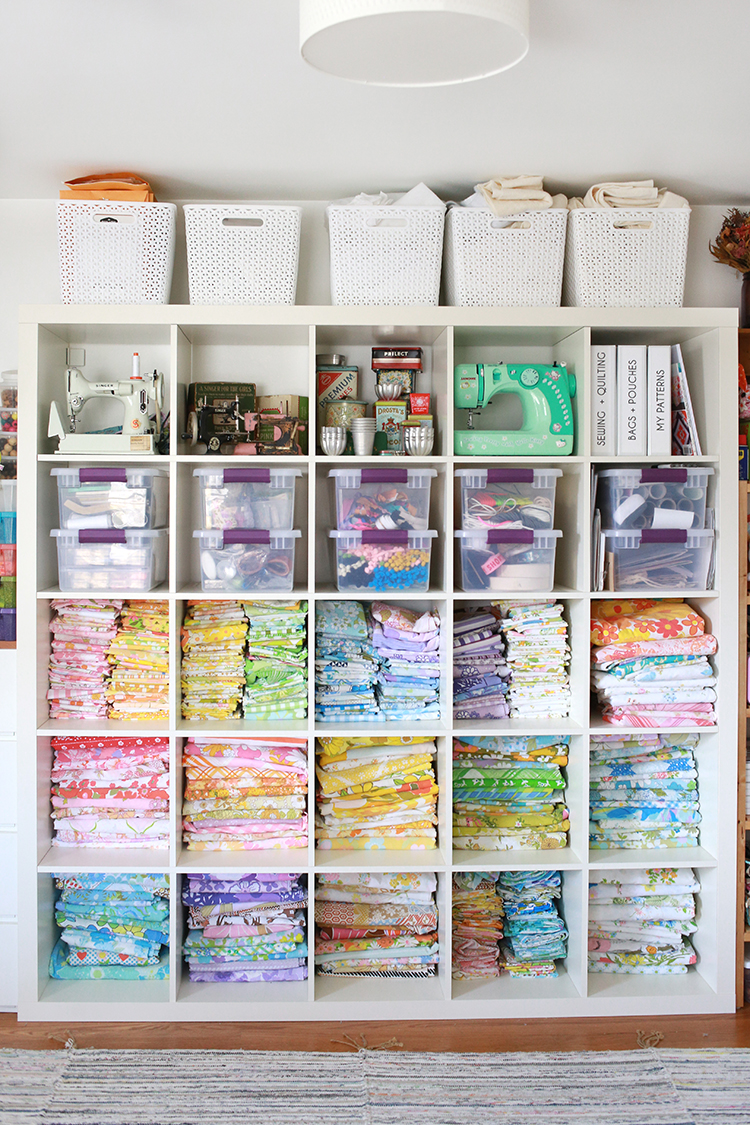
The expedit shelf survived another move, relatively unscathed! I'm using it in basically the same way as my last space. Storage for notions, patterns, interfacing and my vintage sheet collection.


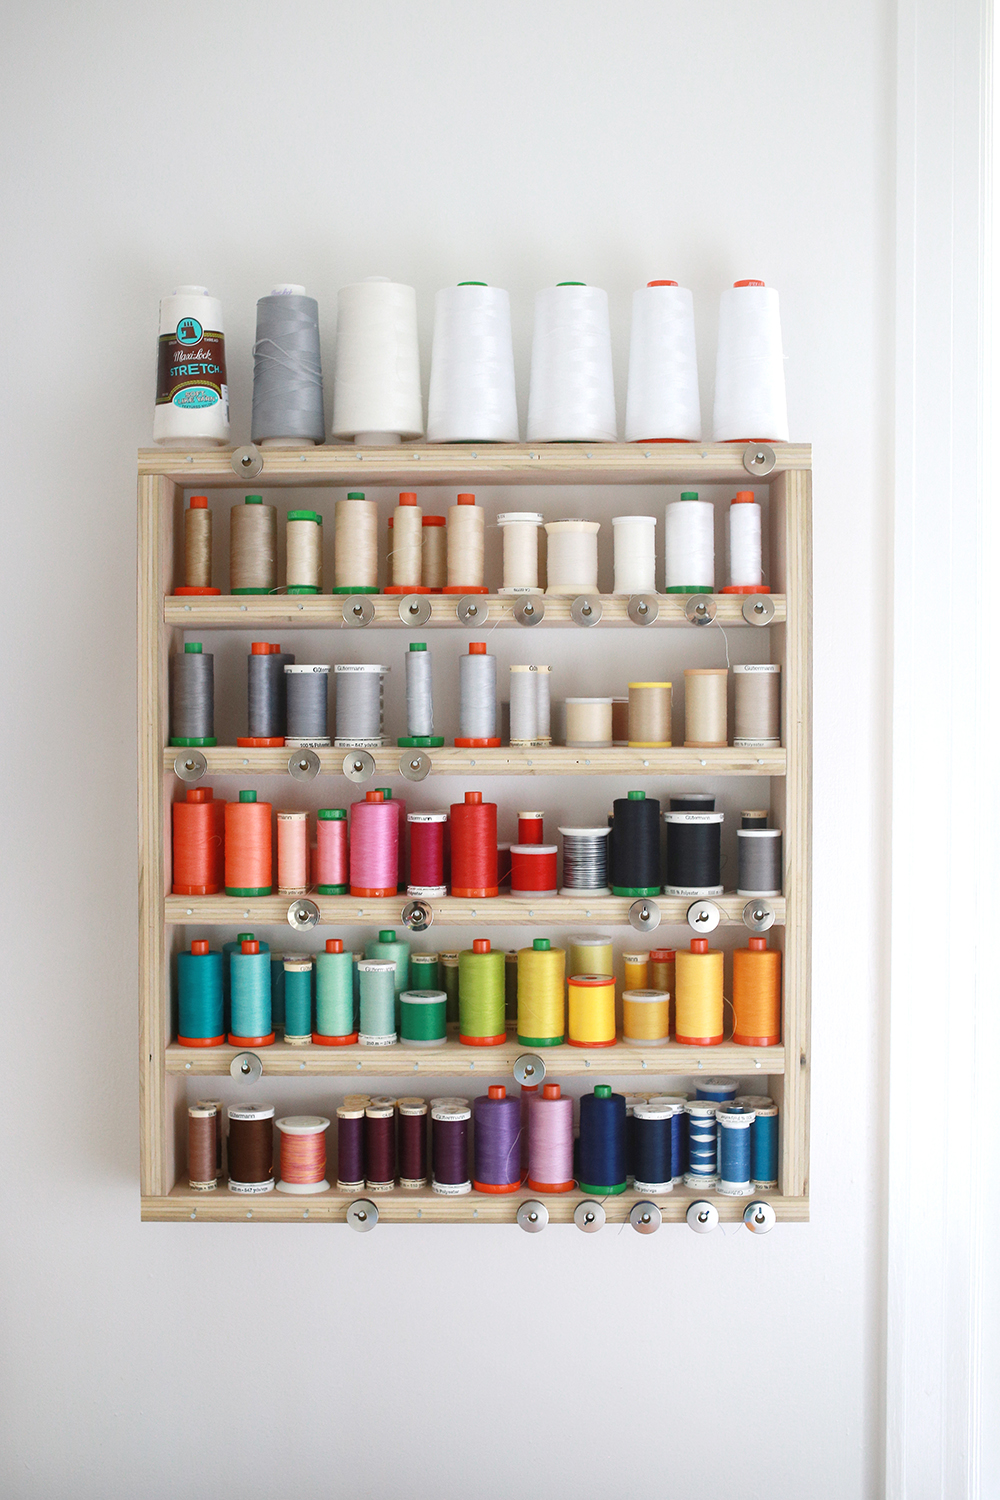
Last but not least, I hung up my thread shelf! At first I wasn't sure I'd like having it so far from my machine, but honestly it's been fine. I sew with white thread like 95% of the time, so it's really not a big deal. I am just happy to have my thread out of a box! I do have a tutorial for this shelf if you're interested: My DIY Thread Storage Shelf

That's it for now! I know this space will continue to change to fit our needs, but for now we're loving it! I am very lucky to have such a beautiful space. I think I'm most excited about all the empty floor space. I love being able to spread out on the floor and I was missing that in our last home. Plenty of room for basting quilts here! We'll see if that translates into more quilting by me!

Happy Sewing!

Big Sewing Room Changes

Friday, September 13, 2024


My sewing room has gone through a lot of evolutions in the past year plus. When baby girl was first born, it became feeding central on the second floor with a glider, extra armchair and lots of baby supplies. At one point Michael's spin bike found a home in here, and as baby got older I made room for a pack and play. Eventually all those things were moved out and for a number of months things in here were "back to normal".

Fast forward to this summer when we made the biggest change yet. We moved our extra queen bed out of baby girl's room and into the sewing room. We really needed a dedicated place for visitors to stay, and it was the only option. It was my idea, but I'll be the first to admit it's been bittersweet. I'm getting more and more used to it, and I think it actually looks pretty good! Let me take you along for the messy journey.

The most time consuming task was moving my shelf unit (an Expedit from Ikea). This thing is heavy, even with nothing in it! I hoped I could just partially unload it and still move it, but no luck. Everything had to come out!

There was only one other wall where this unit could fit, so that's where it went! From a sun-damage perspective this is actually a much better spot. It wasn't getting direct sun before, but either way this wall offers more protection which is a bright side! There is a vent on this wall, but luckily it lined up perfectly with one of the shelves!

These units hold A LOT of stuff. Exhibit A, the floor of the sewing room mid-move. Yikes!! It has to get worse before it gets better!

That's better. Filled back up and looking nice! I took the move as an opportunity to change up my display shelves along the top row. For now I like it!

So much empty space while we waited to move the bed! Couldn't manage all of this in one weekend. I basted one more quilt on the floor during this in between time.

Bed and nightstands were moved in and fit great. They're also from Ikea. We built/stained them when we first moved to Connecticut.

Another bright side, under bed storage! I fit a bunch of these short storage boxes under the bed to hold various supplies. This bin has part of my vintage pillowcase collection.

Here is what things look like now! I didn't even realize this vintage comforter I thrifted recently was a queen size until I threw it on the bed. It looks great, and I won't need to worry about any fading or sun damage, as it's already got a bit of both! And it's still really cute. I'd like to work on the nightstand set up, but for now they're fine!

I've set up my ironing board in front of the shelving unit, which has been working well. I can easily take it down and store it when we have guests staying.


I installed an inexpensive curtain rod behind the bed so that I can hanging quilts, quilt tops, or fabric there. I like that I can change it out whenever I want, and it adds some coziness to the room. I went with white so that it would mostly just blend into the wall. I still need to figure out what art I want to put back up, we'll see.

Dusty has given her stamp of approval and had her first nap on the bed. Baby girl also thinks its one of the best places in the house to run around and explore.

I'm happy with where the sewing room is at right now. Loosing some space to the bed is worth it to have a place for people to stay. Now I need to do a fully updated sewing room tour. My last one was from 2019! It's changed so much in five years!!

Happy Sewing!

DIY Ikea Poang Chair Slipcover

Wednesday, June 12, 2024


Happy Wednesday! Today I wanted to share the cover I made for a thrifted Ikea POÄNG chair! I'm including my measurements and a quick tutorial if you want to make one too.


Last week I found this Ikea POÄNG chair at the thrift store. It had been marked down to $15, which was just too good a price to pass up. I've always liked the look of these chairs and they're comfortable too, so I stuffed it into the trunk and slowly drove it home! I think I saw it there weeks earlier, but the encouragement of friends pushed me to finally buy it. The red color of the cushion is honestly what made me overlook it.

After bringing it home, I first tried dyeing the cover, but it did not go very well. There was just so much fabric and it wasn't taking the dye evenly. I looked to see if Ikea sold slipcovers for this chair, but they don't! So, I decided to make one myself.


I took some quick measurements and decided to use a sheet to cover it. I knew that's what would best fit the style of the room and also would be plenty of fabric. I took advantage of the narrow hem of the sheet for the back of the cover, it avoid needing to hem in. I wanted this project to be quick and easy! The cover is just a really simple envelope style pillow cover.

DIY Ikea Poang Chair Slipcover

Want to sew your own slipcover for your POÄNG chair? Here are the details:

Materials:
3.5 yards of fabric (or a flat sheet)
1 yard of velcro
Coordinating thread

Cutting:
Cut (1) 56"x25" piece for the front.
Cut (2) 31"x25" pieces for the back.*

*If you're not using a sheet with a hem for the back pieces like I did, add to the 31" measurement for the hem you want.

Instructions:
Use a 1/4" seam allowance.

Place front piece right sides up on your work surface. Place a backing piece right sides down, lining up the raw edges with the sides and bottom of the front piece. Place remaining backing piece right sides down, lining up the raw edges with the sides and top of the front piece. The two pieces should overlap in the middle. Pin around all four sides.

Sew around all for sides, securing the backing in place. Finish seams with a zig-zag stitch or serger if desired. Turn cover right sides out and press. Stuff cushion into cover.

Place cushion on the chair frame to determine where to add velcro strip. Attach velcro to the back of the cover according to manufacturer's instructions.


Because I used a thin fabric and I made the cover snug, the stitching lines from the cushion underneath show through! An added bonus. I have yet to add the velcro strip to my cover because I didn't have enough on hand. It's perfectly functional without it, but I am still looking forward to wrapping this project up and getting it installed properly!


My scrap pouf is filling up and makes for a great foot stool to go with the chair! Read more about that project here: Scrap Pouf in Progress

Did you know that Ikea has been making the POÄNG chair for more than 40 years? I love how this chair is fitting into my sewing room! There have been armchairs in and out of this room over the last year, and I was really missing having a comfy chair in here. This has been a wonderful addition. In the end, I'm glad my dyeing experiment didn't pan out, because I love the sweet floral cover I ended up making for it!

Happy Sewing!
Ideas for Storing and Organizing Sewing Notions

Wednesday, March 30, 2022


Happy Wednesday! It's Spring, which means it's time to add to the Sewing Room Organization Series with some new posts. I highly recommend checking out the other posts from this series, we've covered a lot of topics over the last few years! This post is a big one, I'm sharing ideas for storing notions. This includes storage ideas for zippers, buttons, needles, trims, machine accessories, pins, thread, hardware and more. I hope you'll find some ideas that can help improve the organization of your space!

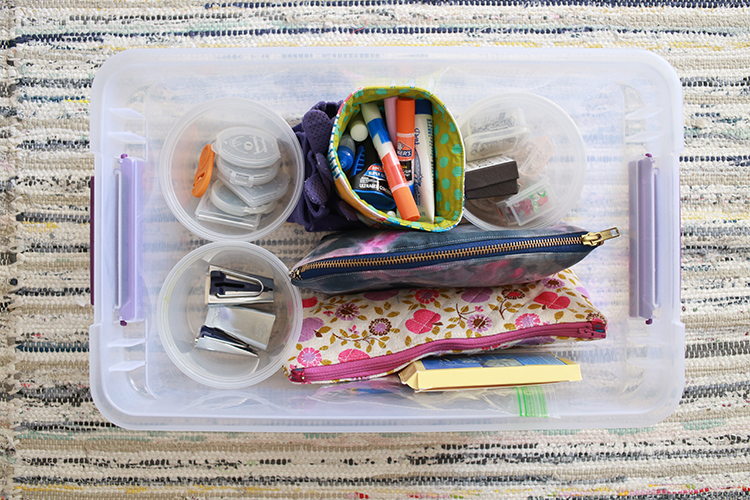
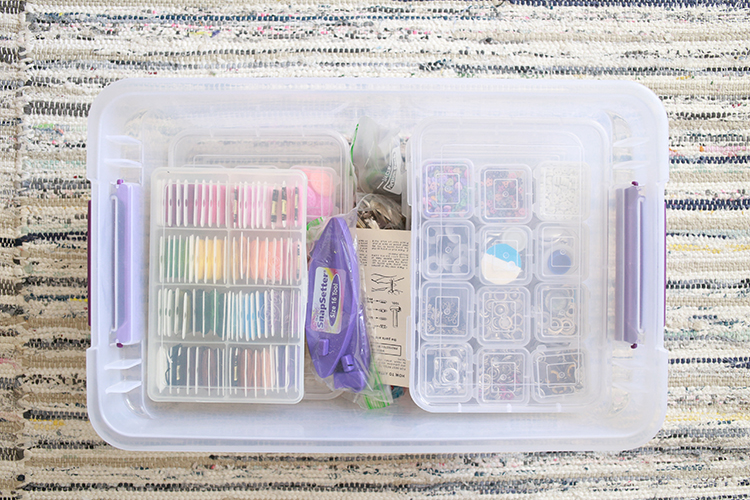
We're going to start by diving into the bins you see in the above photo! I keep the majority of my notions in these clear storage containers.


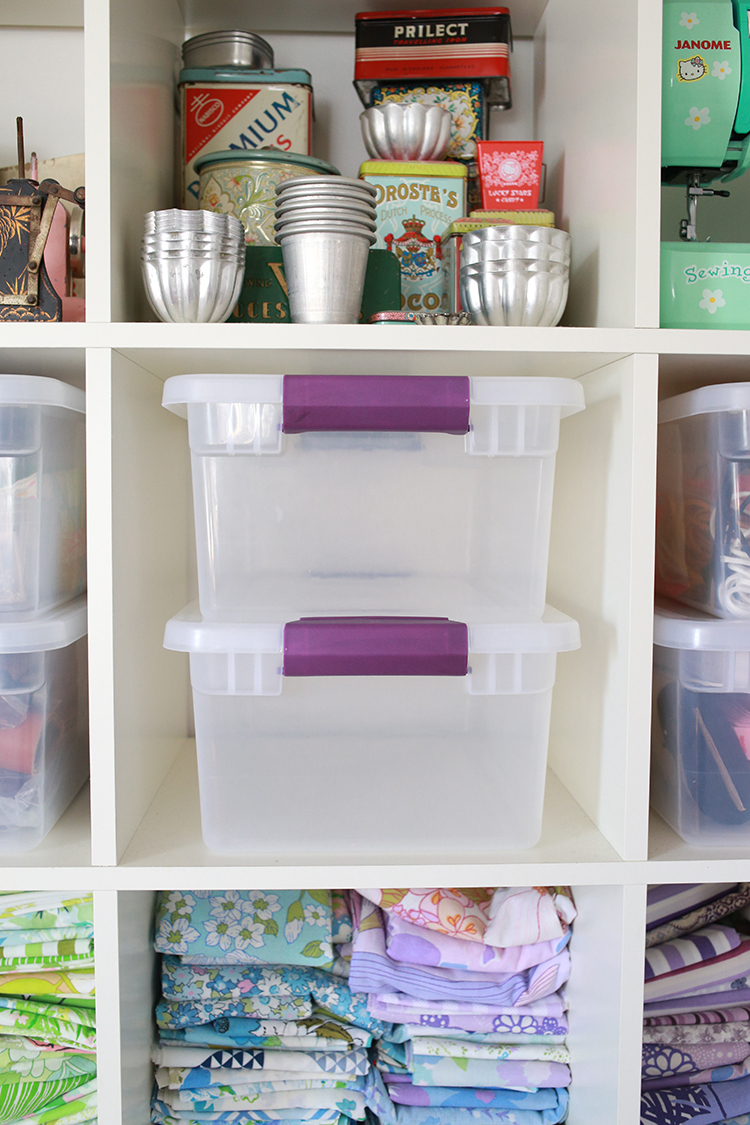
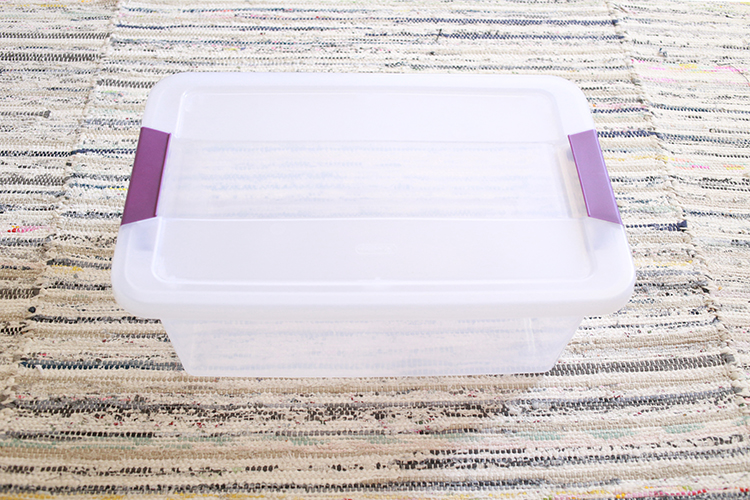
One quick thing before we look inside my bins. I always get asked what they are and where to find them. These are the Sterilite 15qt Clear View Storage Bins*. Two fit perfectly in my cube storage unit from Ikea (Expedit/Kallax). They stack on top of each other easily and they've held up really well. Some of these bins I've had for almost 10 years now! I buy mine from Target.

Okay, now that we've got that bit out of the way, let's look inside the bins and chat about a few different ways I store notions.

Zipper Storage

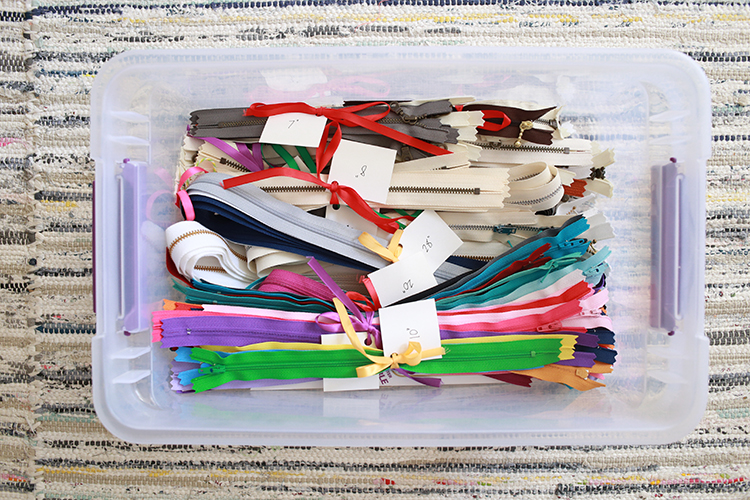
My zipper bin is overflowing with color! My storage solution here is really simple, but it has worked well for me for years. The key is, it's easy to keep up with!


I cut up some index cards and punched a hole in the corner of each piece. The zipper length is then written on the card. A simple length of ribbon or twine holds all the zippers in place with the label attached. Each time I add zippers from the bin, I can find the size, untie the ribbon and add them in.

Machine Accessory Storage

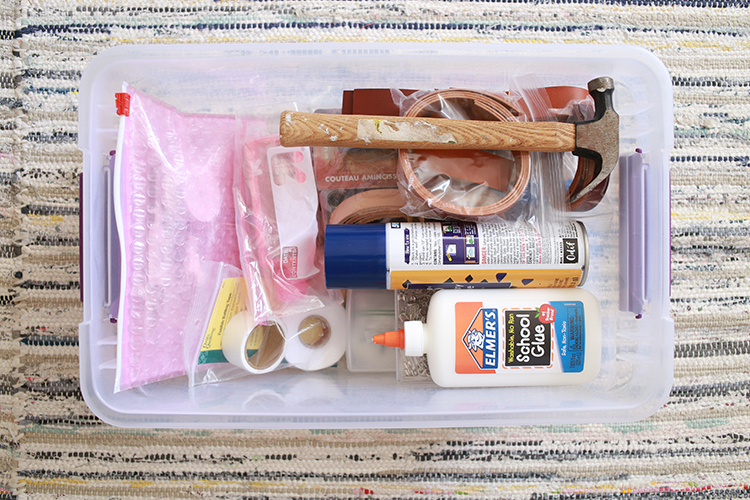
This bin is a bit random, but the common thread is that I don't grab for these groups of items very often. It holds my leather supplies, serger accessories, accessories for my backup sewing machine, plus extra glue, basting spray and basting pins.


For my sewing machine and serger accessories, I like to store them separately so they are easy to grab when I need them for a specific machine. I've used a plastic container that came with the machine and reused a padded zip bag for the other.


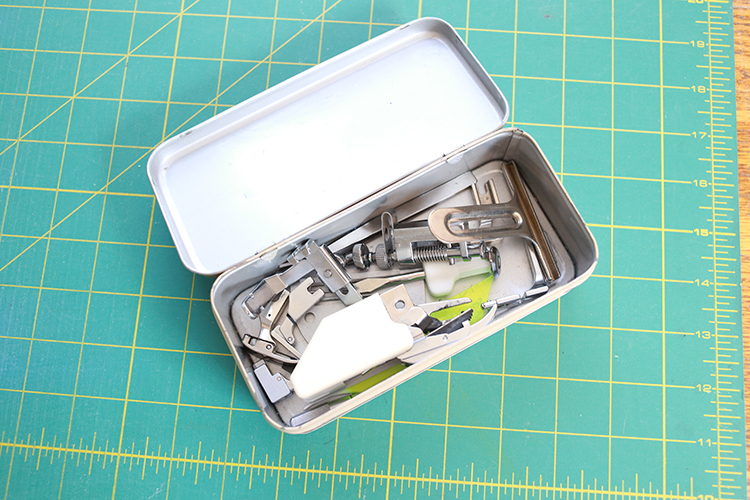
For my main machine, I keep all the feet in a tin that sits on the shelves above my machine. It's nice to have everything within reach of the machine! I try to keep bobbins and other notions out of here, to keep it neat.

Tool, Rotary Blade and Glue Storage

This is my tool bin. I've used a variety of containers here to keep things organized.


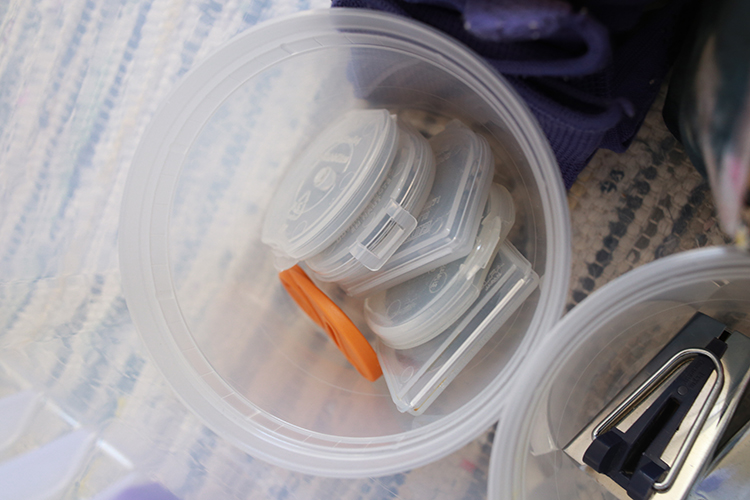
Take-out containers hold rotary cutter blades, binding tools, and extra pins.


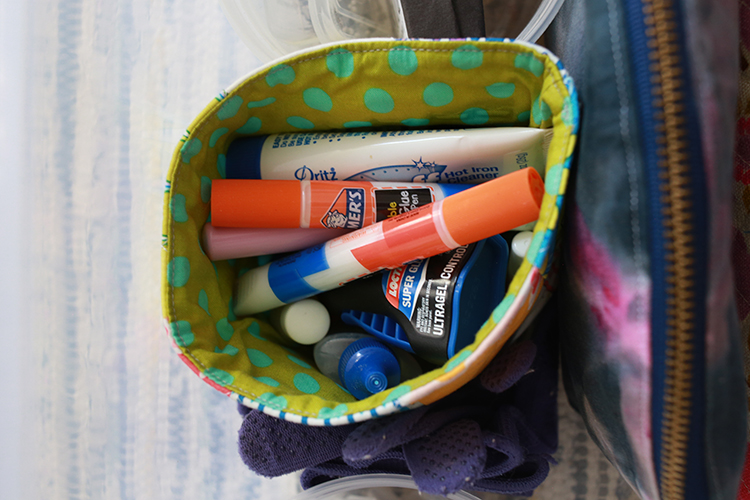
A handmade storage bucket holds glues and iron cleaner.


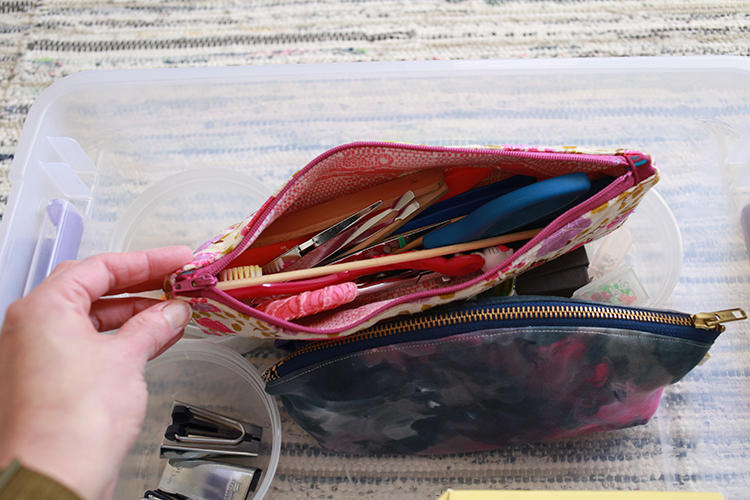
Zipper pouches hold extra scissors, tweezers, marking tools and hand-sewing needles.

Buttons, Hardware, and Floss Storage

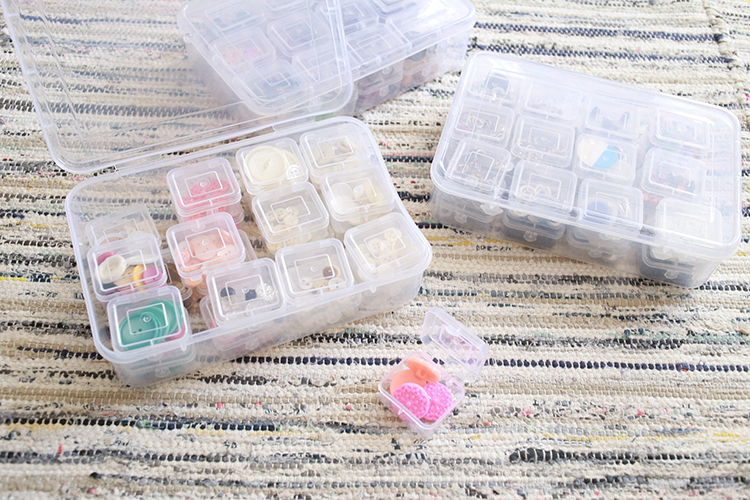
This bin holds a ton of different small notions, hardware, and my button collection. This is probably one of the most organized areas in my entire sewing room!


These little storage boxes from Harbor Freight do most of the work in this bin. Each box has 25 little boxes that fit inside. I have buttons separated by color and type. Another box has all my snaps, eyelets, and other similar sized notions. This has made it extremely easy to find what I need quickly.


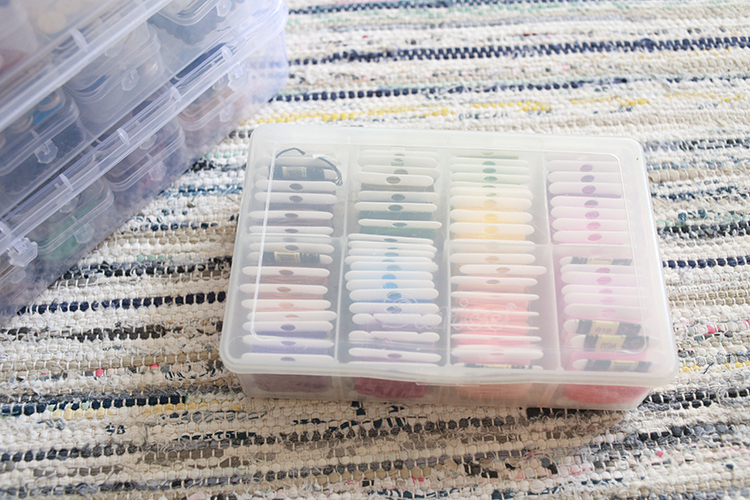
My embroidery floss is all wound up on spools and stored in a clear storage container. I bought my container at a craft store many years ago, but don't forget to check the storage section of your local hardware store or even a fishing section of a sporting goods store for lots of container options!

Trims, Ribbon, and Webbing Storage

I have a bunch of bins dedicated to trims, ribbons and elastics. This particular bin holds pom-pom trim, cording, hand quilting thread, and elastic. I've reused some ziploc bags here to keep things somewhat organized!


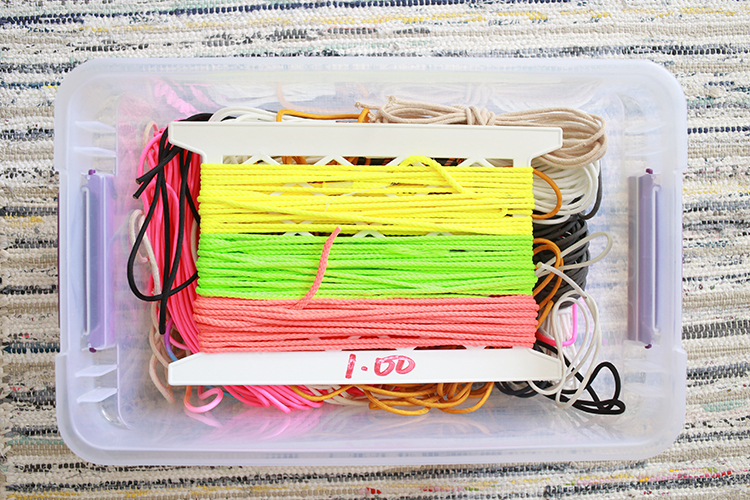
Another trim bin holds nylon paracord. Not super organized, could improve this one for sure!


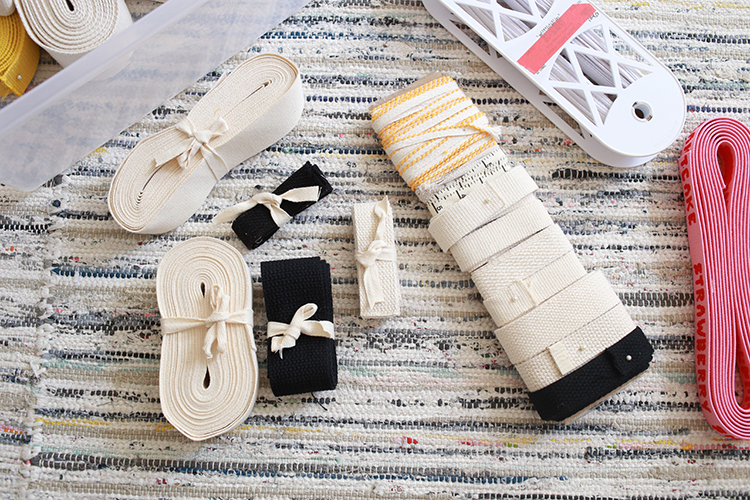
The last bin of trims holds webbing, twill tape, and some ribbons. Some lengths of webbing are simply tied together with some twill. Others have been wrapped around a piece of cardboard and pinned in place.

Twill Tape Storage

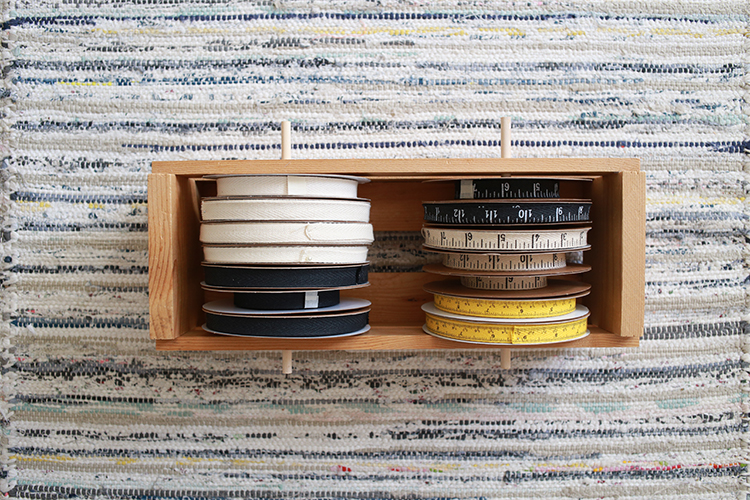
Speaking of twill tape, this is how I store tapes I'm currently cutting off of for sale in my shop! Since they're on a dowel, they can easily spin as I pull lengths off.

Thread and Bobbin Storage

My personal preference for thread storage is to have it on the wall! You can of course use a ready-made thread holder for this, but I built my own a few years ago and still am loving it. I added nails along each shelf to hold bobbins which has been extra nice. Want to make your own? Check out my tutorial for it here: DIY Thread Storage Shelf

Sewing Machine Needle Storage


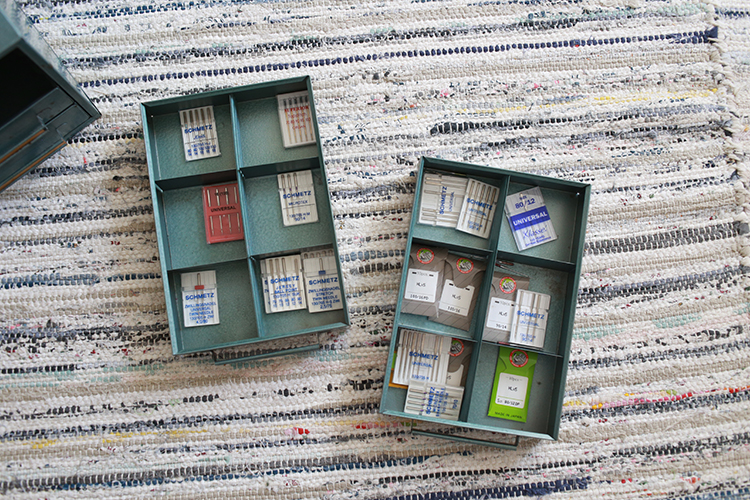
For needle storage, again I like to keep things within reach of my machine. I used this little chest of drawers to store mine, separating by needle size. It's great to be able to quickly grab what I need and keep an eye on what sizes I'm running low on.


I made a long scrappy pincushion (and a tutorial for it too), to hold my lightly used sewing machine needles and sits right in front of my sewing machine. It's empty in this photo, but is full of needles as I write this post. Find the tutorial here: Long Scrappy Pincushion Tutorial

Clip and Basting Pins Storage

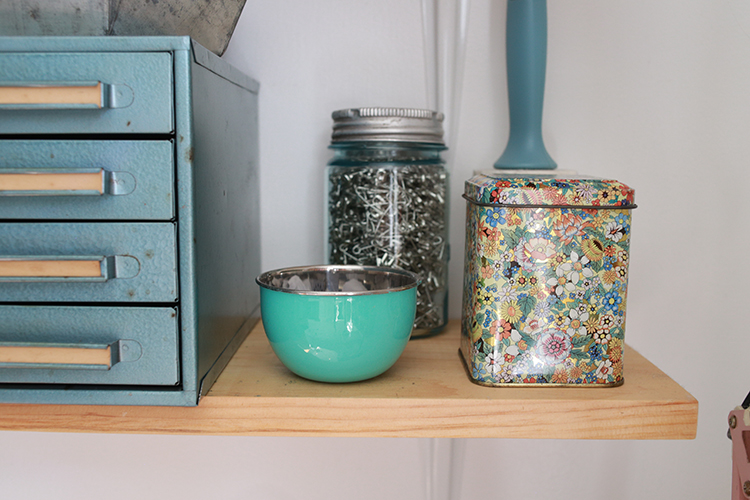
For wonder clips and basting bins, I prefer jars and tins to store them. They look cute sitting on my shelf, and I like that I can easily grab them to travel with if I need to.

Miscellaneous Notion Storage

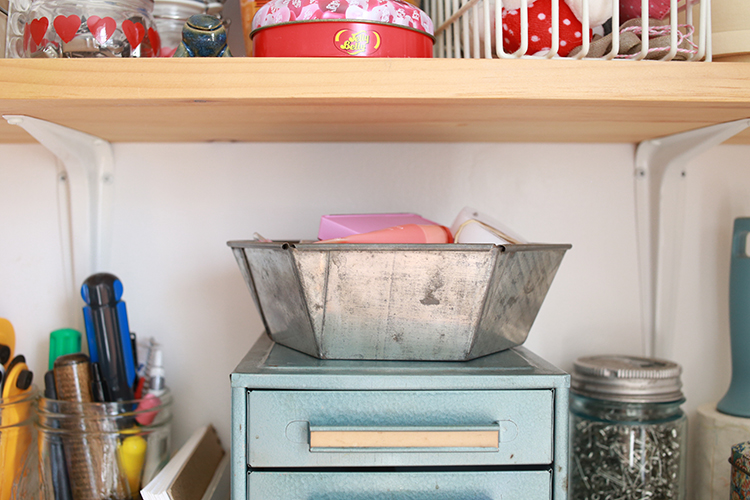
I like to have a place within easy reach where I can keep a few random items. I use this metal baking dish to hold batting tape, lip balm, extra pins, chalk, extra tape measures, glue, etc. Any small notion that I want to be able to get to quickly!

I hope this post has given you some ideas for how to store and organize your sewing notions! My biggest advice for organizing in general is to start with that you already have on hand. Look through your recycling bin, throughout the rest of your home (or apartment or room), or even consider sewing some storage containers! I find I need to buy much less when I look for solutions I already own first. Better for my wallet and for the planet, so a double bonus!

I'd love to hear how you store any of these items in your space. Let mehttps://www.incolororder.com/2022/03/ideas-for-storing-and-organizing-sewing.html know in the comments if you have a storage idea or storage product that you're loving!

Happy Sewing!

*Note: Any links marked with an asterisk in this post are affiliate links. This means if you click through and buy something, I make a small commission, at no extra cost to you.