
Welcome to the second week of the Lined Drawstring Bag Sew Along! Today I'm sharing a tutorial for a patchwork star bag!
I'll be updating the Sew Along Page each week with all the posts so that you can easily catch up or reference these posts after the sew along ends!
I hope you'll sew along with us! Sew from the tutorial or the patterns:
Lined Drawstring Bag Tutorial
Lined Drawstring Bag Pattern
Lined Drawstring Bag Expansion Pattern

Before we dive into today's post, let's quickly chat about our to-do for week 2 of the sew along!
This week's task is cutting! Finalize those fabric choices and cut out all the pieces for your bags. A few posts you might find helpful when tackling this:
- If you missed last week's post about make templates, be sure to check that out! They're great if you don't want to rotary cut, or just want to speed up your cutting process. Find it here: Making Templates for the Lined Drawstring Bag Pattern
- You may be interested in adding a little something extra to your bags, like pom-pom trim or ribbon. I have a post all about embellishing your bags with these. Find it here: How to Use Trim or Ribbon to Embellish Your Drawstring Bags
- If you'd like to add an exterior pocket to your bag, I've got a tutorial for that too! Find it here: Lined Drawstring Bag Tutorial: Adding an Exterior Pocket
- A related post to today's is my present block tutorial from last year's sew along. I think it's super cute! Another option if you want to add a patchwork element to your bags. Find it here: Present Quilt Block Drawstring Bag Tutorial

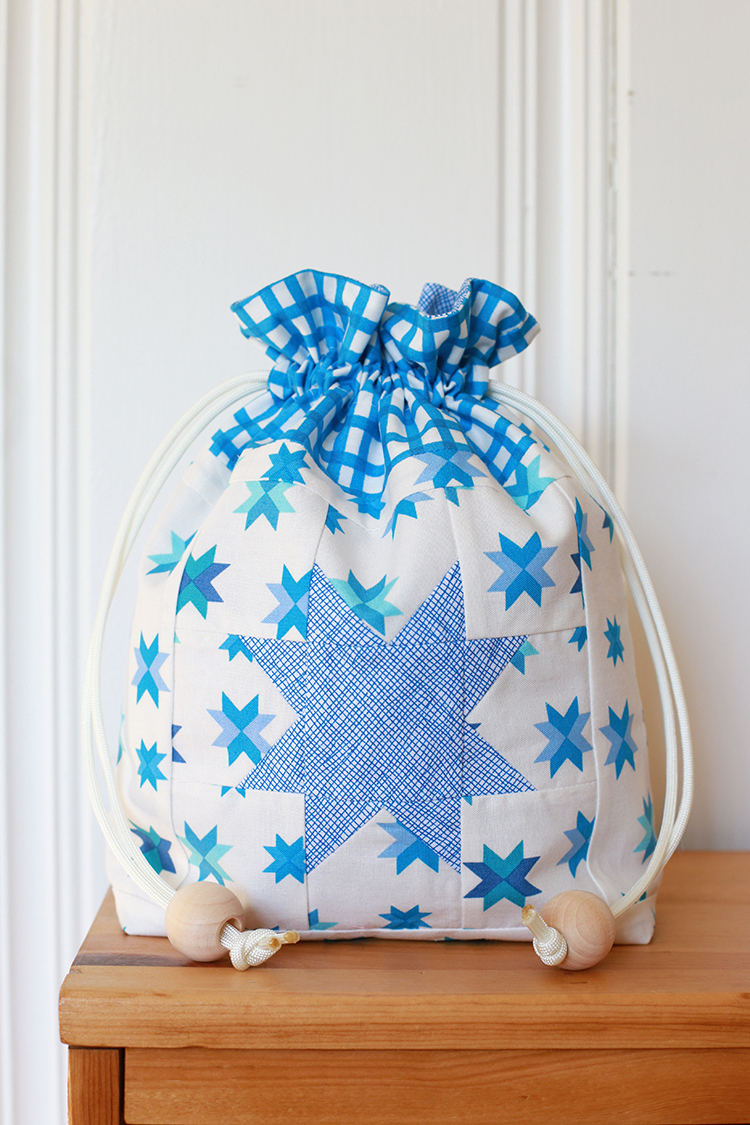
Back to the star of the show (haha), a patchwork star bag! I made a bag with a star block on it a few years ago when I was in the process of making the expansion pattern, and I thought it would be perfect as a holiday bag.

Sewing Level: Beginner Friendly
Finished size: Approx. 10" tall, 7" wide, 3" deep
Patchwork Star Lined Drawstring Bag Materials:
- 1 Fat quarter for Exterior Main*
- 1 Fat quarter for Exterior Accent
- 1 Fat quarter for Interior
- 1 Fat eighth star fabric
- 2 yards of 1/2" twill tape, nylon paracord or 1/8 yd fabric
- Coordinating thread
- Acrylic ruler
- Large safety pin
- Pencil
- Optional: wooden beads
*This tutorial is written for using a non-directional fabric for the Exterior Main.
Looking for supplies? Check out my Pattern Supplies and Resources post.
Patchwork Star Lined Drawstring Bag Cutting:
From Exterior Main Fabric:
- Cut (1) 9”x10.5” piece
- Cut (8) 2.5"x2.5" block pieces
- Cut (2) 6.5"x2.5" side pieces
- Cut (1) 1"x10.5" top piece
- Cut (1) 2.5"x10.5" bottom piece
From Star Fabric:
- Cut (1) 2.5"x2.5" piece
- Cut (8) 1.5"x1.5" pieces
From Exterior Accent Fabric:
- Cut (1) 4”x21” strip
- Subcut into (2) 4”x10.5” pieces
From Interior Fabric:
- Cut (1) 12.5”x21” strip
- Subcut into (2) 12.5”x10.5” pieces
If using fabric for ties:
- Cut (2) 32”x2” strips
If using twill for ties:
- Cut (2) 32" pieces
Patchwork Star Lined Drawstring Bag Instructions:
*Use a 1/4” seam allowance unless otherwise noted*
Before constructing the bag, we first need to make the pieced Exterior Main piece.

1. Using a pencil, mark a diagonal line across the wrong side of all (8) 1.5" star fabric squares.

Place (1) 1.5" star fabric square in the upper-left corner of a 2.5" exterior main square, right sides together.


Stitch across the corner on the line you marked. Trim off the corner, leaving a 1/4" seam. Press corner up.

2. Place a second 1.5" star fabric square in the upper-right corner of the 2.5" exterior main square, right sides together.


Stitch across the corner on the line you marked. Trim off the corner, leaving a 1/4" seam. Press corner up.
Repeat with remaining pieces to create four total star point units.

3. Arrange star point units, 2.5" exterior main squares, and 2.5" star fabric square in three rows of three units each as shown in the above diagram.

Sew units together in each row. Press top and bottom row seams away from the center. Press middle row seams towards the center.

Sew rows together, matching up seams. Press seams open. Trim block to 6.5" square if necessary.

Now it's time to add the borders to the star block.

4. Sew the two 6.5"x2.5" side exterior main pieces to either side of the star block. Press seams away from block.

5. Sew the 1"x10.5" top side exterior main piece to the top edge of the block. Press seams away from block. Sew the 2.5"x10.5" bottom side exterior main piece to the bottom edge of the block. Press seams away from block. Trim piece to 9"x10.5" if necessary. This is the Exterior Main piece for one side of the bag.
Optional: You may choose to add additional structure to your patchwork with a lightweight interfacing. I would recommend something like SF101 by Pellon, and interfacing both Exterior Main pieces.
For the bag construction, refer back to the free tutorial or the everything size in the lined drawstring bag pattern, start at step 1.

I hope you enjoyed this tutorial! I can't wait to see the bags you make! Please share them with me on instagram @jenib320 + #lineddrawstringbag or via email (jenib320 @ gmail.com).
Happy Sewing!
I got busy last week but this is my project for the week. Thanks for the pattern and how to!! Doris
ReplyDelete