Welcome to the fourth week of the Lined Drawstring Bag Sew Along! Today I'm sharing tips for working with paracord!
I'll be updating the Sew Along Page each week with all the posts so that you can easily catch up or reference these posts after the sew along ends!
I hope you'll sew along with us! Sew from the tutorial or the patterns:
Lined Drawstring Bag Tutorial
Lined Drawstring Bag Pattern
Lined Drawstring Bag Expansion Pattern
 Before we dive into today's post, let's quickly chat about our to-do for week 4 of the sew along!
This week's focus is on final touches! Tackle those drawstring casings, make fabric ties or prep twill/paracord ties. Pull ties through the bags and finish them off with a simple knot or some fun beads! A few posts you might find helpful when tackling this:
- Marking the drawstring casings can be time consuming, especially if you're making a lot of bags. I have a video tutorial for an alternative marking technique that is my go-to method. Find it here: Alternative Method for Marking the Drawstring Casing
- If you're like me and you don't have a free-arm on your sewing machine, I have a video tutorial for how to sew the drawstring casings. Find it here: How to Sew a Drawstring Casing Without a Free-Arm Sewing Machine
- Using beads and want to take them to the next level? I have a tutorial all about how to customize unfinished wooden beads. Find it here: How to Customize Wooden Beads with Paint, Stain, and Dye
- You've made your bags and now you're ready to gift them. How about use some reusable gift tags too! I share five different ideas for tagging your bags in this post: Reusable Gift Tag Ideas for Drawstring Bags
- Still need some supplies to finish up your bags? I've got you covered! You can find a variety of cotton twill tape, paracord and wooden beads in my online shop. Find them all here: Shop cotton twill tape, paracord and wooden beads
- Finally, circling back to my post on tips for wrapping gifts in drawstring bags! Find it here: Tips For Using Drawstring Bags to Wrap Gifts
What is Paracord?

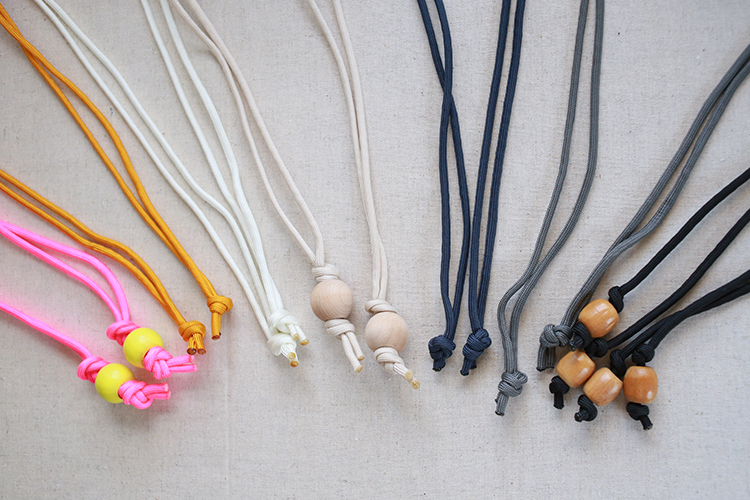
Paracord, or Parachute cord, is a lightweight rope made of nylon. It's called this because it was originally used on parachutes. Today it's primarily used as a general utility cord. Paracord has an inner cord of several strands (the number depends on the type/strength) that are sheathed in more nylon. It's a great material to use for drawstring bag ties! It's relatively easy to find, comes in lots of different colors and is really durable. The most common size of paracord is 550, which is the size I recommend using for drawstring bags.

550 Paracord is a Type III cord with a tensile strength of 550 pounds, it's 4mm in diameter and has 7 inner strands. You can see in the above photo the inner strands are typically a translucent white color, while the outer sheath can be lots of different colors.
Where to Buy Paracord

You can find paracord in a limited number of colors at most craft stores. It's often near the bead aisles. I've also found it at big box stores like Walmart too. Or, you can order it online! There are lots of different online shops that specialize in ropes and cords. I carry two colors in my online shop, cream and white, which you can find here. When I want other colors, I usually shop at Bored Paracord* on Etsy.
If you order smaller amounts or buy it in person, it typically comes as a hank.

If you buy larger amounts it may come rolled on a spool.
How to Cut and Finish Paracord

One of the most important things to be aware of when working with paracord, is that after it's cut, the ends need to be finished in order to prevent unraveling. This is typically done by melting the ends. If you're cutting a piece off of a larger hank or spool, you'll need to finish both ends of your cut, preferably as soon as you cut it. This helps keep any of your cord from going to waste! These are the materials you'll need to finish your paracord:
Sharp scissors: Use all-purpose or craft scissors for this, not your good fabric scissors!
A Tea Light Candle: I've tried using a candle in a glass jar, but have found that the flame moves too much. Tea-lights are ideal for this task. A lot of tutorials use a lighter, but I feel more secure using a candle.
Matches or Lighter: Something to light your candle with.
Non-flamable container: I like to set my candle inside of this thrifted metal loaf pan, but any non-flamable container or surface will work. A cookie sheet, a stone cutting board, a spare piece of tile, etc.

Before we proceed, a disclaimer: Please be careful and exercise caution when working around an open flame. Fabric and paracord are flammable, so do this at your own risk. I recommend doing this in a well-ventilated area. Open a window and/or turn on an exhaust fan.
1. Cut your paracord to the desired length. If some of the white inner strands have gotten long while handling, feel free to trim them.

2. Hold the cut end of the paracord approximately 1/4" away from the candle flame. The end of the paracord will slowly melt. Once melted, move away from the candle and let sit to harden for a minute or two, letting the end hang over the edge of your work surface. This will prevent it from sticking to your surface.

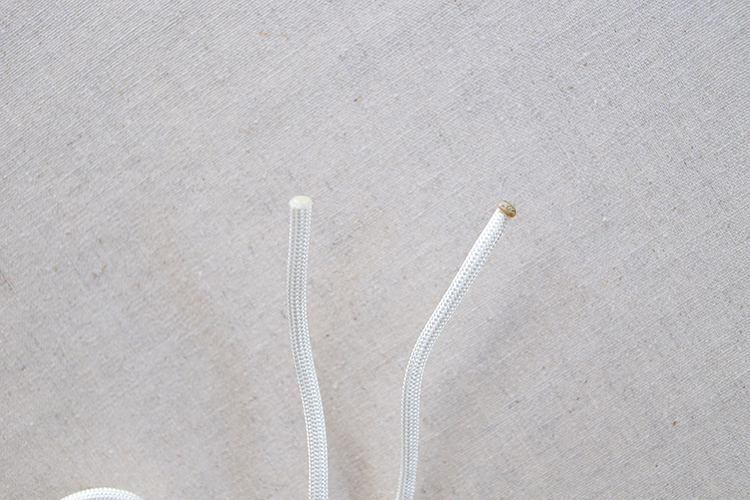
See above two ends of paracord that have melted and cooled. The difference between the two is how close I let the end get to the flame of the candle. On the left is what we're aiming for. It's completely clean and clear, I kept the end an appropriate distance from the flame. On the right is what happens when the end gets too close or touches the candle flame. It's discolored, which is not what we want!
Alternative Finishing Method
If you don't feel comfortable melting the ends of your paracord to finish them, there is another way! Trim the inner strands so that they are flush with the cut edge of the sheath. Seal together by placing a dot of hot glue over the end. Let dry.
Using Paracord for Drawstrings

I love to use paracord for drawstrings. It comes in so many fun colors (even some with a slight pattern), and it's super fast! Using it for drawstrings is simple.
1. Cut two lengths of paracord to the required drawstring length. (You may want to add a little extra if you plan to use beads.)
2. Finish paracord ends.
3. Pierce paracord with a large safety pin and thread through the drawstring casings.
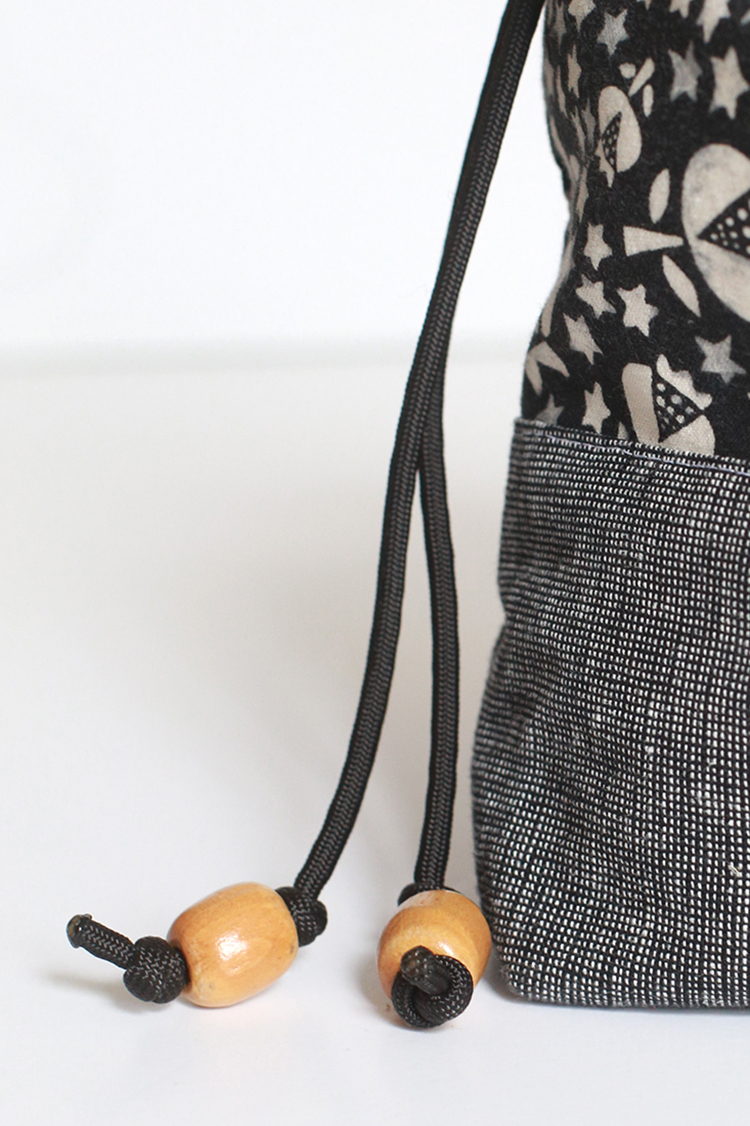
4. Knot each drawstring end, adding beads if desired.
 I hope you enjoyed this tutorial! I can't wait to see the bags you make! Please share them with me on instagram @jenib320 + #lineddrawstringbag or via email (jenib320 @ gmail.com).
Happy Sewing!
*Note: Any links marked with an asterisk in this post are affiliate links. This means if you click through and buy something, I make a small commission, at no extra cost to you.

love the bags, where can the fabric with the knitting abbreviations by found??
ReplyDeleteThis is very helpful - thank you! I 'figured it out' last week when I forged ahead in my own personal sewalong timeline, but I appreciate your encouragement to stay further from the flame and take it slower to get a clear finish. I'll try that next time!
ReplyDeleteAlso, thanks again for stocking the paracord and twill - it was great to be able to order that from you.
The knitting abbreviations fabric was actually a screenprint that I designed and printed myself!
ReplyDeleteI'm so glad, Debbie! Thanks for your support! :)
ReplyDeleteThank you for these clear instructions with pictures. In the past, I have sewn different sizes of your pattern. SomedayI will sew more than 1 at a time. Maybe retirement??? Thank you for all your instructions and the sew a long.
ReplyDeleteHappy Holidays to you