

Happy Wednesday! I'm so happy to bring you the first of a series of quilt settings to accompany my book, Patchwork Essentials: The Half-Square Triangle. I wanted to share something that would be a good add-on to the 60 Block Chart included in the book! The blocks in that section can be used in many ways, including in the final chapter of quilts in the book.

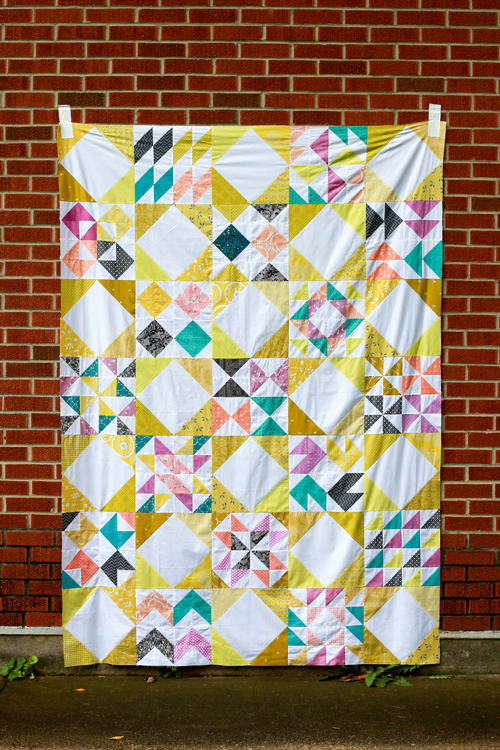
See this finished quilt here.

Over the next few weeks/months I'll be sharing additional quilt settings (layouts!) that you could use with those blocks, blocks from my Simply Sampled or Half-Square Triangle Sampler patterns, or any 12" finished quilt blocks! The quilts will be different sizes, and take a different number of blocks. I'll be sharing instructions for the quilt setting only, not the blocks. I will however be sharing fabric requirements to help guide you on making the half-square triangle blocks from the book needed for each setting!
The first quilt setting I am sharing is a big one! It's mostly made up of blocks, so you don't have a lot of extra work to do after those are done!

Still need a copy of my book? Pick one up here!

Sewing Level: Intermediate/Confident Beginner
Finished size: 60"x84"
Materials:
- (27) 12.5" unfinished quilt blocks
- 1 1/4 yards of background fabric
- 5 1/4 yards of backing fabric
- 68" x 92" piece of batting
- 5/8 yard of binding
- Coordinating thread
Notes:
WOF = Width of Fabric (42")
Fat Quarter = 18" x 21"
Cutting:
From background fabric:
- Cut (3) 12.5" x WOF strips
- From each strip, cut (3) 12.5" squares for a total of 8
From binding fabric:
- Cut (8) 2.5" x WOF strips
---------------------------------------------------------------------------------------------------------------------
To make 27 half-square triangle quilt blocks, you'll need:
| 2-at-a-time HST method | 4-at-a-time HST method | 8-at-a-time HST method | |
|---|---|---|---|
| Print fabric | 11 fat quarters | 12 fat quarters | 14 fat quarters |
| Background fabric | 2 1/2 yds | 2 5/8 yds | 2 1/2 yds |
---------------------------------------------------------------------------------------------------------------------

Instructions:
*Use a 1/4" seam allowance unless otherwise noted.*
1. Arrange blocks using the diagram.
2. Sew blocks together in each row. Press seams in one direction, alternating direction every other row.
3. Sew rows together. Press seams open.
4. Cut backing yardage in half. Press. Trim off the selvedges and sew your pieces together lengthwise. Press seam open.
5. Basting: Using masking or painter’s tape, tape the backing to a clean, hard surface, right side down. Spread out your batting on top of the backing. Smooth out any wrinkles. Carefully spread out your quilt top on top of the batting, right side up. Pin your top, I like to use curved safety pins, spacing the pins a few inches apart. Make sure that your pins are going through all three layers.

6. Quilting: Quilt as desired, by machine or by hand. Trim away excess batting and backing fabric.
7. Binding: Trim off selvedges and sew your binding strips together to form one long strip, press seams open. Fold in half lengthwise, pressing with your iron as you fold. Attach binding using your preferred method. For a detailed tutorial on attaching your binding to both sides by machine, see here.

Enjoy! Share your progress and finished quilt photos using the #patchworkessentials hashtag on social media or add it to the In Color Order Flickr Group!
Check out the other free quilt setting tutorials in this series:
Interlaced Quilt Setting Tutorial

Blockade Quilt Setting Tutorial
thanks
ReplyDeleteWow, Jeni! What a great quilt--with sooo many different blocks from the same pieces. I love how the big purple squares pull your eye in.
ReplyDelete