Showing posts with label Home. Show all posts

Record Cabinet Storage Baskets

Wednesday, June 22, 2022


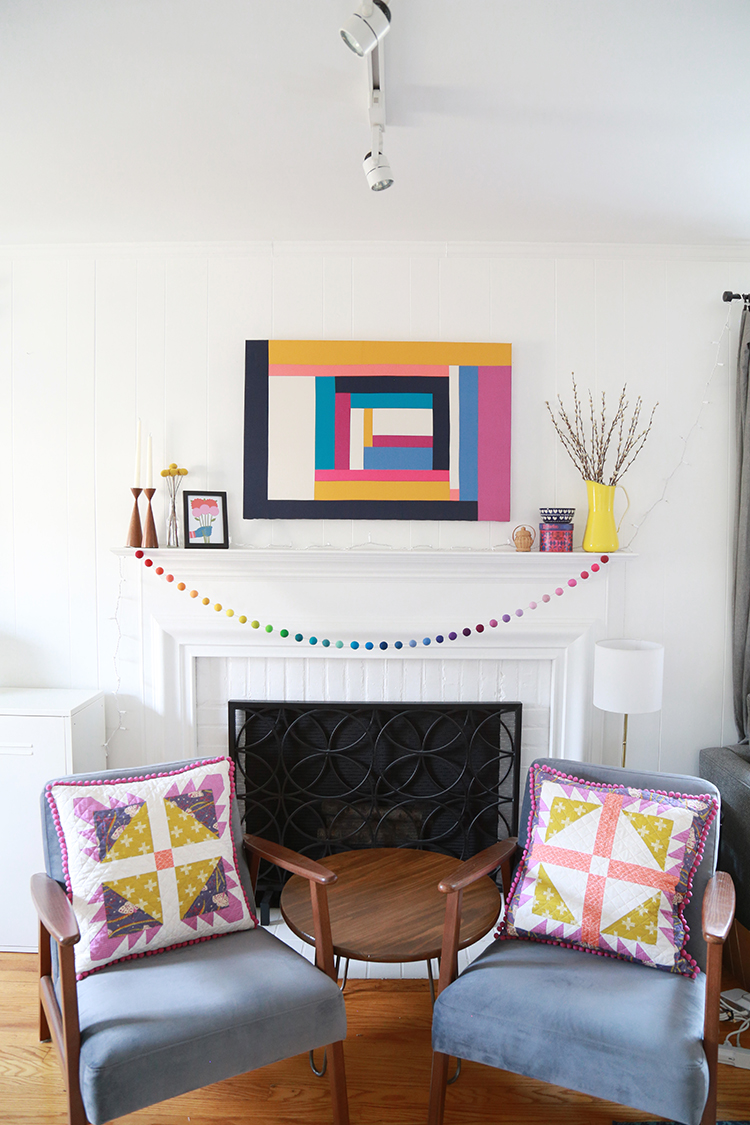
Happy Wednesday! Today I want to share a little home decor project I've worked on putting together over the past year, our little music station!

This spot in our living room was once occuppied by George bunny's play area. After he passed I immediately filled this wall with our armchairs and small table just so that it wouldn't be empty. We knew that was a temporary solution until we could decide what to do with the space. We ended up deciding to set up a music station here, centered around our record collection. Pretty much ever since Michael and I started dating (14 years ago, whoa!), we've been collecting vinyl together, and we've never really had a nice place to display it.

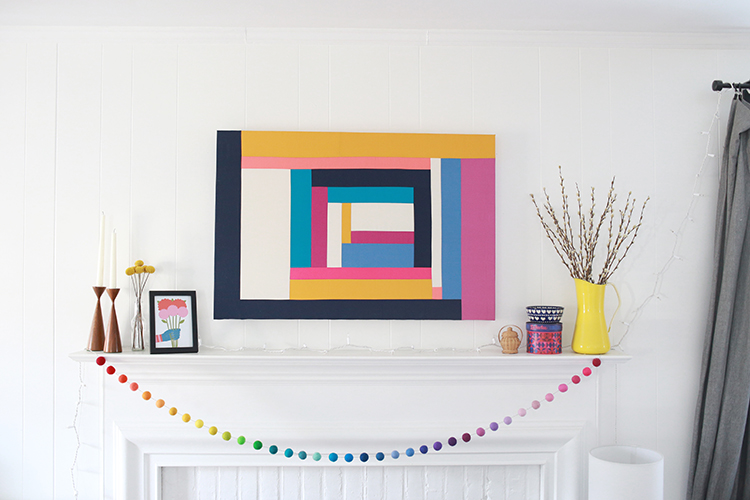
As if we could ever look over to this view without thinking of George, we hung some bunny artwork over the cabinet. The watercolor portrait on the left is by Kayanna Nelson, the center portrait is by Melissa Averinos, and the art print on the right is by Little City Love. We pulled it all together with the garland I had custom made for our wedding by Aidie's Hideaway (they've since closed their shop). Lots of meaningful stuff in this little stretch of wall.

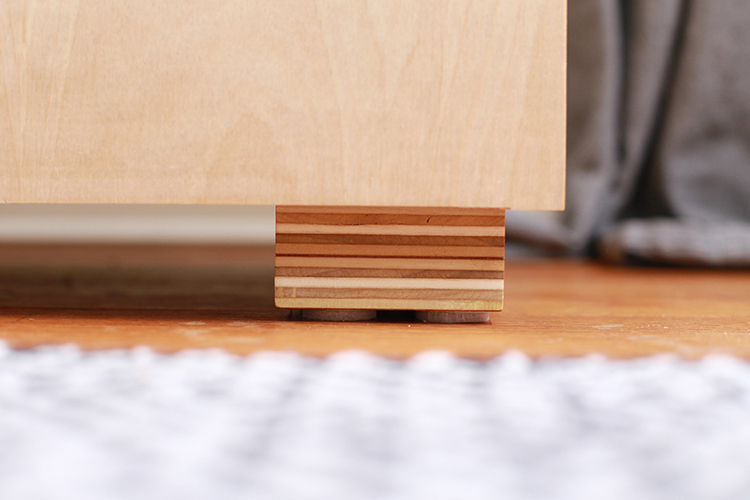
A few quick details on the actual cabinet. I really would like a vintage mid-century cabinet, but while I wait to find the perfect one I decided to put together something that could be repurposed one day. It's actually two Eket cabinets from Ikea (ours are mustard, which they no longer sell it seems), which is great because they can be seperated and used for somewhere else when I find my dream cabinet! The legs from Ikea were perpetually out of stock so I ended up with these legs from Home Depot.


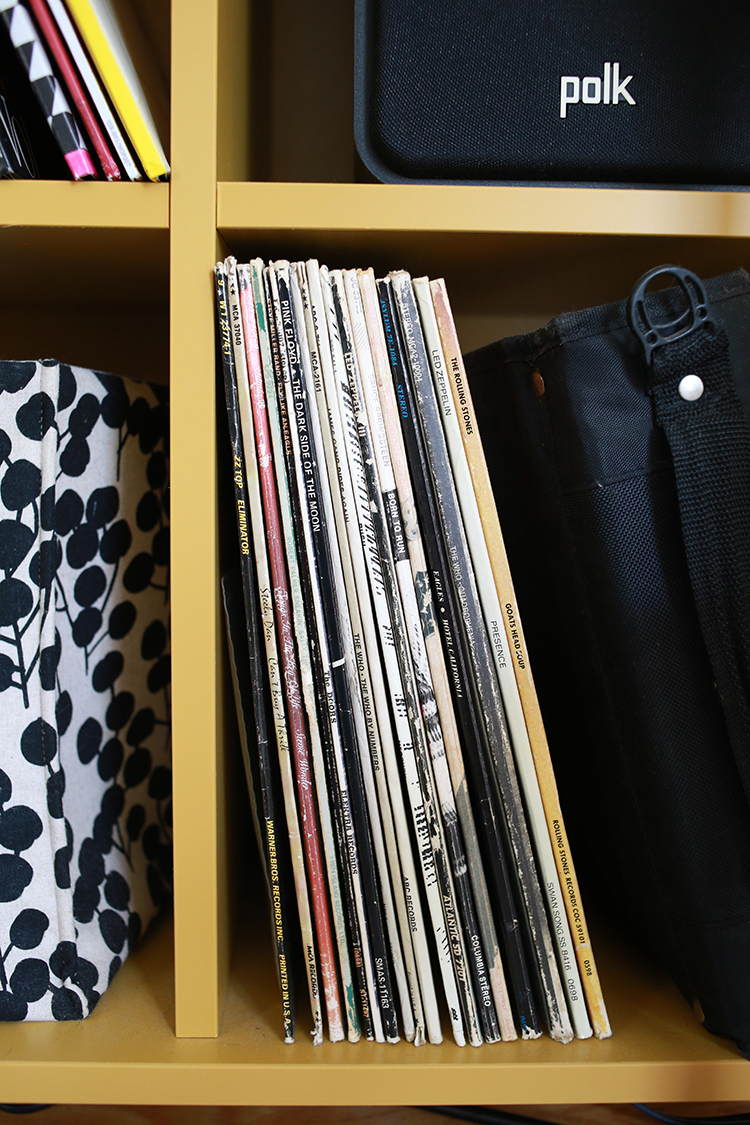
The cabinets are able to hold our entire vinyl collection, CD collection, plus all the electronics. Our receiver, turntable and speakers, plus our $6 thrifted CD player. I still need to manage the cords underneath a bit better, but for now it's been working great for us.


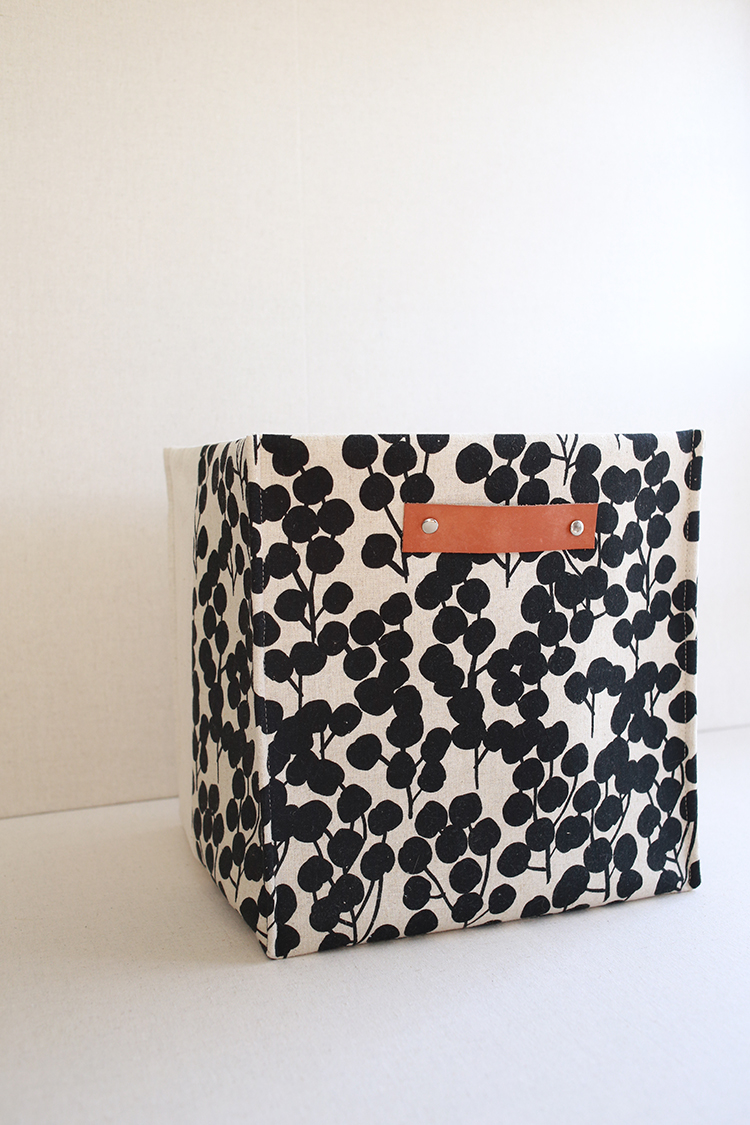
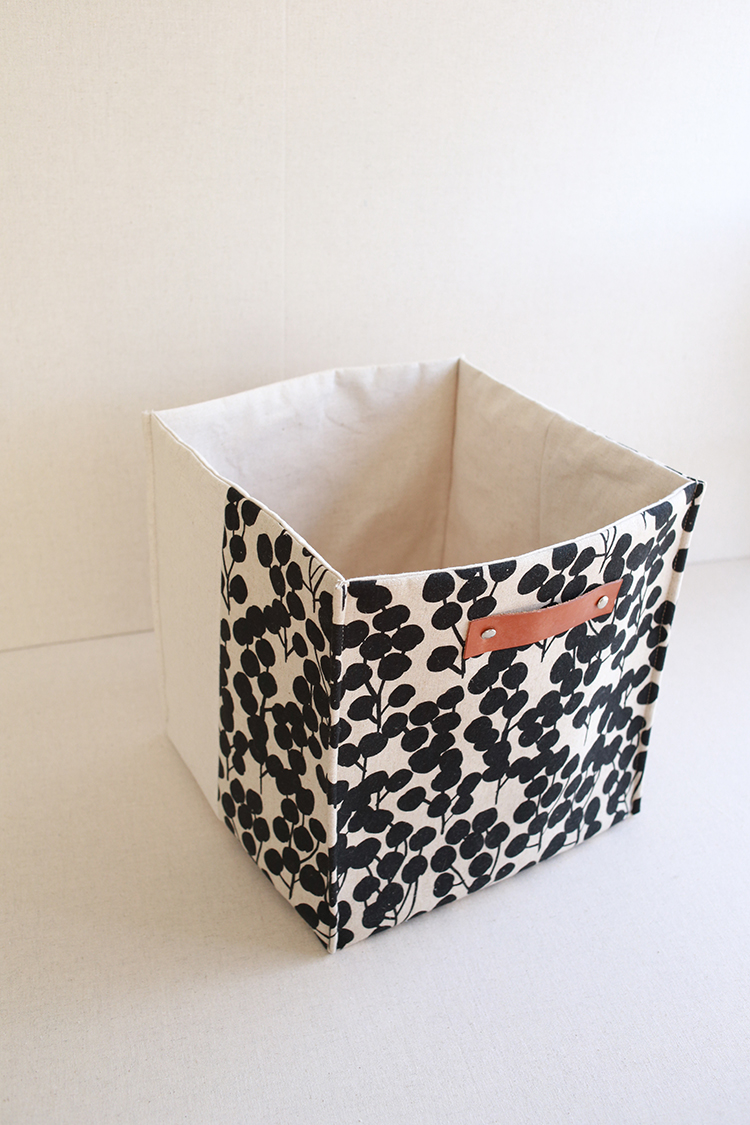
I wasn't too interested in any of the baskets from Ikea that fit this cabinet, so of course I decided to make something! These are super simple, they're basically just square tote bags without handles. They're completely square, approximately 11.5" tall, wide, and deep. They fit nicely inside the cubbies. I did add little leather pulls to the fronts, mostly just for looks. My rivet installation skills could use some work!


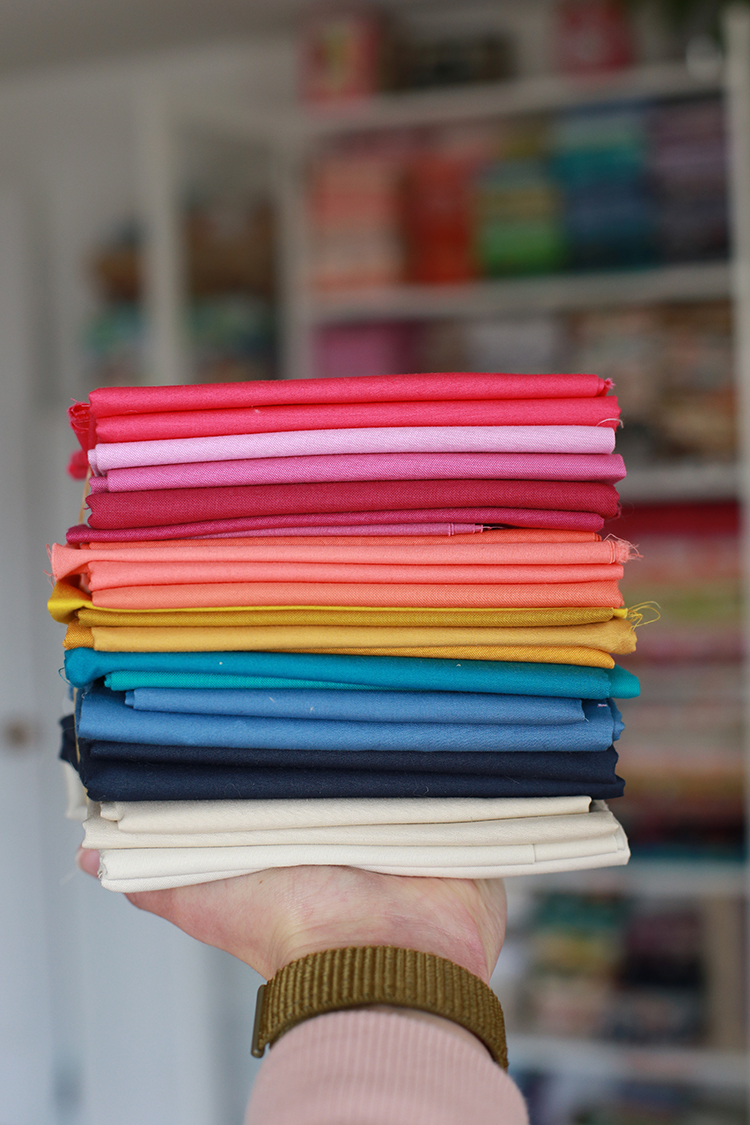
I used some cotton linen yardage that I've had for many years, I beleive it's a Kokka print. I also used some Essex Linen in natural paired with the print. I know I used interfacing, but I can't remember what kind!


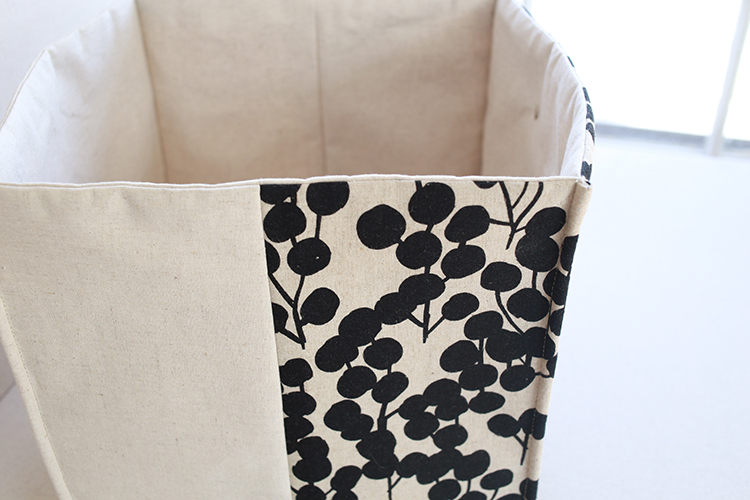
I didn't want to use up all my yardage of this print, so I only used it on the front of the baskets. I wasn't sure if it would work out, but it did! You can't tell that only the front has the print until you pull the basket out. Perfect! So glad I did that.


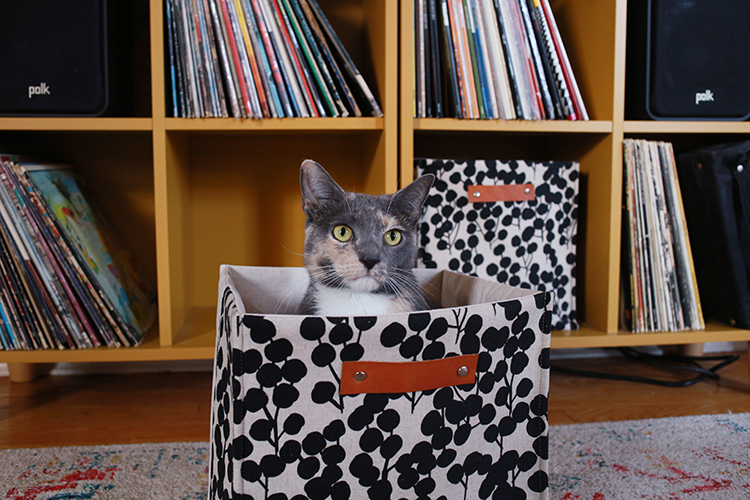
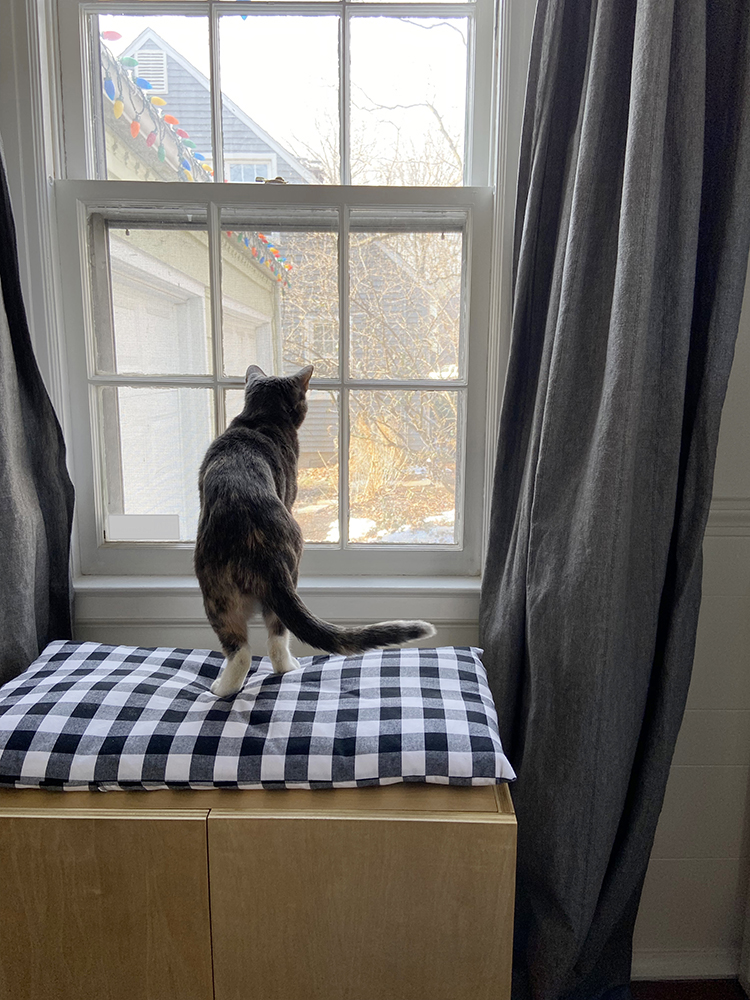
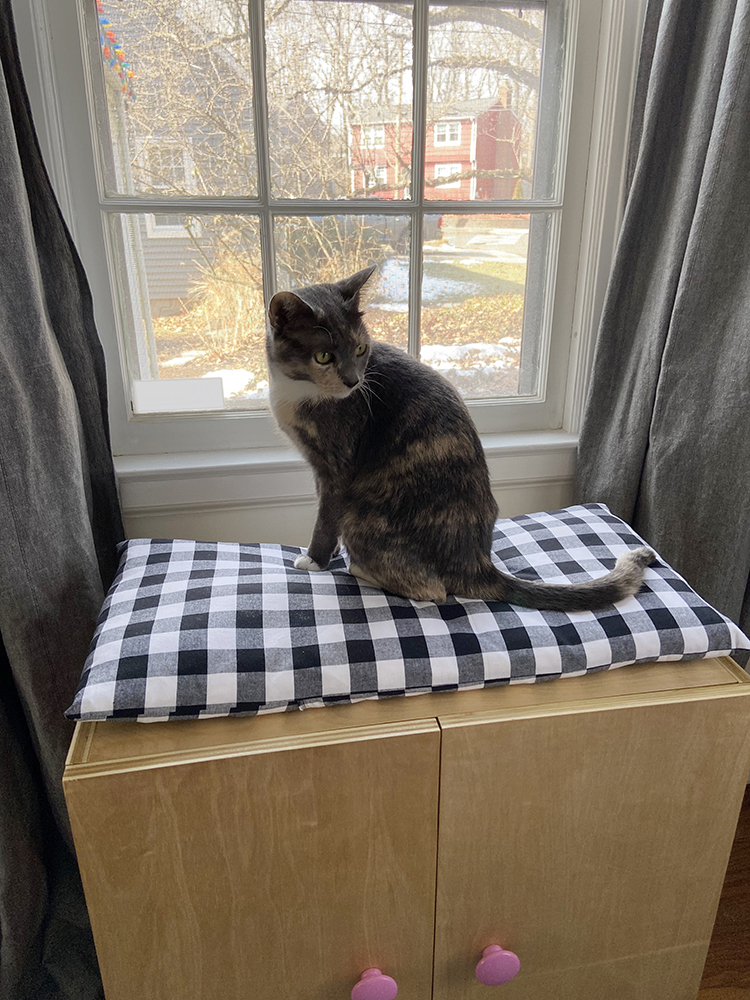
Of course Dusty had to help me take photos. So helpful!


I'm really happy with how this space turned out. I want to make a new runner for the top at some point, but otherwise it's done for now! Unless we're watching TV we pretty much always have music playing in our house, so it feels right to have a dedicated space for music. One note on vinyl records, when we put this space together I decided to catalog our record collection and discovered Discogs. It's like Ravelry but for your music collection. Just wanted to mention it because I've really loved it, in case anyone is interested.

Happy Sewing!

DIY Abstract Fabric Artwork

Wednesday, March 16, 2022

styled-horiz
Happy Wednesday! Today I have a piece of fabric artwork to share. This project has been on my to-do list for years at this point, pretty much ever since I finished my first piece of fabric art back in 2019. It was also on my crafty goals list for 2022, so I'm really happy to check this project off the list!

For more on my first piece of fabric art see this post: Improv Pieced Wall Art

floating
A bit of backstory first. I have wanted a large piece of artwork to go over our mantle pretty much ever since we moved in. I knew I didnt want a mirror there, but I couldn't decide on any artwork to put there. It needed to be big, so I knew it would be expensive (as it should!). I thought about doing a large framed photo or print, but again just couldn't make up my mind on what! Fast forward to making my own pieced artwork in 2019. It turned out better than I expected it to, except that I made it too big! It just didn't look right over the mantle, so I ended up putting it in our dining room, and I love it there.

fabric-stack
I meant to go ahead and make a new piece right away, but I didn't. Finally last week I decided to at least pull some colors for it. After pulling the fabrics, I just ended up starting! One thing led to another and a put together the entire piece and hung it all in one day!

close-up
close-up 2 I went with much more saturated colors this time, and just randomly pieced in a log cabin quilt style. The colors I pulled from the two rugs we have in this main living space. I thought about ordering some other solid colors, but I'm glad I used what I had instead. Feels much more satisfying!

frame This time I remembered to take a photo of the frame before I added fabric! I used mitered corners this time, which is so convienient for the math. The side and top pieces are the same size as the finished frame. My frame is 24" tall x 36" wide. I put the whole thing together with 1x2 lumber, wood glue, and brad nails. I got lucky and it was a beautifully sunny day when I was making this, so I put the frame together on our deck. I'm so happy the weather is improving.

Edited to add: If you don't want to make a completely DIY frame, you could buy canvas stretcher bar kits like these*, which assemble without power tools.

seams
When it came time to attach the pieced quilt top to the frame, I first cut a piece of white Kona cotton* the same size as the quilt top. I used this as a backing so that the frame won't show through to the front. Not sure this is 100% necessary, but it's an easy step so it feels worth the extra work to me. I stapled the fabric to the back of the frame using my new cordless stapler* and then cut away the excess fabric.

scraps I'm really happy with how it turned out! I'd like to try making some smaller pieces at some point. It's such a fun way to use up fabric scraps, and make something totally unique. I love how cheap it is for making large pieces too. Is it weird that I kind of want to make some seasonal pieces to rotate in and out of this spot?

styled-vert
Here is a look at the whole fireplace area! The pillows are from my Bear Paw Pillows Pattern. The garland is by Erika Bea. The print is was a postcard by Lisa Congdon.

Happy Sewing!

*Note: Any links marked with an asterisk in this post are affiliate links. This means if you click through and buy something, I make a small commission, at no extra cost to you.

DIY Hidden Litter Box Cabinet

Wednesday, March 2, 2022

dusty-looking
Happy Wednesday! Today I have my most recent woodworking project to share! This was a big project for me, despite it's small size, and I'm so excited about how it turned out.

front
I built a hidden litter box cabinet for Miss Dusty Kitty! Since our basement is unfinished (ie: too many things for her to get into), I knew we'd need to keep her box upstairs. In an effort to keep it more contained and hidden, I decided to build a cabinet for it! My goals for this project were for it to be functional, cute, and to primarily use materials I already had on hand. I'm happy to say I think I acheived all three of those goals!

I kept the design really simple, just a straightforward rectangular cabinet. I had most of a 3/4" sheet of plywood in the garage leftover from making our open kitchen shelves a few years ago. I based the size around what I could cut from that plywood, the size of her litter box and the height that our windows are off the ground. I wanted the cabinet to double as a lookout spot for her! To build the cabinet I used pocket hold construction. I use a Kreg pocket hole jig*.

entry-door
How cute is the little door for her? I probably could have made it a little smaller, but I wanted to be sure she would go in and out! I originally wanted to do a fun shape like an arch or house shaped openeing, but ended up deciding to keep it simple. I'm not the most proficient with a jig saw, so a reactangular opening felt like the way to go.

inside
Her litter box fits inside with room to spare. I added a mat and also a motion sensor light. Can you sense how spoiled she is already?? I actually had a small piece of 1/4" plywood on hand that I could use for the back. I don't even remember why I bought it in the first place!

knobs
One of the few things I bought for this project were these knobs. I knew I wanted something oversized and these 1 13/16" wooden knobs were just the thing. I painted them this fun purple/pink for a pop of color. It was actually leftover craft paint from Target. I added a couple of layers of Shellac to them when I shellacked the rest of the cabinet.

cushion
The cushion is the one element that will probably be changed at some point. I had some recycled denim insulation that we received as packing material in a delivery meal kit a few years ago. I saved it and used it along with some batting scraps to make a cushion. I used some carolina gingham* I had in my stash. I made a quick unlined envelope closure cover for it and attached it to the cabinet with some velcro. It is a bit lumpy and undersized. For now, it's fine. I'm hoping to make something more substantial later.

hinges
This project was my first time building a cabinet, and my first time installing hinges! I thought I might be biting off more than I could chew by using full overlay hinges, but they were actually really easy to install.

feet
In the spirit of using what I had, I ended up making some simple feet with stacked scraps of plywood. I really wanted some bun feet, but between the feet and the mounting plates, it was going to be more than I wanted to spend. These homemade feet were free! You barely see them anyways, so it felt like a good place to save.

dusty-sitting
I learned SO much making this project. Every time I build something from wood I feel like I learn a ton. It's still a pretty new medium for me, so that makes sense! This project really boosted my confidence and makes me want to tackle bigger projects. Already dreaming of the next one!

A project like this really scratches the making itch for me. It is a useful project that is customized to my specific needs and wants. It also allowed me to learn new skills and get more practice at woodworking. I'm really happy I made this, and Dusty likes it! She knew exactly how to get inside the cabinet, and she loves to sit on top of it. She has a great view of the driveway, which will be teaming with activity from our driveway garden later this Spring!

Finished Size: 25" tall x 25" wide x 14" deep. Kitty door is 9" tall x 8" wide.
Fabrics:
Carolina gingham.*
Hardware: 1 13/16" wooden knobs, full overlay hinges.

Happy Making!

*Note: Any links marked with an asterisk in this post are affiliate links. This means if you click through and buy something, I make a small commission, at no extra cost to you.

February Monthly Report

Thursday, March 5, 2020


Happy March! It's time for February's monthly report. See past reports here.


February was a bit of a strange month over here! I came down with a cold around Valentine's Day that really wore me out. The tail end of it turned into an ear infection, which was not super fun. So, I didn't do much sewing this month. I did bring my singer featherweight downstairs so I could sew in the sunny library while Michael worked on his computer. I think I may keep it downstairs, it's nice to be able to sew on the main level sometimes.


I started a new workshop tote with linen and canvas scraps! This was going to be my scrap project for February but I only got as far as trimming all the half-square triangles. It's at the top of my to do list for March.


I also pulled out my indigo stash and made four blocks for a new courthouse steps quilt. I like how it's coming together so far!


To keep myself accountable for my stash goals, I track my yardage for fabric and yarn each month. Read more about how I track here. Here is how I did in February:

February Fabric
Used up: 0 yards
Brought in: 11 yards
Net: +11 yards
Year to date: +10 yards

February Yarn
Used up: 0 yards
Brought in: 0 yards
Net: 0 yards
Year to date: 0 yards

Yikes! I did not finish any projects this month. The only other month that I've finished nothing since I started tracking was when we moved to CT two years ago. I also had my first big fabric splurge in a long time. I picked up some old favorites, including a backing. At first I felt guilty, but I honestly feel okay about it. I've been so good about limiting purchases the last six months, I was due a little fabric shopping! Plus it was on leap day, so does it even really count? :)


This past weekend I traveled to Houston to visit with my friends Jacey and Amanda. It was so nice to spend time with them (and Jacey's husband too). We usually only see each other once a year, so this was a treat. Plus the weather was incredible!


We got up to all kinds of fun stuff, including some t-shirt dyeing. I have been trying to achieve purple ice dye for a long time and I finally succeeded!


A non-sewing project I worked on recently was a little phase two update to our little pantry. It's at the top of the basement stairs, so we need to make every nook and cranny work for us. First, I added a set of these shoe storage cabinets (trones from Ikea). They're lightweight and nice for storing snacks, noodles, crackers, etc. I cut and finished a piece of plywood for the top to dress it up a little. We now have a chalkboard hanging above it instead of the mini quilt.

I also made a peg shelf for this tall awkward spot at the top of the stairs. It was totally unused space before and it's great for holding cleaning supplies. I roughly followed this tutorial to make the shelf. I customized the dimensions to fit my space and needs. The grocery bag holder is a tutorial here on my blog, find it here: Quilted Grocery Bag Holder Tutorial


George bunny! He is munching away as I type this, he has been doing well.

Have a Great Month!

Improv Pieced Wall Art

Friday, October 11, 2019


Happy Wednesday! Today I have a different type of quilt project to share, wall art!


This project took a long time to come about. I picked up these blocks and coordinating scraps off of a sharing table at Camp Stitchalot hosted by Pink Castle Fabrics in Pleasant Lake, MI either in 2012 or 2013. I can't remember which. I also don't know who made them! (if it was you, please let me know!) They sat in my stash for many years until this past Summer when I decided I needed a big piece of artwork for above our mantel. I knew I wanted to make something, so I came around to the idea of stretching some patchwork over a frame. If you're looking for some inspiration, I recommend checking out the work of Heather Jones.

I couldn't find a frame the dimensions I wanted, so I made it with some lumber I already had on hand. I made mine similar to this tutorial. My frame finished at 48" wide and 34" tall.


The piece ended up being a little too big for our mantel, but worked perfectly in our dining room. Unfortunately I took absolutely no process photos of making this. I made the decision to use these blocks and made the entire top in one afternoon, so it was pretty spontaneous. I made two blocks from the matching scraps and used various off white scraps and yardage from my stash to sash the blocks and border the patchwork.


When it came time to stretching it over the frame, I decided to add a layer of plain kona white underneath, to make it more opaque. I didn't want the frame to show through. Then I slowly stretched it over the frame and secured the pieces with staples. There is a lot of room for improvement if I made another piece like this, but it was really fun! I am thinking I would like a smaller piece for over the mantel eventually, just need to decide on a design and colors. I do think it suits more organic lines and shapes since the seams do get somewhat warped when stretched. So something scrappy and improvisational would be great.


Here is a video showing the back and more on how I put it together.


This was a super satisfying project, and I already had everything on hand to make it. This big piece of artwork cost $0 extra dollars to make, which is pretty darn cool. Plus I was finally able to use up these fun blocks. I hope that the person who made them likes what they became! I'm just glad they aren't sitting in my drawer anymore and I can enjoy them everyday!

2019 Sewing Room Tour

Thursday, February 7, 2019


Happy Thursday! I thought today it would be fun to do a little sewing room tour! I've shown photos here and there of my space, but now that we've been in our home for a year, I figured it was time to give a proper tour of my workspace. Fair warning, this is a photo heavy post!

I'm very lucky to have an entire room in our house to dedicate to my sewing. It's in an extra bedroom on the second floor, and it gets lots of morning sun. Plus there is access to the walk-up attic from this room which is convenient for storage.


I was so happy when I realized I could squeeze both of my tables along the wall where the ceiling slopes. I remember tearing pictures of an attic craft room out of a copy of Martha Stewart Living many, many years ago that had a similar set-up. I thought it was so lovely and cozy, and it is! The tables were given to me by my Dad, who bought them out of an old schoolhouse that was closing.

I've got a cutting mat on each table, and plenty of space to spread out. My sewing machine is on the end of the room with the two windows, which is great.

Note: I sew on a Janome 1600P, see my review of this machine here.


My serger is set up on the other table! I also have room to pull out my older Janome machine if I need to sew buttonholes or use any special stitches.

Note: My serger is a Juki MO654DE.


My quilting cotton fabric stash is housed in a Billy bookcase (with glass doors) from ikea. I wanted the doors to help keep the fabrics protected from sun damage. Thankfully it doesn't get any direct sun!


Next to that is a metal cabinet (vintage) that houses most of my garment fabrics and larger cuts of canvas, linen, etc.


My scraps could be a little more organized, but I keep them somewhat tidy in this red vintage metal chest of drawers.


Sensing a theme? I love vintage metal! This old metal breadbox holds my liberty of london stash!


Opposite my sewing tables is this big cubby unit. It's the largest Expedit from ikea, which has now been replaced by the Kallax line. This was quite a challenge to take apart and move, but it survived! It holds my vintage sheet stash, some collections, notions, hardware, patterns, interfacing, works in progress, and more.


How about a little peek at the top cubbies? First up, some of my vintage sewing machines!


Next, a few vintage tins, including a sewing machine accessories tin and my Droste cocoa tins!


My Hello Kitty Janome sewing machine, and some of my pincushion stash! I have a small wall shelf for my pincushions, but I haven't figured out where best to hang it yet!


This shelving unit holds a lot, in part thanks to my very favorite storage containers! These are 15 quart Sterilite ClearView Latch Bins from Target. I bought my first one a couple years ago because of the purple handles, but quickly realized how great they were. Two stacked can fit perfectly in the cubbies. The internal dimensions of the Expedit vs. Kallax units are the same, so you should be able to use these in Kallax units in the same way. I use them downstairs to store my paper pattern inventory too, it would be scary to count how many I own!


A few months ago I made this thread shelf to store all my thread and bobbins. It hangs next to my sewing machine for easy access. I shared a tutorial for how I made it here: DIY Thread Storage Shelf.


I hung up a set of two shelves on the wall behind my sewing machine to keep tools handy, but off the table. It's also a great place to put a few cute things!


One of my favorite things I've found thrifting here in CT is this vintage pink lamp. It wasn't in super great shape when I found it, and it was only $2! After a little TLC it's working great!


Another DIY project I tackled for my sewing room was a pegboard! I've wanted one of these for a long time, but didn't really have room (or the tools) in my last space. I used this tutorial to make mine. It's so useful!


I haven't hung much up on the walls yet, but I did hang up my pin banners! Find my tutorial to make these here: Enamel Pin Banner Tutorial.


Right behind my sewing machine is my ironing station. I recently installed a metal curtain line (also from Ikea, can you tell we live 20 minutes from one?) on this wall to hang quilts, quilt tops, or a piece of batting as a makeshift design wall.


And last but not least, one last DIY, a rug! The middle of the room is all open, so it's nice to have a rug there most of the time. It's a big room, which means I needed a big rug. With all the stray threads and messy crafts happening in here though, I didn't want to spend a lot on a rug. So, I decided to make one by stitching together some cheap runners from Ikea! The bonus is that it's not super heavy, so I can easily roll it up and out of the way when I want to baste a quilt. Find my simple DIY for this here: Sewing Room Scrap Rug Tutorial.


I hope you've enjoyed this tour around my sewing space!

Happy Sewing!