August Monthly Report

Wednesday, August 31, 2022


It's time for the August monthly report! See past reports here.


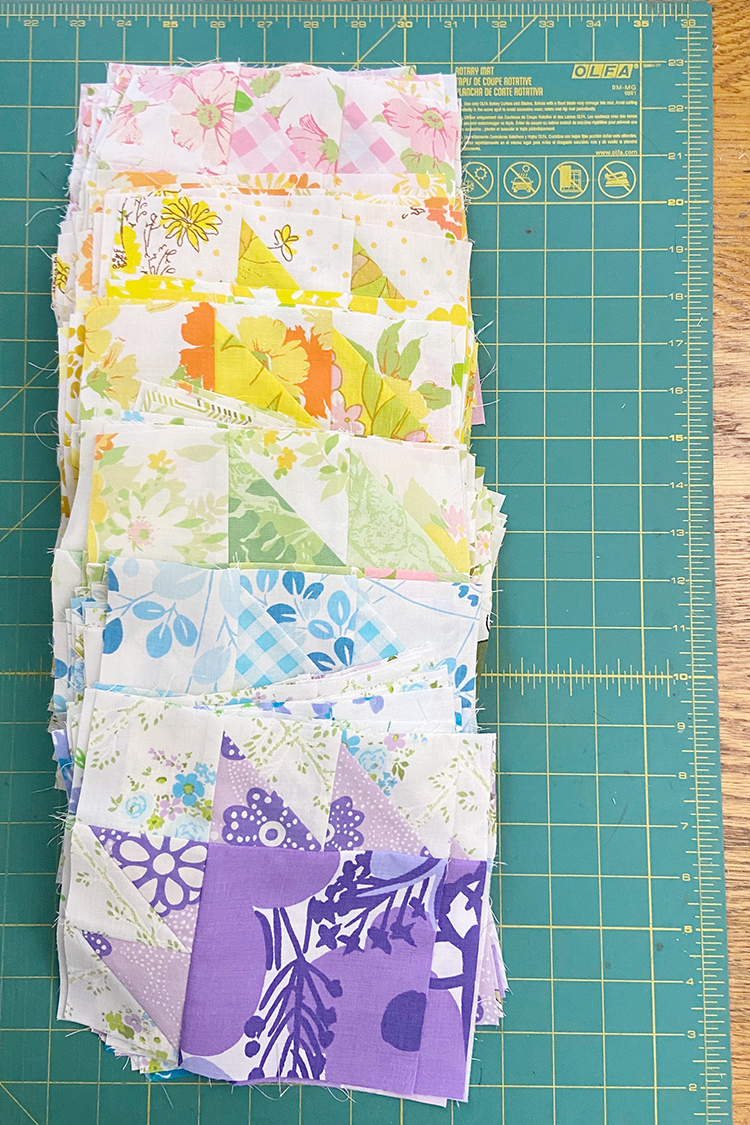
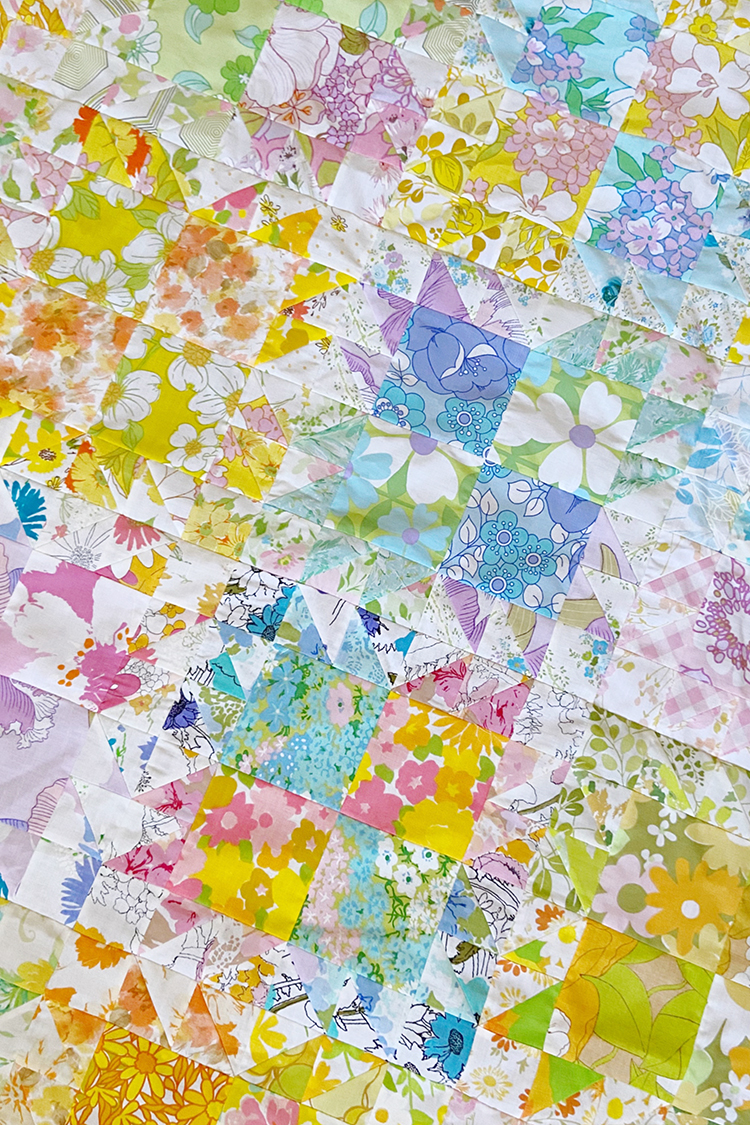
I did quite a bit of sewing in August, mostly on my vintage sheet bear paw quilt! I finished the top, hooray! And I've got enough block parts to make a baby quilt too. I still need to put those blocks together into a quilt top, but at least the main top is done. Now I just need to choose a backing sheet for it. Which is tough because I have so many that would be good for it! A good problem to have, for sure. I made a little video of Instagram where I show all thirty blocks one at a time. You can find it here: Bear Paw Blocks Video


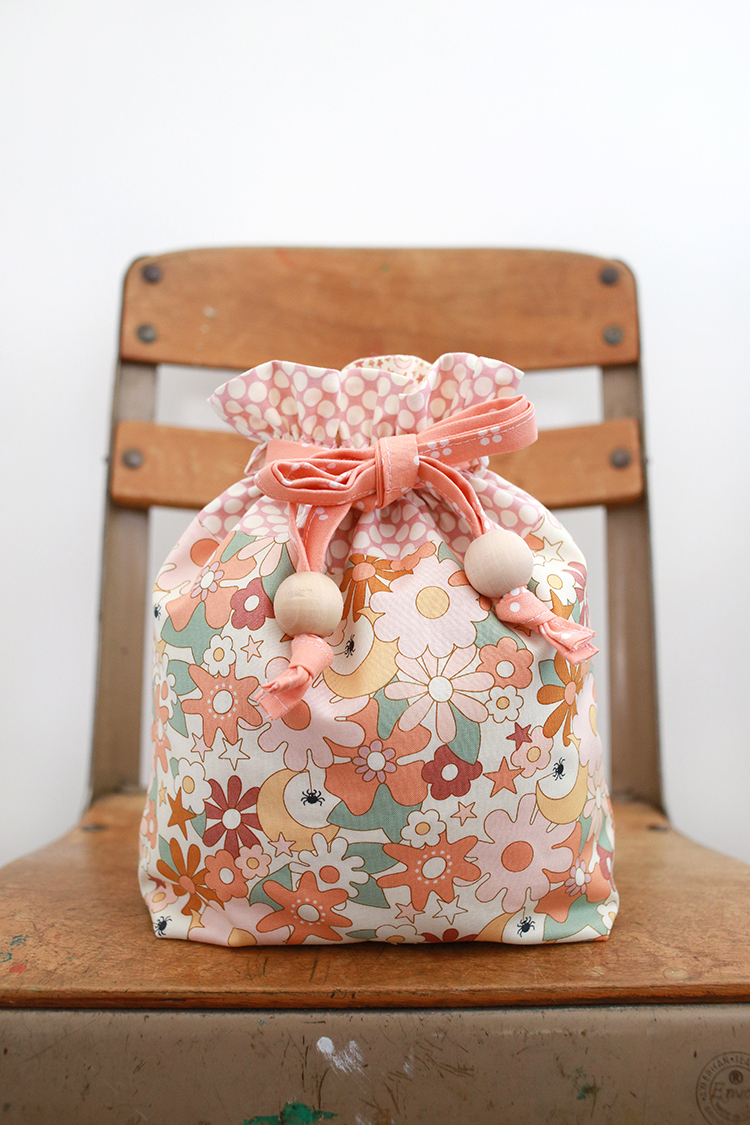
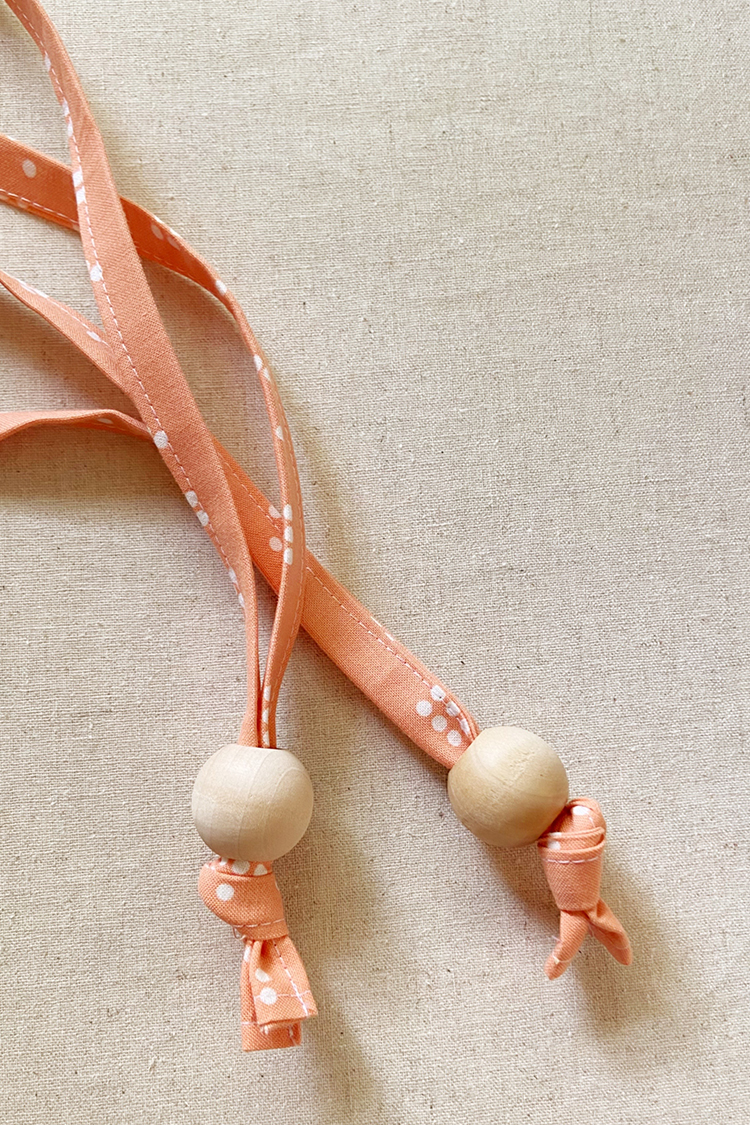
I stitched up a drawstring bag for the first time in what feels like a while! I wanted to make something Fall/Halloween inspired and I had these adorable Kitty Corn* fabrics that I picked up last year. I love how soft the colors are, and the little hidden spiders and moons. I just went with the Everything size. I even made fabric ties, which I rarely do anymore. I am so spoiled by the twill tape! I finished the bag off with some 1" wooden beads. You can find the pattern and beads in my online shop:

Pattern: Lined Drawstring Bag Pattern
Notions: Round Wooden Beads


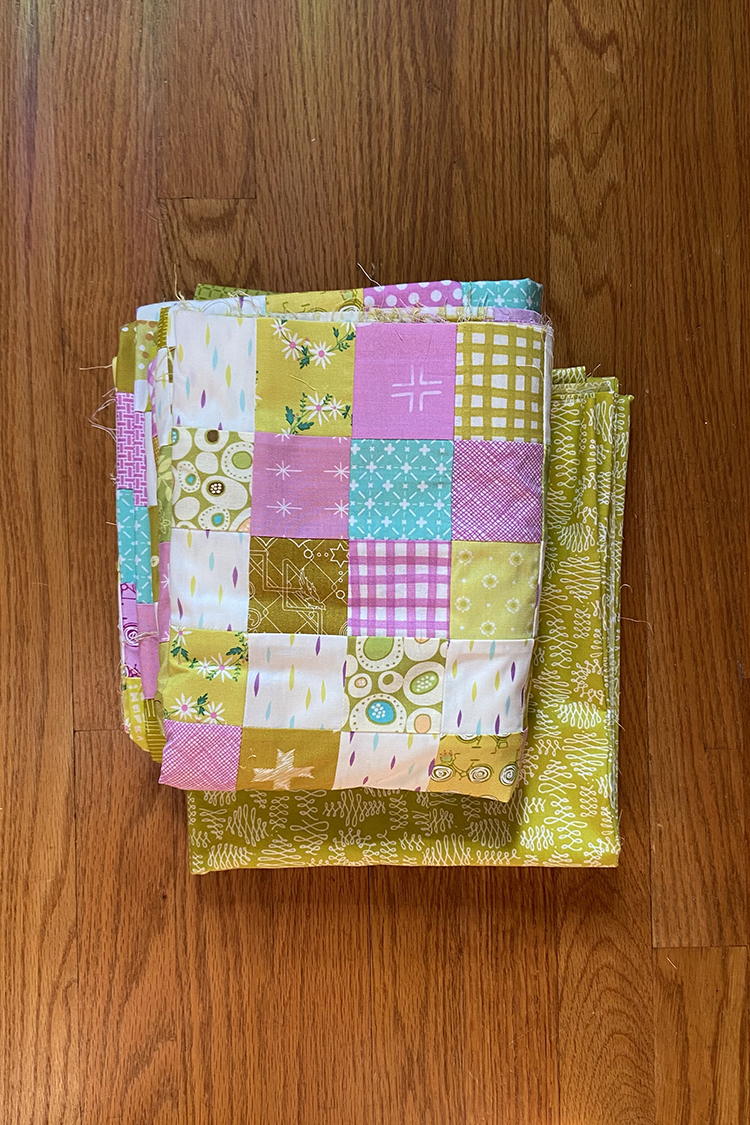
I finally got my all green quilt top (it needs a new name now!), in the mail for longarm quilting! I finished the top a few months ago, but never ironed the row seams or made a backing for it. So I got those things checked off the list! I'm excited to get this quilt done, it's been a work in progress for way too long. See more of this quilt here.


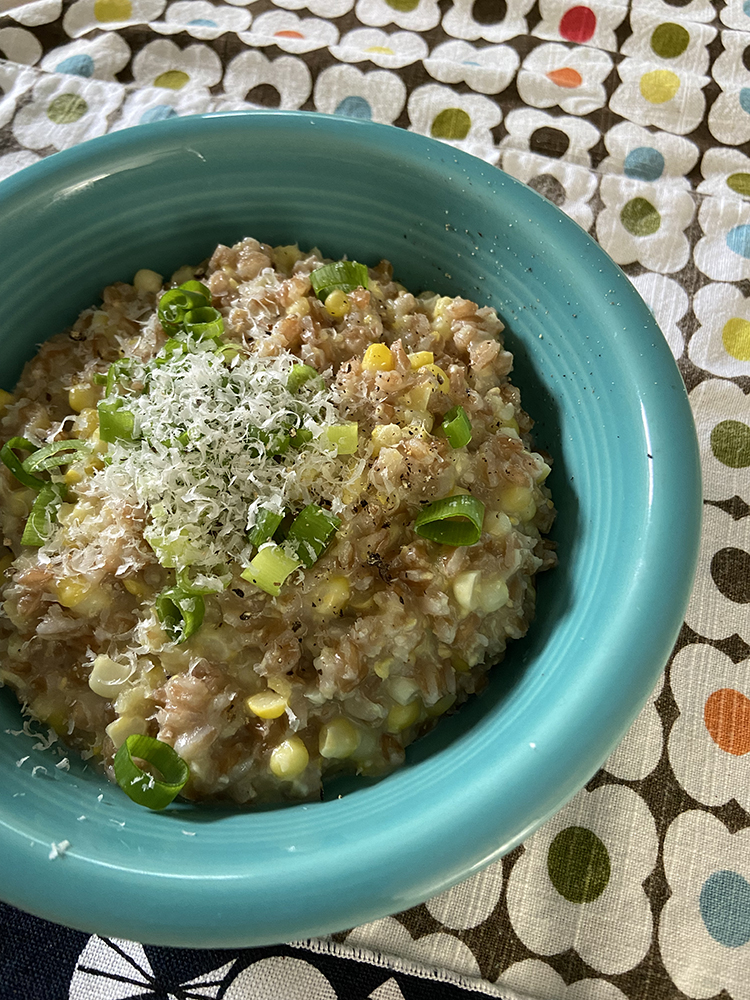
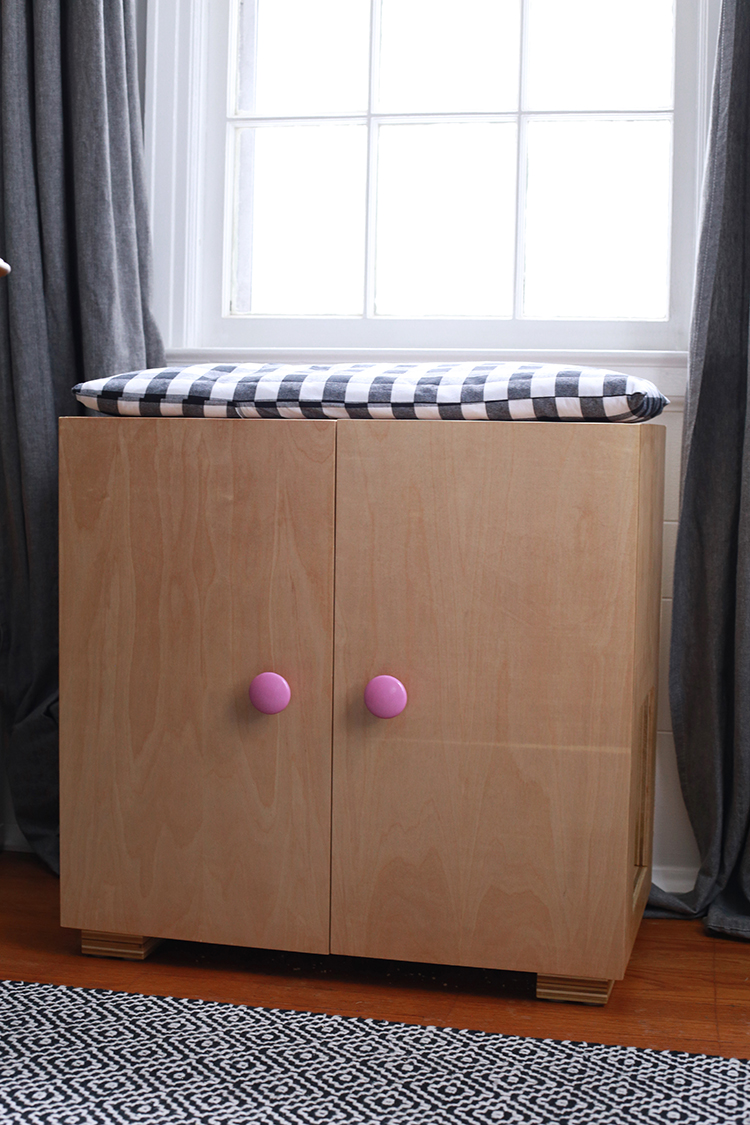
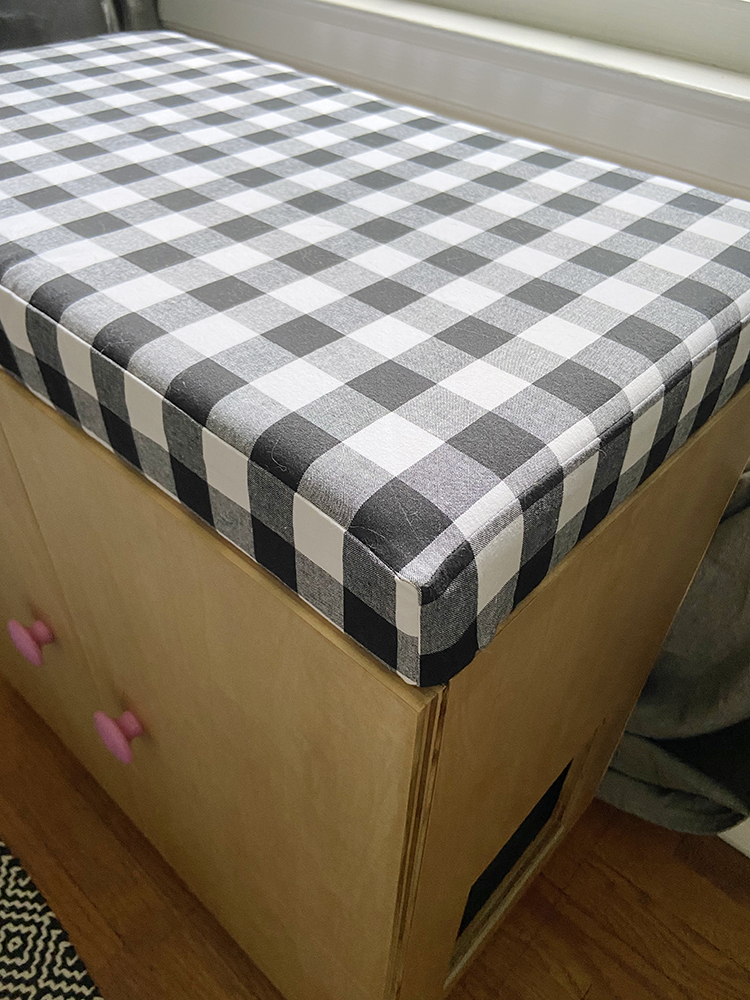
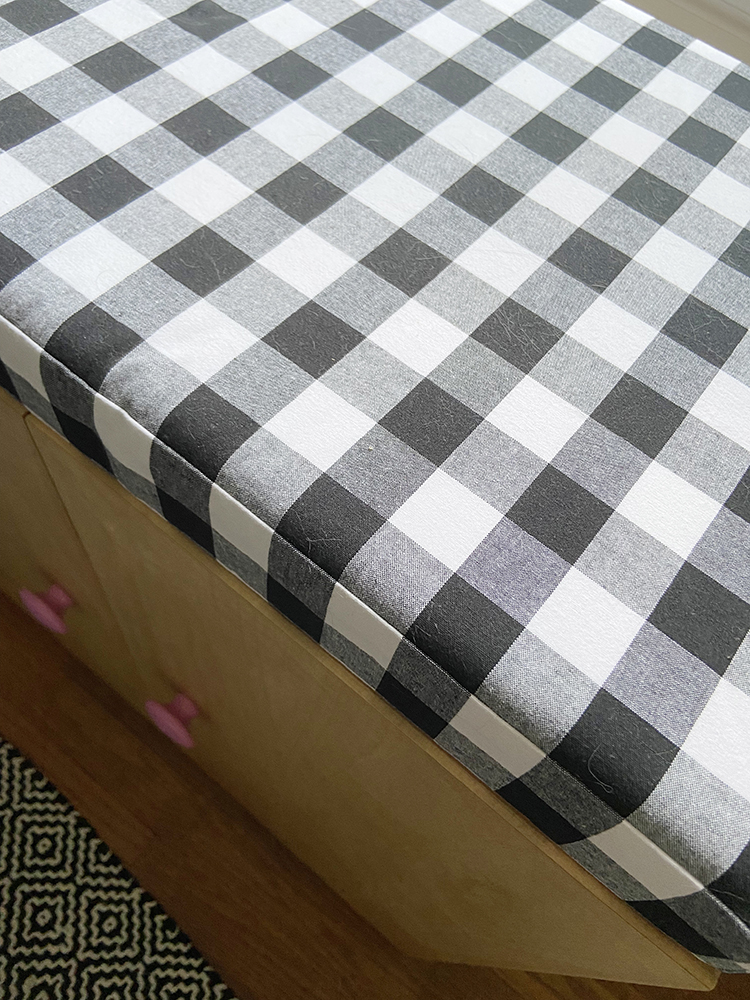
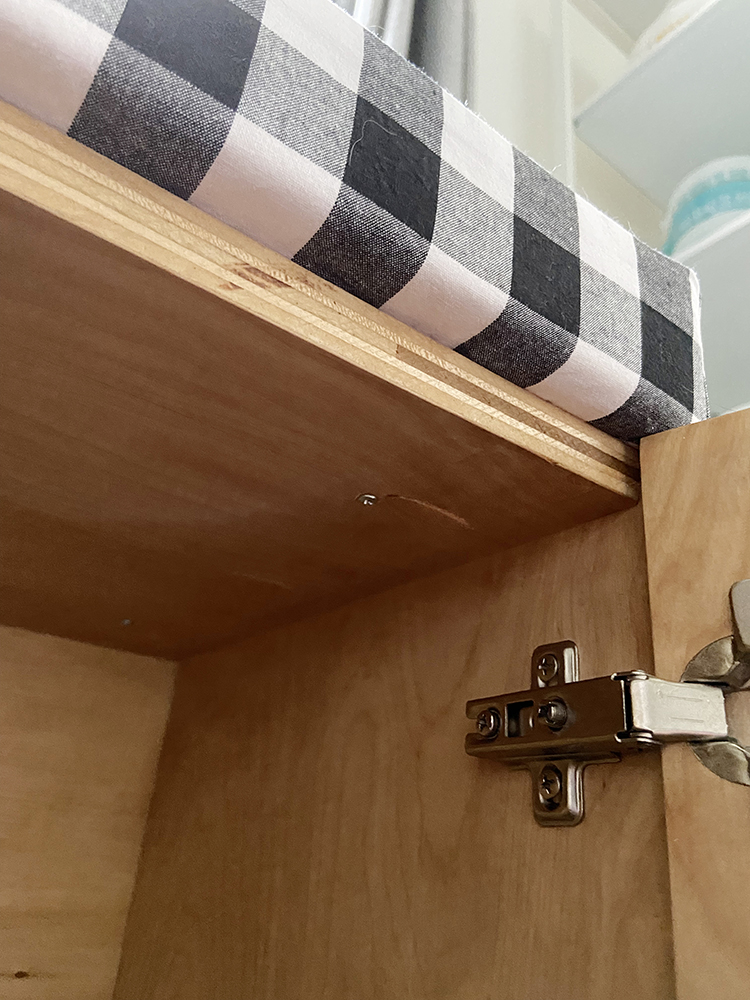
The other sewing I did this month was make a new seat cushion for Dusty's litter box cabinet. I wrote a whole blog post about it, which you can find here: Update to the Hidden Kitty Litter Box Cabinet

To keep myself accountable for my stash goals, I track my yardage for fabric and yarn each month. Read more about how I track here. Here is how I did in August:

August Fabric
Used up: -1.5 yard
Brought in: 0 yards
Net: -1.5 yards
Year to date: -20.75 yards

August Yarn
Used up: 0 yards
Brought in: 0 yards
Net: 0 yards
Year to date: -1000 yards

I'm not exactly crushing my yardage goals lately, but that's okay. I'm still in the negative! At least I used up something this month, that feels good. And I'm not bringing anything in, so that helps too. I need to finish up some quilts so I can really make some progress!


Time to check in my with 2022 crafty goals. This month I:
- Sent my all green quilt (long term WIP) off to be quilted!
- Pieced all the blocks and top for my vintage sheet bear paw quilt (long term WIP).
- Finished the body of one colorwork mitten.


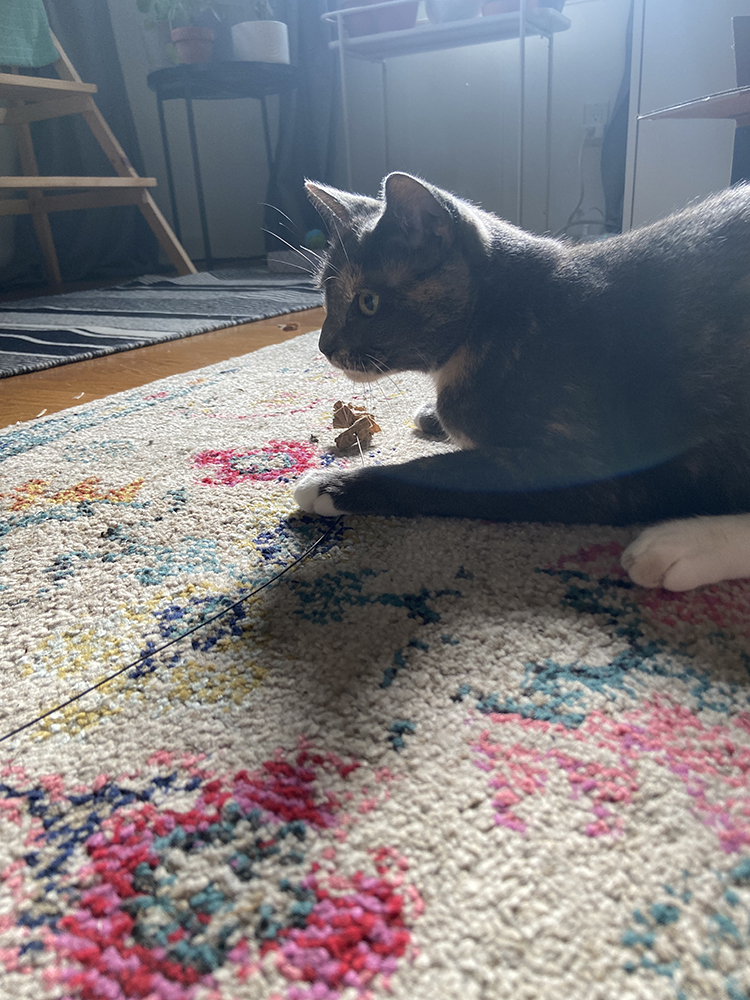
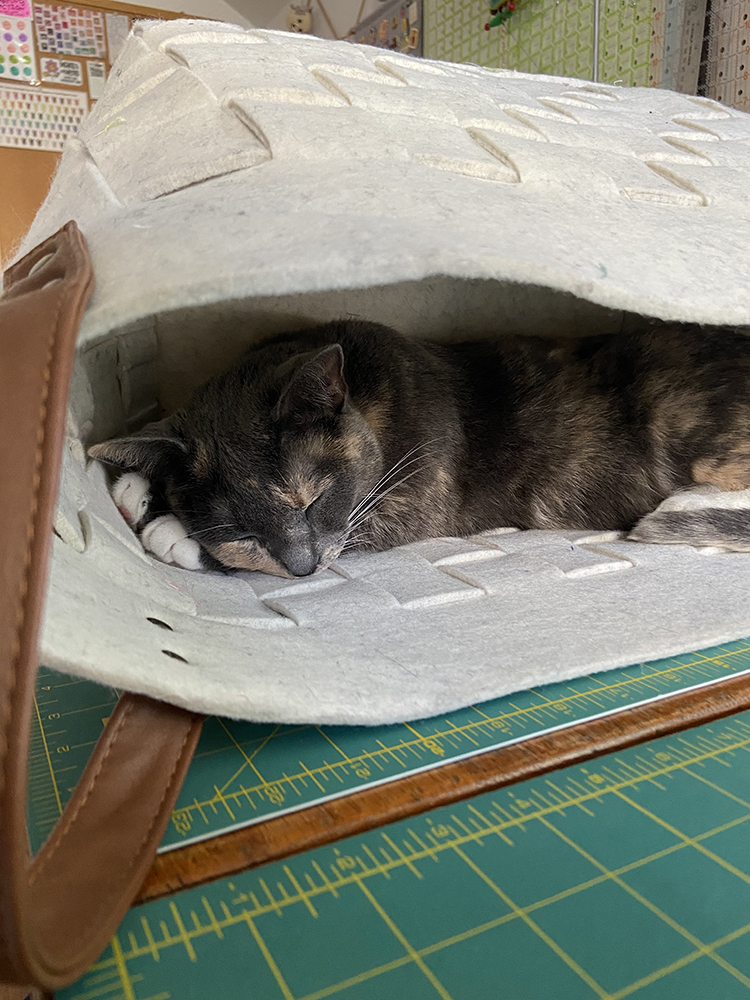
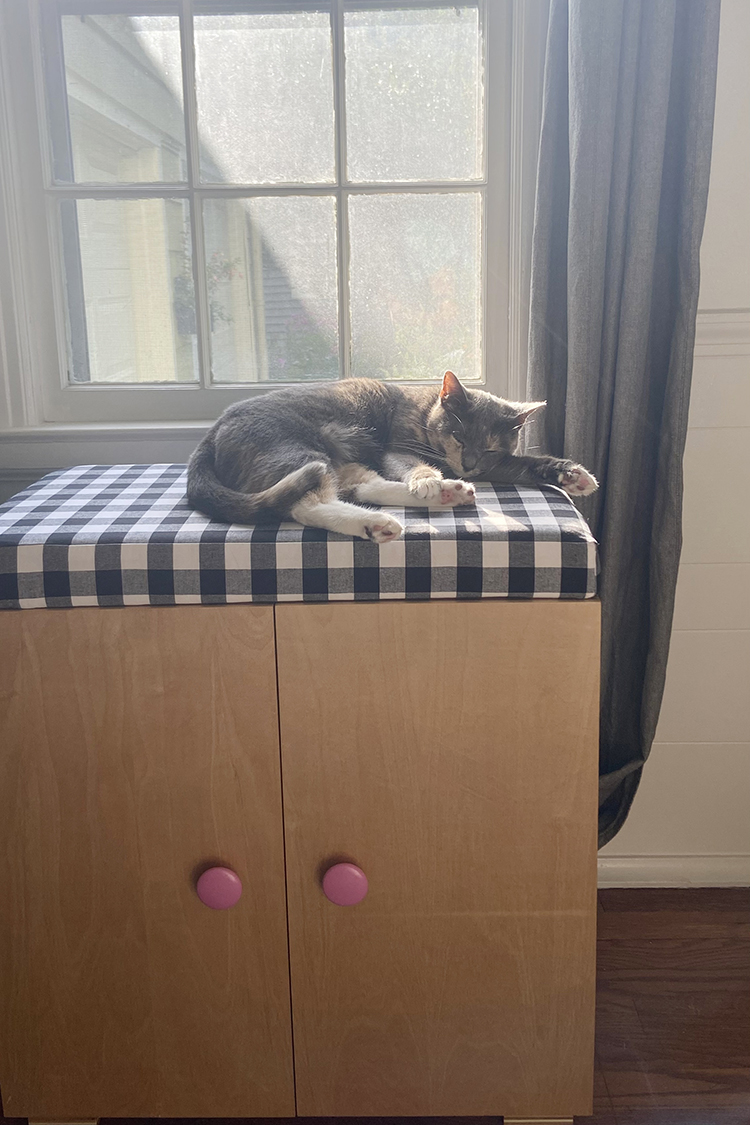
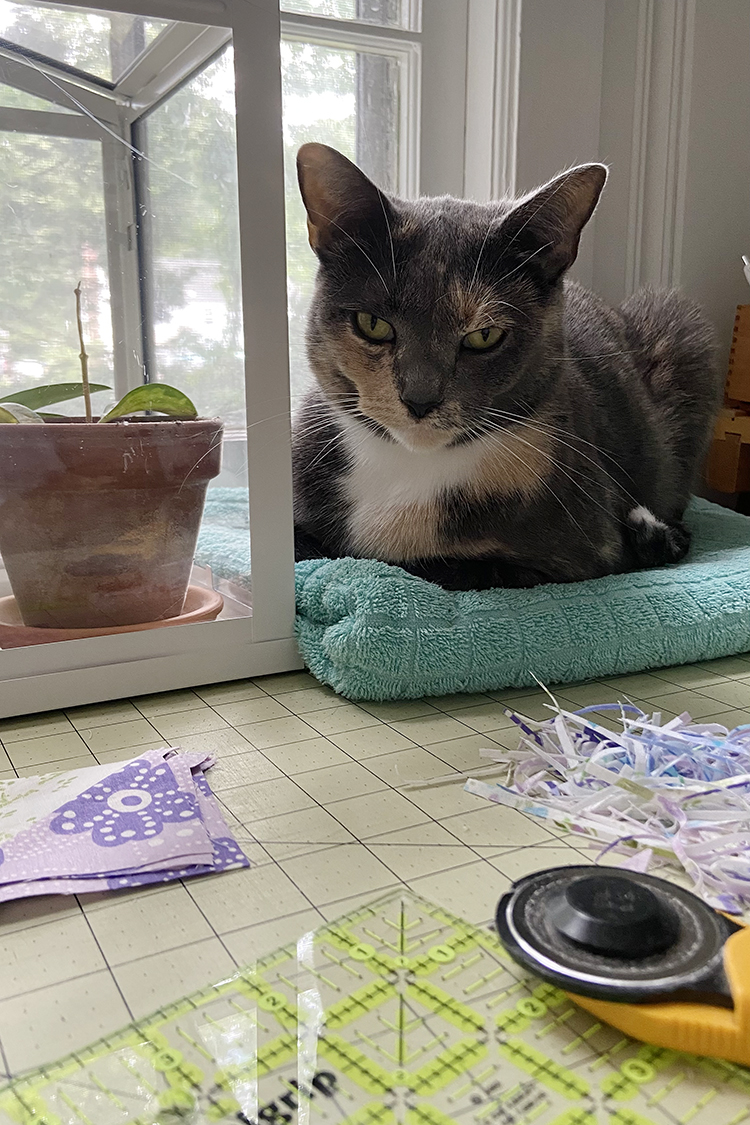
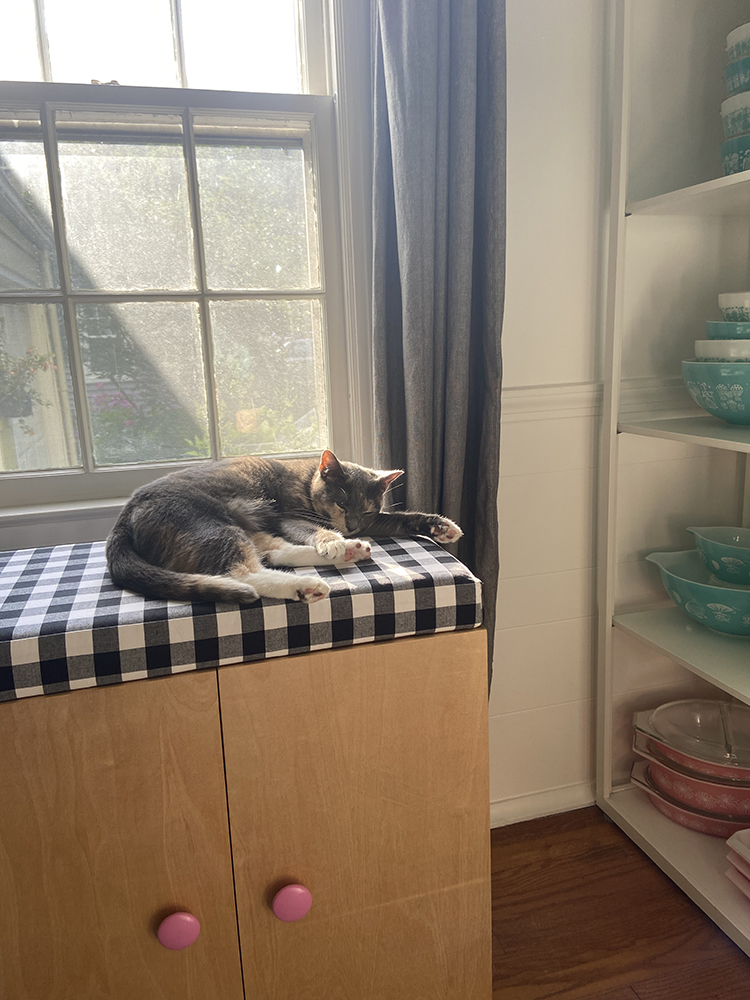
Kitty supervised my work, getting that quilt top out the door! So thoughtful.

Have a Great Month!

*Note: Any links marked with an asterisk in this post are affiliate links. This means if you click through and buy something, I make a small commission, at no extra cost to you.

Friday Favorites 33

Friday, August 26, 2022


Happy Friday! It's time for another Friday Favorites post! Catch up on previous posts here: Friday Favorites Archives

- I've been working on my vintage sheet bear paw quilt all week and I got the top put together on Wednesday! I'm so excited to pick a backing sheet and get it finished.

- Pinterest has been showing me all kinds of vintage sheet projects, and this pink/yellow quilt by Marit really stood out!

- I ordered some new stamps this week for shipping pattern orders. I think these ones are my favorite that I picked up! It's hard to choose though!!

- I love this quilt by Luke Haynes made from repurposed textiles.


- We tried the corn butter farro by Smitten Kitchen and it was a winner! I used a total of 3 Tbs of butter but I think next time I'd reduce that to 2.

- I made spaetzle recently, which I usually don't do during the summer. I really need to upgrade my spaetzle maker to stainless steel, mine has a few rust spots. I have my eye on this one*.

- I tried out the technique in this video to pre-crack the spine of a paperback book, so far I think it is making a difference!

- How cute are these little patchwork pincushions by Tami Gray Voth? I have a bunch of those aluminum molds hanging around, I need to use them for something like this!

- My favorite porcupine Rico eating some corn on the cob!


- A few months ago someone left an anonymous comment (if it was you, thank you!!) recommending this under $2 cat toy*. I Dusty goes absolutely wild for it. Loves it so so much. I tried to get a photo of her playing with it, this is the best I could get!

Have a Great Weekend!

*Note: Any links marked with an asterisk in this post are affiliate links. This means if you click through and buy something, I make a small commission, at no extra cost to you.

New: Indigo Steps Quilt Pattern

Wednesday, August 24, 2022


Happy Wednesday! Today I have another new pattern to share, the Indigo Steps Quilt Pattern!


Earlier this year I released a tutorial for my indigo courthouse steps quilt, but I knew I wanted to eventually release a pattern to include more sizes for the design. Well that day has come! My new pattern has five different size quilts ranging from Baby to an Extra Large Throw! These super sized blocks give the traditional courthouse steps design a modern twist.


This quilt comes together in a flash and would look good in so many different fabric and color combinations! For the cover quilt I've used a single background fabric along with my indigo dyed fat quarters for the prints. Each block uses only 1 fabric, but there are so many possibilities with this design. You could go completely scrappy, or just choose a few colors to feature! I want to make one from my scraps next I think!


As I mentioned there are FIVE quilt sizes to choose from! Here are the included sizes: Baby (36"x36"), Small Throw (54"x72"), Square Throw (72"x72"), Large (72"x90"), Extra Large (90"x108")


This pattern was written for fat quarters, but it can be made from your stash, jelly roll strips or even scraps! There are piece count tables included with each size to make it easier to use what you'd like!


I've had so many ideas for patterns tucked away over the last few years, but I've hesitated from writing them up and releasing them. I tend to overthink my way out of writing them. On the other hand I often get questions about patterns for older designs or designs that have appeared in magazines. It seems silly to keep them to myself when there is interest in the instructions! I'm hoping to release patterns more often for a while to get through my backlog of designs. Next I'm working on writing up a pattern for my Keep On Turning Quilt!


Find the pattern in my online shop here: Indigo Steps Quilt Pattern.

Happy Quilting!

Friday Favorites 32

Friday, August 19, 2022


Happy Friday! It's time for another Friday Favorites post! Catch up on previous posts here: Friday Favorites Archives

- I bought these mason jar inserts* last year but only got around to trying them out this season. They're awesome for making quick and easy bouquets with my dahlias.

- How fun is this wreath of hexi flowers quilt top by Tree House Textiles?

- My latest instagram follow is @aww.sam, which is full of retro eye candy!


- I thrifted this large all white quilt from the Goodwill Outlet this week. I plan to dye it and cut it up to make a quilted coat or two. Just need to decide what color.

- I've been looking for a small egg crate to hold a few hardboiled eggs and I finally ended up ordering this one*.

- We started watching this show over the weekend and are loving it!


- For the longest time I've wanted to try making puppy chow with Crispix, and I did that this week! It's a bit more fragile than Rice Chex, so it broke up a little more, but it still turned out good! I also froze it after making it.

- This is such a fun idea for a snack box. Would be great to take on a picnic!

- We don't have a dog, so I have no need to make dog treats, but this video is so adorable!


- Sweet kitten keeping my company while I sew.

Have a Great Weekend!

*Note: Any links marked with an asterisk in this post are affiliate links. This means if you click through and buy something, I make a small commission, at no extra cost to you.

Tips for Dusting and Displaying Vintage Dishes

Wednesday, August 17, 2022


In the last couple of weeks I've completely disassembled my vintage pyrex and vintage enamelware displays in our dining room for cleaning. Since the shelves are open, they collect a good amount of dust and need to be completely dusted about once a year. I like to spread out the work over a few weekends since it's a bit of a time commitment. To be honest I had been putting this task off, but I'm so happy with the clean and tidy displays I've got now. I took photos as I was working this time and thought I'd share a few tips for how I dust and display my vintage dish collections. These tips would apply to any displayed dishes though, not just vintage!


First of all, with any deep clean I'd highly recommend moving everything off the shelf (or wherever your display is) that you're working on. This makes it so much easier to clean the surface. You'll need some space to work, I usually do this task either on the floor or on our dining room table.

My Dry and Wet Dusting Method

You don't need a lot of supplies, they main thing you'll need is a stack of microfiber cloths and an all purpose cleaning spray.

For the display surface I designate one cloth to remain dry and one wet. I first dust the surface with the dry cloth to remove the bulk of the dust. Then I spray the surface (of the display) with an all purpose cleaner and wipe it clean with a second cloth.

For the dishes themselves I do the same initial steps. I use a dry cloth to wipe away the bulk of the dust. I don't use any cleaning products on the dishes when I dust. Instead I wet a second cloth and keep it in a plastic container as I work. I wipe down the dish with the wet cloth, and then wipe it dry with a dry cotton towel to avoid any water marks on the surface.

Oil Wood Handles

I take this opportunity to treat any wood pieces too. After dusting, I apply a food safe wood oil (I use this one*) with a soft rag. After I few minutes I wipe it down with a clean rag to remove any excess oil, or reapply if it's really soaked in and needs more!

Remove any Price Stickers

I also found a few price stickers that I never removed so I went ahead and did that too. I like to use adhesive remove (I prefer this brand*) and a plastic scraper. I avoid using a razor blade because it can leave scratches or metal marks.


Once everything is wiped down and clean, it's time to put the displays back together! Here are a few tricks I've learned for making my displays look nice.

Tips for Stacking Dishes

To arrange stacking bowl sets so that you can see each bowl, I use small plastic deli containers* (we've gotten most of ours from takeout food!) in between each bowl. For the bottom bowls I set the container with the top facing up, as if I was about to fill the container with something. For the top bowl I place the container upside down. For me, I find this feels the most secure and looks good too!


For smaller bowl stacks I'll use whatever clear plastic I can find that's destined for the recycling bin. For this little bowl stack I used a dome lid that we got on a small container of soup!


Whenever I'm stacking pieces like these vintage pyrex casserole dishes that have lids, I make sure to flip the bottom lids upside down before stacking the next pieces, so that they're a little extra stable. You'll want to be careful anytime you stack things, since they'll be more prone to tipping over.


That's it! Pretty simple. I love having my vintage dish collections on display. I don't find a ton of pieces anymore, but I still love these collections so much. I two shelves dedicated to colored vintage pyrex. The display at the top of this post is most of my vintage enamelware collection, which includes Cathrineholm*, Dansk Kobenstyle* and Arabia Finel* pieces. Did you know you can actually buy new Dansk Kobenstyle* now? It even comes in new colors that they never previously made like pink and purple. I'd be super tempted it my shelves weren't already bursting!!

I hope you've enjoyed this tutorial, or at the very least enjoyed the photos of my collections! I have lots of other tutorials for everything from quilts, pillows, bags, and holiday items to informational series and techniques. Find all my tutorials here: Tutorials. My online shop is filled with patterns for quilts and bags. Find my patterns here: Jeni Baker Patterns

Have a Great Day

*Note: Any links marked with an asterisk in this post are affiliate links. This means if you click through and buy something, I make a small commission, at no extra cost to you.

Friday Favorites 31

Friday, August 12, 2022


Happy Friday! It's time for another Friday Favorites post! Catch up on previous posts here: Friday Favorites Archives

- These solid log cabin blocks by Matthew Friesz are so striking!

- Very tempted by the double wedding ring cheater prints in this collection*.

- The siloutte of the new Corin pattern from Grainline Studios is really nice. I need to get back into garment sewing!


- I had some decent luck at the thrift stores this week. My favorite thing I found were these three vintage floral napkins. I love finding any kind of vintage tablelinens, but I have a soft spot for napkins in particular! They will need a good soak in oxi-clean, then they'll be ready to be put into rotation!

- Speaking of thrifting, I started this puzzle* that I thrifted over the weekend!

- Made this corn salad from Pinch of Yum and loved it! We made the dressing and quinoa as is, but did a slightly different bowl. We used raw corn, black beans, raw cherry tomatoes, raw peppers, and avocado. So fresh and very little cooking involved!


- Last weekend I finally spent some time resetting and dusting my vintage pyrex collection. I had pushed back all the sets against the walls when Dusty arrived, so that she wouldn't be able to knock them over. She seems completely uninterested in them so I think (hope!) it's safe to put them back. Way back when I wrote a whole series on vintage pyrex which you can find here: Vintage Pyrex Series.

- In love with this rainbow patchwork bag made by Joy using my Lined Drawstring Bag Expansion Pattern!

- Opened a new bottle of my favorite perfume* this week. It's not super strong, which is exactly what I like.


- Kitty is always nearby when I'm working :)

Have a Great Weekend!

*Note: Any links marked with an asterisk in this post are affiliate links. This means if you click through and buy something, I make a small commission, at no extra cost to you.

Update to the Hidden Kitty Litter Box Cabinet

Wednesday, August 10, 2022


Happy Wednesday! Today I wanted to share an update that I completed this week to the hidden litter box cabinet that I made for Dusty earlier this year.

front
You can read more about the cabinet itself in this post here: DIY Hidden Litter Box Cabinet


When I originally finished the cabinet, I made a really quick cushion for the top. I only used materials that I had on hand, which in this case meant I had to compromise on the size and quality of the cushion. I wasn't sure how much Dusty would sit on it, so I didn't want to put a lot of time and money into the cushion at that time. Fast forward 6 months and I can report that she sleeps on it almost every day! She loves it in the afternoon when it gets sun. It was officially time to upgrade the cushion for something larger and more permanent.


I decided to use the same 1" black and white gingham fabric that I used on the first cushion, but this time I added some interfacing to give it extra thickness. For the actual construction of the cushion base I followed instructions for an upholstered bench project in Anna Graham's Handmade Style Book*. I used 2" high density foam*, 1/2" plywood and some cotton batting.


The cushion cover consisted of five pieces: a top and four sides. I was extra careful when cutting the top and front side to ensure that the gingham pattern matched up nicely along the edge. I didn't worry too much about the other sides, since they aren't very visible. Once I had the cover sewn, I wrapped it around the cushion base and stapled it in place. I used one of my favorite tools quite a bit on this project, my cordless stapler*. I wish I had taken some photos in progress! My only defense is that it was 94 degrees when I was working on this project!


The cushion is attached to the cabinet with 8 screws, going from the inside of the cabinet into the cushion base. I am really happy with this attachment because it means I can still easily remove the cushion if I want to replace the fabric down the road, but in the meantime it's super sturdy.


I'm so happy with how this new cushion turned out. It not only looks way better, but it's so much bigger than the original cushion! This means Dusty has even more room to sprawl out and have naps in the sun. I know she's going to get a lot of use out of it. I did not expect it to be such a visual upgrade, but I think it looks great. I was kind of winging it as I went, and I didn't make a muslin of the cushion cover, so that makes me even happier with the finished result!

Happy Sewing!

*Note: Any links marked with an asterisk in this post are affiliate links. This means if you click through and buy something, I make a small commission, at no extra cost to you.

July Monthly Report

Monday, August 8, 2022


It's time for the July monthly report! See past reports here.


This month's report is going to be extra short. I finished exactly zero sewing projects in July! This isn't all that surprising, I typically don't sew that much in the middle of the summer, and this July was especially hot for us here in CT.


Even though I didn't finish anything, I did work quite a bit on my vintage sheet bear paw quilt. I posted a progress check in late in July, you can read that here. I'm actually going to end up with more blocks than I need for this quilt, because I accidently over cut two of the colors (pink and green). My plan is to finish them all and make a baby quilt in addition to the throw quilt I had planned to make. I'm very glad to be done with the half-square triangle trimming and am just building blocks at this point.


To keep myself accountable for my stash goals, I track my yardage for fabric and yarn each month. Read more about how I track here. Here is how I did in June:

July Fabric
Used up: 0 yard
Brought in: 0 yards
Net: 0 yards
Year to date: -19.25 yards

July Yarn
Used up: 1000 yards
Brought in: 0 yards
Net: -1000 yards
Year to date: -1000 yards

No fabric went in or out in July, but I did destash some yarn. I was very happy to sell 5 skeins of worsted weight yarn on Ravelry!! I had bought it to make a sweater, but never got around to it. Felt good to let it go to someone who will use and enjoy it!


Time to check in my with 2022 crafty goals. This month I:
- I worked on my vintage sheet bear paw quilt which has been a long term WIP.
- I let some yarn go, which helps with my yardage goal!
- I knit a few rows on my mittens in progress.


Kitten is always near by to help me when I'm working. :)

Have a Great Month!