Shop News: Expansion Printed Pattern, Twill Tape and Wholesale Ordering

Friday, January 31, 2020


Happy Friday! I have some exciting shop related news to share with you today!

https://www.jenibakerpatterns.com/product/cotton-twill-tape
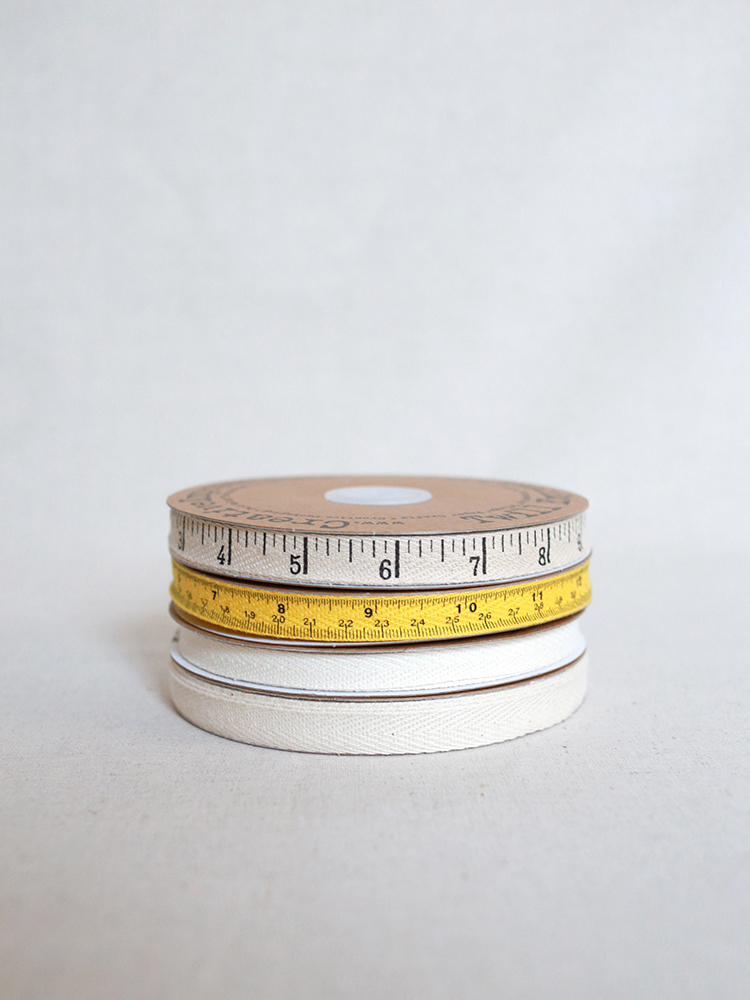
First and foremost, you can now find cotton twill tape in my online shop! Twill is one of my favorite materials to use as the drawstrings when making Lined Drawstring Bags. Natural cotton twill is relatively easy to find, but the cute ruler twill tape isn't always. So, I decided to start carrying a small selection of twill tapes in my online shop! To start, you'll find 3/8" and 1/2" natural twill along with 1/2" antique ruler twill and 1/2" yellow measuring tape twill. Find them all here: Cotton Twill Tape.

For now, I only have shipping set up for the United States. I'm happy to set up a custom listing for international orders, so if you're interested just send me a message here.

I whipped up this quick bag with the yellow measuring tape twill to celebrate! This is the mini accent variation from my Lined Drawstring Bag Expansion Pattern. Fabrics are Noe by Erin McMorris for the main exterior and Girl Friday by Cosmo Cricket (circa 2010) for the accent. I was so tempted to pair the yellow twill with yet another pink or purple print, but stopped myself. That's my go-to for these bags, so I thought this gray was a good change of pace!

https://www.jenibakerpatterns.com/product/lined-drawstring-bag-expansion-paper-pattern
Next up, the Lined Drawstring Bag Expansion Pattern is now available in printed form! This was something I was a little unsure about because it is such a long pattern. I didn't want to take anything out of the printed version, or reformat it too heavily, so it's just a big, thick printed pattern!

Find it individually here: Lined Drawstring Bag Expansion PAPER Pattern
Find it as part of a printed bundle here: Lined Drawstring Bag PAPER Pattern Bundle

Your support of this pattern is what made it possible for me to print it, so thank you!

And now, some wholesale ordering news:
https://www.jenibakerpatterns.com/wholesale
The Lined Drawstring Bag Expansion Pattern is now available for wholesale purchase! Because it is a more expensive to print and package this pattern, it is only available ordered directly through me. In an effort to make that easier, I spent the better part of this month completely overhauling my wholesale ordering process.

If you are a quilt or fabric shop (online or brick + mortar) who would be interested in carrying my patterns in your store, you can find all the information and order here: Jeni Baker Patterns Wholesale Order Form

I'm also offering free shipping on domestic orders of 25 patterns or more (+ discounted shipping on international)!

https://www.jenibakerpatterns.com/product/cotton-twill-tape Happy Friday!

Long Scrappy Pincushion Free Pattern

Tuesday, January 28, 2020


Happy Tuesday! Today I have a little tutorial for this long scrappy pincushion to share with you!

I made this long pincushion from scraps last week for the front of my sewing machine. When I sat down to make something, I had no idea what. I knew I needed to make a scrap project and I spent a couple minutes looking around for problems I could solve. I looked down and the gently used needles sticking out of my machine mat were staring me in the face (picture above, ick!). It's not a great spot for them and it collects dust really fast. So, I figured a low-profile pincushion sitting there would look nicer and function better too.

This project was made entirely from scraps, including the batting and interfacing! It's perfect for using up those long skinny batting scraps that you end up with after trimming down a quilt. I made mine using the quilt as you go (QAYG) method, but you can just as easily sew the pieces together in a long strip and then quilt it all at once. Totally up to you!


Have questions about making pincushions? Check out my All About Pincushions post.

Sewing Level: Beginner Friendly
Finished Size: 1.5"x16"

Materials:
- (8) 2"x2" squares of print fabric
- (2) 2"x2.5" rectangles of print fabric for ends
- (1) 2"x16.5" strip of backing fabric
- (1) 2"x16.5" strip of lightweight interfacing
- 4"x18" batting scrap
- Pincushion filling (I used crushed walnut shells.)

Looking for supplies? Check out my Pattern Supplies and Resources post.

Instructions:
*Use a 1/4" seam allowance unless otherwise noted.*


1. Arrange print squares and rectangles in a single row, with the rectangle pieces at each end.


2. Place the first rectangle piece right sides up on your batting scrap. Using a walking foot, quilt the scrap in place.

3. Place the first square right sides down on top of the quilted rectangle, lining up the short edges. Sew along the matched edge with a 1/4" seam allowance.


Press square away from the quilted rectangle. Quilt in place.

Continue in this way with the remaining squares, ending with the other rectangle piece.


4. Trim the quilted piece down to 2"x16.5". You may find that your piece is a little less than 16.5" long, due to seam allowances being slightly larger or shrinking from the quilting, that's okay! Just trim it down to size and trim the backing/interfacing too.

5. Apply interfacing to the backing piece according to the manufacturer's instructions.


6. Place pincushion top and backing right sides together, clipping or pinning around all four edges.

7. Sew around all four edges, leaving about a 2" opening in the center of one long side. I find this makes turning easier than leaving the opening at one of the ends.


8. Trim the seam allowance to 1/8" at the corners.

9. Press opening seam open, to make closing the opening easier. Turn pincushion right sides out. Use a wooden chopstick or turning tool to help.


10. Fill pincushion with desired filling.


11. Using a hand sewing needle and matching thread, stitch the opening closed.

All done!


Hope you enjoyed the tutorial! If you make a pincushion, please tag me on Instagram! I'm @jenib320 and my hashtag is #jenibaker.

Happy Sewing!

Finished Scrappy Pineapple Quilt

Wednesday, January 22, 2020


Happy Wednesday! Today I am finally sharing my finished scrappy pineapple quilt and I'm very excited about! This was one of my favorite finishes of 2019.

Whenever I go home for a visit, I like to bring at least one finished quilt with me to take photos of while I'm there. My parents have a small white barn on their property that is great for quilt photos. I finished this quilt up just in time to photograph over the holidays!


I started this quilt in May 2017 and finished it in early December 2019. So around 2.5 years in the making. Back in 2017 Dana of Old Red Barn Co. started an informal scrappy pineapple quilt along on Instagram (#superscrappypineapple) which inspired me to start mine!


For the color scheme I chose this incredible print from Jay McCarroll's Center City* collection (circa 2012) for the background first. All the rest of the prints I used were pulled from the colors in the background. Bright blue, red-orange, hot and soft pink, lilac purple, and low-volume whites and creams. I didn't work from my scraps for most of quilt, instead I cut long strips from yardage and cut them to size.


To make the blocks I used the Creative Grids Pineapple Trim Tool*. My blocks are 10" finished. I don't normally like to buy specialty rulers that have such a limited purpose, but working with this ruler was great! It helped make sure my blocks were accurate and was generally easy to use. I made 48 blocks and laid them out in a 6x8 configuration. This gave me a 60"x80" finished quilt.


This quilt was longarm quilted by Carolyn Lochner of Pinwheel Quilting. She used a hot pink thread for the front and a big swirl design! I love quilting like this, that isn't too dense, so that the quilt is still soft. The curves of the quilting design contrast nicely with all the sharp points in the blocks!


For the backing, I picked up this incredible blue floral print from Noe* by Erin McMorris. This print was originally part of her Weekends* collection from many years ago. It is still a huge favorite of mine, I've used this print in other colors for many, many quilt backs. Honestly, I should count them up!


For the binding I used the last bit of yardage I had of this hot pink print from Good Folks* by Anna Maria Horner. I've been holding onto this print for so long, and am now down to the last few small scraps. It was just too good of a match for this quilt!


There were times where it felt like this quilt was never ending, but I actually enjoyed the process more than I expected too. I want to start another long-term log cabin quilt, just need to figure out the details! I precut most of the fabric in advance for this quilt, so I could easily pick it up here and there to work on when I had time. It came with me on a couple sewing retreats too, which is fun to think about! I started it in Wisconsin, worked on it in Ohio, Connecticut, and Michigan. Plus I finished the top at our retreat in Wisconsin over the summer. A well traveled quilt for sure!

Happy Quilting!

*Note: Any links marked with an asterisk in this post are affiliate links. This means if you click through and buy something, I make a small commission, at no extra cost to you.

Handmade Holiday Gifts 2019

Wednesday, January 15, 2020


Happy Wednesday! Before we get too far into January I want to share the gifts that I made for the holiday season!


First up, a piece of wall art for my Brother! I dyed this piece of fabric using the ice dyeing method. I've experimented with this technique quite a bit lately, but haven't shared much. This was one of the pieces I was really happy with! I knew I wanted to stretch it like I did my Improv Pieced Wall Art that I made over the summer. I built the frame the same way, but long and narrow to fit this piece of fabric.

Interested in ice dyeing? Dharma has a great tutorial: Learn how to ice dye


Next up, I made a duffel bag for my Dad! This was actually for his birthday, which is in December too. I made him a pillow for Christmas, which I shared in my December monthly report. This is the fourth duffel bag I've made from Simplicity #2274 by Studio Cherie. You can also buy the pattern directly from the designer, here*. For this bag I made it the same size as the pattern, but with all the extras I included on the one I made for Michael (see it here) a few years ago.

I used 10oz waxed canvas (color is spiced brown) from ALFrancis*, my favorite source for waxed canvas. Long pull zippers came from Zipit*, I used a double zip for the main zipper. I used 2" black webbing instead of jute for the handles, from Online Fabric Store. I added a removable shoulder strap using buckles from Strapworks.


Finally, I made two grocery shopping totes for my Mom! She liked the style of my Workshop Tote Bag Pattern, but wanted some that were a little bit smaller. I sized the plain tote down a bit for these, and added a small loop of twill to the front and back to hook onto the bag holders at the grocery store.

For this tote I used a canvas print from my Curiosities* collection.


And for the second tote I used this sweet print from my friend Anna's new collection, Driftless*.

That's it! Nothing too crazy this year, but I did manage to leave it all until the last minute so I was rushing around the week before Christmas getting everything done. Which is also why I didn't get great photos of anything. That's just how it goes sometimes!

Happy Sewing!

*Note: Any links marked with an asterisk in this post are affiliate links. This means if you click through and buy something, I make a small commission, at no extra cost to you.

2020 Crafty Goals

Friday, January 10, 2020


Happy Friday! Today I want to share my crafty goals for 2020. I have actually been procrastinating posting this list because I don't feel like it's fully finished. Most of my goals are pretty similar or directly carried over from 2019. Not that there is anything wrong with that, but I do think I'm missing something. I'll probably update this list later in the month!


If there was a theme for this year's goals I think it would be scraps. I want to focus even more on using up my scraps this year. I enjoyed working with them this year, but I want to take it further!

Sewing & Quilting Goals for 2020

- Use up more yardage than I bring in. I'll track my yardage each month to help me stay on target. I'd love to top my numbers from last year and bring in less than 48 yards of new fabric.

- Try to spend 15 minutes a day sewing.

- Complete one small scrap project per month.

- Make a quilt from my lawn/voile stash.

- Make a quilt from vintage sheets.

- Make a quilt primarily from scraps.

- Complete 2 long-term quilt projects (Kaleidoscope, Double wedding ring, HST book quilt tops, All green quilt).

- Sew the Kelly Anorak Jacket (ideally in time for Fall).

Knitting Goals for 2020

- Use up more yardage than I bring in. I'll track my yardage each month to help me stay on target.

- Finish a shawl WIP (Briochealicious, Daybreak or Hitchhiker).

- Finish a pair of colorwork mittens.

- Knit a rag rug from fabric scraps.

Crafting Goals for 2020

- Complete a vintage crewel embroidery.

- Create a stash of handmade greeting cards.

- Spend more time this year dyeing.


That's it for now! Here's to a very crafty 2020!

2019 in Review

Monday, January 6, 2020

Happy Monday! It's time to say goodbye to 2019 with my annual yearly review. This is the tenth year in a row I've been posting these wrap-ups! See them all here. Without further ado:

In 2019, I finished...

6 throw quilts and a mini quilt.


4 quilted pillows and 2 pillowcases.


37 lined drawstring bags!


4 zipper pouches, 4 tote bags, a duffel bag and a wallet.


10 needle minders, 7 pincushions, 4 mini #10 caddies, an ironing board cover, a pin banner, and a scissor cozy.


An oven mitt, a heating pad cover, a table topper, a bed for George and 2 pieces of fabric artwork.


A hooded sweatshirt and a wiksten haori.

2019 Fabric Stash:
Brought in: 48 yards
Sewed up/destashed: 155 yards
Net: -107 yards 

For information on how I track my yardage, see this post.

In 2019, I knit...

A hat and a pair of fingerless mitts.

2019 Yarn Stash:
Brought in: 395 yards
Knit up/destashed: 821 yards
Net: -426 yards

I released two new patterns this year:
https://www.jenibakerpatterns.com/product/lined-drawstring-bag-expansion-pdf-pattern
Lined Drawstring Bag Expansion Pattern


Snack Size Pincushions Pattern

I also wrote a number of informational tutorials:

All About Pincushions


All About Quilting with Double Gauze Fabrics


Orphan Block Sampler Quilt Recipe


How to Cut up a Button Down Shirt

And now, a look back at my 2019 crafty goals to see how I did:

Sewing & Quilting Goals for 2019

- Use up more yardage than I bring in. I'll track my yardage each month to help me stay on target.
I'm very happy with how I did on this goal. This was my fourth year tracking my yardage in/out and I feel like I've really hit my stride. I brought in less than 50 yards of fabric the entire year and I ended the year down 100+ yards. Can't wait to continue this in the new year!

- Make sewing a daily habit, even if it's only for 15 minutes.
This did not happen. I think for next year I need to come up with a specific project that I can work on in little pieces, every day. I'm inspired by Cheryl Arkison's morning make to really make a better effort on this goal in 2020.

- Complete one small scrap project per month.
I managed this every month (and sometimes multiple projects) except December! I got too busy making gifts and forgot to make something. As someone who historically hasn't been great about using scraps, I'm very happy with my progress on this goal. Another goal I'll be focusing on in 2020 too.

- Finish or destash four long-term WIPs.
I finished three long-term quilt WIPs, so I feel pretty good about this goal. I worked some on a fourth, but just didn't build enough momentum to finish it.

- Make a quilt from my chambray stash.
Check! I made Michael a quilt for his birthday from all chambray, you can find it here: Chambray and Denim Flying Geese Quilt

- Sew four new garment or bag patterns, ideally one per quarter.
I did okay on this goal. I wanted to make larger items, but ended up completing this goal on a smaller scale. I sewed up Aneela's speedy vinyl pouch pattern, Anna's minimalist wallet pattern, Jenny's Wiksten Haori, a quilt as you go pouch from Svetlana's book That Handmade Touch* and I made a pillow from a block pattern from Emily's book Modern Quilts Block by Block*.

- Practice a new skill (like hand-quilting, applique, y-seams, curves)
I gave hand-quilting and applique a little try, but didn't give either much attention or practice.

Knitting Goals for 2019

- Use up more yardage than I bring in. I'll track my yardage each month to help me stay on target.
The only knitting goal I met! I did manage to decrease my stash this year.

- Finish a shawl WIP (Briochealicious, Daybreak or Hitchhiker).
I am not sure I even picked up a shawl project the entire year.

- Finish a pair of colorwork mittens.
I didn't finish these, but I started a pair and I have both outside mittens knit except for the thumbs. So definitely over halfway done since the linings will knit up really fast!

- Knit or crochet a softie.
No progress on this.

Crafting Goals for 2019

- Complete a vintage crewel embroidery.
Didn't complete one, but I did start one. Little progress, but better than nothing.

- Weave a table runner.
I put my loom back together, but did not weave at all.

- Make wooden ornaments with the Cricut.
I made two! a start with a floss design on it and a George bunny ornament.

- Create a stash of handmade greeting cards.
No progress on this.


I'll be back to share my 2020 crafty goals later this week!

Happy New Year!

*Note: Any links marked with an asterisk in this post are affiliate links. This means if you click through and buy something, I make a small commission, at no extra cost to you.