Patchwork Essentials: Convergence Baby Quilt

Tuesday, May 29, 2018


Happy Tuesday! This quilt is a long overdue share. I finished it and took photos of it in April last year!


This quilt was made with a leftover variation block from my book, Patchwork Essentials: The Half-Square Triangle. In addition to all twelve quilts included in the book, I made a variation block or quilt top of each design. I've slowly either passed these along or turned them into finished projects myself. This baby quilt was made using a variation block for the Convergence quilt.

http://www.jenibakerpatterns.com/product/patchwork-essentials-the-half-square-triangle-book-signed
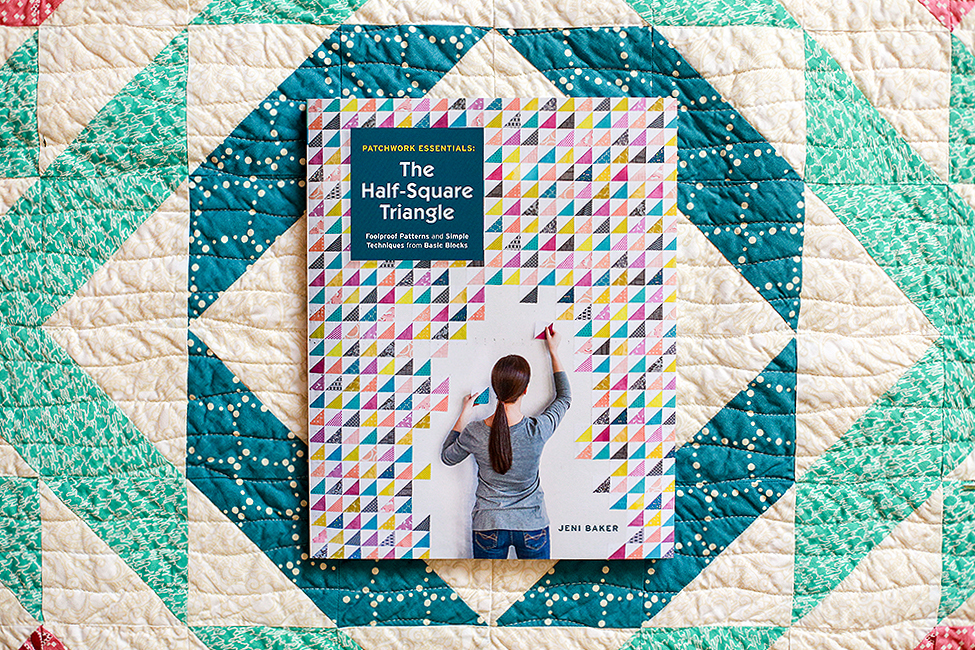
Guess what? I've got signed copies of my book available in my online shop again! Get your copy here.


This block was already pretty big, so one wide border was all it needed to make it baby quilt sized. That pink butterfly print is hard to photograph, it's really much more of a red-purple in person!


I kept the quilting pretty simple, just some wavy lines quilted with my walking foot.


I did have fun piecing the back! I wanted it to be two sided, so I pieced a big asymmetrical cross. I needed something that would still look right after trimming away the extra backing, and I'm happy with how it turned out.


Bound it up in a fun print that happened to match well from my stash. I attached the binding by machine to both sides, as always. I find this especially handy for baby quilts, knowing they'll end up getting washed a lot.

For a tutorial on how I attach my binding see here: Machine Quilt Binding Tutorial


As I mentioned, I snapped these photos last year, when we were still in Wisconsin. This spot was really close to our apartment, my favorite spot on Lake Mendota, Raymer's Cove. Missing it for sure!

Happy Quilting!

FIGO Fabrics LookBook

Monday, May 21, 2018

https://figofabrics.com/lookbooks.aspx
FIGO Fabrics is a new fabric division of Northcott fabrics that launched last week at Quilt Market. They debuted with five beautiful modern fabric collections.

The folks at FIGO reached out to me this Spring to mock-up some of my patterns in their new fabrics and they stitched up a bunch of great projects! Many were on display at the show, and they can all be found in their LookBook! I'm sharing the projects made from my patterns below, but definitely check out the entire thing here, as well as their instagram.

http://www.jenibakerpatterns.com/product/lined-drawstring-bag-pdf-pattern
Pattern: Lined Drawstring Bag Pattern
Fabric: Mountain Meadow by Pippa Shaw, shipping December 2018

http://www.jenibakerpatterns.com/product/florette-quilt-pdf-pattern
Pattern: Florette Quilt Pattern
Fabric: Perfect Day by Naomi Wilkinson , shipping December 2018

http://www.jenibakerpatterns.com/product/triplizip-zipper-pouch-pdf-pattern
Pattern: Triplizip Zipper Pouch Pattern
Fabric: Mountain Meadow by Pippa Shaw, shipping December 2018

http://www.jenibakerpatterns.com/product/triangularity-quilt-pdf-pattern
Pattern: Triangularity Quilt Pattern
Fabric: Special Delivery by Lemonni, shipping December 2018

All images in this post belong to FIGO Fabrics and were taken from their Spring 2018 LookBook.

Tips For Using Drawstring Bags to Wrap Gifts

Friday, May 11, 2018


As much as I love wrapping paper or a cute paper gift bag, my favorite way to give gifts is wrapped in a handmade Lined Drawstring Bag. Especially if the gift itself is handmade, I like to coordinate the bag with the same fabric or similar colors. I thought today I'd share my tips for using these bags for wrapping, plus which size I use for different gifts.


So first, why make a handmade gift bag? A few reasons. I think it instantly adds a little something extra to whatever you're giving. The bags are reusable, so they're an eco-friendly alternative to gift wrap. Adding a handmade element can also help jazz up store bought gifts too, making them more fun and adding a personalized touch. For quilts, I find drawstring bags are a great way for the recipient to store the quilt while it's not being used. Finally, they're just fun to make, so it's a good excuse to make one!


One quick thing I like to do before gifting is to tie up the strings in a bow! It's simple, but is a nice finishing touch!


Looking for other sizes? Check out the Lined Drawstring Bag Pattern which includes 8 sizes and instructions for creating your own custom size!

I'll share a few gift ideas that should comfortably fit into each size included in the pattern, starting with the Everything Bag, which is the same size as the free tutorial.

Everything Bag (tutorial size)

- Bubble bath/lotion/soap set
- Swap goodies (pincushion, candy, fabric, cute scissors)
- Small flower pot + seed packets
- Baked goods
- Scarf or other small accessories

Tiny Bag

- Enamel pin
- Jewelry
- Gift card
- Candy
- Earbuds

Snack Bag

- Small toys like Tsum Tsums, toy cars, Littlest Pet Shop, etc
- Make-up
- A few fat quarters and a spool of thread
- A cute mug and some hot chocolate mix or tea
- Candle

Project Bag

- Set of potholders or dishtowels
- Small stuffed animal
- Knitting/crochet kit (yarn, pattern, needles)
- Dvds
- Framed photo

Artist Bag

- Baby quilt
- Art supplies
- Children's book and a toy
- Small electronics (tablets, ipad, large headphones)
- Quilt kit

Laundry Bag

- Throw quilt
- Large toy
- Handmade pillow
- Dishware
- Small kitchen appliances

https://www.jenibakerpatterns.com/product/lined-drawstring-bag-expansion-pdf-pattern
Want to customize your drawstring bags? Check out the new Lined Drawstring Bag Expansion Pattern! Learn how to center a design on the front, make a drawstring backpack, add patchwork and much more!


Here is where to find the basic bag tutorial and pattern:
Lined Drawstring Bag Tutorial
Lined Drawstring Bag Pattern
Lined Drawstring Bag Expansion Pattern

Happy Making!

April Monthly Report

Wednesday, May 9, 2018


Happy May! It's time for April's monthly report. See past reports here.


I actually sewed quite a bit this month! I didn't finish many projects, but I made progress. It's been slow getting back into a groove, mostly because I keep getting sidetracked. All of the house projects I've been tackling are eating up my time.

One project I did finish this month was a set of coasters to use in my sewing room! I saved these quilted square cutoffs from my Dreamin' Vintage Sew Portable Travel Set that I made a few years ago, not wanting them to go to waste. I finally decided to turn them into coasters. I used binding scraps to finish them, so they're extra scrappy!


I pulled out my scrappy pineapple blocks and made a new block, bringing my total to nine blocks. I love how these are turning out, and I'd like to start working on this project more regularly again.


Most of my sewing this month was on samples for my class at Glamp Stitchalot in November! Here is a little peek.


Lots of block sewing, including these fruity cat blocks. Fruit prints are from Sugar by Erin McMorris. Block tutorial can be found here.

See the plus quilt I made with this collection last Summer, here.


I am trying to get back into knitting too, it's a very relaxing activity for me, and I've missed it. I decided a hat would be a good way to get back into it!

I love matching my project bags to my knitting, of course. Using a lined drawstring bag made from Nordika for this one.


To keep myself accountable for my stash goals, I'm tracking my yardage for fabric and yarn each month. Read more about how I track my here. Here is how I did in April:

April Fabric
Used up: 4.5 yards
Brought in: 3.75 yards
Net: -.75 yards
Year to date: +22 yards

April Yarn
Used up: 0 yards
Brought in: 0 yards
Net: 0 yards
Year to date: +218 yards

I managed to buy no fabric until the very end of the month. I was working on my Glamp projects and I ran out of the neutral dot from Mochi. I was only short a 8"x2" piece, boo! Since it's a work project I didn't want to sub it out, so I ordered some more, plus a few other colors fell into my cart.


Speaking of finishing projects, we were able to cross our pantry off the list this month! Here's a little before/after of our kitchen pantry. It's at the top of the basement stairs, and as you can see it was pretty gross and non-functional when we moved in. So, we tore out the old shelving, did a lot of wall repair, primed, painted, installed new shelves, and ripped out/replaced the old linoleum. It was a big project, but was so worth it. We have so much more storage space now, and it looks a lot cleaner and taken care of. I used this tutorial from Young House Love for the shelves.


A fun thrifting find from April, this candy colored wizard of oz sheet!


Last but not least, George bunny taking a break from running around to wash his face!

Have a great month!