One of my favorite smells ever.. Hyacinth.
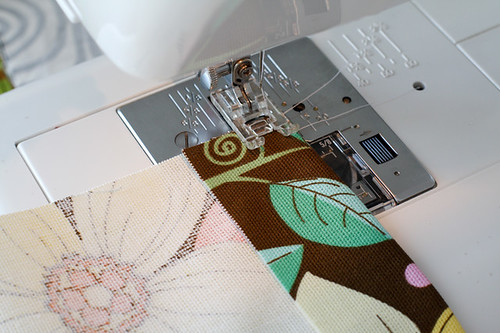
Quick, scrappy patchwork potholder!
A little thrifting from this week!
George enjoying his new box!
Today I love the..
Smell of: Flowers
Sound of: Cavs game!
Taste of: Mac & cheese
Sight of: George
Feel of: A warm spring day!
Good Things about Today:
- It was 68 degrees today! Heat wave!
- Hyacinth for $3! :D
- One more day of classes until Easter break!
- Cavs won a nail-biter!

Out like a lamb..


Tuesday, March 30, 2010
The Cosmos won! They sprouted first!
I've been making air-popped popcorn lately, yum!
I haven't been posting enough photos of my sweet little bun!
Today I love the..
Smell of: Fresh air
Sound of: 500 Days of Summer Soundtrack
Taste of: Special K
Sight of: The sun!
Feel of: George
Good Things about Today:
- Not much homework again!
- Made Baked Penne!
- My apartment is still clean!
- Almost Easter break! :)

I've been making air-popped popcorn lately, yum!

I haven't been posting enough photos of my sweet little bun!


Today I love the..
Smell of: Fresh air
Sound of: 500 Days of Summer Soundtrack
Taste of: Special K
Sight of: The sun!
Feel of: George
Good Things about Today:
- Not much homework again!
- Made Baked Penne!
- My apartment is still clean!
- Almost Easter break! :)
Baked Penne Recipe
This is a super easy meal that takes very little ingredients! It also could be customized very easily!

Baked Penne
1 pound of penne pasta
1 pound of sweet italian sausage
1 jar of pasta sauce
1-2 cups of shredded mozzarella cheese
1. Preheat the oven to 325 degrees.
2. Start a pot of water to boil for the pasta.
3. Brown sausage on the stove, breaking into pieces as you go. Drain.
4. Cook pasta.
5. Combine cooked pasta, drained sausage and pasta sauce in a large casserole. Top with shredded mozzarella and cover.
6. Bake for 25 minutes to heat through and melt the cheese.
Enjoy! :)
*Dear Pyrex friends, this fits perfectly in a 2.5 qt 045 casserole!
*I've made this many times without the sausage as well!
Monday, March 29, 2010
Mashed potatoes and roast chicken. Perfect for a rainy Monday.
Pulled out some of my favorite vintage items for a thrifting post (see the next post!)
Today I love the..
Smell of: Hyacinth
Sound of: A quiet afternoon
Taste of: Mashed potatoes
Sight of: George running around happily!
Feel of: Warm mittens
Good Things about Today:
- Finally vacuumed! I only pull out the big vacuum every so often because it really scares George! Let's be honest, he runs this household :)
- Made it to the post office and the library.
- Another relaxed day.
- Seeing my quilt tutorial on Whipup.net!! :D

Pulled out some of my favorite vintage items for a thrifting post (see the next post!)

Today I love the..
Smell of: Hyacinth
Sound of: A quiet afternoon
Taste of: Mashed potatoes
Sight of: George running around happily!
Feel of: Warm mittens
Good Things about Today:
- Finally vacuumed! I only pull out the big vacuum every so often because it really scares George! Let's be honest, he runs this household :)
- Made it to the post office and the library.
- Another relaxed day.
- Seeing my quilt tutorial on Whipup.net!! :D
Thrifting 101
A few of my favorite thrifting finds.
I have received a lot of wonderful comments about my thrifting finds in the past few months. This has also led to many questions about where I find all of my treasures. With a year of serious thrifting under my belt, I thought I'd write up a little Thrifting 101 to hopefully impart some of my thrifting "wisdom" on you all!
*Looking for information specific to Vintage Sheets? Check out my post on how to identify, shop for, and sew with vintage sheets. *
1. Thrift Stores
The most obvious place to start your thrifting adventures is at a thrift store! Doing a basic Google search for "thrift stores" can give you an idea of the stores in your area. There are several chain thrift/charity shops like Goodwill, Salvation Army, Savers, and St. Vincent de Paul, to name the major ones. Keep in mind there are also some regional chain thrifts, for instance in Cleveland there is Value World and Unique Thrift. Keep on the lookout for church thrift shops as well. Consignment shops may also have vintage goods!
2. Antique Stores/Malls
There are many antique stores that price well-beyond thrift stores prices. However, not all antique stores are created equally! Check out the antique stores in your area to get an idea of the price level! There are antique shops in my area that are overpriced and there are a few that are kind of a hybrid antique/thrift shop in terms of their prices and items. You'll never know until you check them out!
3. Garage Sales & Flea Markets
The most basic level of thrifting that most everyone has experienced at some point in their lives is garage sales! Garage sales can be a great place to start thrifting especially in the coming months. Check to see if your city has a city-wide or neighborhood garage sale date. Craigslist has made garage sale-ing even easier! Many people choose to post their sales on Craigslist giving you an idea of what to expect. Flea Markets are a great thrifting option and are often held at county fairgrounds. Check your local fairground's event calender or do a google search to find flea markets in your area!
4. Estate Sales & Auctions
Check your local newspaper and Craigslist ads for estate sales and auctions in your area. Be sure to make it to estate sales sooner rather than later, they generally get picked over very quickly because everything is priced to sell. Auctions are another place to find some great vintage bargains. Keep in mind that if it has something specific listed, it may attract some more serious buyers, so be ready to compete!
5. Craigslist, Ebay & Etsy
In addition to finding garage sales, Craigslist can also be a great place to thrift! Search the sale ads or even post a want ad for what you're looking for. While Ebay and Etsy usually have pretty high prices, every so often something slips through the cracks! Keep your eye out for auctions that end at inconvenient times (mid-afternoon on a weekday?).
A Few More Thrifting Tips!
- Go often! For the number of times I got out thrifting and find something, I've been out four times where I found nothing! Don't be discouraged when you don't find anything, it simply takes time! Luckily, "new" items are being donated/put up for sale all the time!
- Go when you're traveling. One of my favorite parts about vacation is going to new thrift stores! A google search can give you a good list of thrift stores for that area and with a good map in hand you're ready to go! Keep in mind how you're going to get it back though. If you're flying, only buy as many breakable items as you can fit in your carry-on bag, unless you're brave enough to put them in your regular suitcase!
- Bring a friend. If you're going for a day of thrifting it's not only more fun to go with a friend, it's safer for your wallet! It can get very exciting thrifting when you're finding lots of treasures, but it's all too easy to buy things you don't really need or even want! Having someone there to second guess your purchases can be helpful :)
- Check for sales. Many chain thrift stores have sale days and often coupons. Find out their sale schedules for even thriftier thrifting!
Good luck and Happy Thrifting!
*EDIT* - Melissa pointed me in the direction of two great resources! A thrift store search website called The Thrift Shopper, and an antique store search website called The Antiques Navigator. Thanks for the links Melissa!
Sunday, March 28, 2010
I can now reveal all the blocks I made for the 1st quarter of the 3x6 Mini Bee!
Worked on my black and white mini quilt some more today.
Made myself a new bath mat! :)
Today I love the..
Smell of: Bacon
Sound of: Nothing from Nothing by Billy Peterson
Taste of: Fresh fruit
Sight of: A clean apartment!
Feel of: Fleece
Good Things about Today:
- Did some major cleaning today!
- Free undies from Victoria's Secret!
- Inexpensive groceries
- Worked on some sewing projects :)

Worked on my black and white mini quilt some more today.

Made myself a new bath mat! :)

Today I love the..
Smell of: Bacon
Sound of: Nothing from Nothing by Billy Peterson
Taste of: Fresh fruit
Sight of: A clean apartment!
Feel of: Fleece
Good Things about Today:
- Did some major cleaning today!
- Free undies from Victoria's Secret!
- Inexpensive groceries
- Worked on some sewing projects :)
Saturday, March 27, 2010
It was a good day of thrifting. Picked up a promotional Pyrex casserole (with the cradle!), a pink Butterprint casserole, and some mini vintage lotus bowls! All for $6 :) If only thrifting could be this good every time I go!
Started some of my seeds today! I made the same newspaper start pots as I did last year. They are so super easy to make. I used this as a reference. I found that using a tiny bit of tape helped! I'll be sharing my grand gardening plans soon!
Made another wall organizer today. Wrote up a little tutorial to go with it, it can be found here!
George has been so sweet lately, such a good bunny :)
A new favorite kitty at the shelter. I wish I could take him home! His name is Lucas and he loves to snuggle.
Today I love the..
Smell of: Cincinnati Chili
Sound of: George running around!
Taste of: Strawberry Banana smoothie
Sight of: Spring!
Feel of: A sunny afternoon!
Good Things about Today:
- I was very productive!
- Good thrifting!
- The kitchen is clean.
- Feeling excited for the summer!

Started some of my seeds today! I made the same newspaper start pots as I did last year. They are so super easy to make. I used this as a reference. I found that using a tiny bit of tape helped! I'll be sharing my grand gardening plans soon!

Made another wall organizer today. Wrote up a little tutorial to go with it, it can be found here!

George has been so sweet lately, such a good bunny :)

A new favorite kitty at the shelter. I wish I could take him home! His name is Lucas and he loves to snuggle.

Today I love the..
Smell of: Cincinnati Chili
Sound of: George running around!
Taste of: Strawberry Banana smoothie
Sight of: Spring!
Feel of: A sunny afternoon!
Good Things about Today:
- I was very productive!
- Good thrifting!
- The kitchen is clean.
- Feeling excited for the summer!
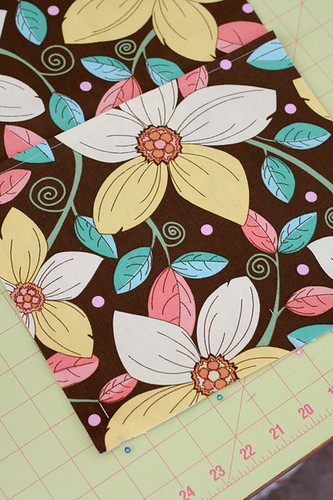
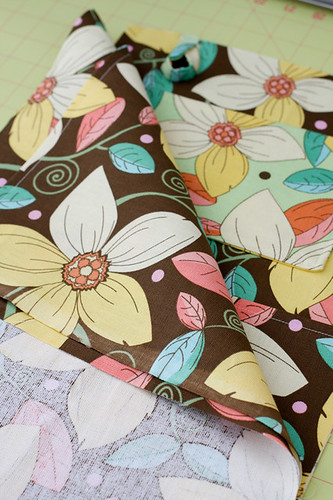
Wall Organizer Tutorial
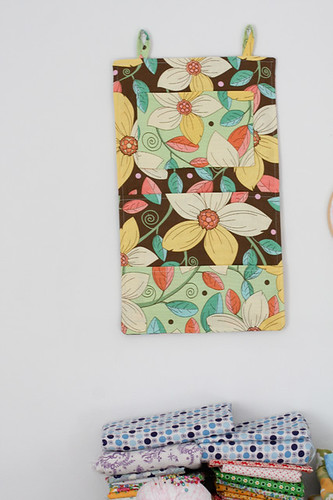
Here is my tutorial for a Pocket Wall Organizer. This past week I made one to organize my mail and realized I probably needed one for my sewing area! I took a few photos along the way, so that you can make one too. Enjoy :)
Sewing Level: Beginner Friendly
Materials:
- 1/2 yard of main fabric
- Fat quarter of a second fabric
- Some scrap cardboard around 10"x16"
I choose to use Home Dec weight canvas for my wall organizer. It gives it a lot of stability. However, the seams where pretty thick at the end. I would suggest that if you're going to use a heavy fabric, use a regular cotton weight fabric for the back piece and back pocket.
Instructions
1. Iron your fabrics and cut the following pieces
From the Main Fabric:
4 pieces 18"x11" - these are the front, back, back pocket, and large front pocket piece.
From the Secondary Fabric:
1 piece 5.25"x11" - this is the bottom pocket piece.
2 pieces 8"x5.5" - these are the small top pocket pieces
2 pieces 2"x5" - these are the hanger pieces.
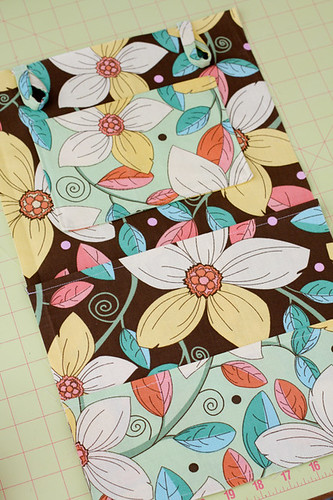
2. First we are going to make the bottom pocket piece. You'll need to fold the long side over 1/4", iron it, fold it over 1/4" again and topstitch.
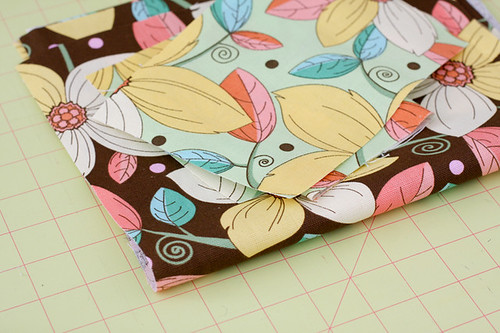
3. Next, take one of the large 18"x11" pocket pieces and fold it in half with the shorter ends together. Iron and topstich the folded side.
4. Take the 2 small top pocket pieces and lay them right sides together. Sew around all four sides leaving a 2" gap for turning. Clip the corners and turn right side out. Don't forget to use a turning tool or something pointy to poke out the corners.
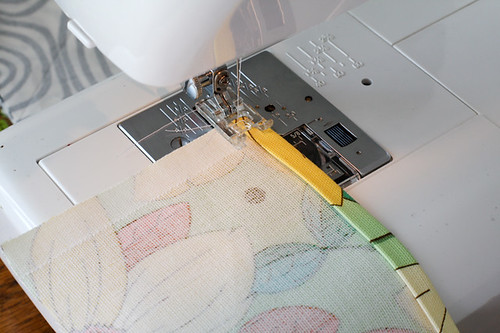
5. Now that all of the pockets are made, it's time to attach them to the front. Line the large pocket piece up with the bottom of the front piece. Stitch across around 1/2" from the bottom.
6. Line the bottom pocket piece up with the bottom of the front piece. Stitch across 1/4" from the bottom.
7. Place the small top pocket piece 2" above the large pocket. Center it widthwise. Pin in place and sew along the sides and bottom.
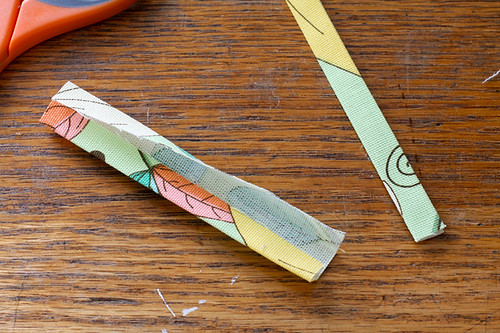
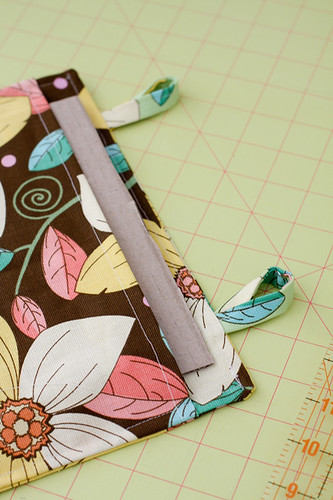
8. Now it's time to make the hangers. Take your hanger pieces and fold them in half length-wise. Iron. Unfold and fold both sides onto the center line created by your first fold. Iron again. Now fold in half length-wise again. Press and topstitch. Do this for both hanger pieces.
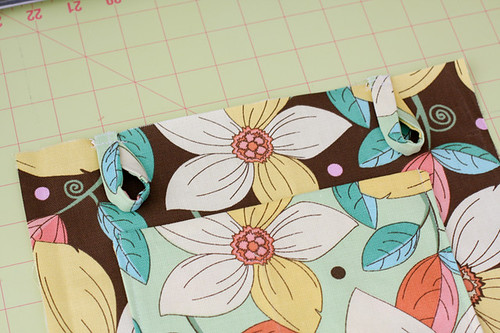
9. Bring the ends of the hanger pieces together and pin 2" from the side of the front piece. Stitch a line across it to secure. Do this for both hanger pieces.
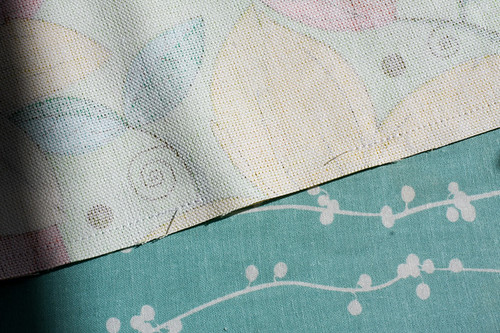
10. Now it's time to make the back pocket. Take one of the 18"x11" pieces and fold down 1.5"-2" on a shorter size. Topstitch.
11. Time to assemble all of the pieces. First, lay the front piece facing upward. Next lay the back pocket (lined up at the bottom) on top and finally the last 18"x11" piece. Pin and stitch around all four sides using a 1/2" seam allowance, leaving an opening for turning. Keep in mind, if you are using canvas like I did, it will be pretty bulky.
12. Iron well and topstitch on all four sides, closing your turning opening. Now, cut a piece of cardboard to fit into your back pocket, and you are done!
Enjoy!

Thursday, March 25, 2010
1. zigzig, 2. Melmac, 3. { patchwork pouch }, 4. the artichoke, 5. 3x6 bee, 6. spring released, 7. Two pinhwheels in a pod!, 8. Bunny says HAPPY SPRING, 9. Mirror Image Quilt 010
Every week I go through my favorite photos on Flickr, and choose nine sewing/quilting related projects to showcase here. These photos and projects are not my own, you can find the original images and creators by clicking the coordinating links! If for any reason you do not want your project featured here, please email me and I'll remove it!
Happy Friday!
Wednesday, March 24, 2010
Made myself a mail organizer. I'll be writing a tutorial for it this weekend!
Also made a little tiny mini quilt from scraps. It will be protecting my Pyrex dish in my entry way from my keys :)
Now my square and loaf pans are matchy after today's thrifting find!
Good luck thrifting on half-price Wednesdays at Salvation Army!
Today I love the..
Smell of: Clean kitchen
Sound of: Z in the new Cavs interviews!
Taste of: Peanut butter on a bagel
Sight of: My new mail organizer
Feel of: A sunny afternoon
Good Things about Today:
- It was a very productive day!
- Wrote up my first tutorial!
- Did a little sewing
- It was warm and sunny today!

Also made a little tiny mini quilt from scraps. It will be protecting my Pyrex dish in my entry way from my keys :)

Now my square and loaf pans are matchy after today's thrifting find!

Good luck thrifting on half-price Wednesdays at Salvation Army!

Today I love the..
Smell of: Clean kitchen
Sound of: Z in the new Cavs interviews!
Taste of: Peanut butter on a bagel
Sight of: My new mail organizer
Feel of: A sunny afternoon
Good Things about Today:
- It was a very productive day!
- Wrote up my first tutorial!
- Did a little sewing
- It was warm and sunny today!
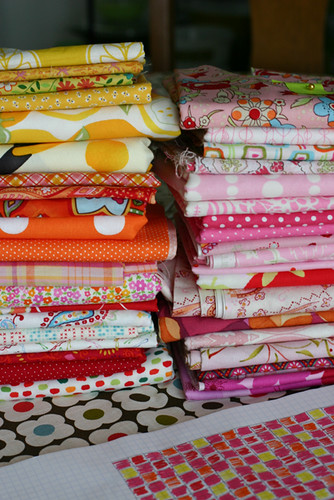
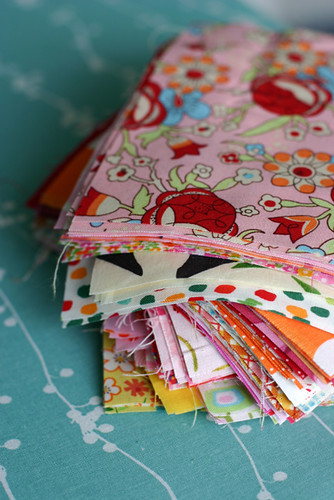
Colors Patchwork Quilt Tutorial
After receiving such positive feedback from all of you on my Cool Colors Quilt, I decided to write up a little tutorial. The tutorial will walk you through the number of colors you'll need, how many squares of each color, and even a blank quilt worksheet so you can try out your color scheme!
See my two finished quilts here: Warm Colors Quilt + Cool Colors Quilt.
Sewing Level: Beginner Friendly
Finished Size: 61"x83"
Materials:
- 20 fat quarters of Color A*
- 10 fat quarters of Color B*
- 5 fat quarters of Color C*
- 5 fat quarters of Color D*
- 5 1/4 yards of backing fabric
- 69"x91" piece of cotton quilt batting
- 5/8 yard of binding fabric
- Colors Patchwork Quilt Worksheet (download here)
*1/4 yard cuts can be substituted.
Instructions:

*Use 1/4" seam allowance unless otherwise noted.*
1. First and foremost, you will need to choose 4 colors (A, B, C, + D) for your quilt. You may choose to use warm or cool color schemes, but this method would also work with any color scheme you’d like. Use the above worksheet to lay out your colors if you'd like, or come up with your own arrangement!
2. Rank your 4 colors in order of importance. You will need a main color (A), secondary color (B), and two additional colors (C and D). Now, choose 20 fabrics from your color A, 10 different fabrics from your Color B, and 5 different fabrics from colors C and D. This will give you a total of 40 different fabrics.
3. Cut out your squares as follows:
Color A – 83 squares of your main color. Use 20 different fabrics.
Cut (5) 6" squares each from 3 fabrics, cut (4) 6" squares each from 17 fabrics.
Color B – 40 squares of your 2nd color. Use 10 different fabrics.
Cut (4) 6" squares each from 10 fabrics.
Color C – 21 squares of your 3rd color. Use 5 different fabrics.
Cut (5) 6" squares from 1 fabric, cut (4) 6" squares each from 4 fabrics.
Color D – 21 squares of your 4th color. Use 5 different fabrics.
Cut (5) 6" squares from 1 fabric, cut (4) 6" squares each from 4 fabrics.
For a total of 165 squares.
*A 6" square acrylic ruler is really handy here. The nice thing about 6" squares is that most standard acrylic rulers are 6"x24". This allows you to use your ruler as a template to cut a 6" strip and then cut 4 squares from each strip.
4. With your colored in worksheet in hand, lay out your squares in 15 rows of 11 squares each. This process requires a certain amount of patience depending on your preferences. I decided I did not want any one fabric to appear in the same row or column. While this may not seem possible, it indeed is! It takes a while to get it just right I suggest working on it for a bit and then coming back to it later if possible. If this issue doesn’t bother you, don’t worry about it. Fiddle with the arrangement until you like it.

5. Now that you’re done with your placement, you’ll want to stack up your rows so that you sew them up in the correct order. I choose to stack the squares moving from left to right, starting at the top of my quilt map.
6. You should now have 15 stacks of 11 squares each. Label the top of each row with a slip of paper attached with a safety pin.
7. Sew your squares together for each row. Depending on your preference, iron your seams open, or you may choose to press towards the right or left. I suggest doing this after you have a few rows completed. This breaks up the sewing a bit and doesn’t leave you with a ton of ironing at the end/
8. Now it’s time to sew your rows together! I suggest sewing your rows together in pairs, 1+2, 3+4, etc. You can then sew your pairs together and continue until you’ve finished. This system helps minimize the amount of bulky sewing you’ll have to do. Just like with your rows, don’t forget to press your seams.
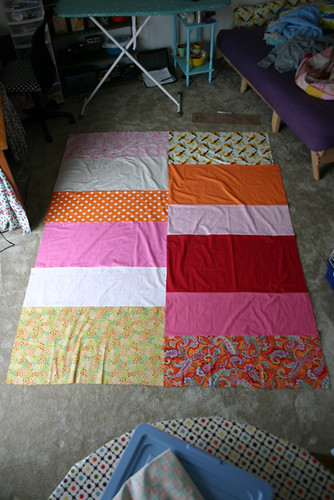
9. Time for the backing! For my two quilts, I choose to try and use up leftover fabrics that I used in the front.
10. I would suggest making your backing about 4" bigger on each side to allow for some shifting during quilting. This makes your backing piece 69"x91". I’ve done two different pieced backings, the first is to split it down the middle using various sized pieces that are 35" wide, just making sure you end up with two 35"x91" pieces that are then sewn together. Another option is to piece strips. Each pieced strip needs to be 69" long, and the stripes sewn together need to add up to 91". Or, keep it simple and use yardage!
11. Basting: Using masking or painter’s tape, tape the backing to a clean, hard surface, right side down. Spread out batting on top of the backing, smoothing out any wrinkles. Carefully spread your quilt top on top of the batting, right side up. You now have a quilt sandwich. Starting in the center of your quilt sandwich, place your first pin, making sure to catch all three layers. Continue to place pins every few inches, securing the layers together.
12. Quilting: Quilt as desired, by machine or by hand. Trim away excess batting and backing fabric.
13. Binding: Trim off selvedges and sew your binding strips together to form one long strip, press seams open. Fold in half lengthwise, pressing with your iron as you fold. Attach binding using your preferred method. For a detailed tutorial on attaching your binding to both sides by machine, see here.

Quilt, bind, wash, and enjoy!
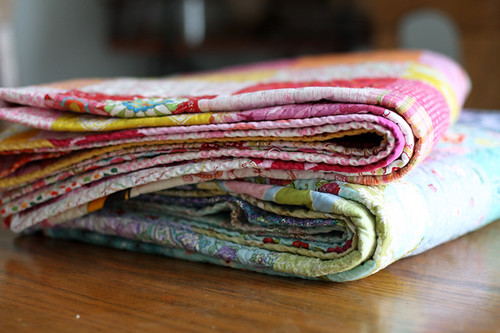
See my two finished quilts here: Warm Colors Quilt + Cool Colors Quilt.
Sewing Level: Beginner Friendly
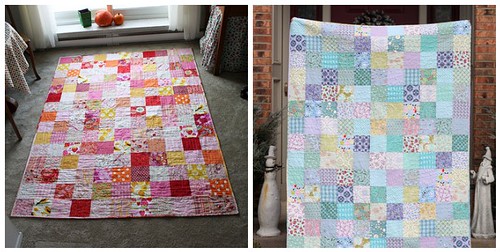
Finished Size: 61"x83"
Materials:
- 20 fat quarters of Color A*
- 10 fat quarters of Color B*
- 5 fat quarters of Color C*
- 5 fat quarters of Color D*
- 5 1/4 yards of backing fabric
- 69"x91" piece of cotton quilt batting
- 5/8 yard of binding fabric
- Colors Patchwork Quilt Worksheet (download here)
*1/4 yard cuts can be substituted.
Instructions:
*Use 1/4" seam allowance unless otherwise noted.*
1. First and foremost, you will need to choose 4 colors (A, B, C, + D) for your quilt. You may choose to use warm or cool color schemes, but this method would also work with any color scheme you’d like. Use the above worksheet to lay out your colors if you'd like, or come up with your own arrangement!
2. Rank your 4 colors in order of importance. You will need a main color (A), secondary color (B), and two additional colors (C and D). Now, choose 20 fabrics from your color A, 10 different fabrics from your Color B, and 5 different fabrics from colors C and D. This will give you a total of 40 different fabrics.
3. Cut out your squares as follows:
Color A – 83 squares of your main color. Use 20 different fabrics.
Cut (5) 6" squares each from 3 fabrics, cut (4) 6" squares each from 17 fabrics.
Color B – 40 squares of your 2nd color. Use 10 different fabrics.
Cut (4) 6" squares each from 10 fabrics.
Color C – 21 squares of your 3rd color. Use 5 different fabrics.
Cut (5) 6" squares from 1 fabric, cut (4) 6" squares each from 4 fabrics.
Color D – 21 squares of your 4th color. Use 5 different fabrics.
Cut (5) 6" squares from 1 fabric, cut (4) 6" squares each from 4 fabrics.
For a total of 165 squares.
*A 6" square acrylic ruler is really handy here. The nice thing about 6" squares is that most standard acrylic rulers are 6"x24". This allows you to use your ruler as a template to cut a 6" strip and then cut 4 squares from each strip.
4. With your colored in worksheet in hand, lay out your squares in 15 rows of 11 squares each. This process requires a certain amount of patience depending on your preferences. I decided I did not want any one fabric to appear in the same row or column. While this may not seem possible, it indeed is! It takes a while to get it just right I suggest working on it for a bit and then coming back to it later if possible. If this issue doesn’t bother you, don’t worry about it. Fiddle with the arrangement until you like it.
5. Now that you’re done with your placement, you’ll want to stack up your rows so that you sew them up in the correct order. I choose to stack the squares moving from left to right, starting at the top of my quilt map.
6. You should now have 15 stacks of 11 squares each. Label the top of each row with a slip of paper attached with a safety pin.
7. Sew your squares together for each row. Depending on your preference, iron your seams open, or you may choose to press towards the right or left. I suggest doing this after you have a few rows completed. This breaks up the sewing a bit and doesn’t leave you with a ton of ironing at the end/
8. Now it’s time to sew your rows together! I suggest sewing your rows together in pairs, 1+2, 3+4, etc. You can then sew your pairs together and continue until you’ve finished. This system helps minimize the amount of bulky sewing you’ll have to do. Just like with your rows, don’t forget to press your seams.
9. Time for the backing! For my two quilts, I choose to try and use up leftover fabrics that I used in the front.
10. I would suggest making your backing about 4" bigger on each side to allow for some shifting during quilting. This makes your backing piece 69"x91". I’ve done two different pieced backings, the first is to split it down the middle using various sized pieces that are 35" wide, just making sure you end up with two 35"x91" pieces that are then sewn together. Another option is to piece strips. Each pieced strip needs to be 69" long, and the stripes sewn together need to add up to 91". Or, keep it simple and use yardage!
11. Basting: Using masking or painter’s tape, tape the backing to a clean, hard surface, right side down. Spread out batting on top of the backing, smoothing out any wrinkles. Carefully spread your quilt top on top of the batting, right side up. You now have a quilt sandwich. Starting in the center of your quilt sandwich, place your first pin, making sure to catch all three layers. Continue to place pins every few inches, securing the layers together.
12. Quilting: Quilt as desired, by machine or by hand. Trim away excess batting and backing fabric.
13. Binding: Trim off selvedges and sew your binding strips together to form one long strip, press seams open. Fold in half lengthwise, pressing with your iron as you fold. Attach binding using your preferred method. For a detailed tutorial on attaching your binding to both sides by machine, see here.
Quilt, bind, wash, and enjoy!
Monday, March 22, 2010
Received more of my favorite Pyrex pattern for my birthday! :)
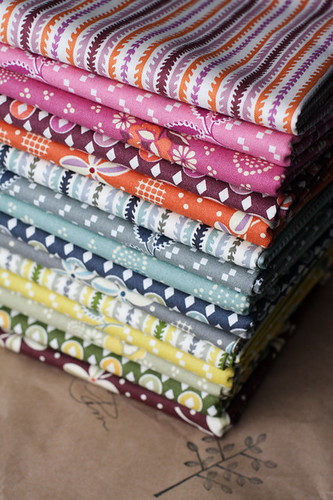
Finally decided to supplement my Hope Valley collection with the striped print. I'm glad I did it now rather than in 6 months, even though it breaks my hiatus.
This little gnomie is living with me now! He's from 1980 and he's also a bell!
Basketball season is in full swing and I'm loving it!
Today I love the..
Smell of: Fresh night air
Sound of: 3rd Rock from the Sun
Taste of: Homemade shirley temple
Sight of: Fun mail!
Feel of: A nice nap!
Good Things about Today:
- The worst of this week is over!
- Despite the rain and gloom I got a few good photos
- George is being a good rabbit!

Finally decided to supplement my Hope Valley collection with the striped print. I'm glad I did it now rather than in 6 months, even though it breaks my hiatus.

This little gnomie is living with me now! He's from 1980 and he's also a bell!

Basketball season is in full swing and I'm loving it!

Today I love the..
Smell of: Fresh night air
Sound of: 3rd Rock from the Sun
Taste of: Homemade shirley temple
Sight of: Fun mail!
Feel of: A nice nap!
Good Things about Today:
- The worst of this week is over!
- Despite the rain and gloom I got a few good photos
- George is being a good rabbit!
Subscribe to:
Posts
(
Atom
)