Tips for Keeping Your Sewing Table Organized and Clutter Free

Friday, April 24, 2020


Happy Friday! Last week I put a call out on Instagram (I'm @jenib320) to hear what kinds of struggles folks have with sewing space organization. I want to start writing regular posts on organizing because it's something I really love. With so many of us spending more time at home these days, having our spaces work well feels extra important!


DIY Thread Storage Shelf

I made a big list of everyone's suggestions and issues and will be pulling from that for topic ideas. If you'd like to share yours, feel free to leave a comment here or on this instagram post. Today I wanted to tackle tips for keeping your sewing table organized and clutter free. This was a common issue that came up, so hopefully these tips will be helpful!

Evaluate Your Space

In my opinion, the easiest and best step to take first when organizing is evaluation. Take a moment to look at your work table and take stock of what you see. Ask yourself a few questions to get started:

What kinds of messes or piles do you make? (unfolded fabric, fabric stacks, tools, thread, scraps, trash, projects, etc)

Where are those messes or piles concentrated?

Do you have dedicated spaces for these items to be put away? (tools, fabric, etc)

When I'm trying to set up a new organization system or change my habits, I like to work with my natural tendencies rather than against them. Personally, I find that this makes me more likely to succeed. The easier it is for me to keep things clean, the more likely I will be to follow through and keep it clean. Let's go through some practical examples of things that I do in my space.

Fabric

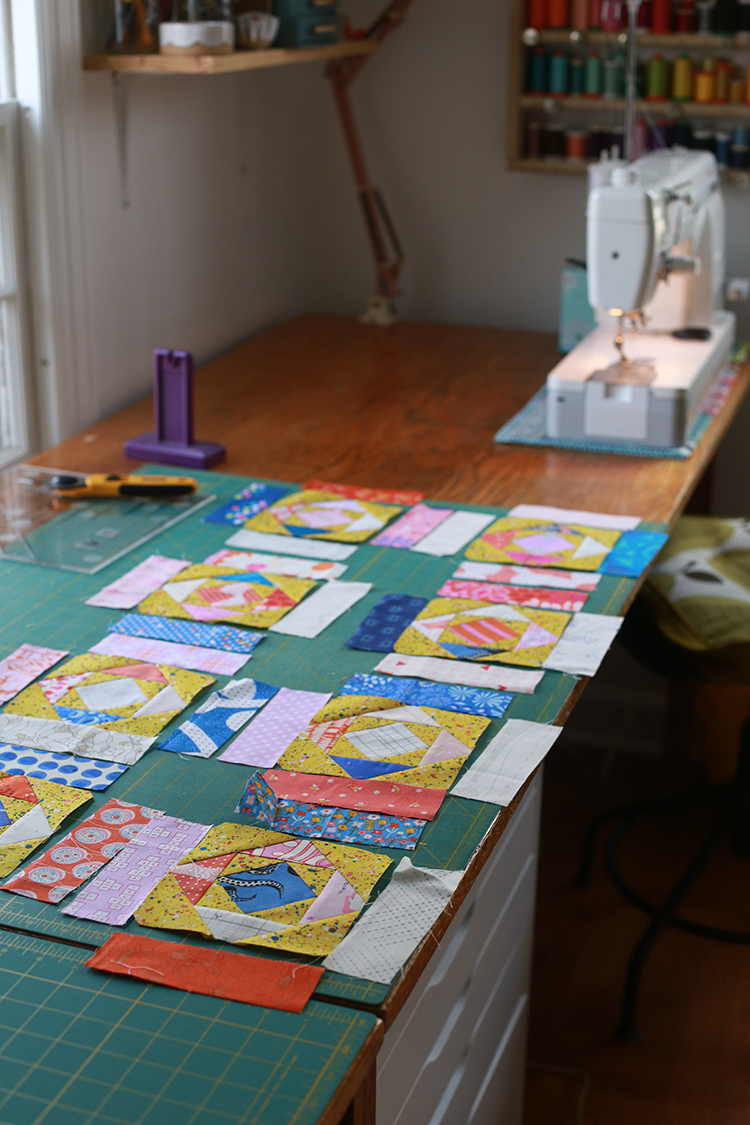
Fabric is what makes the biggest mess on my sewing table. Fabric waiting to be cut up, already cut up and tossed aside, and fabrics ready to be put away. I found I was always stacking up used fabrics in the same spot on my table. So I put a basket there! This way they have a place to go if I don't have time to put them away immediately. It's just as easy to put them in the basket as leaving them on the table top, but it feels more contained.

Scraps + Trash

To keep fabric scraps and trash under control, I keep a small trashcan and a tub for scraps right next to my machine. They're within reach of my cutting mat and machine, so it's easy to keep tossing them as I cut or sew. If you don't have a dedicated sewing space, a small dish or basket for scraps on the table works well too!

Tools + Notions

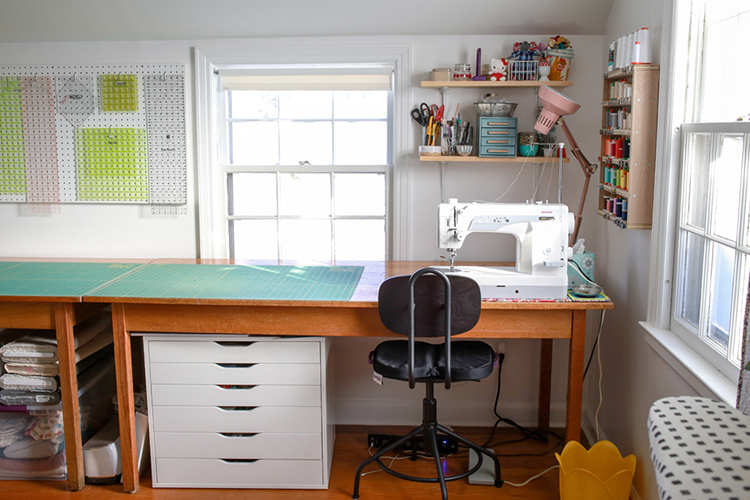
If you have available wall space, I highly recommend getting your tools and any notions you can off your tabletop and on the wall. For tools, I've loved having a couple simple shelves above my sewing machine. Just a few boards and cheap brackets from the hardware store. They're also a great spot to keep often used notions like your go-to thread and extra needles/pins.

Rulers

A pegboard is a great way to store rulers and/or tools. It doesn't have to be that complicated though! Stick a few nails in the wall and you have instant ruler storage! Add ribbon or twill to your scissors and rotary cutter and you can hang those too.

Tool Caddy
If you're storing your tools on your work table, a system for corralling them is key. Keep it simple with a few mason jars or baskets. Or make yourself a tool caddy. I've made a bunch of the #10 Caddy Pattern* by Sew Can She, they're fun!

Patterns + Paperwork

I struggle with keeping my various paperwork organized on my tabletop, so I recently added a metal letter organizer to help me out. It's a great spot to store small works in progress, patterns I want to make soon and a notebook. I was always piling up papers in that corner, so this feels neater.

Projects in Progress

It goes without saying, but good project storage is key to keeping your worktable tidy. I keep the projects I'm currently working on in this cabinet that sits directly underneath my cutting table. Having storage within and arms reach of my machine and table means it's super easy to put things away and access other projects. Next week's post will be on WIP and UFO storage!


I hope these tips and ideas are helpful for keeping your work table more organized. There is no wrong or right way to keep things neat. Work with your unique habits, work flow and space. We're all different, and not every method or technique will work for every person. And that's okay! It's all about adapting to your personal preferences.

Happy Sewing!

*Note: Any links marked with an asterisk in this post are affiliate links. This means if you click through and buy something, I make a small commission, at no extra cost to you.

Scrappy Canvas Workshop Tote Bag

Thursday, April 16, 2020


Happy Thursday! Today I have a finished new tote bag using my Workshop Tote Bag Pattern to share and some shop news too.


Back in February I decided I wanted to make a project that would make a good dent in my canvas and cotton/linen scraps. I have a harder time using these up compared to quilting cotton scraps. Typically they end up becoming little zipper pouches.


The things I had the most of were essex linen scraps. Some overprinted from collections by Anna Graham*, Erin Dollar* and Carolyn Friedlander*. I also added a number of japanese canvas prints and a random denin stripe.

I cut all the yardage and scraps into lots of squares for half-square triangles.


Figuring out the piecing so that no prints touched themselves was a challenge, but it ended up working out well!


The finished tote is nice and sturdy. This is the half-square triangle option from my Workshop Tote Pattern.


I used 1" cotton webbing for the handles! The biggest reason for making this tote was to test out the new cotton webbing that I ordered for my online shop! I ordered it when I ordered the twill tapes, but it took me a while to get this tote finished and photographed. Plus getting new products in the shop always takes longer than I think!


So! You can now find 1" and 1 1/4" wide cotton webbing in my online shop. The 1" webbing is what I use for most tote bags including the Workshop Tote Pattern and the Elemental Tote Pattern. The 1 1/4" webbing is used in the Sew Portable Travel Set Pattern, and can sometimes be difficult to find in stores. Thought it would be nice to stock that too.

Find it in my shop here: Cotton Webbing


It feels good to use up some of these scraps. A few I've been holding onto for years. Always seems a bit silly once they end up in a project!


This last photo is making me laugh at the moment. Ever feel like a crumpled up tote bag? This last month has been full of ups and downs. We're all going through it together, at different levels of course, but it's a little comforting to know we're not doing this alone. Stay well, stay safe friends!
Pattern: Workshop Tote Bag Pattern
Fabrics: Prints by Anna Graham*, Erin Dollar* and Carolyn Friedlander*
Notions: 1" Cotton Webbing

Happy Sewing!

*Note: Any links marked with an asterisk in this post are affiliate links. This means if you click through and buy something, I make a small commission, at no extra cost to you.

Pastel Posy Vintage Sheet Quilt

Thursday, April 9, 2020


Photo © 2020 Love, Patchwork & Quilting Magazine

Happy Thursday! I have a finished quilt to share with you all today, and thankfully it's a cheerful one!


The pattern for this quilt can be found in Issue 84 of Love, Patchwork & Quilting Magazine, which is on newsstands now! I made this quilt back at the tail end of last summer, and it was so fun to work on.

Side note, I can't believe the magazine is already on it's 84th issue! Before it was a monthly magazine it was quarterly, and I contributed to the first issue, Spring 2013. Amazing how fast time flies!


The quilt is made completely from vintage sheets from my stash, which gives it an extra soft look and feel. I used eight different sheets for the star points and four different lighter sheets for the background.


Photo © 2020 Love, Patchwork & Quilting Magazine

It was fun to make another star quilt from vintage sheets, this quilt is my fifth one! Here are a few other ones I've made: Sparkling Cider Vintage Sheet Quilt, Starry Mini Quilt, Giant Vintage Star Throw Quilt, Giant Vintage Star Baby Quilt + Pillow.


Love the good quilt wrinkle. As soon as I received the quilt back from the magazine, I threw it in the wash. I love the look of a freshly washed quilt. That little bit of shrink and crinkle from the dryer is the best. I find it especially nice for vintage sheet quilts. They feel instantly worn in and soft.


The backing and binding are also vintage sheets. I picked the backing quickly but had a hard time picking a binding. I ended up going with a bright green sheet that had a lot of other colors in it too, to pull it all together.


If you're interested in sewing or quilting with vintage sheets I'd recommend this post: How to Identify, Shop for and Sew with Vintage Sheets

Happy Quilting!

March Monthly Report

Wednesday, April 1, 2020


Happy April! It's time for March's monthly report. See past reports here.


Before things got too crazy around here with Michael working from home and all the anxiety caused by the virus, I sewed a few things! First up, a drawstring bag. This is the same size as the tutorial and the Everything size from the pattern. Making these is always a nice palette cleanser and I love having unused ones on hand for gifts if I need something fast!

Tutorial: Lined Drawstring Bag Tutorial
Pattern: Lined Drawstring Bag Pattern
Ties: Ruler Twill Tape


I also stitched up and finished a new workshop tote! My stash of cotton/linen and canvas scraps was getting out of control, so I decided to make the HST version of the tote. I wanted to see how bulky the seams would get when using heavy fabrics and it was really not an issue, yay! I need to share this tote in full soon!

Pattern: Workshop Tote Bag Pattern


I am currently finishing up a quilt sampler for a magazine, but once it's done I'm going to start another double gauze quilt! I love the quilts I've made from these fabrics and it felt like a good time to make another one.


To keep myself accountable for my stash goals, I track my yardage for fabric and yarn each month. Read more about how I track here. Here is how I did in March:

March Fabric
Used up: 2.75 yards
Brought in: 0 yards
Net: -2.75 yards
Year to date: +7.25 yards

March Yarn
Used up: 0 yards
Brought in: 0 yards
Net: 0 yards
Year to date: 0 yards

No fabric came in this month! I didn't finish tons yardage wise, but that's okay. Slow but steady! April should be better on that front, since I'll be finishing a quilt and I have other plans to get myself motivated to finish more. We'll see how that goes!


I've been knitting! I picked up these mittens again this month and finished both outsides. I was really dragging my feet about knitting the thumbs. I've started the lining now, which should go pretty fast.


Spring is on it's way! I'm so excited for it to get warmer, I love being outside. I know I will cherish my time in the yard even more this Spring. My daffodils and hyacinth are getting close to blooming, which is fun!


George bunny! Always munching and wanted to run around. He has been loving the extra attention lately. Such a sweetheart, as always.

Have a Great Month!