November Monthly Report

Monday, December 21, 2020


Happy December! Coming in most of the way through the month to sneak in the November report. Let's keep it short and sweet. See past reports here.


All of the sewing that I did in the month of November was for the Lined Drawstring Bag Sew Along! I made a bunch of bags, including 24 tiny bags for my advent calendar. When I wasn't sewing drawstring bags I was working on the sew along posts, editing photos or shooting videos. It was a lot of work, but I hope it was fun! You can find all the posts from the sew along here: Lined Drawstring Bag Sew Along.

Here are a few of my favorite bags I made in November:


All made with my tutorial/patterns:
Lined Drawstring Bag Tutorial
Lined Drawstring Bag Pattern
Lined Drawstring Bag Expansion Pattern


To keep myself accountable for my stash goals, I track my yardage for fabric and yarn each month. Read more about how I track here. Here is how I did in November:

November Fabric
Used up: 5.25 yards
Brought in: 3 yards
Net: 2.25 yards
Year to date: -17.5 yards

November Yarn
Used up: 0 yards
Brought in: 0 yards
Net: 0 yards
Year to date: 0 yards

I bought a little fabric this month, from my friend Holly's shop, Bijou Lovely. I couldn't let those Ruby Star Society apples go by without grabbing them! Plus a few other things jumped into my cart too. :)


We put up our Christmas tree the Friday after Thanksgiving which was fun. I love having it up and digging into all my ornaments. It makes it feel so cozy in the house. We're staying here in the holidays, so I really went all in on decorating to help us stay cheery.


George the bunny, looking as cute as ever.

Happy Sewing!

Lined Drawstring Bag Tutorial: Adding an Exterior Pocket

Wednesday, December 9, 2020


Happy Wednesday, and welcome to week four of the Lined Drawstring Bag Sew Along! If you're just joining in on the fun now, you can find all the previous sew along posts here: Lined Drawstring Bag Sew Along Schedule. This is the last of the formal sew along posts, but I'll be sharing more of my personal projects later this week or early next. I'll also be sharing your projects in my Instagram stories this week!

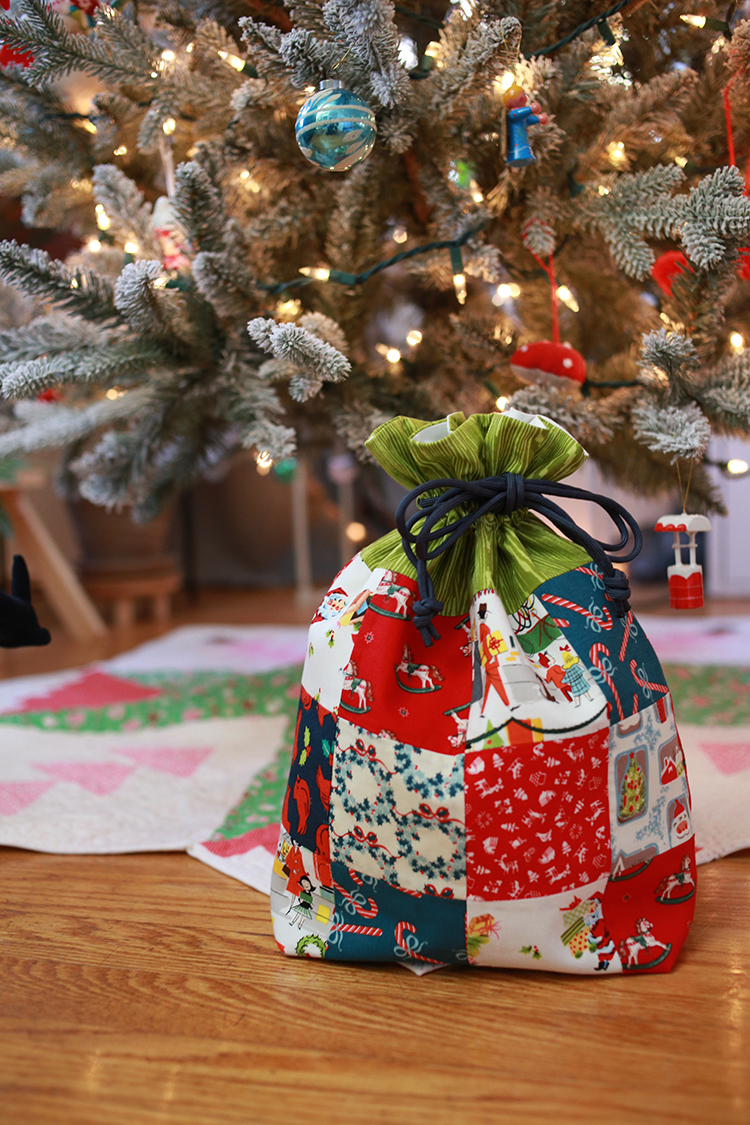
Today I have another tutorial for you! We'll be adding a simple slip pocket to the exterior of the bag! Perfect for a small gift, gift tag or small card! Or make a tiny pocket and use it for the tooth fairy! We'll be working with the Everything Bag size (same as the tutorial), but there are tips at the end of the post for adding one to other sizes from the pattern.

For reference:
Lined Drawstring Bag Tutorial
Lined Drawstring Bag Pattern
Lined Drawstring Bag Expansion Pattern


I was inspired to write this tutorial after making some drawstring bags from thrifted button down shirts last year. Read more about those bags in this post: Upcycled Lined Drawstring Gift Bags + How to Cut up a Button Down Shirt .

I had originally planned to simply repurpose the fabric from the shirts, but ended up repurposing the pockets too. They turned out so cute, I knew I wanted to eventually write this tutorial. You'll find instructions for a simple pocket, but you could definitely get creative and make different style pockets to add to your bags! A dress shirt style pocket or maybe a pocket with a rounded bottom would be really fun.


The instructions below are for a 4" finished pocket. Head to the end of this post for guidance on other pocket sizes and apply pocekets to the other bag sizes.


Sewing Level: Beginner Friendly
Finished size: Approx. 10" tall, 7" wide, 3" deep

Pocket Lined Drawstring Bag Materials:
- 3 Fat quarters (18"x21")
- 1 Fat eighth pocket fabric
- 2 yards of 1/2" twill tape, or 1/8 yd fabric
- Coordinating thread
- Acrylic ruler
- Large safety pin
- Water soluble pen

Looking for supplies? Check out my Pattern Supplies and Resources post.

Pocket Lined Drawstring Bag Cutting:
From Exterior Main Fabric:
- Cut (1) 9”x21” strip
- Subcut into (2) 9”x10.5” pieces

From Exterior Accent Fabric:
- Cut (1) 4”x21” strip
- Subcut into (2) 4”x10.5” pieces

From Interior Fabric:
- Cut (1) 12.5”x21” strip
- Subcut into (2) 12.5”x10.5” pieces

From Pocket Fabric:
- (2) 4.5" squares

If using fabric for ties:
- Cut (2) 32”x2” strips

If using twill for ties:
- Cut (2) 32" pieces

Pocket Lined Drawstring Bag Instructions:

*Use a 1/4” seam allowance unless otherwise noted*

Before constructing the bag, we first need to make the slip pocket and attach it to one of the Exterior Main pieces.


Place pocket pieces right sides together. Pin around all four sides, leaving a small opening for turning in the side that will be the bottom of the pocket.


Sew around all four sides, backstitching when you start and finish, leaving the opening unsewn.


Trim seam allowance down to 1/8" at the corners to reduce bulk.


Turn pocket right sides out and press well. Top stitch along the top edge of the pocket piece.


Center the pocket across the width of the Exterior Main piece (for the Everything Bag 10.5" is the width) and place it 1" down from the top edge of the Exterior Main piece.


Pin pocket in place.


Top stitch along both sides and the bottom to secure the pocket to the exterior and close up the opening left for turning. Trim away any threads and press well.

For bag construction, refer to the free tutorial or the lined drawstring bag pattern. If you need extra guidance on the construction, please refer to the video tutorial.


Here are the approximate maximum size pockets you could add for each bag size included in the Lined Drawstring Bag Pattern. Also suggestions for how far down to place the top of the pocket on the Exterior Main. For a pocket that is completely centered in the finishd bag exterior, I recommend checking out my Lined Drawstring Bag Expansion Pattern. It explains exactly how to find the center of the exterior main and how to center something on it, in great detail!


Max. Finished Pocket Size* Placement from Top Edge
Tiny Bag
2"x2"
3/4"
Snack Bag
4"x3"
3/4"
Everything Bag
5.5"x5.5"
1"
Project Bag
7"x7"
1"
Artist Bag
9"x9"
1.25"
Laundry Bag
17"x10"
2"
CD Bag
5"x5"
1/2"
DVD Bag
9"x7"
1/2"
*Add .5" to both dimensions of the desired finished pocket size when cutting.
(Example: Finished pocket size 2"x2", cut pocket pieces 2"x2")


I hope this tutorial is useful! It's a simple addition to a plain bag, that makes it even cuter for gifting!

Happy Sewing!

Christmas Patchwork Lined Drawstring Gift Bag

Monday, December 7, 2020


Happy Monday! I'm happy to be sharing another personal finish for the Lined Drawstring Bag Sew Along today. We're heading towards the final week of the sew along, which seems impossible! Time has been going by so fast, and I am excited to share the last tutorial on Wednesday.

This past week I finished up my patchwork lined drawstring gift bag. I have a surprisingly small number of lined drawstring bags made up in Christmas fabric. I don't tend to buy too much holiday fabric, so maybe that's why? I honestly probably need to make a few more so that I have enough to wrap our gifts this year! I usually do a mix of bags and wrapping paper, but I'm planning to mostly use bags this time around.


A few years ago my friend Jacey gave me a stack of really cute Christmas fabric scraps and I've been holding onto them waiting for just the right project. I didn't sew as much with scraps this year as I would have liked, so it felt good to get a scrap project under my belt during the sew along. All these fabrics are so cute, I think I originally wanted to make something that didn't cut them up too much, but I'm pleased with how much that could still shine in this bag.


I chose to make the Project size bag from the lined drawstring bag pattern, since it uses larger squares than the Everything size. I really didn't want to chop up those adorable prints! This patchwork variation is a part of the lined drawstring bag expansion pattern.

Find the patterns in my online shop here:
Lined Drawstring Bag Pattern
Lined Drawstring Bag Expansion Pattern


I struggled a bit trying to decide on an accent fabric to use, but ended up with this olive green faux bois print from an old Joel Dewberry collection. This particular green color is in quite a few of the prints, so I think it works in the end. The bag is a bit busy with all the different patchwork prints, so a neutral might have been a better choice. I'm happy with how it turned out though.


I'm glad I still had some of this dusty navy paracord left for the ties. That color is also in a number of the prints, so it felt like a good unifying choice.

I buy most of my paracord from Bored Paracord* on Etsy.


I love finishing off lined drawstring gift bags by tieing it up in a bow! Makes it look even more festive in my opinion.

Happy Sewing

*Note: Any links marked with an asterisk in this post are affiliate links. This means if you click through and buy something, I make a small commission, at no extra cost to you.

Wine Bottle Drawstring Gift Bag Tutorial

Wednesday, December 2, 2020


Happy Wednesday, and welcome to week three of the Lined Drawstring Bag Sew Along! If you're just joining in on the fun now, you can find all the previous sew along posts here: Lined Drawstring Bag Sew Along Schedule. So far in the sew along I've shared my tips for picking out fabrics for drawstring bags, a full video tutorial, plus some of my personal drawstring bag projects.

Today I'm sharing a brand new bag size! I haven't shared many additional sizes, so it's fun to release this new size for you all! This bag is made using the same construction as the lined drawstring bag tutorial and pattern, so I'll just be sharing the measurements and cutting instructions for this bag here in this post. You'll need to refer to the tutorial or pattern for instructions to sew up the bag.


This is a cute alternative to the standard tall gift bag! It's not only eco-friendly but reusable and customizable! Choose fabrics to match the colors of the bottle, or to match the holiday or occasion.

Use it to gift wine, liquor or a nice bottle of vinegar or olive oil. Homemade vanilla, coffee syrup, or a custom infused oil would all make wonderful gifts to wrap up in this bag too. I think it would also be a great size for holding a reusable cutlery set. Add a cloth placemat or napkin and a set of reusable straws and you've got a compact little dinnerware set to throw in your backpack or bag for lunch on the go. You can avoid single-use plastic silverware in style!


I designed this bag specifically with holiday gift giving in mind. It's tall and skinny, sized just right to hold a tall bottle. The neck of the bottle sticks out of the top of the bag, giving a little preview of what's inside! I tested it with a variety of different bottles that we had on hand, but it was designed with a wine bottle in mind. The largest diameter bottle we have on hand is just under 3.5" across, and it fit great. I think anything too much larger than 3.5" will be a tight fit.

Depending on the exact size of the neck on the bottle you're wrapping, you may find that you need a little extra tie length in order to tie up a bow with the ties. If you're using twill or paracord, you can always cut them extra long and then trim them down after they're made.


The inside height of the bag, measured from the bottom of the bag to the drawstrings is 8.5". The measurement from the bottom of the bottle you're wrapping to the "shoulder" of the bottom (right before the neck), should be less than 8.5" in order for the drawstring to close around the neck. If you need the body of the bag to be a little taller to fit a specific bottle, just add a few inches to the height of the exterior main pieces (the 10.5" measurement), and add an equal amount to the height of the lining pieces (the 14" measurement).


Sewing Level: Beginner Friendly
Finished size: Approx. 12" tall, 4" wide, 3" deep

Lined Drawstring Bag Materials:
- 3 Fat quarters (18"x21")
- 1 1/2 yards of twill tape, nylon paracord, or 1/8 yd fabric
- Coordinating thread
- Acrylic ruler
- Large safety pin
- Marking pen

Looking for supplies? Check out my Pattern Supplies and Resources post.

Lined Drawstring Bag Cutting:
From Exterior Main Fabric:
- Cut (1) 10.5”x21” strip
- Subcut into (2) 10.5”x7” pieces*

From Exterior Accent Fabric:
- Cut (1) 4”x21” strip
- Subcut into (2) 4”x7” pieces*

From Interior Fabric:
- Cut (1) 14”x21” strip
- Subcut into (2) 14”x7” pieces*

If using fabric for ties:
- Cut (2) 26”x2” strips

If using twill for ties:
- Cut (2) 26" pieces

*This tutorial uses subcutting. There may be scrap leftover from the strips after you've cut your pieces. It's written this way to ensure that any directional fabrics are cut correctly. The scraps will not be used in the final bag. The final measurements for each piece can be found on the second line of each cutting instruction if you’d rather cut from scraps. All piece dimensions are listed as height x width.

Lined Drawstring Bag Instructions:

For bag construction, refer to the free tutorial or the lined drawstring bag pattern. In step 7, the depth is 3" (draw a line 3", across the corner). If you need extra guidance on the construction, please refer to the video tutorial.


I hope this will be a useful size bag for all your gifting needs! It would also be great for holding anything that's tall and skinny, doesn't have to be just for gifts. You could extend the length and make one to hold a curling iron or straightener! Lots of ways to use this size and all the other sizes in the pattern.

Happy Sewing!