Showing posts with label Geometric Bliss. Show all posts

Glamp Stitchalot Mystery Medallion Quilt

Tuesday, March 22, 2016


Happy Tuesday! Today I am happy to be sharing a finished quilt with you! This is one of the bigger quilts I've made in a while. In November of last year, I taught at the inaugural Glamp Stitchalot retreat! There were five other teachers (Violet Craft, Sarah Fielke, Katy Jones, Alison Glass and Tula Pink) and we all worked together to design a mystery medallion quilt, which students worked on throughout the weekend! I've finally finished up my sample of the mystery quilt!

Unfortunately, the pattern was exclusive to the event.


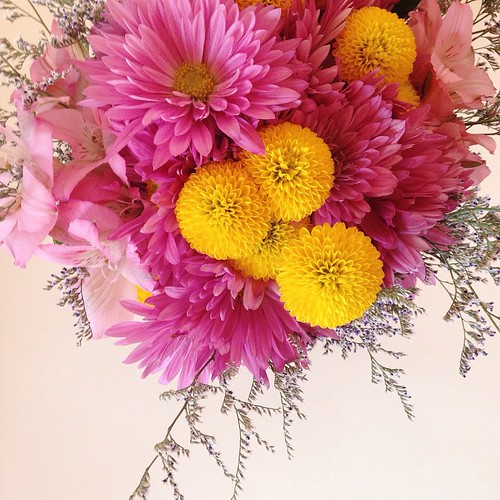
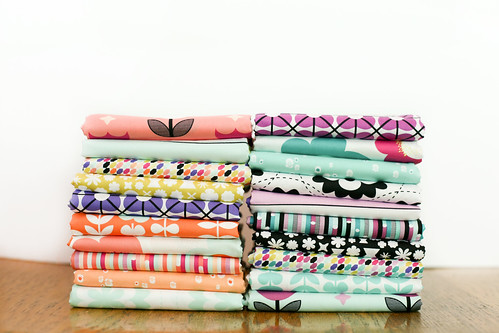
A look back at my initial fabric pull for this quilt, all from my stash! I ended up adding quite a bit to this pile, especially the black and white fabrics! I love these warm colors, especially with the addition of eggplant purple.


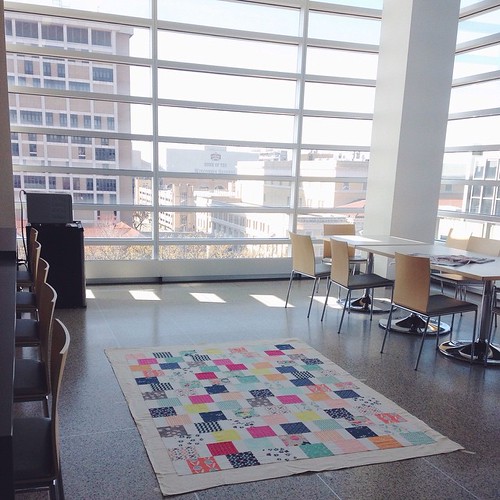
Ta da! The full finished quilt! I am so so pleased with how this ended up turning out. To be honest, I started this quilt not too long before teaching at the retreat, and it took quite a few very long sewing days to get it done in time. I'm glad that I did, but even happier that it's finished and I can now enjoy it!

Each teacher was responsible for designing a center block and a border. I used my own center block and then did a border from each teacher, with my own border to finish it off! Surprise, surprise, mine uses half-square triangles! :)


I took a bit of liberty with a couple of the borders. On Sarah's applique border, I used elements from her center block for my cornerstones in that border. I also shrunk the leaves a bit for the vines so that I could fit a few more.

For Katy's border, I was starting to really run short on time, so I simplified it by using some giant hexagons. I even got lazy and used my iron to press the fabric around the paper template, to avoid having to baste them! I did end up needing to cut a hexagon out of white solid to insert inside the hexagon shape so that the background fabric wouldn't show through. I didn't think ahead enough, it would have been a better choice to have the white be the background in that border!


I knew I wanted to finish it off with a strong binding. In the quilt top, I used black and white fabrics that were predominately white. For the binding, I used a print with a black background and white accents from my Geometric Bliss collection.


A quilt that I put this much work into deserved an extra special quilting treatment. I sent it off to my friend Christina Lane for her to work her magic on! She really knocked it out of the park, she knows just what I like :)


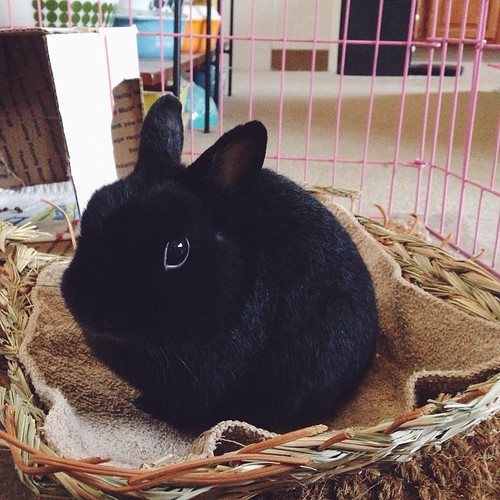
She even drew up some George bunnies and quilted them into the final border!! I totally freaked out when I saw them, it's such a super sweet touch. The quilting absolutely makes this quilt, I love it!

For more information on Christina's longarm quilting services, visit her website here. Don't forget to check out her pattern shop as well!


One more shot of those adorable smooching bunnies!


And one last shot of the full quilt! This quilt was too big and heavy for my typical duct tape/brick wall setup. They're storing two sets of short bleachers on a basketball court near our apartment, it was the perfect place to take these photos!

Happy Quilting!

Knit Stuffed Animals

Monday, January 18, 2016


Happy Monday! Today I want to share some more gifts that I stitched up at the end of last year. One was a Christmas gift, and the other two were "congratulations!" gifts, but were given at Christmas.

When I was at Quilt Market in Houston this past Fall, I saw these softies sewn up in knit fabrics in the Cloud 9 Fabrics booth (see them here). They were so cute and soft, I could not get them out of my head. The patterns are all from Shiny Happy World, and I'll link them individually below. I think I bought the patterns in my hotel room after the show closed one of the nights. I thought it was such a fun way to use knit fabrics and I love stuffed animals, so it was the perfect match!


I also happen to have plenty of knit fabrics on hand! I have eight different knit prints with Art Gallery Fabrics, four from Geometric Bliss and four from Curiosities. I've been trying to focus on finding non-garment projects that use knits, in addition to slowly building a wardrobe of handmade shirts.

I made all three softies at the same time, assembly line style. I used my Janome Memory Craft 4800, which is my backup machine. It's easier for me to use when sewing with knits. I used a stretch needle to sew all of these, along with Aurifil 50wt cotton thread. I thought I might use my serger for parts, but didn't end up using it.


First up is Franklin the Fat Cat! As soon as I read the name of the pattern, I was in love. I love a good fat cat! This one was the easiest of the three patterns, and also the smallest. One of Michael's cousins had a baby in December, so of course I had to make one for the baby! I was giving them a baby quilt made with Curiosities, so I decided to make a softie to match.


I used the Sweet Nothings Fond Knit along with a little bit of the Amaranth Knit Solid for the ears. Since this was for a baby, I embroidered the face instead of using plastic eyes. I also reinforced the arms, legs, ears and tail. Instead of using plastic pellets, it's filled only with fiberfill.


Next up is Benson Bunny! This one might be my favorite, since it is a bunny! This one probably took the longest. It has soft and stable in the ears to give them shape. It also has a stuffed tail and felt nose, both of which are attached by hand at the end. This bunny went to live with baby's big sister! I figured it has to be hard sharing all the attention, so she needed a softie too.


I used the Radical Blooms Blush and Parallel Segments Quartz Knits from Geometric Bliss for this bunny. The head and ears are Peachy Custard Knit Solid. I was able to find the perfect matching mint felt from The Sewcial Lounge, score! I filled the arms and legs with plastic pellets and there is some in the body along with fiberfill. I also used safety eyes on the bunny. I am very thankful that I reinforced the limbs and ears on this one too, since upon opening he was already getting played with and tugged on!


Last up is Munch! He has a mouch that you can stick your hands (or his!) in, which is really fun. I thought the construction of this guy would be the hardest of the three because of the mouth, but it really wasn't. It came together easily in the end! I made Munch for my brother for Christmas!


For Munch I used the Spherical Buds Aqua Knit from Geometric Bliss. For his mouth and ears I used the Turquoise Knit Solid. As instructed, I used a mix of fiberfill and plastic pellets to fill Munch. I also used safety eyes for him. I had to be extra careful when cutting him out since I was using a directional print. Luckily I did it right!


I really enjoyed sewing these! It is always fun taking flat fabric and turning it into something three dimensional. It's so satisfying. I haven't sewn a lot of softies before, so this was a learning experience for sure. I have a few other patterns I'd like to try this year. I think the softies turned out so sweet, and they were well received. Now that I've made all three, I need to decide which to make for myself! :)

Happy Sewing!

Geometric Bliss Triangularity Quilt

Wednesday, August 19, 2015


Happy Wednesday! I have a quilt finish to share today, WOO! Last month I finally got around to stitching up one of my nearly a year in the making Triangularity quilt. I cut this quilt out almost immediately after receiving my Geometric Bliss yardage last October. The triangles sat for a long time, and I worked on it a little at a time throughout this year. I let it sit so long, that by the time I was putting the rows together I had forgotten that I cut enough triangles for a Full/Queen vs. a Throw! I did a little ripping and got back on track. I should have taken better notes!


I'm excited to have another quilt made in this collection. There are so many of my favorite colors in this collection: orchid, mint, turquoise, coral, peach, gold/green, red orange, black/white! 


This quilt is quite big at 91" square! As I mentioned this is the Full/Queen size from my Triangularity Quilt Pattern. This uses the included triangle size, and uses half-yard cuts. The pattern has four additional sizes, plus instructions/math for creating your own custom quilt!


I sent this quilt over to Melissa of Sew Shabby Quilting for the quilting. With all the geometric prints and the triangle shapes of the piecing, I wanted to keep the quilt design geometric too. The Crackle pattern fit the bill. It gives the quilt a really interesting texture, it's super cool in person!


I struggled a bit to decide on a binding fabric, so I asked Instagram! I ended up going with a Verve Violet and a dash of Empire Yellow (both are Pure Elements solids). Since the front has so much going on, using solids seemed like the best choice. I also wanted the binding to coordinate well with the backing, since I actually pieced it!


For the backing, I used a black and white script print from Minimalista plus the Cuboid Orchid print from Geometric Bliss. I didn't have enough of the main backing print, so I stretched it with the purple, creating this semi-wonky plus. Makes it kind of two-sided!


I'm so happy to add another large quilt to my collection. I was talking to Jacey last week and we agreed that we never regret making a quilt too big, but we often wish we'd made quilts larger. I have a lot of quilts around 60"x80" or smaller, but not many big enough for our bed. Now I have another to add to that list! Yay!

Happy Quilting!

All Points Patchwork Review + Project

Tuesday, June 2, 2015


My tv tray set up: 40wt thread, my favorite snips and wonder clips!

Happy Tuesday! Today I have the pleasure of sharing a review of Diane Gilleland's new book, All Points Patchwork. If you're not familiar with Diane's work, I recommend checking out her blog, CraftyPod! It's full of creative, crafty goodness.


Pinned in place and ready to stitch down.

When Diane approached me about reviewing her book, I'll admit, I was a little hesitant. I knew it would be lovely, but I have never been comfortable with English Paper Piecing. Then I realized that was even more of a reason to check it out! I have dabbled here and there with hexagons, but have never felt like I really knew what I was doing.


I finally learned which needles work best!


Filled with step-by-step photos. Also, how did I never know about the quilter's knot?!

All Points Patchwork goes beyond the hexagon and explores all kinds of different shapes. What makes this book so unique is that it is an idea book vs. a project book. It's full of great project ideas, but the focus is on technique and exploring the process. It is a true resource, and I felt really inspired after reading through it. The book discusses tools and materials, techniques, building your own patterns, and then is broken down into chapters focusing on one or two shapes at a time.


Ahh, this is my comfort zone, designing with shapes by computer!


I was immediately drawn to these shapes, and used them in my final design.

Rather than feeling overwhelmed faced with the thought of choosing a project to make, I was given the freedom to design my own! I hopped on the computer and designed a "block".  Knowing the book was filled with tips and tricks on everything from knots and choosing thread color to basting complex shapes, I was confident I could tackle it.


Someone (me) didn't measure right the first time and put in too-short a zipper. Whoops!

I had so much fun making my block. As someone who isn't that comfortable with hand-stitching I was surprised by how quickly it came together! After I finished my block it took me a while to decide what to make with it. At first I was thinking a mini quilt, but ended up making a new iPad pouch. The walls are pretty much covered in my sewing room, so that seemed a more practical use!


I really love these colors together. Also, our world here in WI is so GREEN right now!

I used prints from my Geometric Bliss collection for the block and other parts of the pouch. The block is top stitched down onto some linen. I used a combination of Pellon's SF101 Shape Flex and new FF77 Flex-foam interfacing to give it extra padding. I quilted the exterior pieces with Aurifil 50wt #2024 thread to give it some structure.


Side note: We have a picnic table in our front yard again, yay!


Just one more photo!

I am really proud of my finished project, and I feel confident that I could tackle a larger English Paper Piecing project in the future. This book is a great resource, and I will have no problem making room for it on my bookshelf for a long time. I am thankful that I made time to do something outside of my comfort zone!

Diane has created a website just for the book, check it out for even more resources: AllPointsPatchwork.com. You can find All Points Patchwork now at your local bookstore, Amazon, Powells, and Barnes & Noble.

Catch-Up

Wednesday, April 15, 2015

Spring Flowers
Happy Wednesday! I'll try not to be too wordy on Wordless Wednesday!

Flowers from a leftover bouquet going strong. Love these colors.

Basting my Offset Quilt
Joined Michael in the lab this weekend to baste my Curiosities Offset quilt.

Geometric Bliss Triangularity Quilt
Picked up some older projects again, including my Triangularity quilt made from Geometric Bliss.

Dreamin' Vintage Double Wedding Ring
Trying to make some progress on my Dreamin' Vintage double wedding ring quilt. 16 arcs down, 152 to go!

Sweater Buttons
Found some buttons for my sweater! I've finished the body, just need to knit the sleeves.

Modernhandcraft Pincushion
Had to add this pincushion by Modernhandcraft to my collection!

Painting by Melissa Averinos
My George art collection continues to grow too. In love with this painting of George and I by Melissa Averinos!

Stitch Tsum Tsum Plush
I'm sort of obsessed with these Tsum Tsum plush from Disney. They're too much!

George
And of course, George the bun, looking all cute!

Have a great day!

Half-Hexagon Bunting Tutorial

Monday, April 13, 2015

Half-Hexagon Bunting Tutorial - In Color Order
Hi there! I've been meaning to post a tutorial for this for a while now, and time got away from me. I made this sweet bunting out of Geometric Bliss for my booth at Spring Quilt Market in Pittsburgh last year. It was one of those things that once I thought of it, I couldn't get it out of my head. It's a fun alternative shape for a bunting, and I think it turns out super cute!

Half-Hexagon Bunting Tutorial - In Color Order
I've written the instructions so that you can create any size bunting you'd like. Use step 6 to determine the size of your bunting. My bunting measures 250" from first flag to last flag, and 284" including the tails. I used 36 flags, and stretched my fabric by using a solid on the back of each flag. It fit very comfortably across a 12' wall. 

Half-Hexagon Bunting Tutorial - In Color Order
Sewing Level: Beginner

Materials:
- 7 1/2" x 3 1/2" pieces of print fabric (flags)
- Approx. 1/2 yard of solid fabric (tie)
- Coordinating thread

Instructions:
*Use a 1/4'' seam allowance unless otherwise noted*

1. Download the template here, and trace onto heavy card stock or template plastic.

2. Use the template to cut out twice your desired number of "flags". (Mine has 36 flags, so cut 72)

Half-Hexagon Bunting Tutorial - In Color Order
3. Place two half-hexagon pieces right sides together. On one wrong side, mark the seam allowance intersections in each corner. This makes it easier to get a nice sharp corner.

4. Sew around three sides, leaving the large top edge open.

5. Trim excess seam allowance at each corner. Turn and carefully poke out each corner. Press well.

Repeat steps 3-5 for remaining flags.

6. Determine your total desired length from first flag to last flag, then add 72" to that for the loose tails. Divide that number by 42 to determine how many 2" strips you should cut. Yardage required equals 2" multiplied by the number of strips. (Mine required 8 strips, so 1/2 yard)

7. Sew strips end to end into one long strip, pressing seams open.

8. Press each short end of strip under 1/4". Topstitch to secure.

9. Fold strip in half lengthwise, wrong sides together. Press. Unfold, and fold each raw edge into the crease you just created. Press. Fold in half again and press.

Half-Hexagon Bunting Tutorial - In Color Order
10. Find the center of the strip and mark it. Nestle the unfinished edge of the first flag into the fold of your strip, 3/8" from the center mark. Pin or clip in place.

11. Place a flag on the other side of the center mark. Continue to add flags approximately 3/4" apart.

12. Carefully topstitch along the open edge of the entire length of the strip, securing the flags in place.

Half-Hexagon Bunting Tutorial - In Color Order
Enjoy your new bunting! If you make something using this pattern, I hope you'll share it in the In Color Order Flickr Group or using the #jenibaker hashtag on Instagram!

If you're a shop interested in carrying Geometric Bliss, it can be ordered through Art Gallery Fabrics.  Find your sales rep here, call toll-free (888) 420-5399, or visit artgalleryfabrics.com.