Showing posts sorted by relevance for query vast quilt. Sort by date Show all posts

Flagged Quilt Tutorial

Tuesday, July 3, 2012

Flagged Quilt Tutorial - In Color Order
Flagged Quilt, a photo by jenib320 on Flickr.
I'm really excited to share this fun modern quilt with you today! I couldn't wait more than a few days to cut into my Blogger's Choice Bundle from Fat Quarter Shop, and I knew I wanted to do something that would really show off the prints. I love using big blocks for quick quilts! And this one came together really fast! :)

If you like quick big block quilts, check out my Giant Vintage Star Quilt Tutorial!

When I was picking fabrics for this bundle, I was immediately drawn to La Dee Da by Erin McMorris. She is one of my favorite designers, and I've been so excited for this collection.  So that was the starting point.  I knew I wanted to incorporate some basics from the line and found my color palette after looking around at what else would be available at the same time.  Lucky for me, Lillybelle by Bari J and Grand Hotel by Jenean Morrison had some similar colors.  From there, Art Gallery Elements were a no brainer! So here we have it! A palette of mustard, aqua, teal, and blue-gray.

Flagged Quilt Tutorial - In Color Order
Flagged Quilt, a photo by jenib320 on Flickr.
I was super tempted to use a simple patchwork design for this quilt, but wanted to try something different! I had seen a half-rectangle triangle quilt on Pinterest a few weeks back, and after seeing this Half-Rectangle Triangle tutorial on the Modern Quilt Guild Blog, I was sold! I paired my bundle with Kona White for the background, a vintage sheet for backing, and Art Gallery solids from my bundle for the binding.  I used my go-to free motion loopy quilting to finish it up.  I also used Pellon cotton batting for the first time, and it quilted up so nicely!

Flagged Quilt Tutorial - In Color Order
Flagged Quilt, a photo by jenib320 on Flickr.
This quilt could certainly be made with triangles, but sometimes it's nice to mix it up! I myself find triangles a bit fussy between cutting with templates and the sewing itself.  This method allows you to use simple rectangles to create a similar look.  Much more up my alley, but feel free to use a triangle template if you'd rather make it that way!

So, would you like to make one of your own?  I'm calling this a mini tutorial, because I will not be showing how to make the half-triangle rectangles since there is a perfectly good tutorial already! Plus this was my first time making them, hehe! Just make sure you use the measurements found here for your rectangles! Here we go!

Flagged Quilt Tutorial - In Color Order
Flagged Quilt, a photo by jenib320 on Flickr.
Sewing Level: Intermediate


Materials:
- 12 print fat quarters
- 2 1/4 yards of background fabric
- 4 yards of backing fabric (or a full size sheet)
- 72"x80" piece of batting
- 1/2 yard of binding (or 3 fat quarters like mine!)
- Coordinating thread
- Marking pen

Finished size: 64"x72"

Cutting:
From each of 12 print fabrics:
- Cut (2) 9"x13" rectangles, for a total of 24 pieces.

From background fabric:
- Cut (8) 9"x WOF strips
- From each 9" strip, cut (3) 9"x13" pieces for a total of 24 pieces.

From binding fabric:
- Cut (7) 2.5" x WOF strips

(If using fat quarters for binding, cut (6) 18"x2.5" strips from each of 3 fat quarters)

Flagged Quilt Tutorial - In Color Order
Flagged Quilt, a photo by jenib320 on Flickr.
*Use a 1/4" seam allowance unless otherwise noted.*
 
1. Separate your print and background pieces into two piles, making sure you have one of each print in both piles.

2. Use one pile to create 24 half-rectangle triangles according to the first part of this tutorial on the Modern Quilt Guild Blog.  Square up blocks to 8.5"x12.5". Set aside.

3. Use the second pile to create 24 OPPOSITE half-rectangle triangles according to the second part of the tutorial. Square up blocks to 8.5"x12.5".

We create our half-triangle rectangles in two parts because each pair of print/background pieces creates two identical half-rectangle triangles.  In order to create our flag pieces, we need two that go in different directions!

Flagged Quilt Tutorial - In Color Order
Flagged Quilt, a photo by jenib320 on Flickr.
4. Lay out your blocks in six rows of eight.  Play around with the layout! I tried out a few different things before landing on this.  You might like the prints/colors mixed up, or you could create diamonds or other shapes if you so choose! I've provided a graphic above to show my arrangement.

5. Once you have your layout how you like it, mark your rows (I simply use paper scraps and safety pins) so they don't get out of order! Sew together blocks in each row. Press your finished rows in alternating directions.

6. Sew your rows together, pressing seams open or in the same direction.

7. Baste, quilt, bind, and enjoy! :)

Flagged Quilt Tutorial - In Color Order
Flagged Quilt, a photo by jenib320 on Flickr.
I hope you've had fun hearing about my quilt and this mini tutorial!

Flagged Quilt Tutorial - In Color Order
Flagged Quilt, a photo by jenib320 on Flickr.
A very Happy 4th of July to all of my US readers! This quilt would look quite cute done up in red, white, and blue, don't you think?

Vast Quilt - In Color Order
© 2015 Lauren Hunt for Lucky Spool Media.

Looking to experiment more with super sized blocks? Check out the Vast quilt from my book, Patchwork Essentials: The Half-Square Triangle.

Cheers!

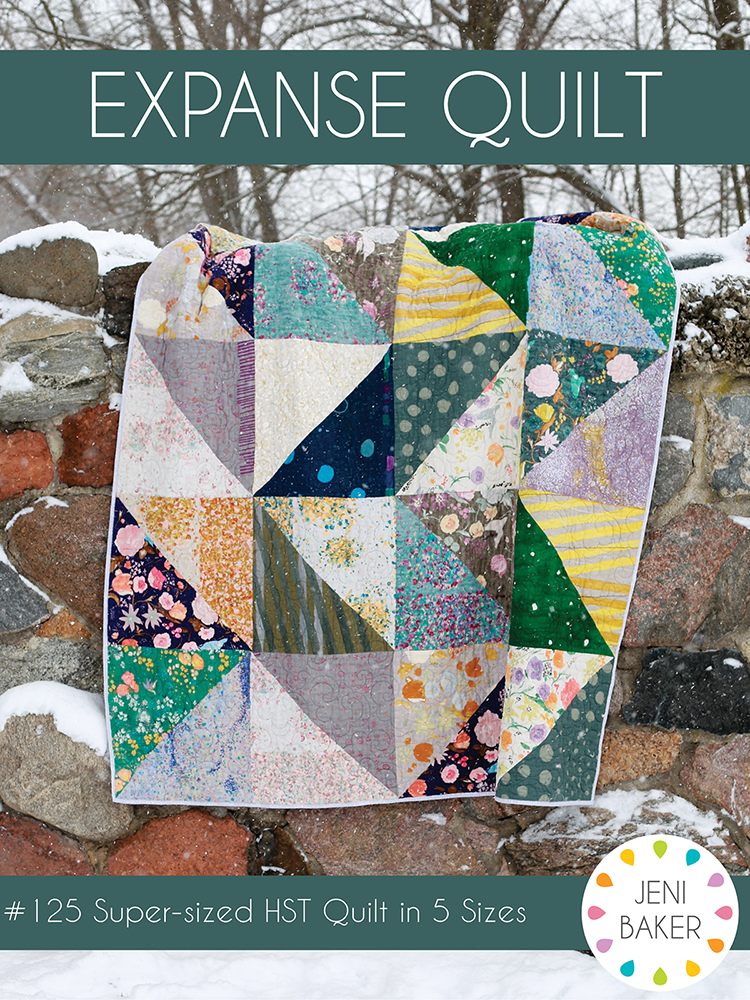
New: Expanse Quilt Pattern

Wednesday, August 3, 2022


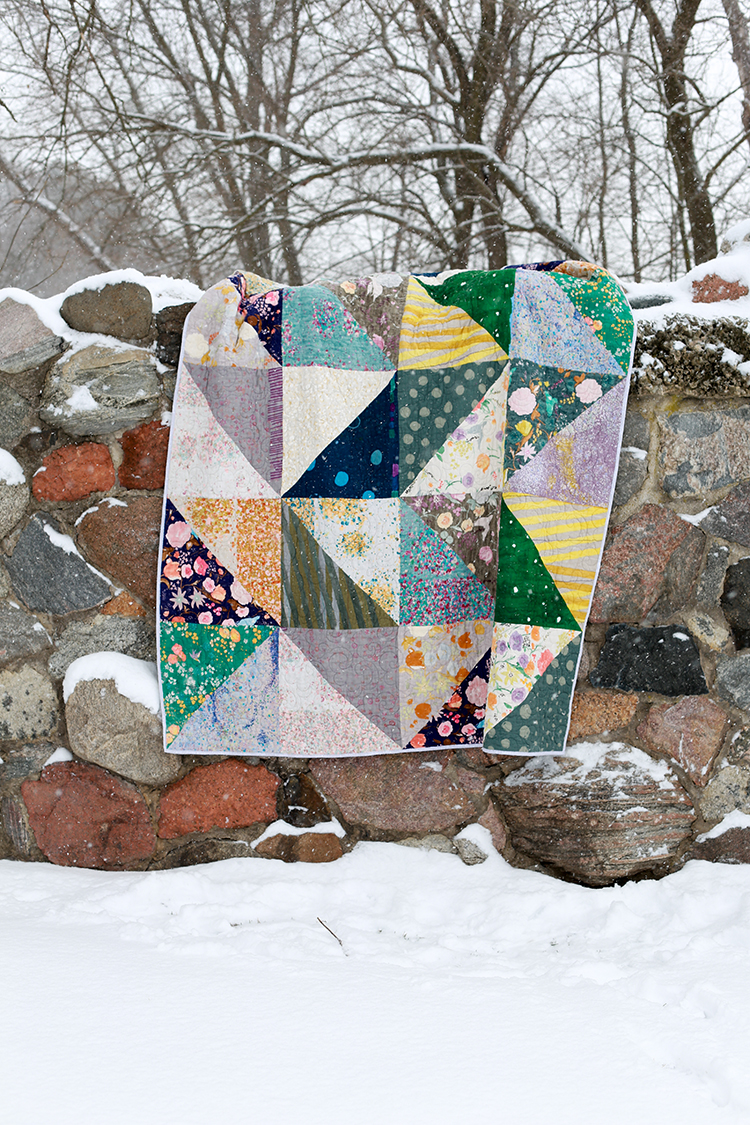
Happy Wednesday! Today I want to chat about my newest pattern, the Expanse Quilt Pattern.

I've been playing around with super-sized block quilts since 2011 when I made my Giant Vintage Star Quilt. I still love that quilt and I've continued to revisit the idea through other quilts and tutorials (like this one) and the Vast quilt that's in my book, Patchwork Essentials: The Half-Square Triangle.

You can find the new pattern for sale here: Expanse Quilt Pattern


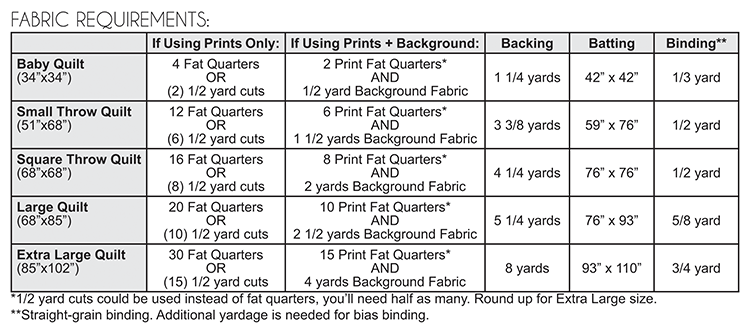
Nearly every big-block quilt I've made has been a square throw size. This has resulted in many emails over the years asking for help to make larger quilts. This has led me to finally release the Expanse Quilt Pattern, which has five different size quilts made with super-sized half-square triangle blocks!

This big block quilt is the perfect project to show off those fabrics you can’t bear to cut up. It comes together super quick, making it great for last minute gifting! Choose between two style options: using all print fabrics or pairing prints with a background fabric.


As I mentioned there are FIVE quilt sizes to choose from, hooray! Here are the included sizes: Baby (34"x34"), Small Throw (51"x68"), Square Throw (68"x68"), Large (68"x85"), Extra Large (85"x102").

In addition to instructions for making half-square triangle blocks and making your quilt, you'll also find coloring pages at the back of the pattern to help you plan out your quilt.


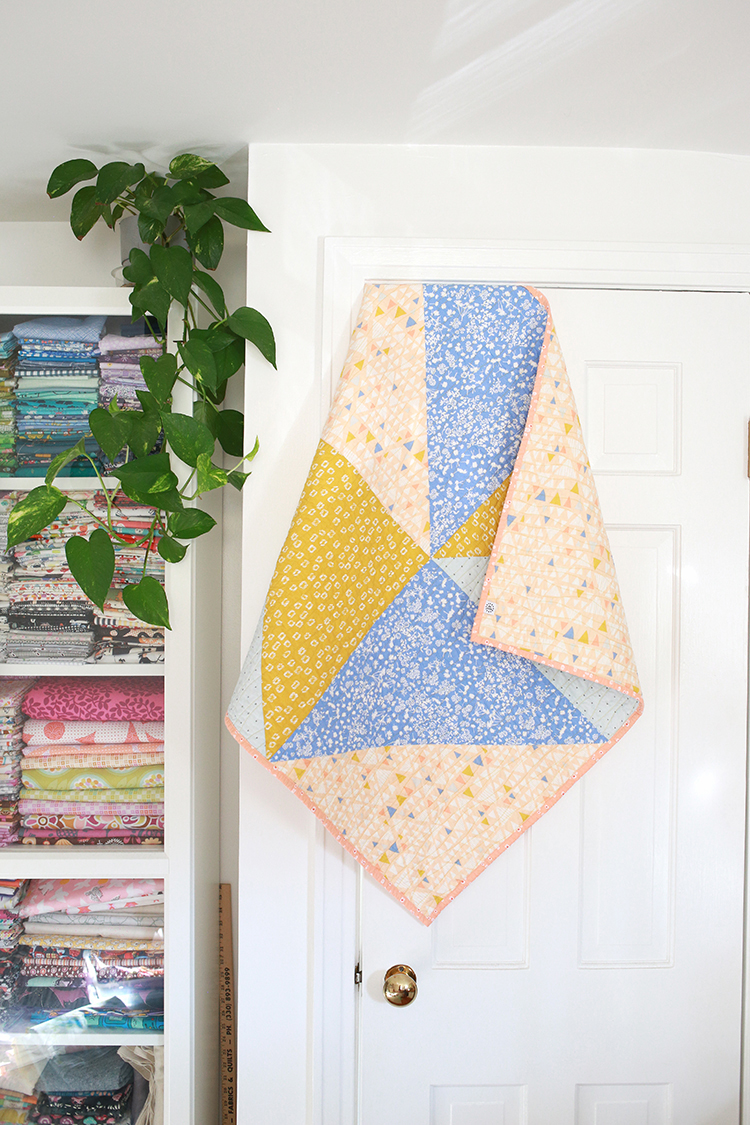
I always thought it would be fun to make a baby quilt with this design. If you don't spend a ton of time picking fabrics (you only need a few), and choose a relatively simple quilting design, I think you could pull this baby quilt together in an afternoon. Sometimes you need a last minute baby quilt, and I think this is a great option. Here is the baby quilt I made! I picked all the fabrics around the Leah Duncan fabric that I used for the backing. I love how it turned out!


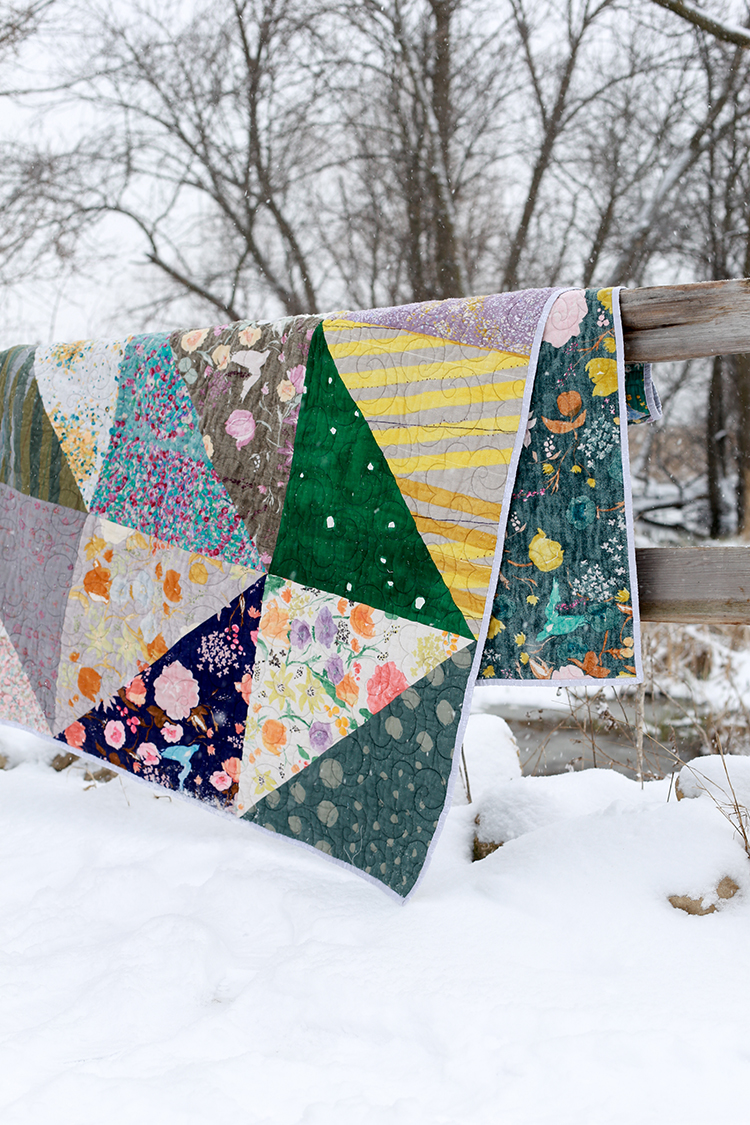
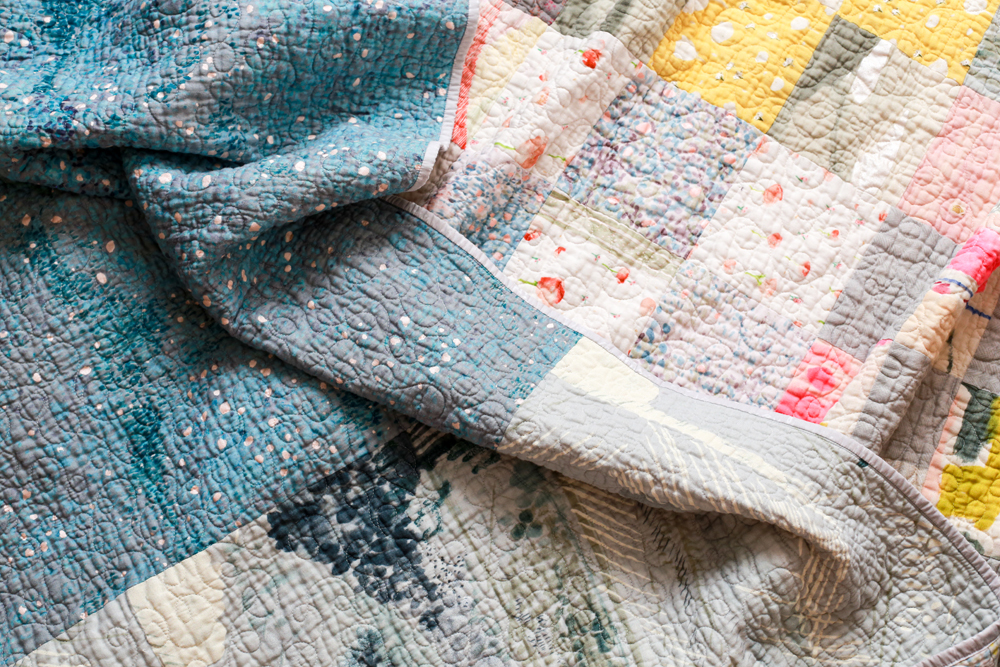
There are so many different color/fabric directions you could use for this quilt. I love making quilts that have no background fabric and this design works so well this way. Sometimes it's hard to choose a background fabric, or you just don't have enough on hand! This one was made with brushed cottons and double gauze fabrics by Nani Iro. I used wool batting and brushed cotton on the back, so it's incredibly cozy.

Read more about this quilt here: Nani Iro Brushed Cotton Expanse Quilt


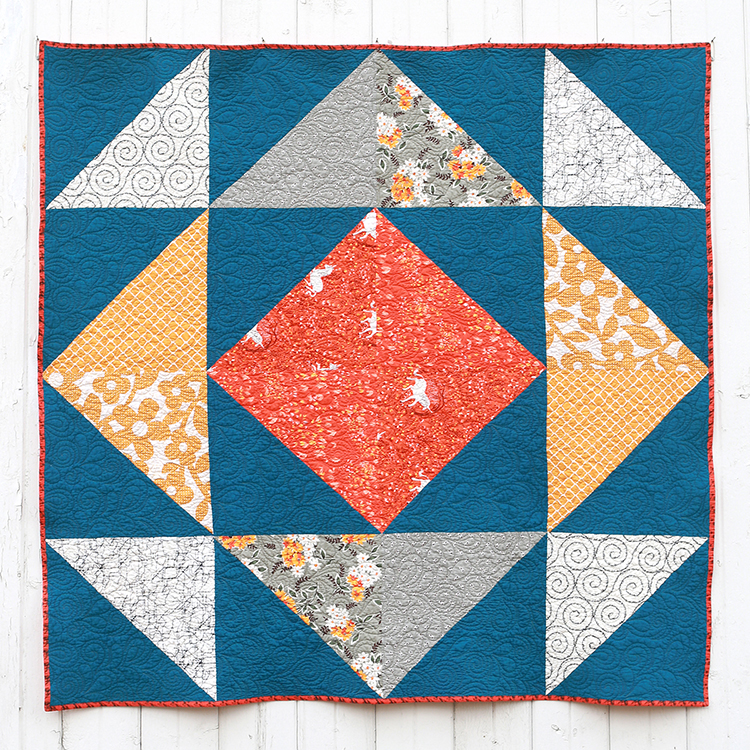
Going in a totally different direction, one of the options in this pattern is to use a background fabric along with prints. This really has a ton of options in terms of design. You can decide how many different colored prints you want to use and arrange the blocks however you'd like. So many different possibilities. Here is a quilt I made using this gorgeous teal shot cotton as the background fabric. The whole quilt is centered around the orange unicorn print. The quilt ends up looking like one giant quilt block!

Read more about this quilt here: Super-sized Unicorn Half-square Triangle Quilt


You can find the new pattern for sale here: Expanse Quilt Pattern

Happy Quilting!

Giant Vintage Star Quilt Tutorial

Wednesday, August 24, 2011


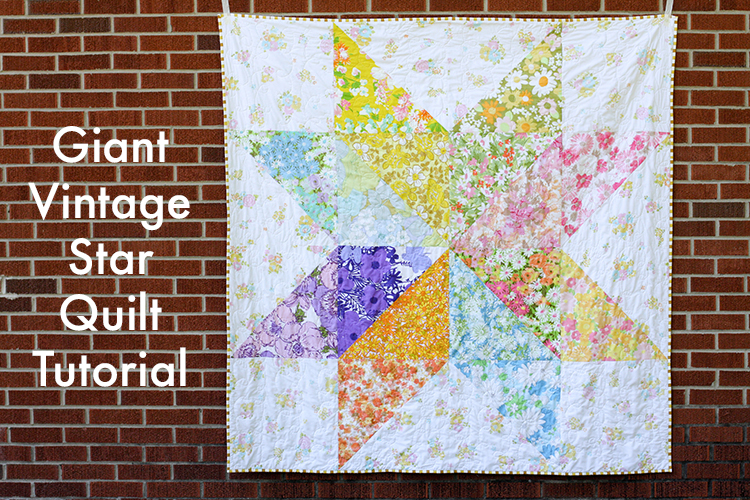
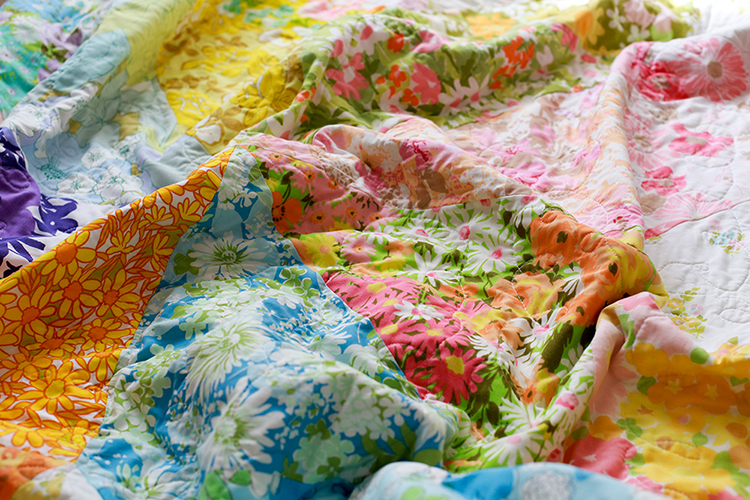
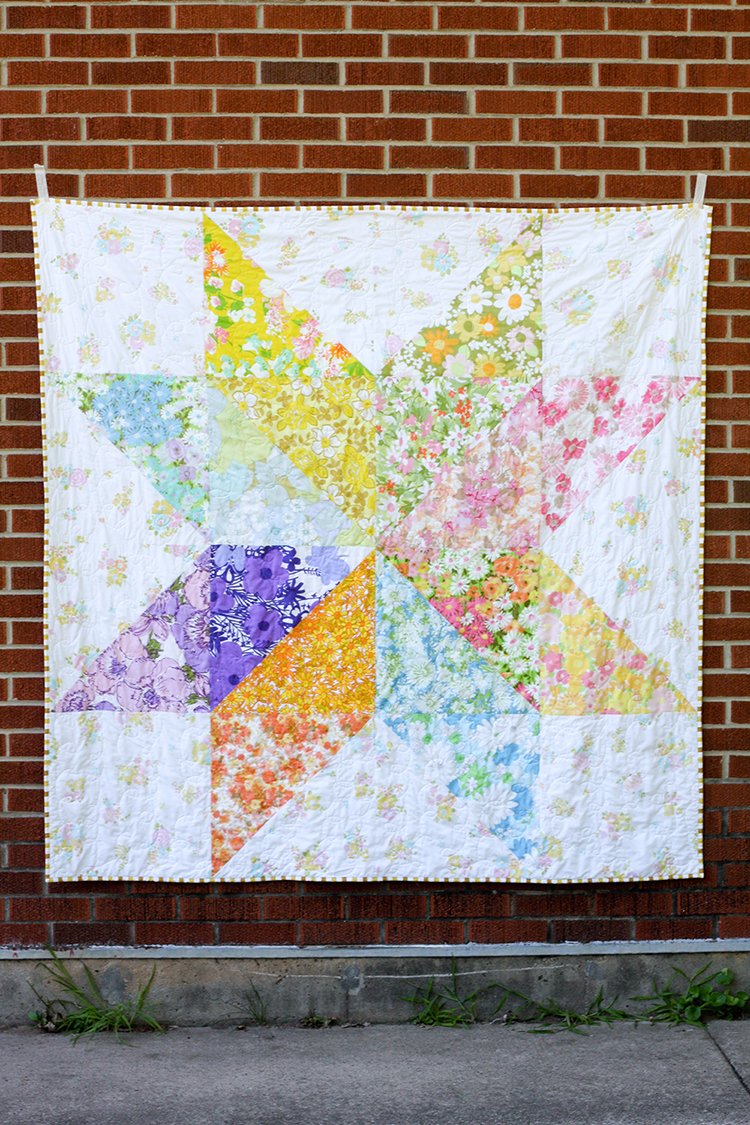
As promised, a tutorial for my Giant Vintage Star Quilt. This quilt takes advantage of a single quilt block, super sized! It takes a traditional block, the Starflower block, and makes for a very modern quilt. Perfect for beginner and advanced quilters alike. For more on my process and the inspiration behind this quilt, see this post: Giant Vintage Star Quilt.

https://www.jenibakerpatterns.com/product/giant-vintage-star-quilt-pdf-pattern
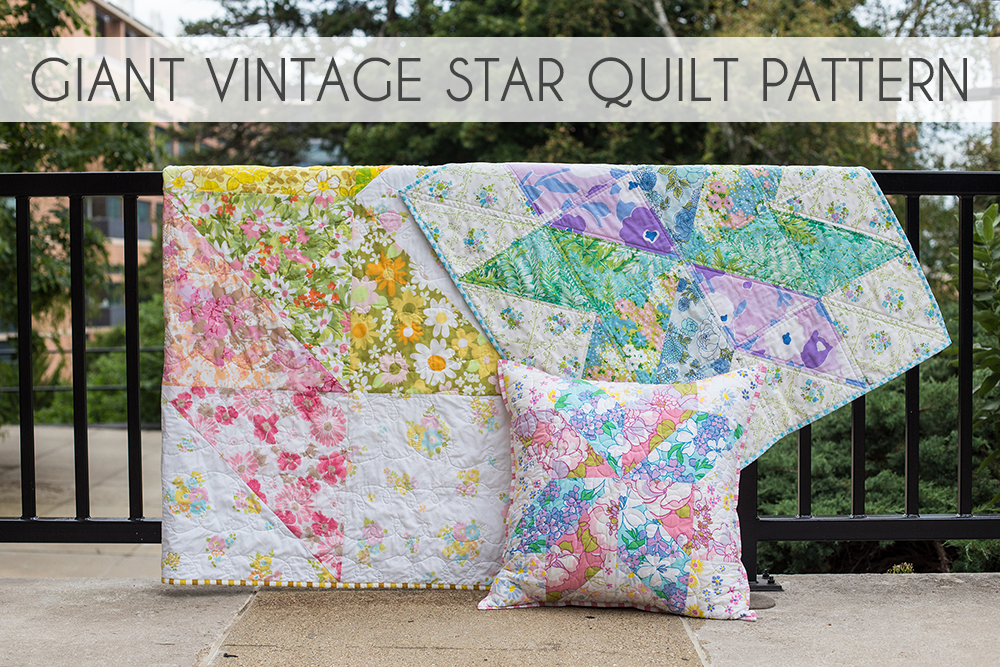
If you'd rather have this tutorial in downloadable/printed form, check out the Giant Vintage Star Quilt Pattern. It features a throw quilt (same size as this tutorial!), baby quilt, and quilted pillow. The yardage for all the different color combinations is broken down to make it easy to customize your quilt!

Find the pattern in my online shop here: Giant Vintage Star Quilt Pattern.

Fabric Shops: If you'd like to teach classes on this design, I ask that you order paper copies of my pattern for each student. You can order patterns wholesale through this form. Please refrain from teaching directly from this tutorial, thanks!


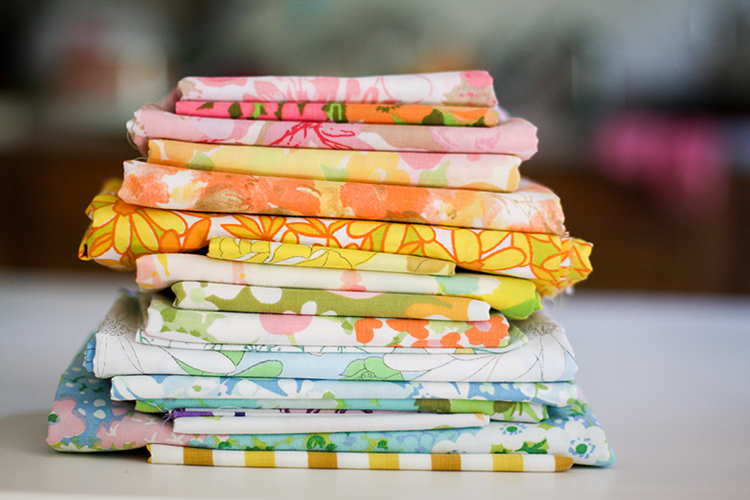
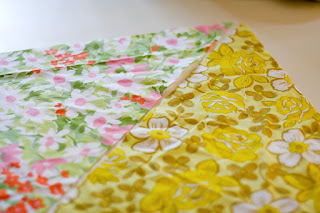
I made my quilt entirely from vintage sheets, but you can use any fabric you'd like to make your quilt! There are lots of shops that sell vintage sheet fat quarters* on Etsy, if you want to make one just like mine! If you'd like to learn more about working with vintage sheets, check out my post: How to Identify, Shop for and Sew with Vintage Sheets

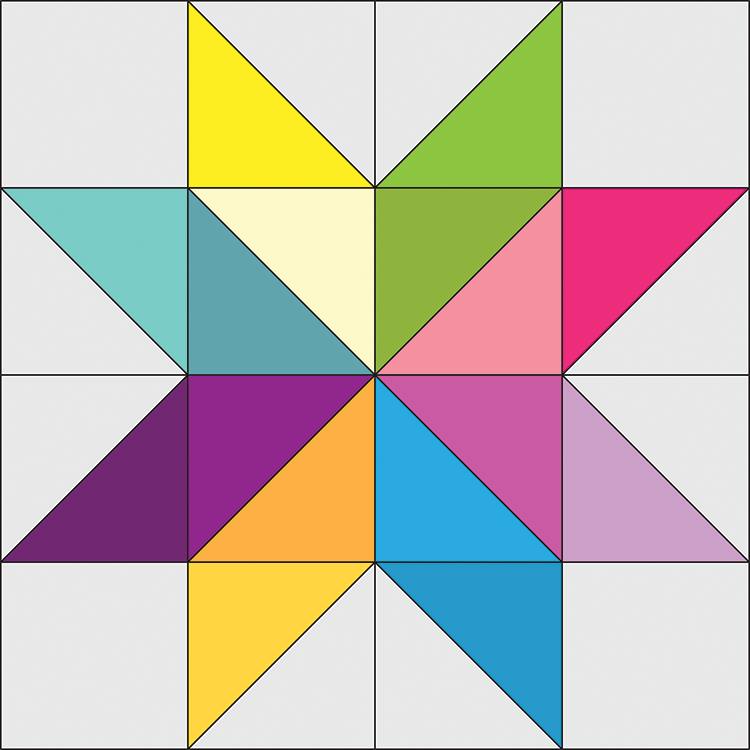
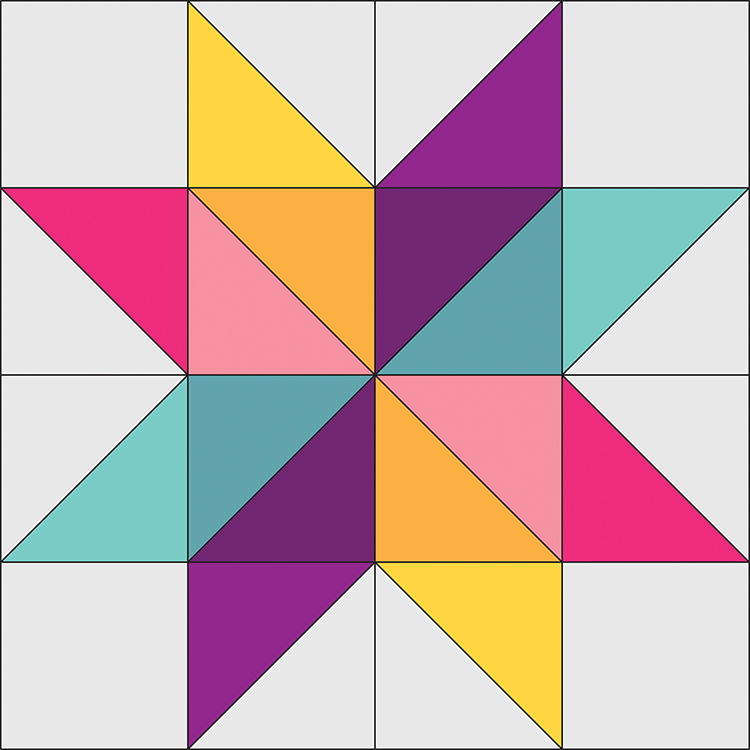
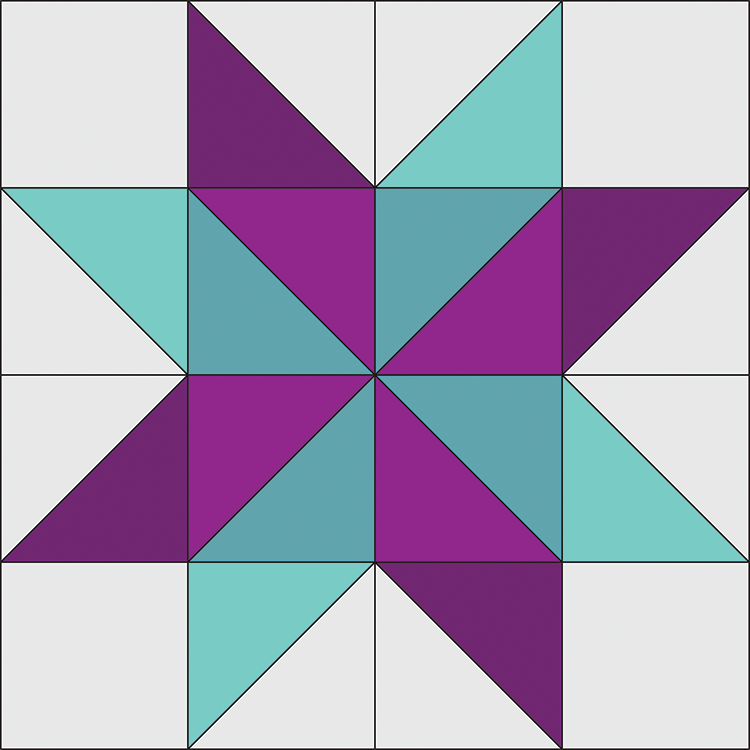
First, you need to decide what kind of color layout you'd like! You may choose to use as few as two colors or as many as eight. You could also use as few as two fabrics or as many as sixteen! I've drawn out a few options here as examples:


This is the layout I used, 8 different colors using 16 different fabrics.


A little less busy, 4 different colors.


And finally, just 2 colors.

However many colors you decide on, you also need to decide on how many fabrics to use. The traditional starflower block uses a single fabric for each 'petal'. In my quilt I used one color in each petal but two different fabrics. You may choose to do whatever you'd like for your quilt!


Sewing Level: Beginner Friendly
Finished Quilt Size: 68"x68"
Finished Block Size: 17" square

Giant Vintage Star Quilt Materials:
- 8 fat quarters (minimum, use up to 16)
- 2 yards of background fabric
- 76"x76" piece of quilt batting
- 4 1/4 yards of backing fabric (or a Twin bedsheet)
- 1/2 yard of binding fabric

Giant Vintage Star Quilt Cutting:
From each print fat quarter:
- Cut (1) 18" square

From background fabric:
- Cut (4) 18" squares and (4) 17.5" squares

Giant Vintage Star Quilt Instructions:

Use a 1/4" seam allowance unless otherwise noted.

1. Before cutting, you'll want to decide how much variety you want and what kind of color scheme you'd like. That will determine how much fabric you need and how you'll construct your quilt. If you don't mind prints repeating in your quilt, you can use 8 fat quarters. If you don't want any repeats and want more variety like mine, you will need 16 fat quarters, but you'll only be using half of each fat quarter, or you can make two matching quilts.

TIP: It can be helpful when working with large pieces to use spray starch or a starch alternative like Flatter by Soak* to help keep those long seams from getting stretched out. Spray before cutting.


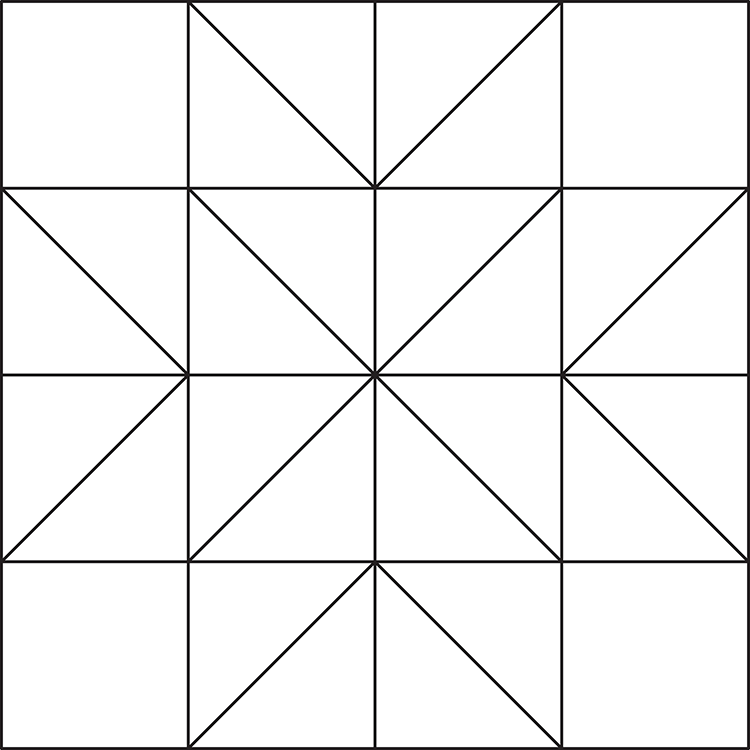
2. Think about how you want to lay out your colors. This will determine which prints you pair up together. I've included this blank quilt diagram that you can print and color in your layout if you'd like!

3a. If you're using 4 or 2 colors AND 8 fat quarters, you'll be constructing your blocks using the traditional half-square triangle (HST) method. You need a total of 8 print + background HSTs and 4 print + print HSTs. So, create 2 pairs of print + print squares, and 4 pairs of print + background squares. You can use my Half-Square Triangle Tutorial if you need help with that!

3b. If you're using 8 colors AND/OR 16 fat quarters, you'll be putting together your half-square triangles a different way. You need to cut your print squares and 18" background squares in half across the diagonal.* You'll end up with a total of 32 print triangles and 8 background triangles. Take half of your print triangles and set them aside for another project, you won't be needing them to create this quilt top. Now, pair up 8 print triangles with your 8 background triangles. Take the remaining 8 print triangles and pair them up with each other. Sew each pair of triangles together to create 12 half-square triangles.

To make that diagonal cut, I temporarily taped a 24" ruler and a 6" ruler end to end with masking tape!

4. Once your half-square triangles are finished and pressed, they may need trimming down to 17.5"


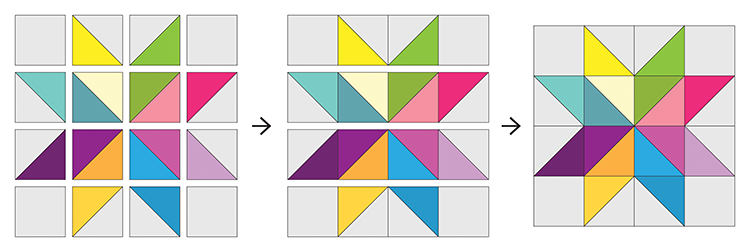
5. Lay out your blocks, arranging your half-square triangle blocks like the diagram above to create the starflower petal shapes. Use the 17.5" background squares in the corners. Sew blocks together in each row. Press seams in one direction, alternating direction every other row. Sew rows together. Press seams open.


6. Making Backing: Cut backing yardage in half. Press. Trim off the selvedge and sew your pieces together lengthwise. Press seam open.

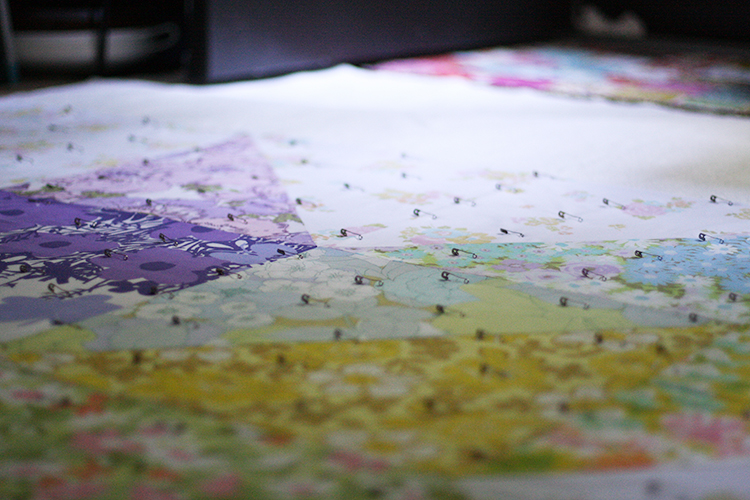
7. Basting: Using masking or painter’s tape, tape the backing to a clean, hard surface, right side down. Spread out your batting on top of the backing. Smooth out any wrinkles. Carefully spread out your quilt top on top of the batting, right side up. Pin your top, I like to use curved safety pins, spacing the pins a few inches apart. Make sure that your pins are going through all three layers.

8. Quilting: Quilt as desired, by machine or by hand. Trim away excess batting and backing fabric.

9. Binding: Cut yardage listed for binding into 2.5” strips. Trim off selvedges and sew your strips together to form one long strip, press seams open. Fold in half lengthwise, pressing with your iron as you fold. Attach binding using your preferred method. For a detailed tutorial on attaching your binding to both sides by machine: Machine Quilt Binding Tutorial.


I hope you've enjoyed this tutorial! I have lots of other tutorials for everything from quilts, pillows, bags, and holiday items to informational series and techniques. Find all my tutorials here: Tutorials. My online shop is filled with patterns for quilts and bags. Find my patterns here: Jeni Baker Patterns

If you make something using one of my tutorials or patterns, I hope you'll tag me @jenib320 and use my hashtag #jenibaker on instagram!

More projects made from this tutorial:
Liberty Lawn Giant Vintage Star Quilt

Looking to experiment more with super sized blocks? Check out the Vast quilt from my book, Patchwork Essentials: The Half-Square Triangle.

Photo © 2015 Lauren Hunt for Lucky Spool Media.

Happy Quilting!

*Note: Any links marked with an asterisk in this post are affiliate links. This means if you click through and buy something, I make a small commission, at no extra cost to you.

Flannel Whole Cloth Quilt

Tuesday, January 15, 2019


Happy Tuesday! I thought I would break up the handmade gift posts which one of my recent quilt finishes. So today I'm sharing my flannel whole cloth quilt!


This is one of the simplest, quickest quilts I've ever made, but from idea to finished quilt it took such a long time to execute. I bought 10 yards of flannel for this quilt back in 2011. I had just finished my flannel plus quilt. I fell in love with that quilt, and I still use it constantly. Flannel on both sides of a quilt is one of the coziest things, and I knew I wanted another one, so I stocked up on two prints from Anna Maria Horner's Folksy Flannels collection.


Fast forward seven years to this past Fall. I had the idea to turn those cuts into a whole cloth quilt from the beginning, but never had a huge need for it. We had been living in apartments that had heat included in our rent, which I took full advantage of! So having more than one flannel quilt wasn't super necessary. Now that we live in our own house, and an older home at that, let's just say it's a little colder inside during the winter! I quickly realized that we could use a few more cozy quilts.


So, one afternoon I took the time to figure out how big I could make the quilt with the two 5 yard cuts I had (67"x77"). I had already pre-washed the fabric years ago, so that was out of the way. I did decide to take the time to pattern match the seam on both the front and that back, and I'm so glad I did. It really was much easier and less time consuming than I originally expected it to be. I think that's honestly part of what made me put off this project. I took some guidance from Amanda Jean's post on the subject. Considering I haven't done much of this, I'm very pleased with my seams, they are nearly invisible now that the quilt has been quilted and washed! Win!


I love my Nani Iro brushed cotton Vast quilt that has wool batting, so I went with wool again for this quilt. It is like a fluffy, fuzzy, warm cloud! 100% happy with that choice. It makes me want to use more wool batting in the future. For the quilting, I sent it to Melissa of Sew Shabby Quilting. I went with the popcorn design, which I have had done before and love.


Since this quilt is super simple, I wanted to dress it up a little by curving the corners. I think it adds just enough interest. For the binding, I used a long stashed Free Spirit solid voile. The color is heather.


We've been using this quilt every day since I finished it! It's usually on our couch, and Michael and I fight over who gets it. There were times when I thought about destashing this flannel, feeling like I was never going to make things project. I'm so glad I held on to it, moved with it twice, and finally gave it a purpose in this quilt. I still love the prints, and I think they more than hold their own as a whole cloth quilt.

Happy Quilting!

Patchwork Essentials: Vast Quilt

Thursday, January 31, 2019


Time to share another quilt from my book, Patchwork Essentials: The Half-Square Triangle! You can find all the posts about Patchwork Essentials using the MY BOOK link at the top of every page, or here.


I'm slowly going to share each quilt, in order, with the exception of a few that I've already shared. We've made it to the relative size chapter, and the first quilt is Vast!

For more on how the book is structured see this post.

https://incolororder.bigcartel.com/product/patchwork-essentials-the-half-square-triangle-book-signed
Need a copy of the book? Buy a signed one here: Patchwork Essentials: The Half-Square Triangle


Photo © 2015 Lauren Hunt for Lucky Spool Media.

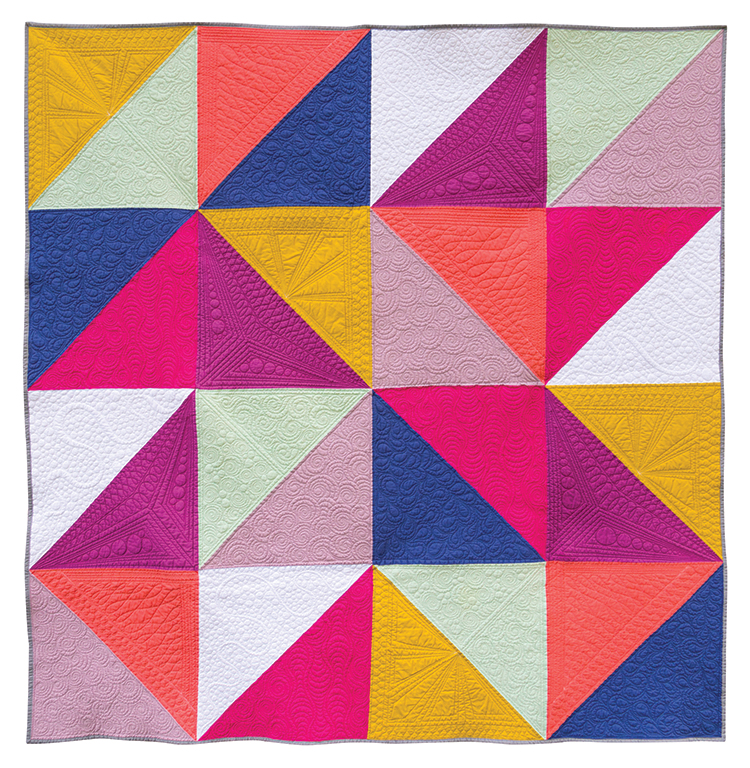
I knew when I first had the idea for the book that I wanted to include a quilt that used supersized half-square triangles. I've played a lot with the idea in other quilts, like my Giant Vintage Star Quilt, so I wanted to include another variation on the idea.


Photo © 2015 Lauren Hunt for Lucky Spool Media.

I wanted to play with all solids for at least one quilt in the book, as a personal challenge. I haven't made a lot of all solids quilts, but it felt like the right way to make this already bold design feel even bolder. I used Pure Solids by Art Gallery Fabrics for this quilt. I used the following colors: Raspberry Rose, Coral Reef, Empire Yellow, Sweet Mint, Blueberry Zest, Mauvelous, Verve Violet, and Snow.


The absolutely gorgeous quilting was done custom by Melissa of Sew Shabby Quilting. I asked her to choose a different design for each color! This way it almost gives the solid colors a print feel, especially when you look at it from a distance. I love all the variety of design, it turned out just how I envisioned.


I kept things pretty simple for the backing and binding. Another solid for the binding, and a blender from Minimalista for the back! I remember stocking up on clearance fabrics for backings before I started working on the book quilts. It didn't take long to go through most of my stashed backing fabric.


Photo © 2015 Lauren Hunt for Lucky Spool Media.

I recently finished up the variation quilt top that is shown in the book, so I'll be sharing that quilt finish soon too!


Happy Quilting!

All About Quilting with Double Gauze Fabrics

Thursday, July 18, 2019


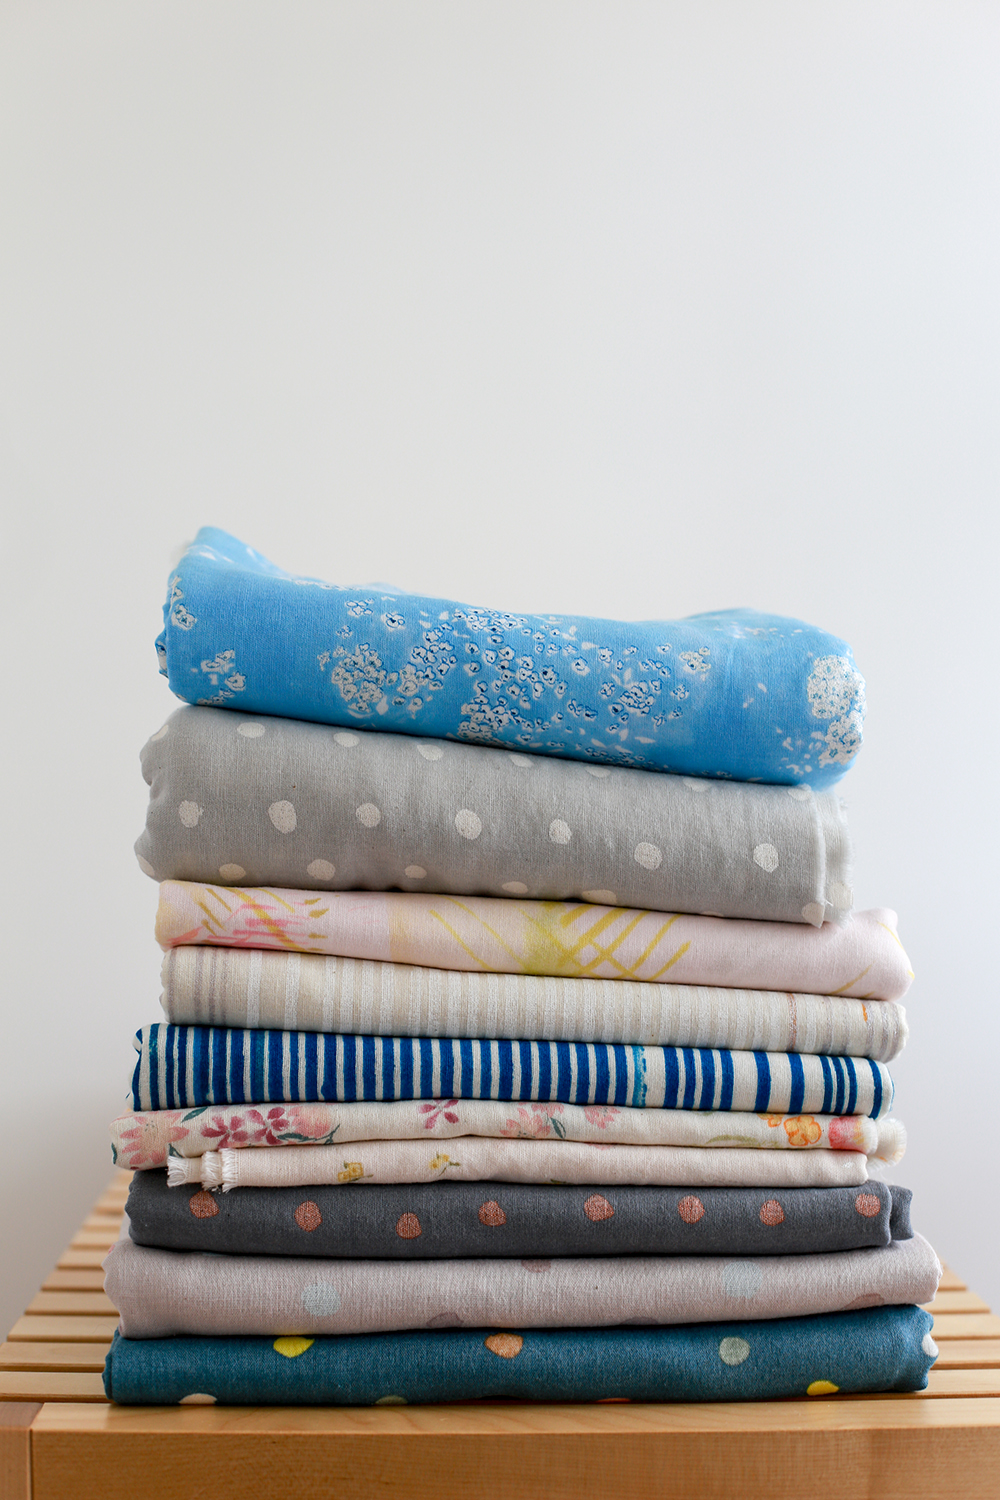
Now that I have two all double gauze quilts under my belt, I wanted to upgrade from my little list of tips to a full post all about quilting with double gauze. I've learned a lot between these two quilts so I wanted to share all of that with you today. If you've ever had questions about working with double gauze, where to buy it or even what it is, this post is for you!

What is Double Gauze?

https://www.incolororder.com/2019/07/all-about-quilting-with-double-gauze.html
Double gauze is a really lovely lightweight woven fabric. It is made up of two thin layers of gauze fabric, that are tacked together with small stitches every 1/2" of so. You can't see the stitches from the front side of the fabric, but they are somewhat visible from the back especially if the print is dark and the second layer is lighter. Most of the double gauze that I've seen on the market today is 100% cotton.

Personally, my favorite double gauze fabrics are Nani Iro by Naomi Ito for Kokka. The designs and quality of the fabrics are so good and really appeal to me. I also love the solid double gauze fabrics by Kobayashi. They're really reasonable in price and come in great colors.

Where to Buy Double Gauze

If you’re unable to find double gauze in your local fabric shops, here are a few online shops that carry double gauze:

Miss Matatabi (JP)
Fabric Worm (CA)
Jones & Vandermeer (NY)
Pink Castle Fabrics (MI)
Imagine Gnats (OH)
Stonemountain & Daughter Fabrics (CA)
Dry Goods Designs (WA)
Super Buzzy (CA)

Pre-washing Double Gauze
https://www.incolororder.com/2019/07/all-about-quilting-with-double-gauze.html
Double gauze has a tendency to shrink quite a bit. It's also pretty loosely woven, so it can be prone to unraveling. Both of these factors make pre-washing important in my opinion. I normally only pre-wash fabrics for garments, but I think it's worth taking the time to wash double gauze for a quilt. I prefer to wash it on cold with a mild detergent and tumble dry with heat.

Prepping and Cutting Double Gauze
https://www.incolororder.com/2019/07/all-about-quilting-with-double-gauze.html
You may find that double gauze is easy to cut and handle if it's pressed with spray starch or a starch alternative like Flatter by Soak. Personally, I don't find I need either to work comfortably with double gauze, but I do use a lot of steam. I like to change to a fresh rotary blade before cutting double gauze, so that all my cuts go cleanly through the fabric.

Seams, Needles, and Thread for Double Gauze
https://www.incolororder.com/2019/07/all-about-quilting-with-double-gauze.html
When working with double gauze I find it helpful to use a nice new needle. My favorite size for working with fine fabrics is 75/11. I've used both 50wt cotton thread and 100% polyester thread when piecing double gauze quilts and found that they perform pretty similarly. I do think that especially for the quilting, polyester is the way to go. It's typically stronger than cotton and it glides nice and smoothly through the fabric. I use 1/2" seam allowances when piecing with double gauze to make it a little extra durable. I press all my seams to the side, alternating direction every other row so that the seams nestled. Double gauze seams can get pretty thick, but I'm not comfortable pressing these seams open. My favorite sharp, thin pins are ideal for working with double gauze.

Batting for Double Gauze
https://www.incolororder.com/2019/07/all-about-quilting-with-double-gauze.html
For both of my double gauze quilts I've used Dream Orient quilt batting which is a bamboo/silk/tencel/cotton blend batting from Quilter's Dream. It is really airy and lightweight, which is a fantastic combination with the double gauze fabrics in my opinion. Regular cotton and cotton blend batting would be lovely too. Personally I wouldn't use anything super thick, but I have used 100% wool batting with double gauze and it's wonderful.

Quilting Double Gauze
https://www.incolororder.com/2019/07/all-about-quilting-with-double-gauze.html
For my first double gauze quilt, I sent it out for longarm quilting to Gina Pina. She did a beautiful dense loopy meander. For my second double gauze quilt, I did the quilting myself, simple lines on the diagonal. I followed all the usual steps that I take when basting/quilting and found no real difference between quilting this quilt and a quilt made from quilting cotton. I used pins for basting, spacing them about 7" apart. I used a walking foot and 100% polyester thread for the quilting, and I reduced the pressure of my presser foot slightly. I used a new 90/14 needle.

Binding Double Gauze
https://www.incolororder.com/2019/07/all-about-quilting-with-double-gauze.html
With double gauze quilts (and other non-quilting cotton quilts) I like to take an extra step to ensure it will hold up to wear. After trimming off the excess backing and batting, I use my serger to finish the edges of the quilt. In my mind this helps with durability if the binding were to get worn, but I have also found it made the edges lie flatter while attaching the binding which is a nice bonus. It's a totally optional step, but gives me extra piece of mind.

My other recommendation is to avoid double gauze for the binding. It can be thick and difficult to manage on garments, so I think it would be hard to use for binding on an all double gauze quilt. I've used voile or lawn as binding on my double gauze quilts and I love the difference in texture. It reminds me of baby blankets that have the wide silky binding.

Washing and Care for Double Gauze Quilts
https://www.incolororder.com/2019/07/all-about-quilting-with-double-gauze.html
I wash double gauze quilts pretty much the same way I wash all my quilts. I wash them by themselves, on cold. I use a mild detergent without fragrance and I throw 1/2 cup of regular table salt into the washer with my quilt to prevent color bleeds. A few years ago my Mom mentioned that my Grandmother used to do this and I've been doing it ever since! I don't know why it works, but I haven't had a problem since I started using salt. The fabrics are pre-washed in this case, so bleeding isn't as likely, but I still use it as a precaution. Once it's washed I throw it in the dryer and tumble it dry on high. I want it to shrink up to get that nice double gauze crinkle.

https://www.incolororder.com/2019/07/all-about-quilting-with-double-gauze.html
One difference I have noticed between my two double gauze quilts is that it seems like the more dense the quilting, the more wrinkled up the quilt will get. The extra quilting also makes the quilt surprisingly heavy compared to the one with less quilting. Just something to keep in mind when you're planning your quilt!

https://www.incolororder.com/2019/07/all-about-quilting-with-double-gauze.html
I wanted to share a little side-by-side comparison of the quilt before and after washing/drying. The fabrics were pre-washed before piecing. The photo on the left was taken right before I threw the finished quilt in the wash. The photo on the right was taken after it was washed on cold and dried on high.

My Double Gauze Quilts
https://www.incolororder.com/2019/07/all-about-quilting-with-double-gauze.html
Nani Iro Dreams Quilt
 

Double Gauze Plus Quilt
 

Nani Iro Vast Quilt

Happy Quilting!