
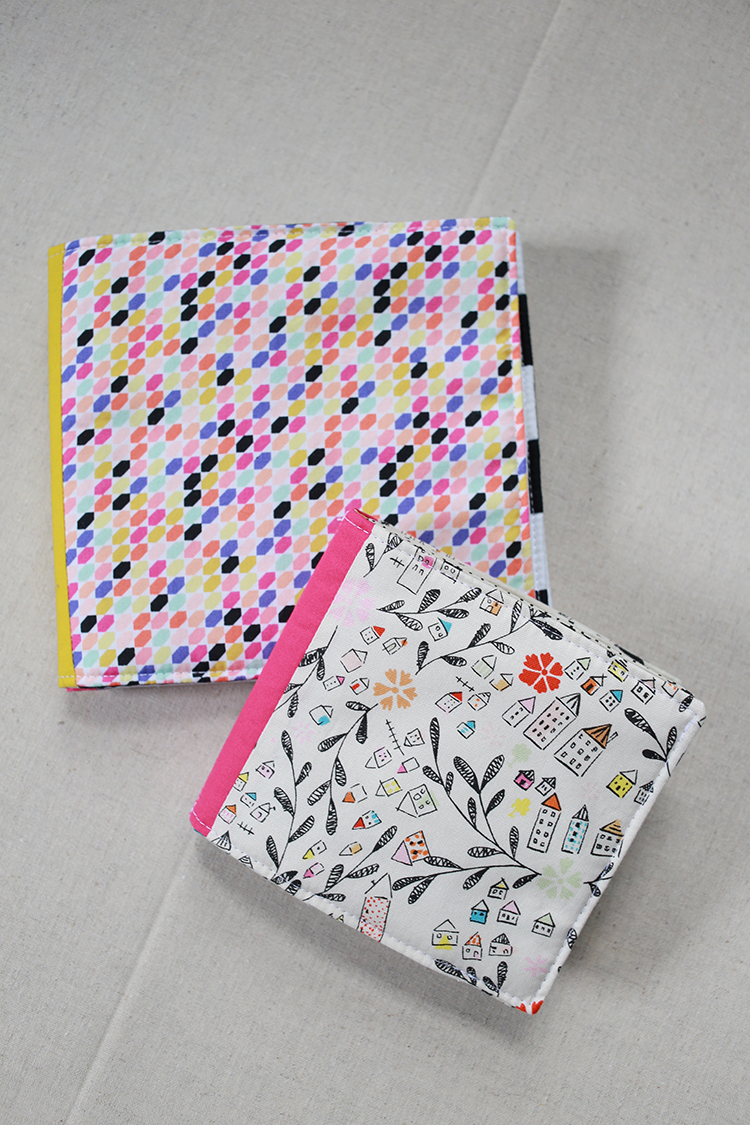
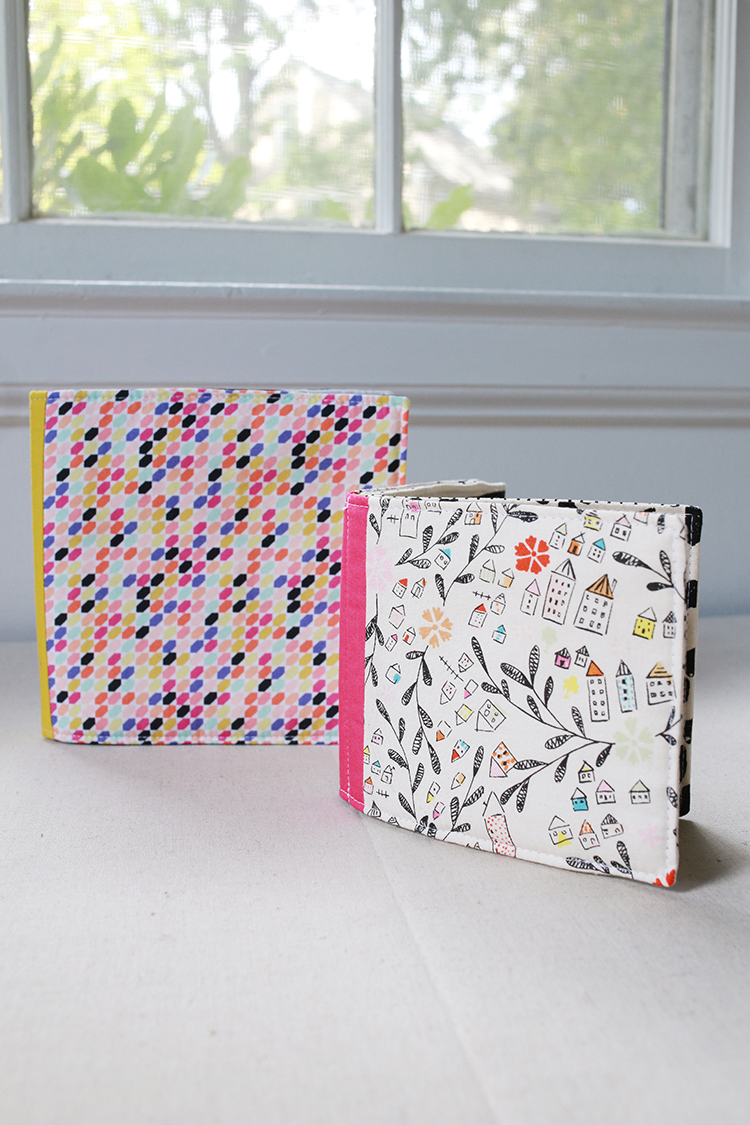
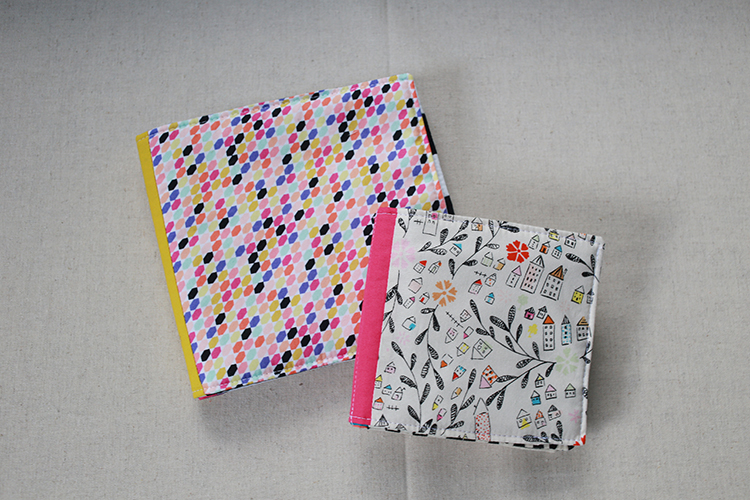
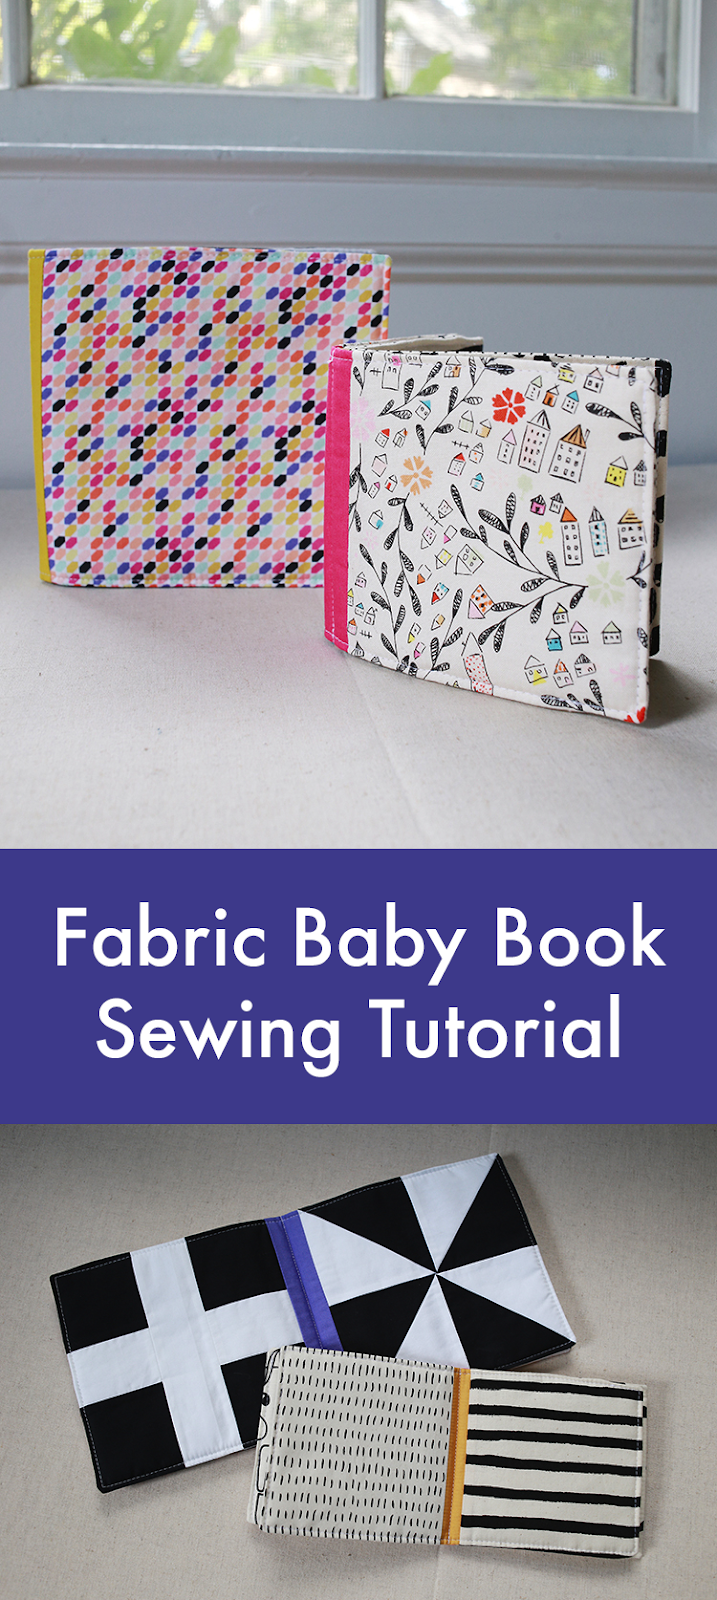
Happy Wednesday! I wanted to start sharing some of the projects I sewed for Baby P, starting with these soft, high contrast baby books! This was one of the more fun projects I made, where as most of the other things I sewed for her were a bit more on the practical side. I didn't see a tutorial for one of these (specifically high contrast), so I quickly drew up my own design for it and thought I'd share it as a little tutorial. I think these would make a great gift! Give it on it's own, or alongside a quilt, clothes or board books.

I'm sharing two versions, a pieced quilt block version and a simple version. The pieced quilt block book uses 6.5" quilt blocks made in black and white solid fabrics. I'm sharing instructions for the six blocks I made, but you could make any 6.5" blocks you want! You don't have to use black and white fabrics either, if you don't want to. The simple book uses 5" charm squares in a variety of black/white prints. Again, you could use any fabrics or colors you'd like. Both versions come together quickly and can be made entirely from scraps!


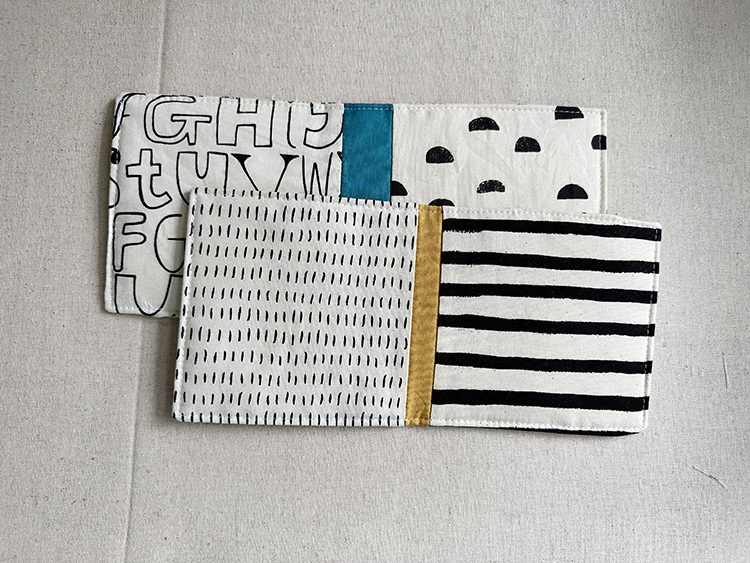
Here is a look at all six quilt block pages!
A few other modifications you could make:
- Add tags! Fold short pieces of ribbon in half and sandwich them between the page layers so that they stick out.
- Make it a noisy book! Add a layer of crinkle paper* to each page.
- Fussy cut novelty prints for interior pages to make an I-spy book for toddlers or older children!
One quick note as you make your fabric book. The interior "pages" are slightly less wide compared to the exterior "cover". This is so that when the book is closed, the interior pages don't stick out! This is acheived by the different width strips for the "spine".
Disclaimer: Always supervise baby or child when playing with a book made from this tutorial. If you decide to add ribbon tags or other embellishment, be sure to secure well to the book so that it doesn't come loose and become a choking hazard. Be careful to trim all loose threads and firmly secure stitching. Follow these instructions at your own risk and use your own judgement to decide what is right for you.
Simple Fabric Baby Book

Materials:
(2) 5" squares colorful print (for exterior cover)
(6) 5" squares black and whtie prints (for interior pages)
(2) 1.5"x5" strips (for exterior spine)
(2) 1"x5" strips (for interior pages)
(2) 10"x4.5" pieces of fusible fleece
(2) 9.5"x4.5" pieces of fusible fleece
Optional:
(1) 10.5"x6.5" piece of crinkle paper*
(1) 10"x6.5" piece of crinkle paper*
Simple Fabric Baby Book Construction

*Use a 1/4” seam allowance unless otherwise noted.*
1. Arrange (2) 5" exterior cover squares with 1.5"x5" strip in the middle. Sew squares to either side of the strip, press seams open. Arrange two 5" interior page squares with 1.5"x5" strip in the middle. Sew squares to either side of the strip, press seams open.
Apply 10"x4.5" fusible fleece to the wrong sides of the cover and interior page, centering the interfacing.
Place cover and interior page right sides together. If using, add a 10.5"x5" piece of crinkle paper up against the wrong side of the cover.
Sew around all four sides, leaving a small gap open for turning. Trim seam allowance at the corners. Turn right sides out, press well. Topstitch around all four sides, closing the gap.

2. Arrange (2) 5" interior page squares with 1"x5" strip in the middle. Sew squares to either side of the strip, press seams open. Repeat with remaining squares and strip.
Apply 9.5"x4.5" fusible fleece to the wrong sides of the two interior pages, centering the interfacing.
Place interior pages right sides together. If using, add a 10"x5" piece of crinkle paper up against the wrong side of an interior page.
Sew around all four sides, leaving a small gap open for turning. Trim seam allowance at the corners. Turn right sides out, press well. Topstitch around all four sides, closing the gap.

3. Place cover side down on your workspace. Place interior page on top of the first piece, centering it on the cover. Pin or clip pages in place. Sew down the spine through both the cover and interior page to secure together using a 3.0 stitch length.
Care: Book can be washed by hand or machine with warm or cold water. Let air dry.
Quilt Block Fabric Baby Book

Materials:
(1) fat quarter or 1/4 yard black solid
(1) fat quarter or 1/4 yard white solid
(2) 6.5" squares colorful print (for exterior cover)
(2) 1.5"x6.5" strips (for exterior spine)
(2) 1"x6.5" strips (for interior pages)
(2) 13"x6" pieces of fusible fleece
(2) 12.5"x6" pieces of fusible fleece
Optional:
(1) 13.5"x6.5" piece of crinkle paper*
(1) 13"x6.5" piece of crinkle paper*
Make Quilt Blocks
*Use a 1/4” seam allowance unless otherwise noted.*
Cross Block

From black fabric:
(4) 2.75" squares
From white fabric:
(2) 2"x2.75" pieces
(1) 2"x6.5" piece
1. Arrange pieces into three rows. Sew pieces together in each row, press seams open. Sew rows together, press seams open. Trim block to 6.5" square.
Hourglass Block

From black fabric:
(2) 4" squares
From white fabric:
(2) 4" squares
1. Using a marking pen or a pencil, draw a diagonal line across the wrong side of both white squares. Place one white square and one black square right sides together. Stitch 1/4" on both sides of the marked line. Press and cut apart on the marked line to create two half-square triangles. Press seams open. Repeat with remaining squares. Trim half-square triangles to 3.5” square.
2. Arrange pieces into two rows. Sew pieces together in each row, press seams open. Sew rows together, press seams open. Trim block to 6.5" square.
Striped Block

From black fabric:
(6) 3.5"x1.5" pieces
From white fabric:
(6) 3.5"x1.5" pieces
1. Arrange strips into two columns. Sew pieces together in each column press seams open. Sew columns together, press seam open. Trim block to 6.5" square.
HST Block

From black fabric:
(2) 4" squares
From white fabric:
(2) 4" squares
1. Using a marking pen or a pencil, draw a diagonal line across the wrong side of both white squares. Place one white square and one black square right sides together. Stitch 1/4" on both sides of the marked line. Press and cut apart on the marked line to create two half-square triangles. Press seams open. Repeat with remaining squares. Trim half-square triangles to 3.5” square.
2. Arrange pieces into two rows. Sew pieces together in each row, press seams open. Sew rows together, press seams open. Trim block to 6.5" square.
Pinwheel Block

From black fabric:
(2) 4" squares
From white fabric:
(2) 4" squares
1. Using a marking pen or a pencil, draw a diagonal line across the wrong side of both white squares. Place one white square and one black square right sides together. Stitch 1/4" on both sides of the marked line. Press and cut apart on the marked line to create two half-square triangles. Press seams open. Repeat with remaining squares. Trim half-square triangles to 3.5” square.
2. Arrange pieces into two rows. Sew pieces together in each row, press seams open. Sew rows together, press seams open. Trim block to 6.5" square.
Nine-patch Block

From black fabric:
(5) 2.5" squares
From white fabric:
(4) 2.5" squares
1. Arrange squares into three rows. Sew squares together in each row, press seams open. Sew rows together, press seams open. Trim block to 6.5" square.
Quilt Block Fabric Baby Book Construction
1. Arrange (2) 6.5" exterior cover squares with 1.5"x6.5" strip in the middle. Sew squares to either side of the strip, press seams open. Arrange two 6.5" interior page blocks with 1.5"x6.5" strip in the middle. Sew squares to either side of the strip, press seams open.
Apply 13"x6" fusible fleece to the wrong sides of the cover and interior page, centering the interfacing.
Place cover and interior page right sides together. If using, add a 13.5"x6.5" piece of crinkle paper up against the wrong side of the cover.
Sew around all four sides, leaving a small gap open for turning. Trim seam allowance at the corners. Turn right sides out, press well. Topstitch around all four sides, closing the gap.
2. Arrange (2) 6.5" interior page blocks with 1"x6.5" strip in the middle. Sew squares to either side of the strip, press seams open. Repeat with remaining squares and strip.
Apply 12.5"x6" fusible fleece to the wrong sides of the two interior pages, centering the interfacing.
Place interior pages right sides together. If using, add a 13"x6.5" piece of crinkle paper up against the wrong side of an interior page.
Sew around all four sides, leaving a small gap open for turning. Trim seam allowance at the corners. Turn right sides out, press well. Topstitch around all four sides, closing the gap.
3. Place cover side down on your workspace. Place interior page on top of the first piece, centering it on the cover. Pin or clip pages in place. Sew down the spine through both the cover and interior page to secure together using a 3.0 stitch length.
Care: Book can be washed by hand or machine with warm or cold water. Let air dry.
I hope you've enjoyed this tutorial! I have lots of other tutorials for everything from quilts, pillows, bags, and holiday items to informational series and techniques. Find all my tutorials here: Tutorials. My online shop is filled with patterns for quilts and bags. Find my patterns here: Jeni Baker Patterns
If you make something using one of my tutorials or patterns, I hope you'll tag me @jenib320 and use my hashtag #jenibaker on instagram!

Happy Sewing!
*Note: Any links marked with an asterisk in this post are affiliate links. This means if you click through and buy something, I make a small commission, at no extra cost to you.
jeni, this is such a delightful project. thank you so much for sharing. your creativity is blossoming along with your family.
ReplyDeleteThank you for sharing such a delightful project! I plan to make one for my first grandchild for Christmas!
ReplyDeleteThis is AMAZING!!!! What an incredible idea and well explained tutorial!!! Thank you SO much for sharing!!!!
ReplyDeleteThank you so much for sharing this tutorial. It was so easy to follow which made the project quick to sew. I have made a slightly bonkers book from scrap fabrics for my niece's baby who is due imminently. I think it looks brilliant... time will tell what baby thinks!
ReplyDelete