
Welcome to the second week of the Lined Drawstring Bag Sew Along! Today I'm sharing a tutorial for a peppermint stripe bag!
I'll be updating the Sew Along Page each week with all the posts so that you can easily catch up or reference these posts after the sew along ends!
I hope you'll sew along with us! Sew from the tutorial or the patterns:
Lined Drawstring Bag Tutorial
Lined Drawstring Bag Pattern
Lined Drawstring Bag Expansion Pattern
Before we dive into today's post, let's quickly chat about our to-do for week 2 of the sew along!
This week's task is cutting! Finalize those fabric choices and cut out all the pieces for your bags. A few posts you might find helpful when tackling this:
- If you missed last year's post about make templates, be sure to check that out! They're great if you don't want to rotary cut, or just want to speed up your cutting process. Find it here: Making Templates for the Lined Drawstring Bag Pattern
- You may be interested in adding a little something extra to your bags, like pom-pom trim or ribbon. I have a post all about embellishing your bags with these. Find it here: How to Use Trim or Ribbon to Embellish Your Drawstring Bags
- If you'd like to add an exterior pocket to your bag, I've got a tutorial for that too! Find it here: Lined Drawstring Bag Tutorial: Adding an Exterior Pocket
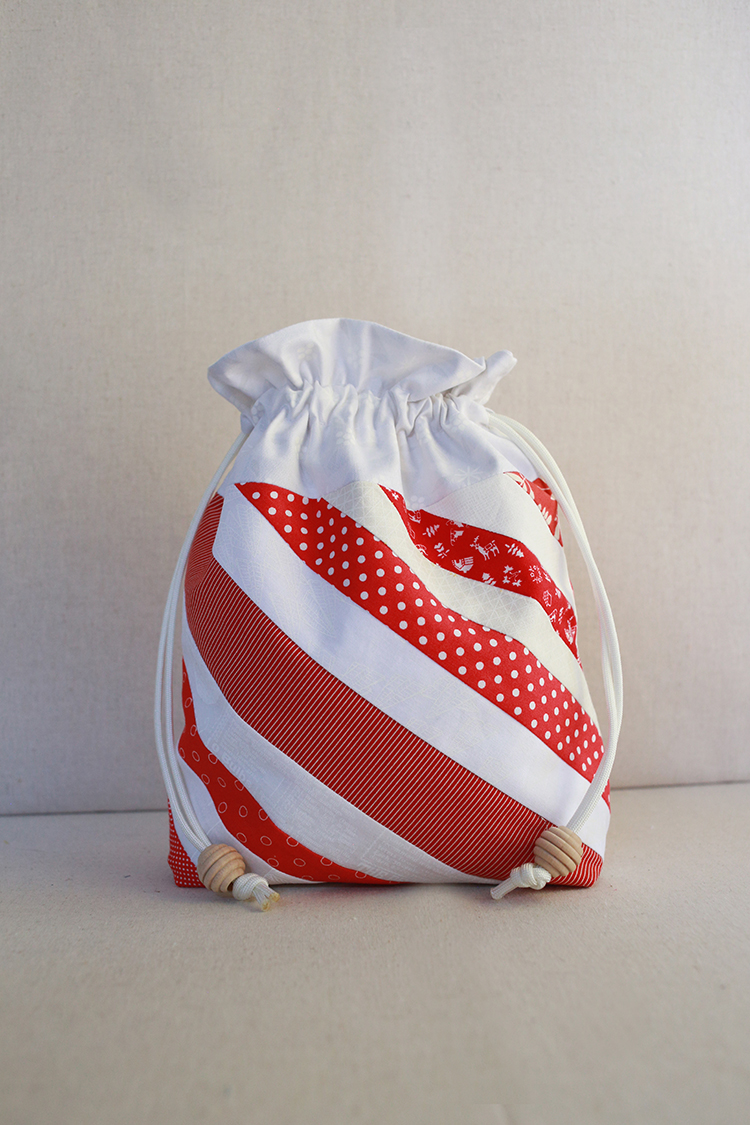
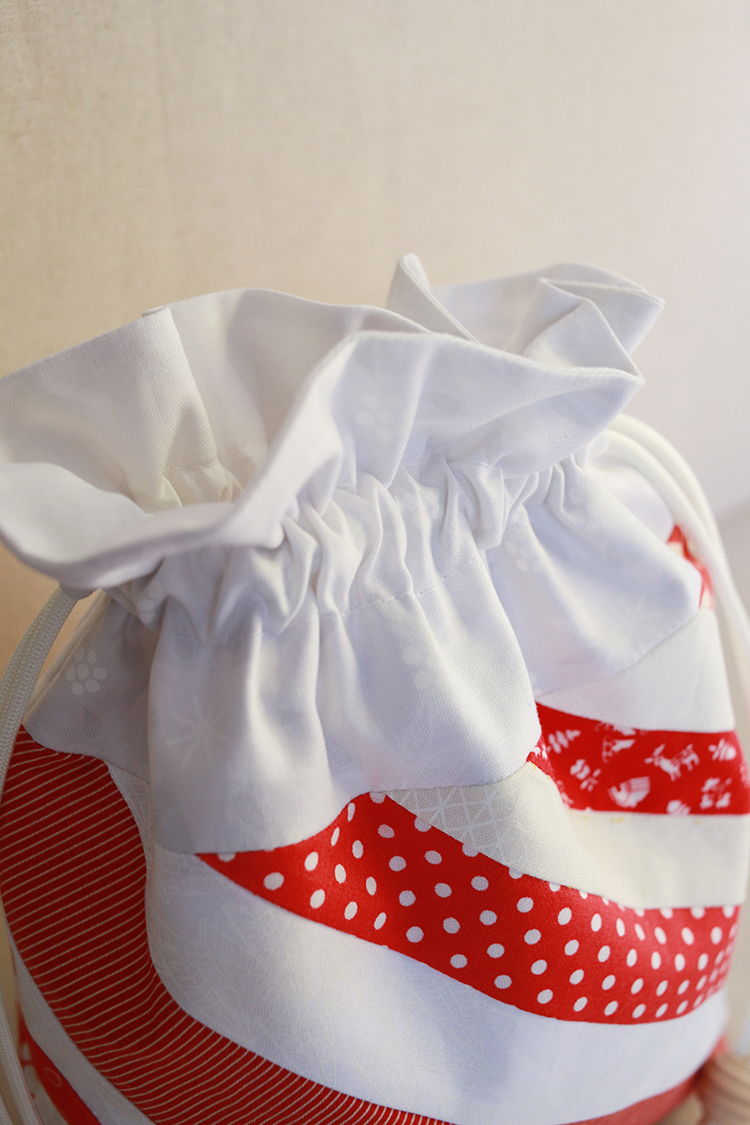
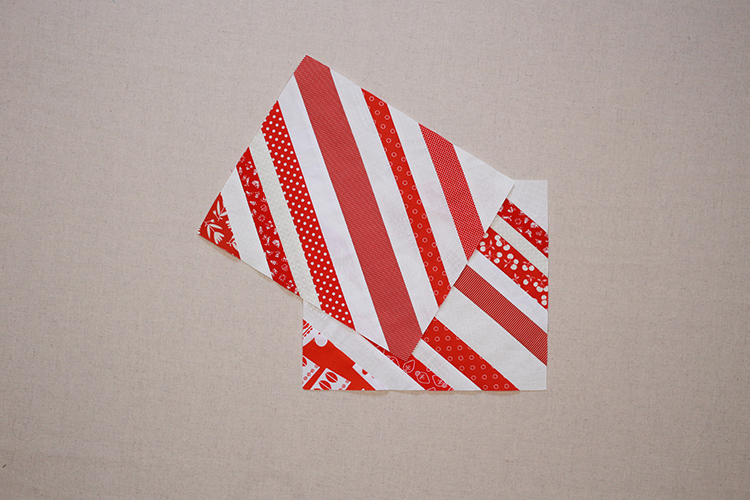
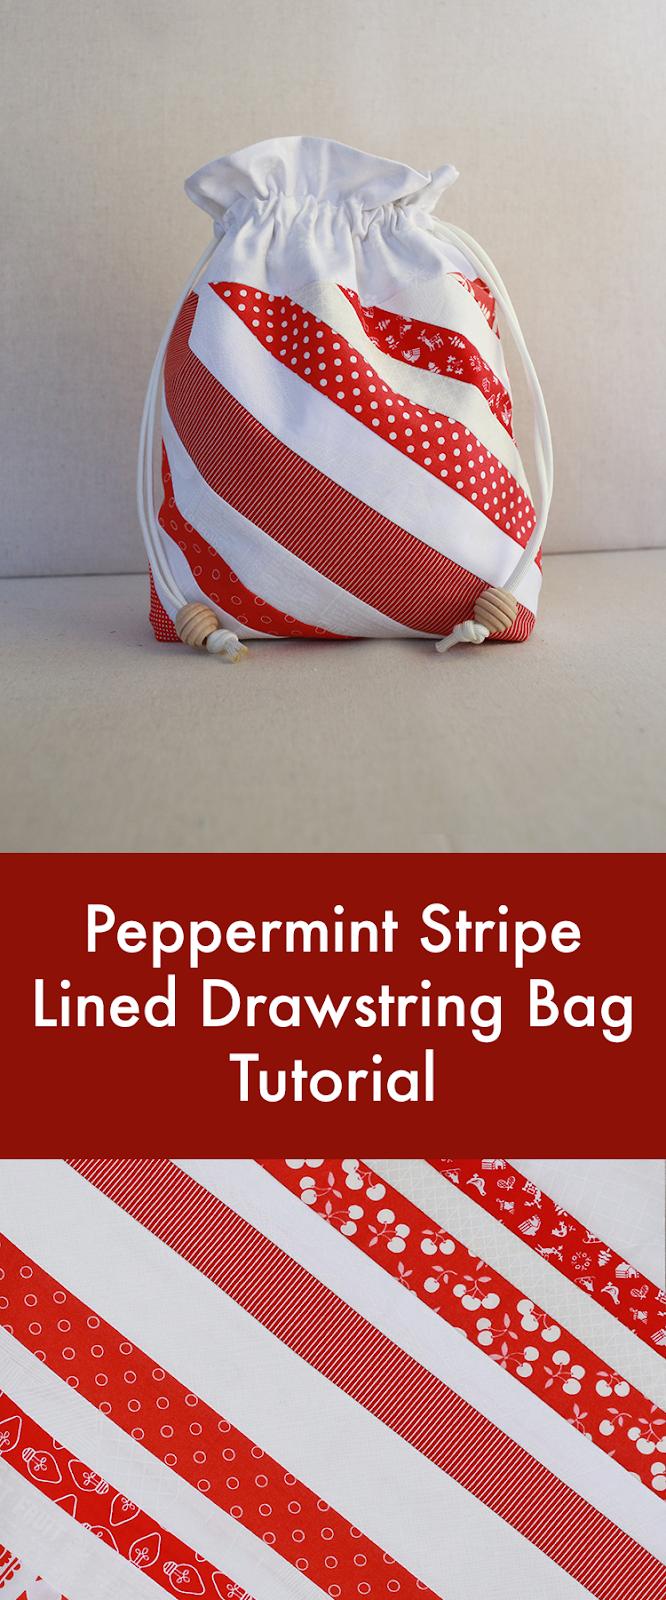
When I was brainstorming tutorial ideas for this year's sew along, I knew I wanted to make a bag that was candy inspired! I thought about a pieced candy block (maybe next year!), but then got the idea for a peppermint candy bag! I was thinking of the peppermint starlight mints that are wrapped in cellophane. The ruffle at the top of these drawstring bags reminds me of the way these candies are wrapped! I used red and white strips to mimic that look, but feel free to use any colors you want!
To make this bag, you'll need to piece two strip blocks for the Exterior Main. They're foundation paper pieced.

Sewing Level: Intermediate
Finished size: Approx. 10" tall, 7" wide, 3" deep
Peppermint Stripe Lined Drawstring Bag Materials:
- Strip scraps in a variety of widths (a few at least 12" long) for Exterior Main*
- 1 Fat quarter for Exterior Accent
- 1 Fat quarter for Interior
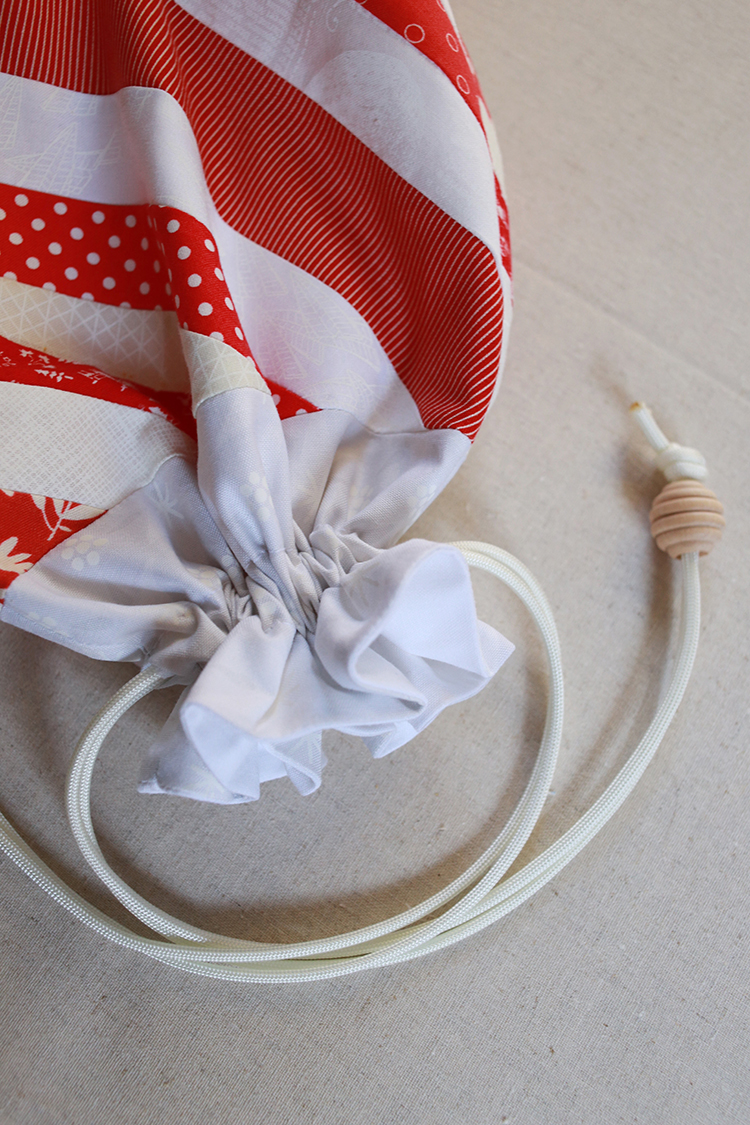
- 2 yards of 1/2" twill tape, nylon paracord or 1/8 yd fabric
- Coordinating thread
- (2) pieces of scrap paper at least 9"x10.5"*
- Washable glue stick*
- Acrylic ruler
- Large safety pin
- Pencil
*I used one piece of scrapbook paper cut down the size and then realized that brown kraft paper from a package worked just as well!
Looking for supplies? Check out my Pattern Supplies and Resources post.
Peppermint Stripe Cutting:
From Exterior Accent Fabric:
- Cut (1) 4”x21” strip
- Subcut into (2) 4”x10.5” pieces
From Interior Fabric:
- Cut (1) 12.5”x21” strip
- Subcut into (2) 12.5”x10.5” pieces
If using fabric for ties:
- Cut (2) 32”x2” strips
If using twill for ties:
- Cut (2) 32" pieces
Peppermint Stripe Lined Drawstring Bag Instructions:
*Use a 1/4” seam allowance unless otherwise noted*
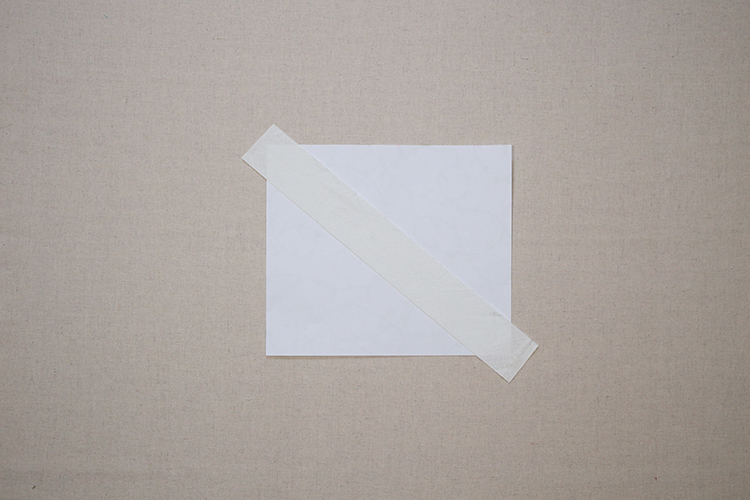
1. Using a tiny bit of glue from a glue stick, attach a long strip, right sides up, centered on the diagonal of the paper. You want the ends of the strip to be longer than the paper.
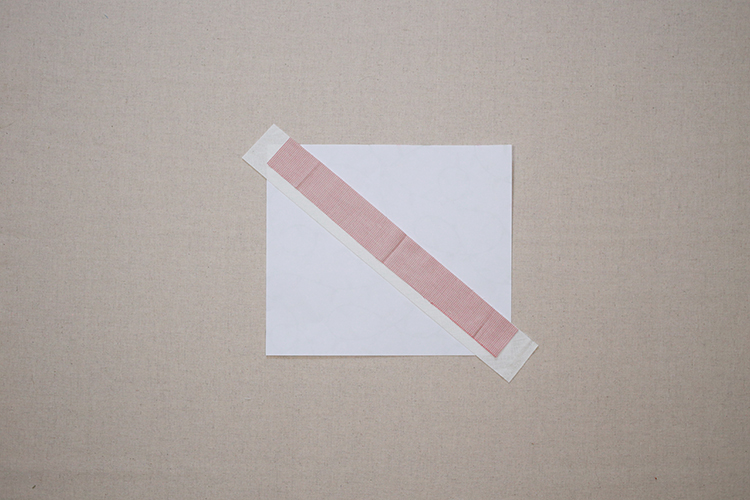
2. Grab your next strip, and place it right sides down on your center strip. Again, make sure the ends of the strip go off the edges of the paper.
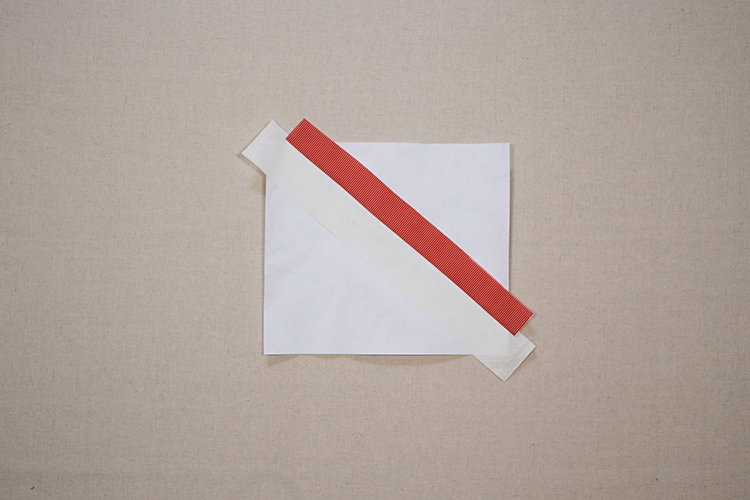
3. Shorten your stitch length to 1.8, and stitch along the edge of your strips (and through the paper too) using a 1/4" seam allowance. Open your strips up and press with an iron (avoid using steam!), or your fingers.
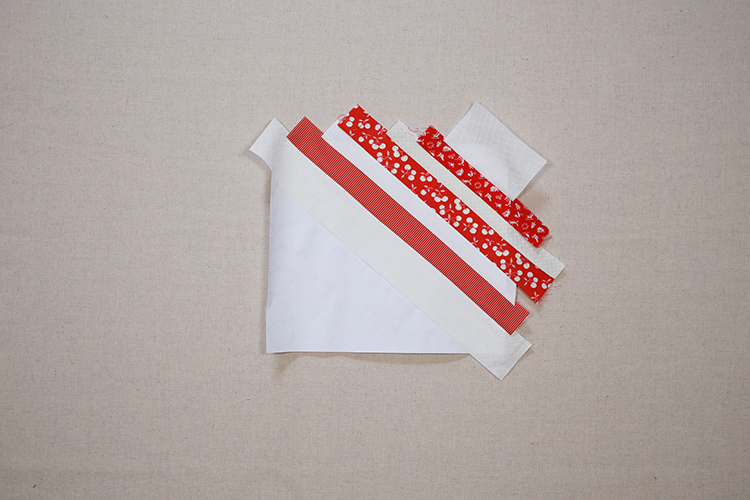
4. Continue adding strips until you've covered the entire half of the paper.
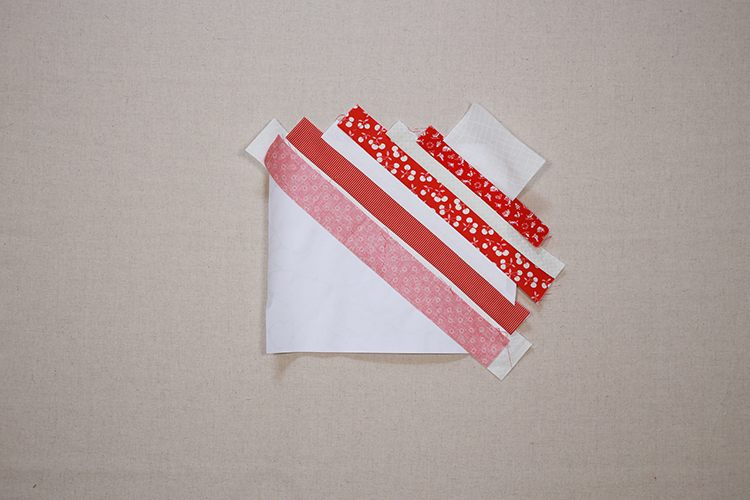
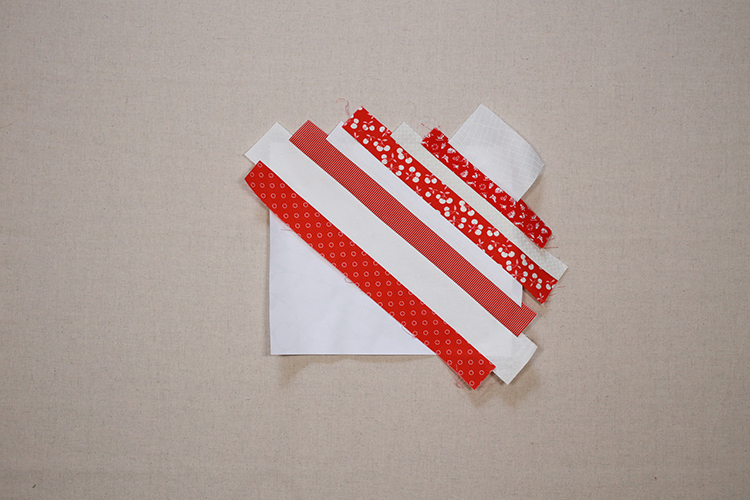
5. Now flip your work around and do the same to fill up the other half of the paper.
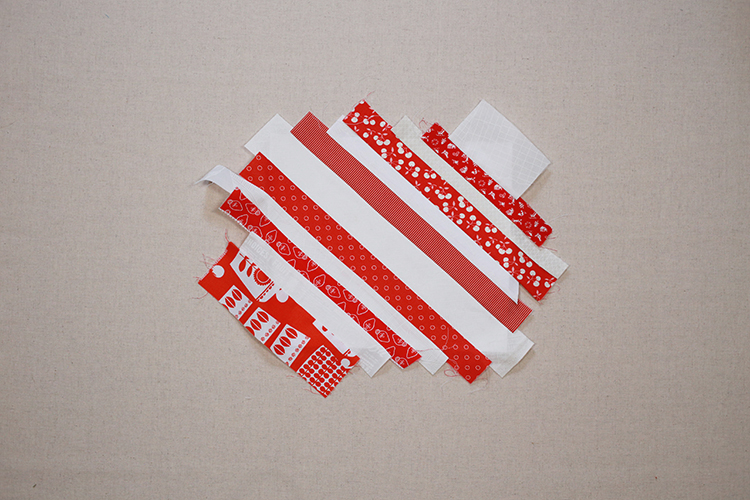
6. Once the paper is covered entirely, press well and flip it over to the wrong side. Using the paper as a guide, trim away the excess fabric. Piece should measure 9"x10.5".

7. Finally, tear off the paper carefully from the back starting at a corner. Press well. Repeat for the second exterior piece!
Optional: You may choose to add additional structure to your patchwork with a lightweight interfacing. I would recommend something like SF101 by Pellon, and interfacing both Exterior Main pieces.
For the bag construction, refer back to the free tutorial or the everything size in the lined drawstring bag pattern, start at step 1.
I hope you've enjoyed this tutorial! I can't wait to see your bags! Please share them with me on instagram @jenib320 + #lineddrawstringbag or via email (jenib320 @ gmail.com)!
Thank you for more great bag patterns! I never buy wrapping paper and this is a great way to use stash!
ReplyDeleteoh jeni, how sweet is that. thanks for the inspiration and tutorial. happy holidays to your loveliness and your family. (-:
ReplyDelete