
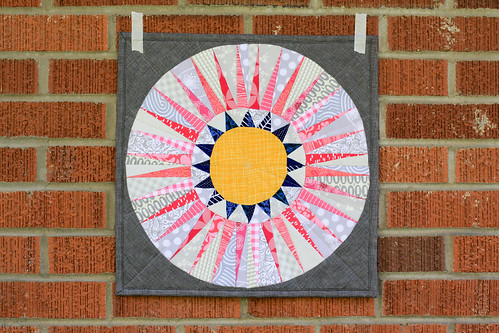
Hi Everybody! Today I'll be walking you through the basics of paper piecing using a New York Beauty Block! The template I used (Block 7) can be found and downloaded along with nine other blocks here: Free New York Beauty Block Patterns.
I feel like I'm still just getting my feet wet in terms of paper piecing, so if you've never paper pieced before, I'd recommend starting with something small to get the basics of it, like this simple square from Quilter's Cache! Definitely check out Faith's star tutorial too, her photos are awesome!
I hope you'll try this out! This block honestly is way easier than it looks! Everything is pieced together in sections, and paper piecing makes it a lot easier to be accurate. I won't lie, I was a little afraid of this block when I first started, but quickly realized it's doable! It even came together quickly too, once I got into a groove! So, let's get started!
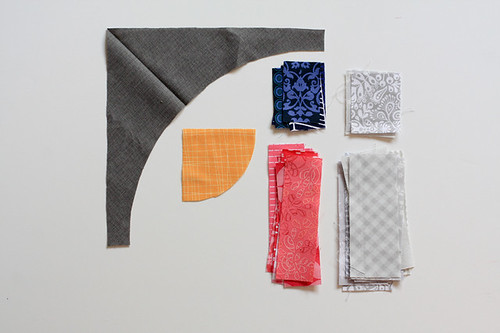
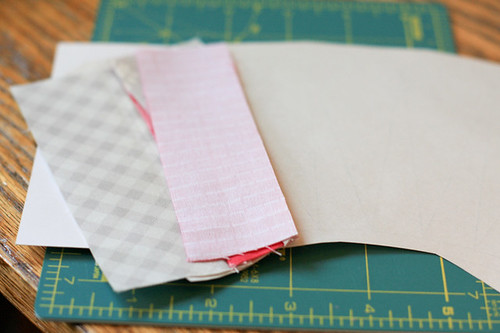
Materials for one block:
- (8) 5"x1.5" pink prints
- (5) 2.5"x1.5" navy prints
- (9) 5"x2" gray prints
- (4) 2.5"x2" gray prints
- (1) 3"x3" square of yellow print
- (1) 9"x9" square of background fabric
- Template found here. (Block 7)
*If you plan on making all four, you'll need four times the fabric. For the background, I got all four pieces out of a 1/4 yard.
Tools:

- Paper (I use Carol Doak's Foundation Paper)
- Acrylic ruler
- Add a Quarter Inch ruler (optional)
- Rotary cutting tools
- Note card
- Pins
- Scissors
- Rotary Cutter/Mat
*I like to use foundation paper over regular printer paper because it is slightly see-through, so you can see the printed pattern from the other side! It's also easier to tear off at the end!
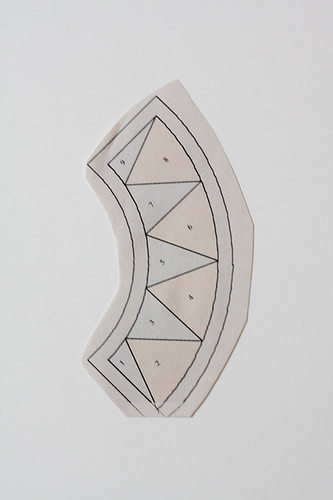
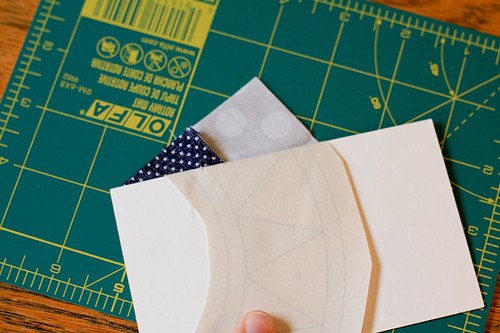
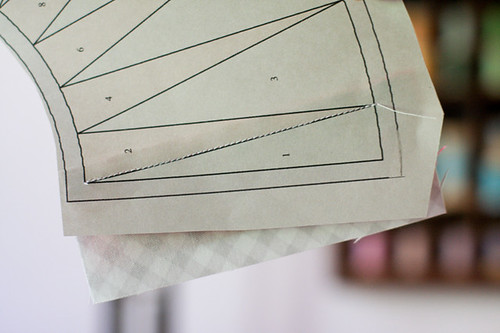
1. Print off your templates. Make sure to print them without scaling! As you can see above, mine cut a bit of the corners off, so I just drew them in with pencil!
Before you start sewing, set your stitch length down a few notches. My machine's stitch is 2.4 normally and I set it down to 2.0 or smaller. This makes it easier to tear off the paper!
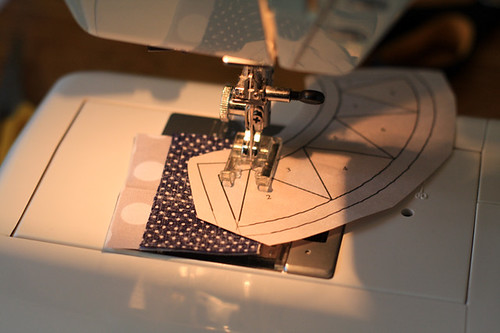
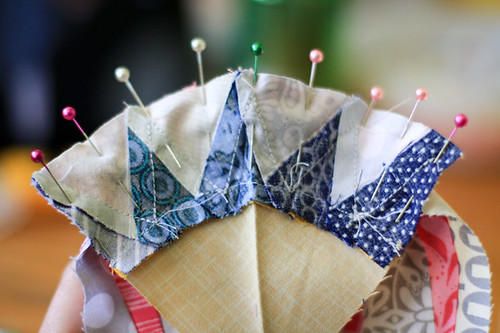
2. Starting with the small arc, take one 2.5"x1.5" navy piece and one 2.5"x2" gray piece. Place them navy piece on the back side of the paper, over top of the shape labeled "1". Make sure it overlaps 1/4" past the line between "1" and 2". Put the gray piece on top of the navy piece, right sides together.

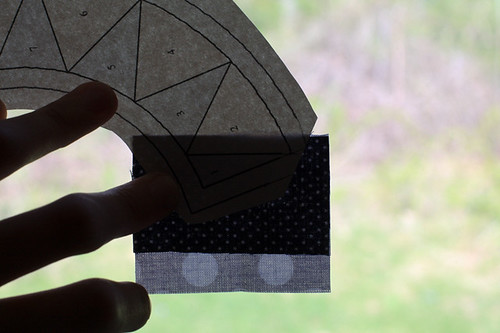
3. Carefully take your pieces to the machine. Stitch on line between "1" and "2". Finger press or iron the piece open.
4. Flip your paper piece back over, paper side up. Grab your note card and place it on the line between shapes "2" and "3".
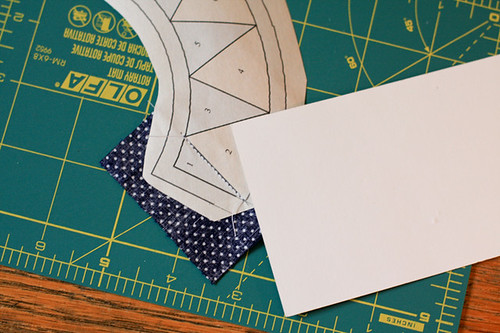
5. Fold the paper piece over the note card. Using a ruler, measure 1/4" and trim the excess.
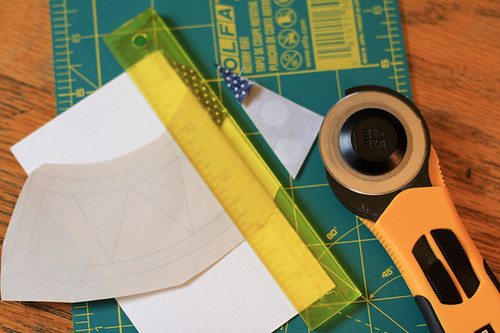
*This is where the add a quarter inch ruler really comes in handy. It has a groove on the edge that fits nicely up against the fold, so it doesn't slide around when you're cutting!
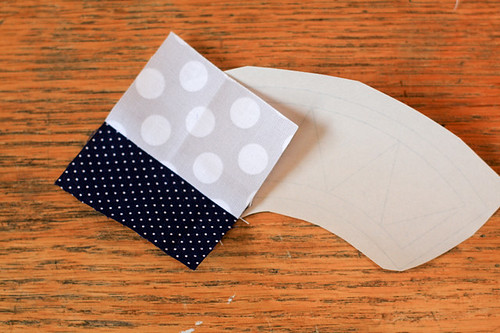
6. Grab the next navy piece and line it up, right sides down, against where you just trimmed. Center it so that it overlaps both side edges.

7. Stitch along the line between shapes "3" and "4".
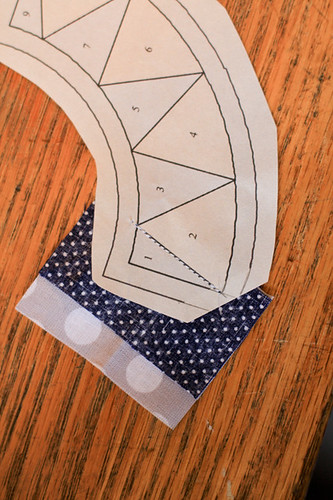
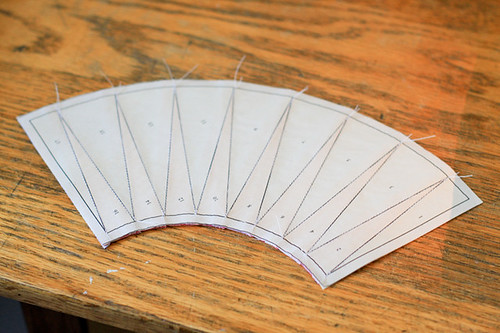
Continue stitching the pieces across the arc, alternating navy and blue pieces.

8. When the full arc is pieced, flip over your work. From the back, trim along the outside seam allowance using scissors.
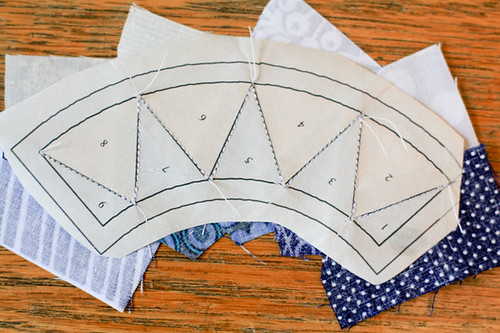

9. Carefully tear off the paper pieces. Fold and crease along the stitching to help loosen each piece.

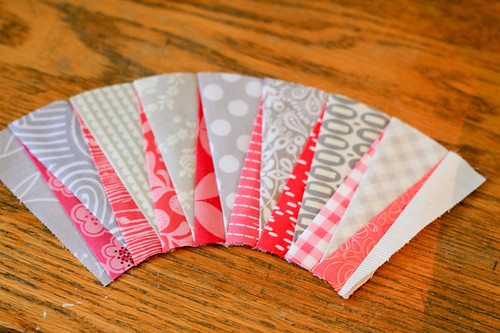
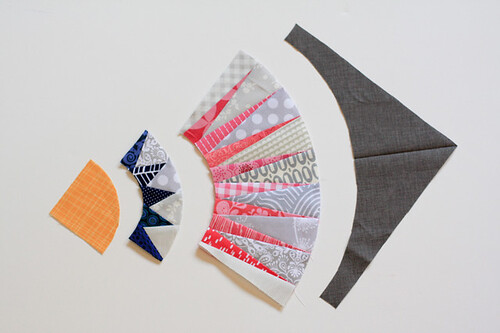
Yay! Your first arc is pieced! :)
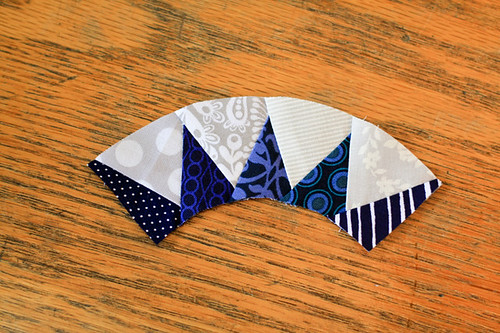
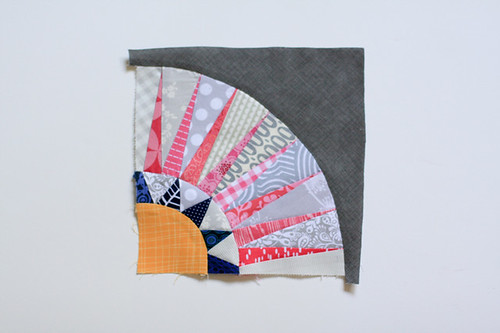
10. Next, piece the larger arc in the same manner, using the gray 5"x2" pieces and pink 5"x1.5" pieces, Starting with a gray piece.
Once your second arc is finished, it's time to put everything together!
11. First, go ahead and cut out your yellow center and your outer background. I choose to use my background template on the fold, cutting out one piece. I did not cut off the extra seam allowance, so that I'd have some extra wiggle room, but do whatever you feel most comfortable with!
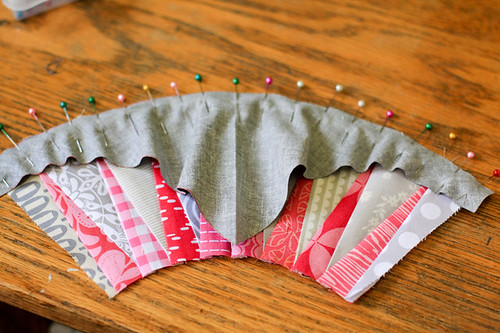
12. Take your background, center, and two arc pieces and fold them in half, pressing with your iron so you have a crease.
13. Starting with your large arc and background piece, match up the center creases, and slowly pin across the arc. Stitch slowly with a scant 1/4" seam allowance. Press towards the background piece.
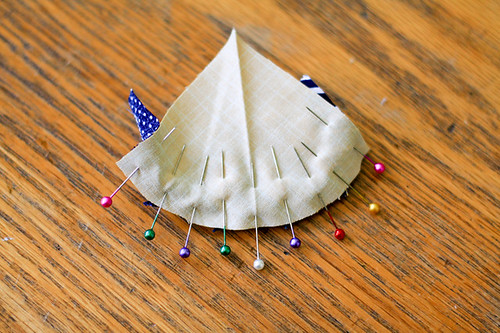
14. For your small arc and center piece, match up the center creases and pin. Pin the edges together, then pin in between, easing the pieces together. Stitch slowly with a scant 1/4" seam allowance. Press towards the center piece.
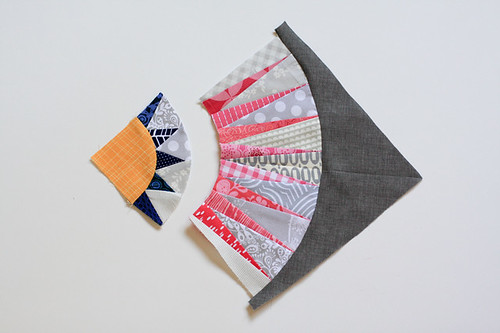
15. Pin your two pieces together, matching up the center creases and pin. Pin the edges together, then pin in between, easing the pieces together. Stitch slowly with a scant 1/4" seam allowance. Press towards the smaller arc piece.
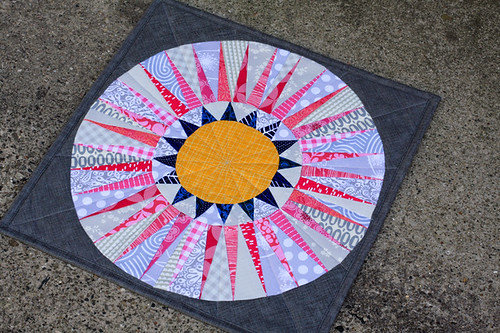
16. Press thoroughly and trim to 8.5" square. If you're making four blocks, I'd recommend waiting to trim until you've finished them all, that way if any one is a little scant, you can make sure they all trim to the same size! :)
Do you want to know a little secret? My blocks were all a little smaller than 8.5", so I ended up trimming them down to 8.25". No harm done!
Voila, you're done! I made my four blocks into a mini quilt, you can read a bit more about it here!
Happy Sewing!
That is sooo pretty!
ReplyDeleteThank you for the great tutorial.
Soile
really pretty Jeni. Your fabric choices are always so lovely
ReplyDeleteWOW... I've always admired New York Beauties, but once again, your fabric and color selections really make this block sing! I've never tried paper piecing, but you're inspiring me -- also, the curved seam part of this isn't so scary because I very recently sewed 150 drunkard's path blocks for the quilt I'm working on now, so I feel confident about that part and just the paper piecing would be new to me.
ReplyDeleteOne question, though -- why does the dark gray background fabric have that diagonal seam out to the corner? Why not just cut that as one piece without the seam? Is it needed to control grainline, or because the skinny area might be prone to stretch and distort, or is it optional?
That appears to be a quilting line, not a seam. Does it matter now, more than 6 years later? I recently acquires a Karen K Stone NY Beauty kit and am working hard to complete it!
DeleteHello Pat in Florida! I like your 6 years later comment. Disabled veterans from the Miami VA are using this pattern in a quilting-as-therapy project. They're using donated fabric from discarded neckties for this project.
DeleteMost neckties do not have large enough single portions of fabric to make a solid background. So, for them, the line is a seam. The ready made pdf pattern is particularly helpful as it's set up as a two-piece background.
Your mini is lovely, and your tutorial looks very easy to follow! I worked on some new paper piecing this weekend. It's such a fun process!
ReplyDeleteGreat tutorial and stunning block!!!! Thank you!!!!
ReplyDeleteGreat tutorial Jeni! This one is definitely going somewhere near the top of the to do list :)
ReplyDeleteI love your trick with that note card! I hadn't seen it before, good tip!!
ReplyDeleteI have never done paper piecing before but I really want to try this! Thanks!
ReplyDeleteJeni - that is so awesome! Thank you for sharing - i hope to try it sometime! Toni
ReplyDeleteYou inspired me! Your tutorial was great. Thank you so much for sharing it with us. Here's how mine came out:
ReplyDeletehttp://www.polkadotsparrow.com/2012/07/april-mays-sampler-new-york-beauty/
The links to the pdfs are working again for anyone following this quilt along.
ReplyDeleteGo to:
http://www.lenzula.de/ Click on the NY Beauties link in the page.
the link is not working. ;) can someone send the pdf of the paper piecing of the new york beauty block?
ReplyDeleteHere is the correct link: http://www.lenzula.de/images/pattern/free/nyb/Nyb7.pdf
DeleteGoing shopping for supplies - can't wait to get started.
ReplyDeleteNo templates were available.
ReplyDeleteYou can find it here: https://www.lenzula.de/freie-pattern/new-york-beauty/Nyb7.pdf
DeleteI have made 42 blocks and each one came out 7.5” don’t understand why as 1/4 seams used.?
ReplyDeleteI'm guessing the template wasn't printed at 100% scale. That would result in a smaller block.
Delete