

Dyeing fabric with indigo is one of my favorite summer activities! Over the years, I’ve experimented with different resist techniques, and I’m excited to share what I’ve learned with you.
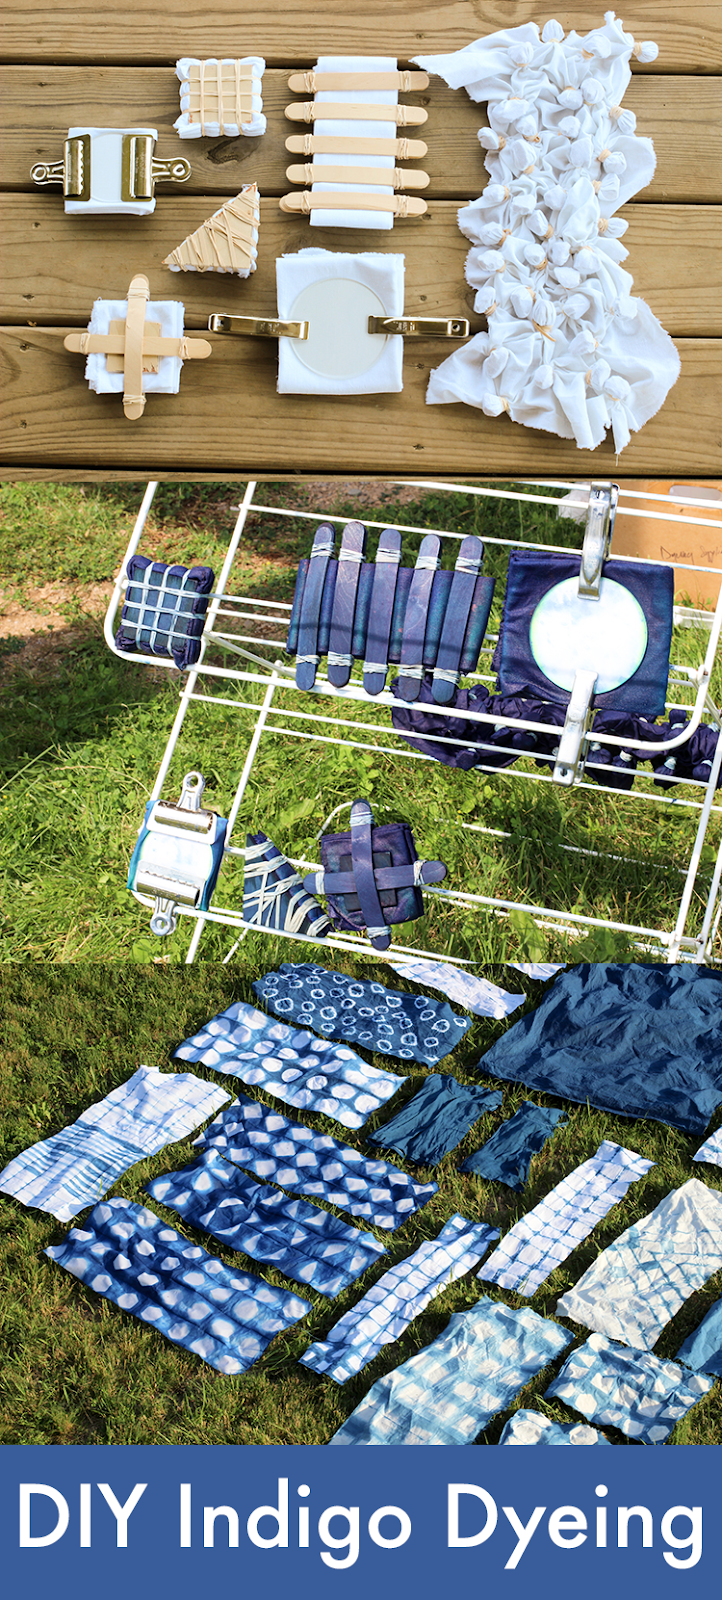
One of the most exhilarating things about using resists when dyeing fabric is the unknown result that awaits when you unwrap your piece. Resists can involve folding, stitching, binding, twisting, clamping and compressing the fabric to keep parts of it from being exposed to the dye. The un-dyed parts create the design! You may have already done some resist dyeing in the form of tie-dye. It can produce beautiful results, and it’s interesting to see how easily you can change the pattern through the resist.
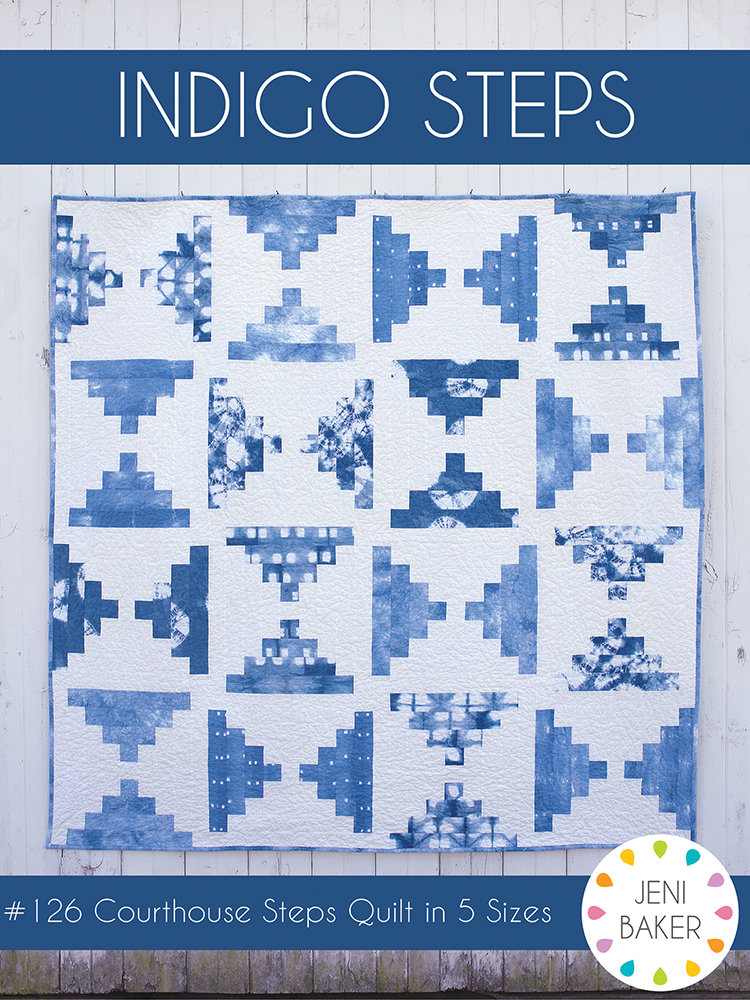
Looking for a project to use your newly dyed fabrics? Check out my Indigo Steps Quilt Pattern!

Dyeing fabric is messy and indigo in particular can be a little smelly, so I recommend doing this outside if you can! If you have to do it inside, make sure to invest in some plastic sheeting to cover your surfaces and protect your space. Good ventilation is important too!
Indigo Dyeing Supplies Needed:

Indigo Dye Kit* - I don’t have a dedicated dye space or a lot of supplies that I can dedicate to dyeing in general, so I like to make things easy and use a kit when I indigo dye! The Jacquard kit* I like to use can dye up to 15 yards or 5 lbs worth of fabric. You can see in the above photo what comes in a kit. The chemicals you need for the indigo bath, a pair of gloves, instructions, and a few resist materials. If you'd rather buy the individual ingredients instead of a kit, you'll need: pre-reduced indigo crystals, soda ash, and sodium hydrosulfite.
5 Gallon Plastic Bucket - Dedicate this to your dyeing, it will get stained blue. A bit of bleach and a scrubber can get most of it out, but be prepared. Pick up a lid for it too!
Long Rubber Gloves - Most indigo kits come with latex gloves, but in my opinon they are way too small! I would recommend an extra long pair like these*. Don't skip the gloves, the indigo will dye your skin and especially your fingernails. When I skipped gloves once I had to sand the dye off my fingernails, it was so hard to get out!
Long Plastic Spoon - For stirring the dye pot. Nothing fancy, something from the thrift or dollar store will do!
Plastic Pitcher - For measuring water, should have a gallon mark on it.
One thing to keep in mind while gathering supplies and materials: if you use it for dyeing, it should not be reused in the kitchen.
Resist Materials - Rubber bands, cotton twine, clothespins, popsicle sticks, clamps, pairs of wooden shapes, pairs of plexiglass shapes, small stones.

My favorite resist techniques use the most basic materials (rubber bands in particular). Bonus, they’re cheap and you probably have plenty at home already! I can typically get a few uses out of them before they snap.

One way to create patterns on the pattern is to use pairs of shapes and clamps, and involves folding up fabric and clamping it between the shape pairs. The kit comes with a few wooden shapes. Rossie Crafts etsy shop* carries a variety of plexi-glass shape pairs that work great. I have some circles from their shop. I have used a variety of different clamps, you can't really go wrong there! Inexpensive squeeze clamps* work well, as do c-style clamps*.
Choosing Fabric for Indigo Dyeing:

Cotton - I primarily like to dye 100% cotton fabrics. It takes the indigo dye very well and is inexpensive. I’ve used a lot of Kona Cotton White*, as well as Cambridge Cotton Lawn* in White. You’ll also find fabric called Kona Cotton PFD*, which stands for “Prepared For Dyeing”. This just means it doesn’t contain some of the chemicals that could get in the way of the dye. It’s not super important because those chemicals can also be removed by prewashing, which I recommend.

White on white quilting cotton prints can be really fun to dye! The base fabric will take the dye and the white printing will take much less.

You can also dye pre-made 100% cotton items like t-shirts, bags, towels, etc. I've had great luck dyeing these flour sack towels*! These make excellent gifts too.

If you’re looking for extra wide fabrics, many solids can be found in 108" widths. I used 108" wide Kona Cotton* for my Indigo Shower Curtain.
Cotton/Linen - This fabric dyes well, although not as well as 100% cotton. It doesn’t get quite as dark. I’ve used Essex Linen* with good success.
How to Dye with Indigo:

1. Prewash fabrics. I recommend prewashing all of your fabric before dyeing. Use a mild detergent and dry on high to remove all sizing and chemicals that could interact with the dyeing. Avoid using fabric softener if possible.
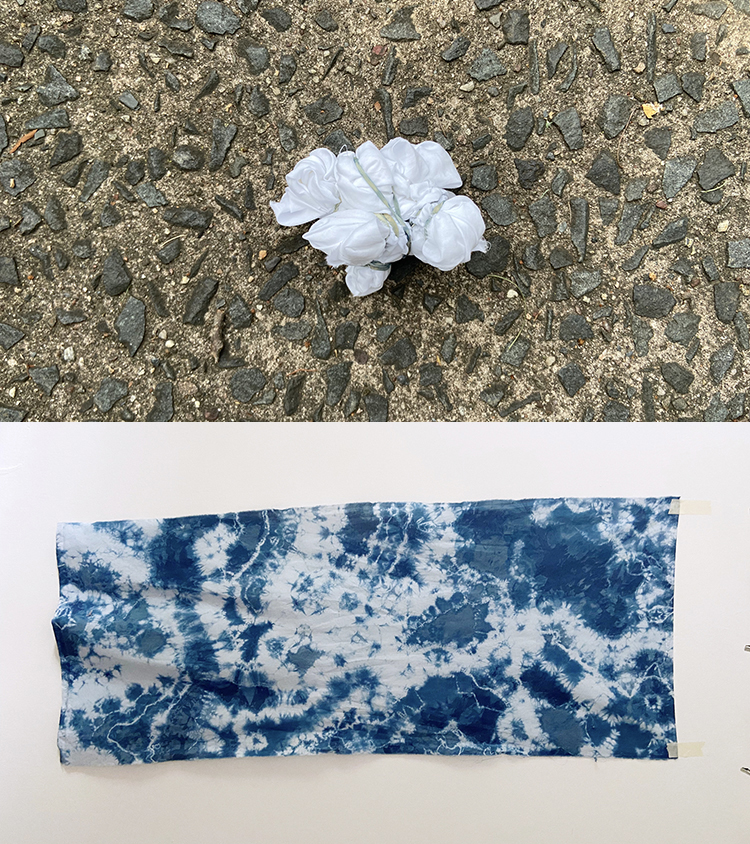
2. Apply your desired resists to dry fabric. I’m sharing lots of different resisting techniques that I've used (plus before and after results) below.
When using pairs of shape resists (wooden or plexi-glass), you'll want those on the outside of your folded fabric. You'll want one on the top and one on the bottom, held together tightly by clamps.

3. Wet your resisted fabrics. I like to soak them in a bucket of clean water until I’m ready to dye.
4. Prepare dye bath according to kit manufacturer’s instructions. You’ll be mixing the chemicals and dye provided in a bucket with water. I use warm tap water when I can. Stir slowly and carefully so as not to add too much oxygen to the dye bath. Cover with plastic wrap or a lid and let sit for 15-20 minutes.

5. Remove a resisted fabric piece from the clean water. Squeeze excess water from the piece, before letting go, slowly submerge the piece in the dye bath. Hold the piece under, gently moving it around in your hands, so that you don’t add unwanted resist with your grip! Keep it under for up to 5 minutes. I usually do less, and I don’t time it.
 6. Squeeze the piece in the dye bath and quickly pull it out. Let the piece drip over the ground, not over the dye bath. Let it sit on the ground, in a clean bin, or on a drying rack. When it first comes out of the dye bath it will be bright green. It will slowly turn dark blue as the indigo hits the oxygen in the air. It’s really magical! Turn the piece periodcally to expose all the sides to the air. Let it sit for 20 minutes, without removing the resists.
7. You may choose to re-dip your pieces to achieve a darker blue. I usually double or triple dip all of my pieces.
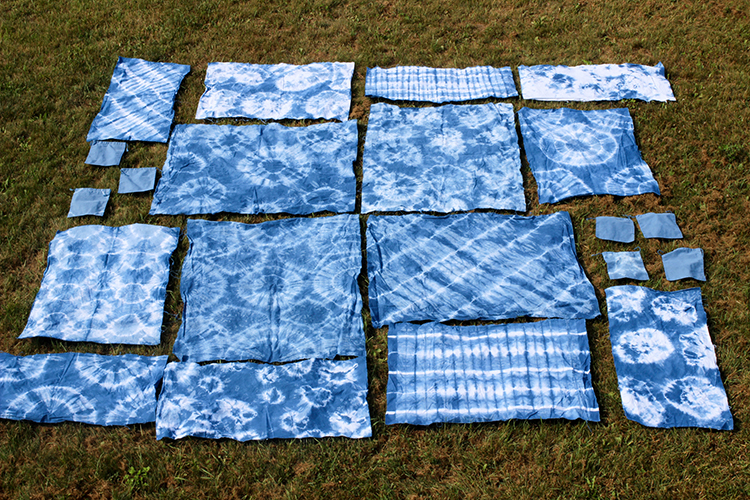
8. Let your piece sit for 15-20 minutes until all the fabric you can see is blue, then remove all the resists. Unfold and reveal the pattern you’ve made! Lay out to sit and finish oxidizing if it needs to.
9. Rinse in cold water until water mostly runs clear. Wash and dry with a gentle detergent. I like to use a small amount (1 teaspoon or less) of original dawn dish soap. After your pieces are washed and dried you can test the colorfastness of the dye by rubbing a piece of white printer paper on the fabric. If it turns blue, you'll need to wash it again!
Resisting Techniques:
The resist methods I've used to create my fabrics have been influenced by two ancient types of dyeing that have great cultural significance. The first is Shibori, which has roots in Japan and other parts of Asia. I'd highly recommend reading this short essay by Yoshiko Iwamoto Wada, as well as their book "Shibori: The Inventive Art of Japanese Shaped Resist Dyeing" to learn more about it. The second is Batik, which has roots in Indonesia, as well as the Middle East, Africa and in other parts of Asia. There is a lot of great information out there on Batik dyeing, I found this article from the site Living in Indonesia to be insightful.

Accordion folded, secured with rubber bands.

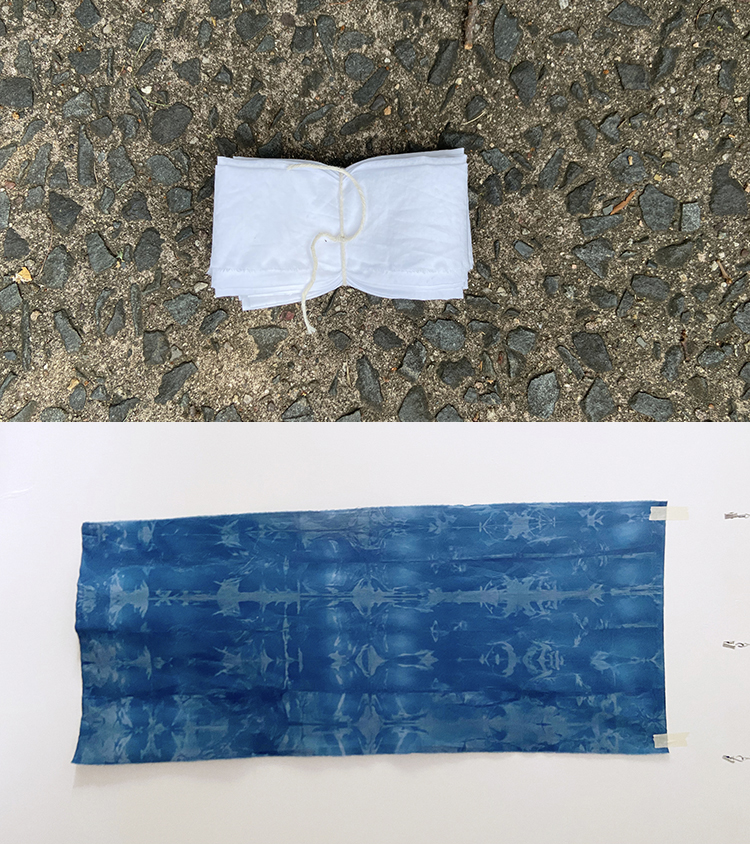
Machine basted with a long stitch length, that is then gathered and tied.

Resist held with rubber bands. Over-dyed after resist was unwrapped. (resist purchased from here)

Rubber band resist done symmetrically, with multiple resists per column of fabric.

Single rubber band resists done all over.

Fabric was scrunched into big messy balls and then resisted with rubber bands.

Resist done with small rocks and rubber bands.

Resist held with rubber bands.

Resist held with clamps. (resist purchased from here)

Resist held with clamps. (resist purchased from here)

Resist held with rubber bands.

Resist held with popsicle sticks and rubber bands.

Resist held with popsicle sticks and rubber bands.

Fabric was twisted into a cone and then resisted with wrapped twine.

Fabric was scrunched into a ball and then wrapped in twine to secure.

Fabric was scrunched into big messy balls and then resisted with rubber bands.

Fabric was scrunched into big messy balls and then resisted with rubber bands.

Fabric was folded and secured with twine.

Accordion folded, secured with twine.

Accordion folded, secured with clothespins.

Fabric was scrunched into big messy balls and then resisted with rubber bands.

Loosely accordion folded, secured with rubber bands.

Machine basted with a long stitch length, that is then gathered and tied.

Rubber band resist done symmetrically, with two resists per column of fabric.

Machine embroidered piece with polyester thread. We weren't sure what kind of thread was used for the embroidery when it went into the bath, but the result tells me it wasn't cotton! The stitching stayed white, while the fabric took the dye.

Fabric was scrunched into big messy balls and then resisted with rubber bands.

Accordion folded, secured with clothespins.

This fabric was folded and then resisted with a square on the top and bottom held together with clamps.

Wax resist applied to fabric before dyeing.

Wax resist applied to fabric before dyeing.

Wax resist applied to fabric before dyeing.

Wax resist applied to fabric before dyeing.

Accordion folded and secured with clamps.

Accordion folded into a square and secured with clamps.

Accordion folded and then folded into triangles and secured with a clamp.

Accordion folded into a square and secured with clamps.

Long skinny tucks secured with several rubber bands each.

Accordion folded into a triangle and secured with wooden resist and clamps.

Accordion folded into a triangle and secured with clamp.

Accordion folded into a square and secured with clamps.

Long skinny tucks of different sizes tucks secured with several rubber bands each.

Honeycomb folding using this tutorial.

Honeycomb folding using this tutorial.

Dipped with ribbon still intact holding squares together. (mini charm pack)

Long skinny tucks secured with several rubber bands each.

Long skinny tucks secured with several rubber bands each.

Long skinny tucks secured with several rubber bands each.
Fabric was scrunched into big messy balls and then resisted with rubber bands.
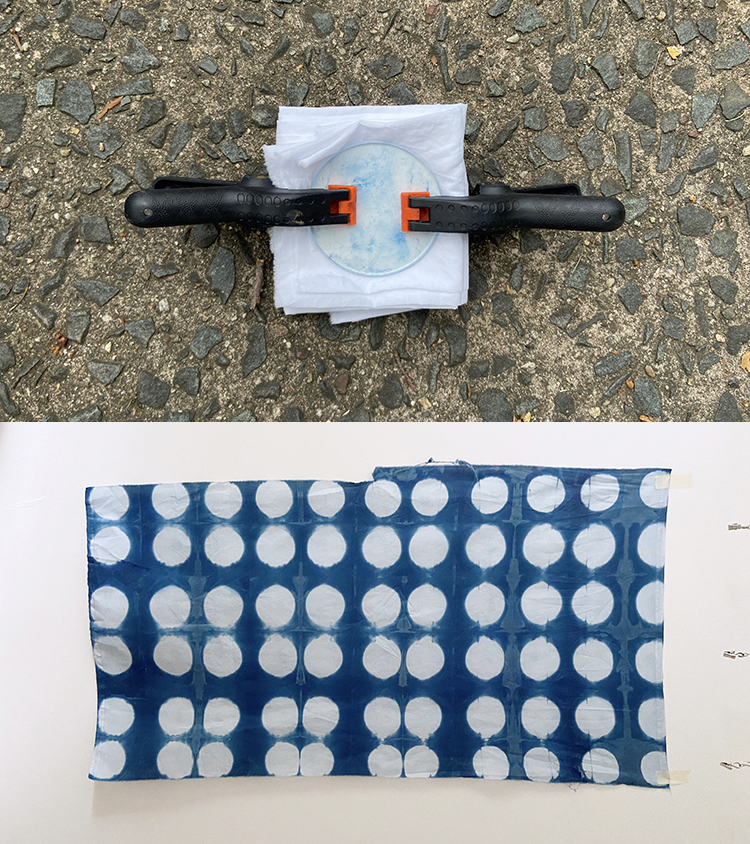
Accordion folded into a square and secured with circle resists and clamps.

Long skinny tucks of different sizes tucks secured with several rubber bands each.
Accordion folded into a rectangle and secured loosely with twine.
Projects I've Made Using Indigo Dyed Fabrics:
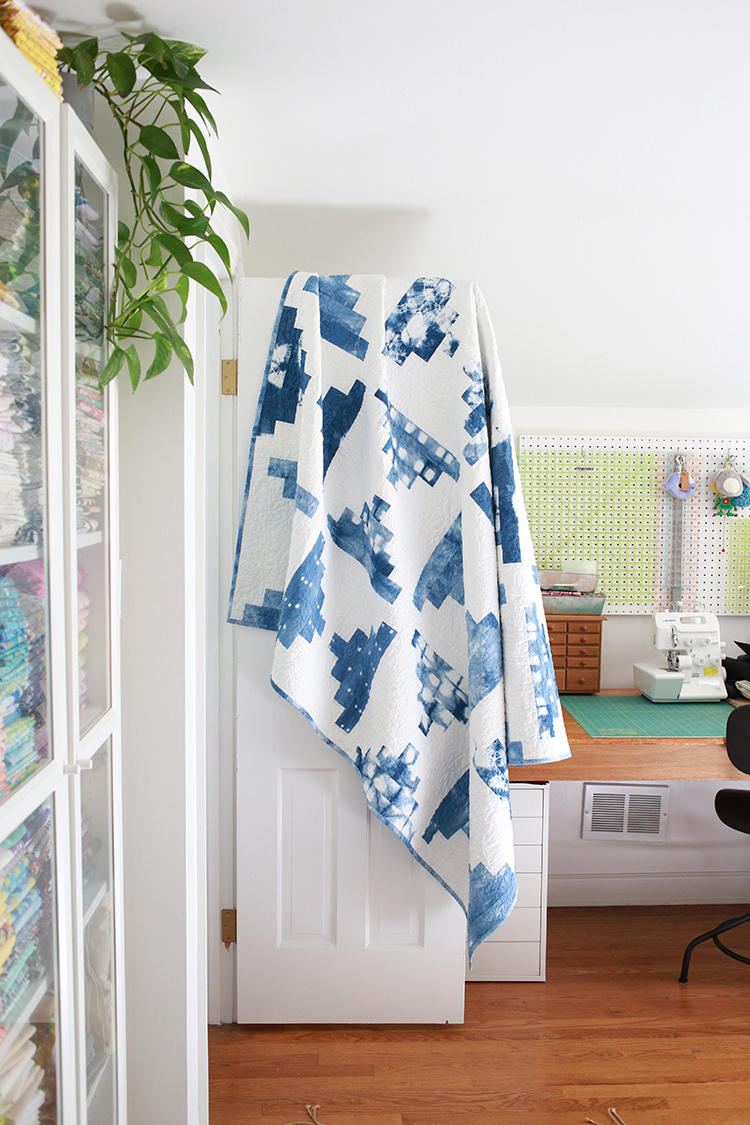
Indigo Steps Quilt

Indigo Picnic Quilt

Indigo Patchwork Quilt

Indigo Dyed Workshop Tote Bag

Indigo Sew Together Bag

Indigo Go Anywhere Bag

Indigo Handmade Shower Curtain

Indigo Dyed Hand Towels
The Modern Natural Dyer by Kristine Vejar* - Beautiful modern projects to explore natural dyestuffs.
Wild Color by Jenny Dean* - Another natural dyeing resources with tips for scavenging dyestuffs.
Color Your Cloth by Malka Dubrawsky* - My favorite dyeing resource, lots of information on wax resist techniques.
Modern Color by Kim Eichler-Messmer* - An illustrated guide to dyeing fabric for modern quilts .
Fabric Dyeing Basics Tutorial - Basic instructions for dyeing fabric for RIT Dyes.
See more of my dyeing adventures here.
Happy Dyeing!
Disclaimer: I am not an expert when it comes to dyeing. I have learned some tricks and tips while experimenting on my own, but please exercise caution when working with dyes. Keep small children and pets away from dye baths and supplies. Dye is permanent and will stain clothes and tile grout. It will temporarily stain bathtubs, but can usually be cleaned up pretty easily with bleach-based cleaning products. Use your best judgement.
*Any links marked with an asterisk in this post are affiliate links. This means if you click through and buy something, I make a small commission, at no extra cost to you.
Fantastic Jeni! I love every piece and all the textures are so exiting and beautiful!
ReplyDeleteWhat fun designs you came up with! Love the indigo too :)
ReplyDeletevery cool! i've been wanting to try indigo but haven't gotten to it yet. has the dye crocked much?
ReplyDeletePretty cool designs!
ReplyDeleteThese turned out beautifully! Bookmarking this for a late summer day ;)
ReplyDeleteoh I love all of these!!! so great. wish I would have given it a try! next time, right?! I cannot wait to see what you make with these, maybe you have made something already!! :)
ReplyDeletePerfect!! What a marvelous weekend!!
ReplyDeleteso fun!
ReplyDeleteYou got some very cool pieces! What a fun kit to work with. My daughter is going to teach me the art of hand dying in a week or two...I am so excited to learn her surface design techniques!
ReplyDeleteVery cool. I have a dye kit with green dye. I might have to break it out and give this a try. Best to do it in the warm weather, so it can be outside.
ReplyDeleteI want to dye more! It was such a fun day. I think your popsicle stick piece is one of my favorites from the day! And the pebbles, of course.
ReplyDeleteWow, what a gorgeous transformation! I bet you guys really enjoyed this activity. I really adore the teamwork you guys have. And the outcome is really fantastic! Hope to see more cool and vibrant colors to dye! Thanks a lot for the inspiration. I might try this out. See ya!
ReplyDeleteMy Website: PhD by Publication
Wow! So amazing! That sounded like a wonderful weekend!
ReplyDeleteThe fabric came out GREAT!
ReplyDeleteThese are great!
ReplyDeleteI have all of my supplies together and ready to get started! Have you dyed a quilt before??? Seems rather daunting to try to handle all of that wet fabric (queen size)
ReplyDeleteI haven't! That would be quite a task! I would recommend a large container with lots of extra room for the dye bath, and a second set of hands for sure. A second empty container to put it in after it's been dyed, would be helpful too I think. To squeeze out the extra liquid without getting it too messy. Best of luck!
DeleteOh my, I just found your wonderful blog. Thank you so much for taking the time to take before and after pictures and posting them! I was researching ideas for doing a tie dye/shibori style shower curtain and I was wow-ed by all your work.
ReplyDeleteHow do I keep the dye from runing.
ReplyDeleteI don't do anything extra to keep it from running! You could soak your fabrics in Retayne if you're nervous about running!
DeleteJeni, what a wealth of information and such generosity in sharing your knowledge. Amazing - thank you!
ReplyDeleteWow! These are beautiful. Thanks for taking the time to share your methods.
ReplyDeletethank you for sharing your adventure with Shabori! wonderful documentation for novices like me!
ReplyDeleteThank you for this work and effort to share. I am having a dye session in my garage for girlfriend Xmas gathering. I will be studying your wonderfully detailed instructions.
ReplyDeleteHelp! I did a dye session today,followed your instructions carefully, but the dyed fabric never turned green. What did I do wrong?? I used RIT indigo dye.
ReplyDeleteRIT's indigo dye is simply their all-purpose dye, in the color 'indigo'. Unfortunately, it isn't comparable to the dye process described here.
DeleteGreat information! Thank you for all of the step by step photos!
ReplyDeletethank you for your wonderful tutorial
ReplyDeleteWonderful sharing Jeni! Great info & samples!
ReplyDeleteBeautiful work! Irregular designs are my favorites. Thanks for sharing.
ReplyDelete