
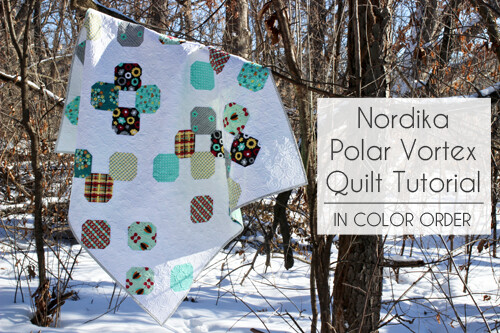
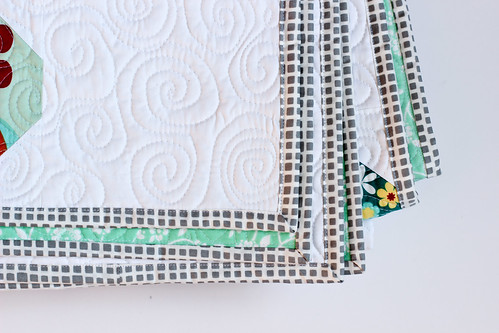
I used my Nordika collection for my quilt. The line feels very wintery to me, so a snowball quilt felt appropriate! I've named this quilt Polar Vortex to commemorate this crazy cold we've been having! I used the Snow Pure Element solid for the background and Shadow Squared Element for the binding, both by Art Gallery Fabrics. I backed it with a vintage sheet!
Sewing Level: Intermediate
Materials:
- 9 fat quarters of print fabrics
- 2 1/4 yards solid fabric
- 1 3/4 yards of 90" wide cotton batting
- 3 1/2 yards of backing fabric*
- 1/2 yard of binding fabric
- Coordinating thread
- Water soluble marker or pencil
*Optional pieced back: 1 3/4 yards + 4 fat quarters
Notes:
Finished Quilt Size: 54"x54"
Width of Fabric (WOF) = 42" assumed
Fat Quarter = 18"x21"
Cutting:
From 9 fat quarters:
- Cut (4) 6.5"x6.5" squares
From solid fabric:
- Cut (9) 2.5"xWOF strips
- Subcut each strip into (16) 2.5"x2.5" squares
- Cut (8) 6.5"xWOF strips
- Subcut each strip into (6) 6.5"x6.5" squares
Total print squares: 36
Total solid 2.5 squares: 144
Total solid 6.5" squares: 45
Instructions:

*Use a 1/4" seam allowance unless otherwise noted.*
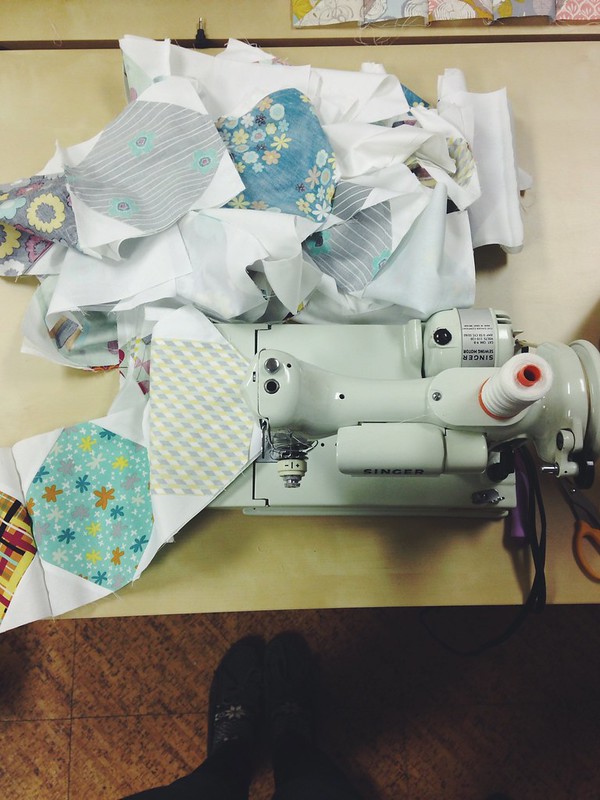
1. Using a water-soluble marker or a pencil, mark a diagonal line across the wrong side of four solid 2.5" squares. Place one square in the upper-left corner of the a print 6.5" square, right sides together. Stitch across the corner on the line you marked. Trim off corner, leaving a 1/4” seam. Press corner up.
2. Turn block clockwise and repeat step 1 with the remaining three corners.
3. Repeat steps 1-2 with remaining 2.5" solid squares and 6.5" print squares. You'll have a total of 36 blocks.
4. Mix up pieced blocks and 6.5" solid squares in a bucket or bag. Randomly piece together rows of 9 blocks.

5. Arrange rows until you find a layout you like. Press seams in each row in a single direction, alternating direction every other row.
6. Sew rows together to finish the quilt top, press seams open.
7. Prepare Backing: It’s good practice to cut your backing and batting at least 4” larger than your top on all four sides. I’ve included this overage in the backing yardage requirements. Cut your backing yardage in half. Press. Trim off the selvedges and sew your pieces together lengthwise. Press seam open.
---------------------------------------------------------------------------------------------------------------
*Optional pieced backing
This is an easy pieced backing that doesn't require tons of yardage!
Cutting:
From 4 fat quarters:
- Cut (1) 16"x21" rectangle
From backing yardage:
- Cut (2) 62"x21" rectangles
Instructions:
*Use a 1/4" seam allowance unless otherwise noted.*

1. Sew 16"x21" pieces together in a row along the long edges. Press seams open. Piece should measure 62.5"x21". Trim down to 62".
2. Sew a yardage rectangle to the top and bottom of the pieced unit from step 1. Press seams open.
---------------------------------------------------------------------------------------------------------------
8. Basting: Using masking or painter’s tape, tape the backing to a clean, hard surface, right side down. Spread out your batting on top of the backing. Smooth out any wrinkles. Carefully spread out your quilt top on top of the batting, right side up. Pin your top, I like to use curved safety pins, spacing the pins a few inches apart. Make sure that your pins are going through all three layers.
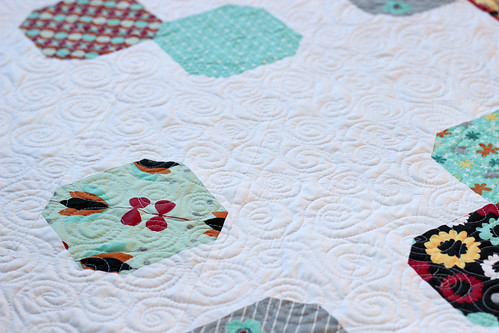
9. Quilting: Quilt as desired, by machine or by hand. Trim away excess batting and backing fabric.

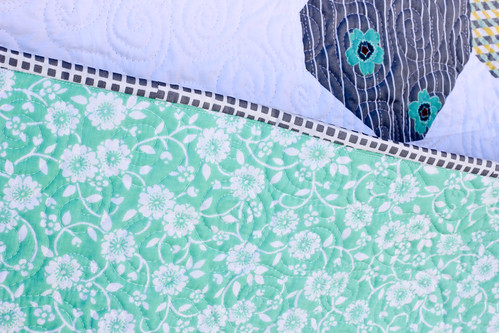
10. Binding: Cut yardage listed for binding into 2.5” strips. Trim off selvedges and sew your strips together to form one long strip, press seams open. Fold in half lengthwise, pressing with your iron as you fold. Attach binding using your preferred method. For a detailed tutorial on attaching your binding to both sides by machine, see here.
As always, if you make something from my tutorials, patterns or with my fabric, I'd love for you to add it to the In Color Order Flickr Group! :)

Happy Sewing!
Super cute Jeni!
ReplyDeletethanks for sharing! while the polar vortex itself is no fun, this quilt is great!
ReplyDeleteVery sweet quilt, Jeni! Thanks for sharing the tutorial. Love the name... Brilliant!
ReplyDeletelove it!! thank you for the tutorial!
ReplyDeletePolar Vortex LOL! Love it :) I'm in Central NY so we're having another one right now. Really neat pattern, thanks for sharing it with us. Cindy
ReplyDeleteThank you for the amazing tutorial for this cute quilt!
ReplyDeleteI like it! And I have a good amount of Nordika left over after finishing my Penny Sampler. Hmmm.
ReplyDeleteThis is adorable!!!
ReplyDeleteLove this - it would be a great pattern for charm squares too!
ReplyDeleteI will put this on my bucket list. This would make a great baby quilt too.
ReplyDeleteA Polar Vortex quilt…so very appropriate for many of us. I live in the northeast corner of Iowa…I should have checked your blog earlier in the day as we had no school today due to sub-zero temps…polar vortex in action. I have some soft browns and blues that would lovely!! Thanks for sharing!! Stay warm!
ReplyDeleteJeni..the quilt is stunning! I love the snowball pattern and your colors are fantastic
ReplyDeleteJeni, it's simple and beautiful, just like I like it :) Thank you very much for this tutorial!
ReplyDeleteThank you Jeni. It's beautiful.
ReplyDeleteLove it Jeni - perfect project to show off your beautiful fabric!
ReplyDeleteDo tell us about your new white Featherweight!!! Love it! Quilt is super cute!
ReplyDeleteCute Jeni!! I love it :)
ReplyDeleteCute! Thanks for the tutorial. Great job on the quilting too!
ReplyDeleteWhat a fun layout for a snowball block. Thanks for sharing.
ReplyDeleteLove this.,
ReplyDeleteThat looks like fun! I'm pinning it for the next time I've got someone else's coordinated leftovers to play with. :-)
ReplyDeleteOoohhh... I LOVE this! Thank you for sharing!
ReplyDeleteI found the link to this from The Crafty Quilter. Polar Vortex really caught my eye. We have another one coming to western New York right now I believe. And I just happen to have some nice wintry fat quarters on hand. But being relatively new to quilting, is there a particular reason why you move in a clockwise direction while sewing those corner pieces on?
ReplyDeleteJeni, I bought all the fabrics from this collection and have had it in my stash, washed and ironed and finally I'm ready to get this quilt started! I love the way your paired the very awesome Scandinavian themed prints that you designed with all this gorgeous white! Love, love, love! I even bought the Accu Quilt dies for the two square sizes to make this.
ReplyDeleteBeautiful job and sweet quilt! I wish the tutorial was in a PDF format too that could be down loaded. Thanks for sharing this lovely creation! It does have a polar feel to it!
ReplyDeleteI love the way this look so clean simple and wonderful!! I found you site just going from one site to another However I have Book marked you Thank you.
ReplyDeleteI CAN SEE THIS WITH A VERY LIGHT BLUE BACKGROUND WITH RED. WHITE AND BLUE PRINTS THAT WOULD MAKE A GREAT QUILTS OF VALOR QUILT AND IT WOULD ONLY NEED A BORDER TO FIT THE DEMINSIONS NEEDED FOR A QOV
ReplyDeleteI have all of your patterns and your book. A big fan of all that you share with us and this tutorial is just another example of why I love your work. Many thanks.
ReplyDelete