
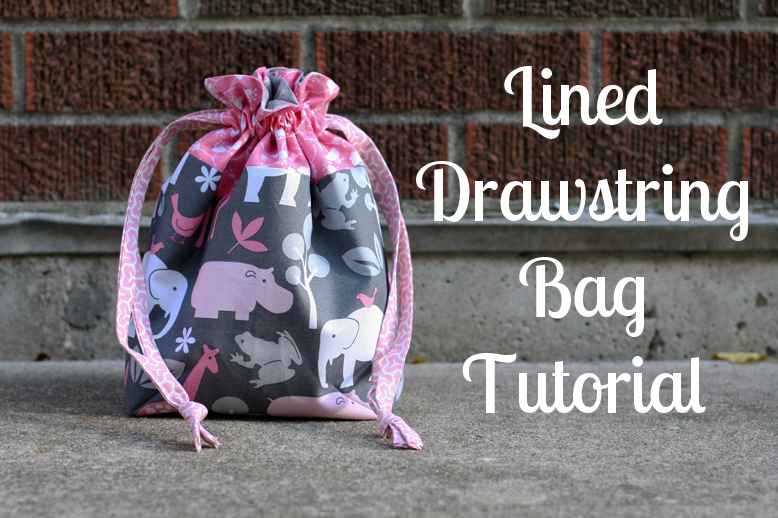
I love making bags! In my opinion, you can never have too many. Especially little bags, they are just so handy. I whipped up one of these bags right before traveling and thought you all might enjoy a little tutorial to make your own.

These bags are fat-quarter friendly, they only use three fat quarters (plus twill or fabric for ties), so even if your stash is small, you can make these bags! I use them for everything, they can hold a lot. They make a great gift, or the perfect eco-friendly, reusable wrapping. They're a great DIY gift bag!

Looking for other sizes? Check out the Lined Drawstring Bag Pattern which includes 8 sizes and instructions for creating your own custom size!

Customize your bags even further with the Lined Drawstring Bag Expansion Pattern!
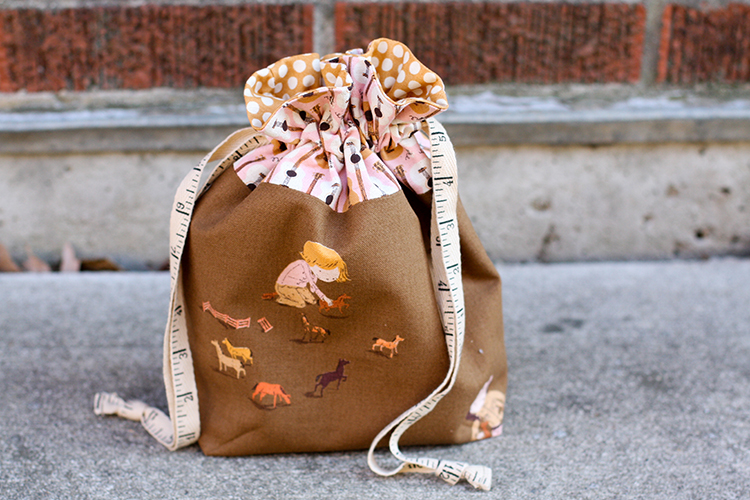
The best part for me of course, was choosing the fabrics! I chose a focus fabric (the animal print), for the exterior, and then pulled colors from there to use as the coordinating exterior accent, interior, and ties. Notice my focus fabric is directional (meaning it has a clear "top" and "bottom"). I've written the tutorial to work with directional prints.
Optional: For added structure, you may choose to add interfacing to your bags, but it is not necessary. I’d recommend using interfacing only on the Exterior Main pieces. Using it on the Exterior Accent could interfere with the drawstring.
I have a full video tutorial available for this bag in addition to the written tutorial here in this post. It covers the full process from cutting to finishing. Watch the video in this blog post, or watch it on YouTube, here: Lined Drawstring Bag Video Tutorial

Fabrics used (left to right): Zoology by Michael Miller, Modern Meadow by Joel Dewberry, Peacock Lane by Violet Craft, Grunge Basics by Moda
**Fabric Shops: Please don't teach classes using this tutorial. I have a paper pattern that includes this bag available for wholesale ordering. Order through this form.
Sewing Level: Beginner Friendly
Finished size: Approx. 10" tall, 7" wide, 3" deep
Lined Drawstring Bag Materials:
- 3 Fat quarters (18"x21")
- 2 yards of 1/2" twill tape, nylon paracord or 1/8 yd fabric
- Coordinating thread
- Acrylic ruler
- Large safety pin
- Water soluble pen
- Optional: decorative beads
Looking for supplies? Check out my Pattern Supplies and Resources post.
Lined Drawstring Bag Cutting:
From Exterior Main Fabric:
- Cut (1) 9”x21” strip
- Subcut into (2) 9”x10.5” pieces*
From Exterior Accent Fabric:
- Cut (1) 4”x21” strip
- Subcut into (2) 4”x10.5” pieces*
From Interior Fabric:
- Cut (1) 12.5”x21” strip
- Subcut into (2) 12.5”x10.5” pieces*
If using fabric for ties:
- Cut (2) 32”x2” strips
If using twill for ties:
- Cut (2) 32" pieces
*This tutorial uses subcutting. There may be scrap leftover from the strips after you've cut your pieces. It's written this way to ensure that any directional fabrics are cut correctly. The scraps will not be used in the final bag. The final measurements for each piece can be found on the second line of each cutting instruction if you’d rather cut from scraps. All piece dimensions are listed as height x width.
Lined Drawstring Bag Instructions:

*Use a 1/4” seam allowance unless otherwise noted*

1. Arrange your pieces as shown in the above diagram: Interior, Exterior Accent, Exterior Main, Exterior Main, Exterior Accent, Interior.

Be sure to arrange directional prints with the “top” of the print facing out, towards the interior pieces.

2. Sew all your pieces together in this order, creating one long strip. Backstitch when you start and finish each seam. Press your seams open.

3. Fold your sewn strip in half, right sides together, matching the interior ends. Pin along the raw edges, matching up each seam and pinning it to secure. Leave a 3" space at the center of the open end (interior), for turning later.

4. On both sides, mark a 1" opening in the center of the exterior accent piece. Measuring from one side of the exterior accent, mark at 1.25" and 2.25". These two smalls sections will be left unsewn, creating an opening for the drawstrings.

5. Sew along the three open sides, backstitching when you start and finish. Don’t sew between the 1” opening you marked on both sides or the the 3" opening on the end. Be sure to backstitch before and after each opening.

6. To create the flat bottom of your bag, we need to box all four corners (2 interior, 2 exterior).
Starting with an interior corner, wiggle both interior pieces apart, flattening the corner (where the seams meet). Line up the bottom and side seams, wiggling them between your fingers to feel that they are lined up. You may find this is easier if you first press the seams open a few inches in each direction.

7. Lay your acrylic ruler across the corner, lining up the diagonal edge of your piece with the 45˚ angle line. The stitching line should line up at 1.5" (as shown above). Draw a line 3" wide across the corner using a water soluble pen.


8. Sew on this line, across the corner. Backstitch when you start and stop. Trim off the corner, leaving a 1/4” seam.
Repeat steps 6-8 for the remaining interior corner and both exterior corners.
If you need additional help adding boxing the corners of your bag, watch this video I taped at Quilt Market with the Fat Quarter Shop!

9. Turn your piece right sides out, pulling through the opening in the interior. Gently push out the corners. Press the lining opening under 1/4” and stitch closed with a small seam allowance.

10. Nestle the interior into the exterior. Press along the top edge.
 11. Find the 1” opening on each side of the bag. Mark a small horizontal line at the top and bottom of the opening. Using your acrylic ruler, extend the lines around the entire bag.*
*Alternatively, slide the bag onto your machine bed, lining up the needle with the top mark. Place a piece of washi or masking tape on the machine bed to use as a guide. Repeat with the bottom mark. This technique is shown in the video above. (Some 1" wide masking tape is super helpful here!)
 12. Sew all the way around your piece on the lines you marked. Backstitch at the start and finish. You’ll have two stitch lines when you’re done, one above and one below the 1” openings. This is the casing for the drawstrings.
If you’re using a sewing machine without a free arm like mine, turn the bag inside out after marking the lines. Sew on the lines, “inside the bag”. This technique is shown in the video above.
Now it’s time to make your ties. If you’re using twill, skip to step 18.

13. Take your fabric strips and fold down 1/4” on each short edge, wrong sides together. Press. Topstitch to secure.

14. Fold in half lengthwise, wrong sides together. Press.

15. Unfold, and fold each raw edge into the crease you just created. Press.

16. Fold in half again and press.

17. Topstitch along the open edge to close with a very small seam allowance. Repeat steps 13-17 to create the second tie.


18. Attach a safety pin to one end of your ribbon or fabric tie. Insert the safety pin into one of the side openings.
I now sell these large safety pins in my shop! Find them here.


19. Wiggle it through, passing the other opening, pulling it all the way back around and out the opening where you started.
 20. Even out your the ends and tie together in a tight knot. Repeat with the remaining tie, starting at the other side opening.
*If you’re using twill instead of fabric ties, you may choose to treat the ends with Fray-Check or clear nail polish to prevent fraying. Or finish by turning each end under by 1/4" twice and topstitching to secure.
 Voila! You're done!
Ready to make some more? Check out the Lined Drawstring Bag Pattern which includes 8 sizes and instructions for creating your own custom size!

Don't forget you can easily customize your bags by incorporating patchwork! For three kinds of striped bags, see this tutorial. Find all the variations and tutorials here: Lined Drawstring Bag Tutorials and Variations.
Customize your bags even further with the Lined Drawstring Bag Expansion Pattern!

Enjoy! Share your finished bag photos using the #lineddrawstringbag hashtag on social media!
Happy Sewing!
Made one today for a gift. Great instructions and everyone in my knitting group loved the bag. Thanks for the tutorial.
ReplyDeleteThis was a great tutorial! Cute, clever bag - I interfaced mine for a little more body, and it came out just perfect. Thank you!
ReplyDeleteOMG, Jenny! I have been puzzling about how to make a little drawstring purse to go with my Victorian Christmas caroling costume (big enough for keys, chapstick, pitch pipe, and jingle bells!). Decided not to do it because, after a gazillion hours sewing the costume, I felt too burned out to invent a purse pattern. Then on the Charlotte Modern Quilt Guild page I saw they are doing a holiday drawstring bag swap and linked here for your pattern. This is EXACTLY what I had in mind! Thank you SO MUCH!!! :-)
ReplyDeleteI just made one! I am a total sewing newbie, and I just made a gorgeous lined drawstring bag, worthy of gifting! Thank you!
ReplyDeleteJeni, thanks for the awesome pattern! Just made my first two bags yesterday, and I love them! Great tutorial. Many thanks!
ReplyDeleteI just made another one, laundry-bag-sized this time! This beginner is THRILLED!
ReplyDeleteI love making these bags of yours!
ReplyDeleteI've just made my son a library bag using this ace tutorial! Thanks so much! I'll be posting my own version over on http://adayinthelifeofjayde.blogspot.com.au/
ReplyDeleteThanks again!
nice tuto thanks you so much :)
ReplyDeletemike cruickshank
I made a tissue box cover that uses a similar pattern with heavy cotton fabrics and using a ribbon for the tie worked nicely.
ReplyDeleteSo much fun and good instructions!
ReplyDeleteI'm not much of a seamstress, but I just made one of these adorable bags and it came out so cute and was so easy! I have ribbon on hand and I'm wondering if that will work for the ties.
ReplyDeleteI just made my first ever draw string bag, your tutorial is fab! I've cut out 5 more!! They'll be birthday and Xmas pressies:) emilyste7ens at gmail dot com
ReplyDeleteAbout how long does it take to make one bag?
ReplyDeleteThey take me around an hour! But the first one always takes longer since you're reading the instructions as you work. It definitely depends on your sewing speed too! :)
ReplyDeleteThank you for the very cute, easy and fast drawstring tutorial.
ReplyDeleteI love this pattern, but your directions are the BEST.
ReplyDeleteHi I love this tutorial thanks so much
ReplyDeletesome reason my brain isn't working today I want to make the whole bag from 1 fabric, how long of a piece do I use I looked at the measurements and then the pic and I still am stumped :| so sorry hope you can help :) thanks again
Hi Natasha, you'll need a 48.5"x10.5" piece to make it from one piece. If you'd like to use two pieces to make the cutting easier from yardage (with a seam at the bottom), you'd need two (25"x10.5" pieces. For step 4, the center of the 1" drawstring opening will be 14" from the edge with the 3" opening.
DeleteLove this bag pattern, and I've made 2 of them. I was wondering if you've made any and added interfacing?
ReplyDeleteI have! I would recommend adding it to the Main piece only, so that it doesn't interfere with the drawstring!
DeleteThank you for the drawstring bag tutorial. I'm getting ready to sew up two more. The pattern and instructions are written clearly with useful photographs as a guide. And it results in a great little bag!!
ReplyDeleteOnly came across this last night and made one this morning. It's really gorgeous, thank you so much! Your instructions are so clear, it was wonderfully easy to follow. I shall be making more for sure.
ReplyDeleteBEST TUTORIAL EVER! :):):)
ReplyDeleteThis looks like a wonderful tutorial for lined drawstring bags. Thanks for all your great pictures. I just found it a little late for this Christmas, but I hope to try it before next Christmas. lol
ReplyDeletePrecious bags! Have a question regarding the exterior main fabric. Tutorial says to cut (1) 9”x22” strip
ReplyDelete- Subcut into (2) 9”x10.5” pieces* How do you cut 9" x 22" if fat quarter is only 18"x 21"?
Thank you!
They should all read 21", will update.
DeleteQuestion re exterior main fabric cut - fat quarter is 18"x21" and directions say to cut (2) 9" x 22" strips. So I need to piece the strip? Please clarify!
ReplyDeleteThey should all read 21", will update. You don't need to piece the strip.
DeleteThank you so, so much! I just made a bag and it looks INCREDIBLE!
ReplyDeleteThanks so much for the idea and perfect tutorial. It helped my daughter to do her first sewing project on her own!
ReplyDeleteThanks for your well written and illustrated tutorial. Am I correct that the drawstrings, when pulled from opposite ends, closes the bag? I've been looking for such a construction because I have a small antique Japanese bag whose drawstrings work that way. In addition, it has 2 other opposite drawstring pulls that open the bag when tugged! I would love to figure out how that type of construction works.
ReplyDeleteThat's right! When you pull both strings it closes the bag.
DeleteThank you for this great tutorial !
ReplyDeleteThese are beautiful!
ReplyDeleteI am new to sowing and I have found the tutorial really helpful so I can make the bags to put gifts in. Thank you.
ReplyDeleteThank you for this easy to follow patter. I just completed one and am in love with it. Will be doing more for all my knitting & crochet projects.
ReplyDeleteIt's good tutorial.
ReplyDeleteI've made so many of these bags! I bought the pattern so I can make smaller dice bags for my D&D group. The bag in this pattern is SO useful. One bag holds all my embroidery floss, one holds all my washi tape, one holds small things when I travel, and so many more have held gifts given to friends. I LOVE that there are no exposed seams in the end, so no fraying. My edges never quite match up perfectly, but it doesn't matter. These are the best bags!
ReplyDeleteAwesome pattern. Very simple with great instructions. Will be making plenty more in different sizes!
ReplyDeleteWonderful tutorial! I have made several drawstring bags over the years but your method is so much easier. It never would have occurred to me to line up all the pieces and sew them all together and make one big pouch. The masking tape trick is great. Thank you.
ReplyDelete