Showing posts with label Shining Stars Sampler Quilt Pattern. Show all posts

Amanda's Fantastic Quilt Voyage

Tuesday, May 31, 2016


Happy Tuesday! Today I have a special quilt finish to share. For the past year and a half I've been a part of a traveling quilt bee with some really lovely ladies. Our bee is called Fantastic Quilt Voyage, and you can see the blocks we've been making in the hashtag #fantasticquiltvoyage on Instagram. We each started our own quilt, and then it is passed along to each member and they add to it. I haven't posted any of the blocks I've made, but I did share my quilt start last February, in this post. I need to do a catch-up post with all the blocks I've made for each person's quilt at some point.


When my sweet friend Amanda became unable to finish her quilt, I offered to put it together and finish it for her. I happened to have her quilt to work on at the time, so it just made sense. Her quilt had a Buffy theme, so vampires and Amanda's signature black, white, red, navy, and a pop of aqua color scheme. You can see some of her inspiration here.


I brought the blocks that had been made so far with me to the retreat I attended at Stitch Supply Co. in January. I made a few blocks that weekend and a few friends made some blocks too.

Putting this quilt together was pretty outside of my comfort zone. I arranged the blocks out on the floor of my sewing room and started putting blocks together, adding to blocks and making more blocks to eventually put together a top with no obvious grid. I didn't remember to take photos of the blocks I made until the quilt was done, but that's okay! Here are my blocks:


I drafted up this interlocking plus block, I needed something big to fill that space!


I made a few blocks using Carolyn Friedlander's Sessoms pattern.


Some simple wonky cross blocks.


I made a Monty Python inspired crazy-eyed bunny using Elizabeth Hartman's Bunny Pattern.


I made use of scraps and made a few scrappy improv blocks.


I drew up with cross made from half-square triangles early on and was glad I could squeeze it in.


Extra pointy star block from my Shining Stars Sampler Pattern.


And finally some funky striped half-square triangle blocks.


In an effort to use my stash, I pieced the backing. I used a favorite print of Amanda's (from Luxe in Bloom by Sarah Watson) for the binding. I sent the top to Melissa of Sew Shabby Quilting for quilting. The crackle pattern seemed like a perfect match for the theme of this quilt.


I needed a way to transport the quilt and decided to make a set of pillowcases to go with it. This is my favorite way to gift quilts. Most quilts can fit comfortably folded up inside a pillowcase! I use this tutorial when I make pillowcases.


Jacey and I went out to visit Amanda this past month and we were able to give her the quilt in person! It was so fun to surprise her with the finished quilt! I have to admit, it was a bit nerve wracking working on this quilt. I wanted to make sure that I did everyone's blocks justice and that I stayed true to Amanda's vision. Based on her reaction when we gave it to her, it was a success! :)

Happy Quilting!

Shining Stars Sampler Projects

Thursday, March 3, 2016


One of the workshops that I taught at QuiltCon last month was my Shining Stars Sampler Pattern. The pattern as written makes a generous 60" x 80" throw quilt. In case there were students who didn't want to commit to a full quilt, I wanted to share some alternative project ideas for the blocks. I made three projects: a baby quilt, a table runner, and a quilted pillow. Unfortunately, I realized while laying in bed the night before the workshop, that I left the projects at home! I was super bummed, but that's what the internet is for! I've been sharing each project on Instagram this week, but wanted to share them here as well in a bit more detail.


The colors for these projects were all pulled from a small stash of prints from Jenean Morrison's 2011 collection, Silent Cinema. I've been hoarding this fabric for a while, and it seemed like a good time to finally use it. I pulled lots of other prints in these same colors, as well as a variety of low-volume prints.


First up, the baby quilt! The pattern features three different block sizes, that in the end are all sashed out to be the same size. For the baby quilt, I used the smallest block size, and made four blocks. I used the same sashing pieces as called for in the pattern, but arranged them so that all the stars meet in the middle. I made each star with two prints and used low-volume prints for the background and sashing. I wanted it to be a very soft quilt in terms of colors.


For the quilting, I quilted free-motion swirls in the sashing, and little tiny doodle loops in the background of each star block. I left the prints in each star un-quilted so that they would really pop. I pieced together coordinating prints for the backing and bound it off in another soft low-volume print.


Next up, the table runner! For the table runner, I used three of the medium-sized star blocks. Again, I used two prints for each star, with a low-volume background. For the sashing on this runner, I used a variety of prints for each block to give it a different look. I also deviated from the pattern a bit by centering the stars in one direction.


I went with my tried-and-true wavy line quilting for the runner. It's done with a walking foot, and you simply wiggle the quilt back and forth as you quilt. It's fun, and very forgiving. Plus it gives you such a nice crinkle once it's washed and dried! Again, I pieced prints for the backing. I finished it off with a gray binding.


Finally, the pillow. I used one of the large blocks in the pattern for the pillow. I sashed it the same way as you would in the pattern if you were making the whole quilt. I used two prints in the star block and a low-volume for the background. I chose to use one sashing fabric versus multiple.


I kept the quilting very minimal on the pillow. I outlined the star and outlined the border seams. I finished it off by making a zippered back, which is my personal favorite way to finish off a pillow. I serged the seams on the inside to finish it off.


Last but not least, a parting shot of the full-size quilt! For more details on this quilt and the pattern, see this post. For the all solids version of this quilt I made last year, see this post.

Happy Quilting!

Shining Stars Sampler Quilt

Sunday, January 10, 2016

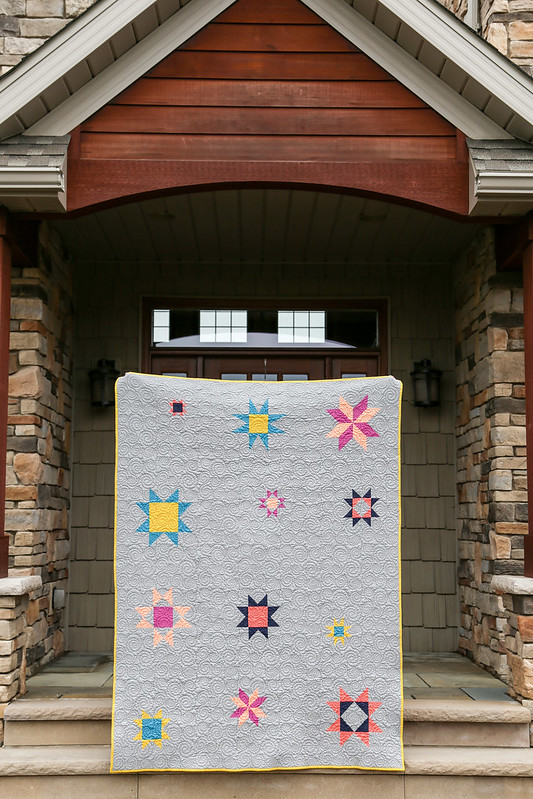
Solid Shining Stars Sampler Quilt
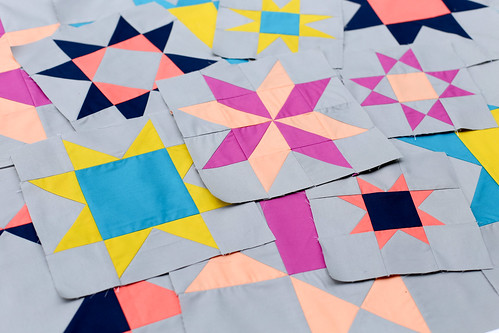
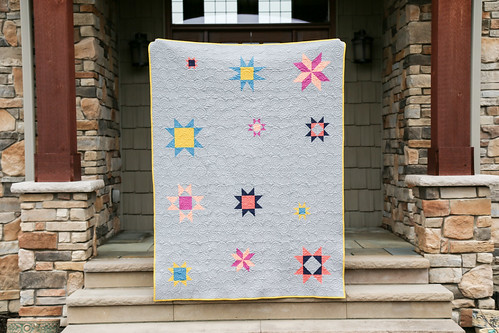
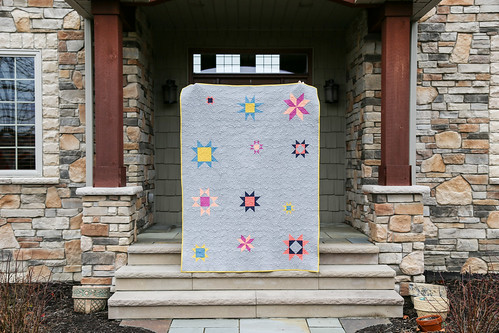
Happy Monday! This past Spring I decided to sew up a new version of my Shining Stars Sampler Pattern. The pattern features six different star blocks, which are sewn up in two sizes.

Solid Shining Stars Sampler Quilt
I wanted to challenge myself to sew a large quilt with just solids! This is pretty far outside of my comfort zone, but I have to admit, I really ended up enjoying it. I limited myself to only six colors plus the background.

These are fun blocks to make, especially the small ones. I think I'd like to make a quilt of just small start blocks this year. We'll see!

Solid Shining Stars Sampler Quilt
This quilt pattern is one of the classes I'm teaching at QuiltCon in Pasadena, CA next month! We also just wrapped it up as a Block of the Month Club at The Sewcial Lounge.

Solid Shining Stars Sampler Quilt
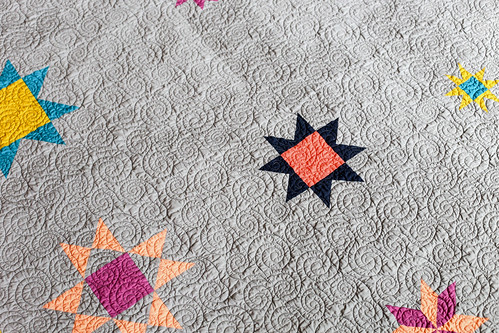
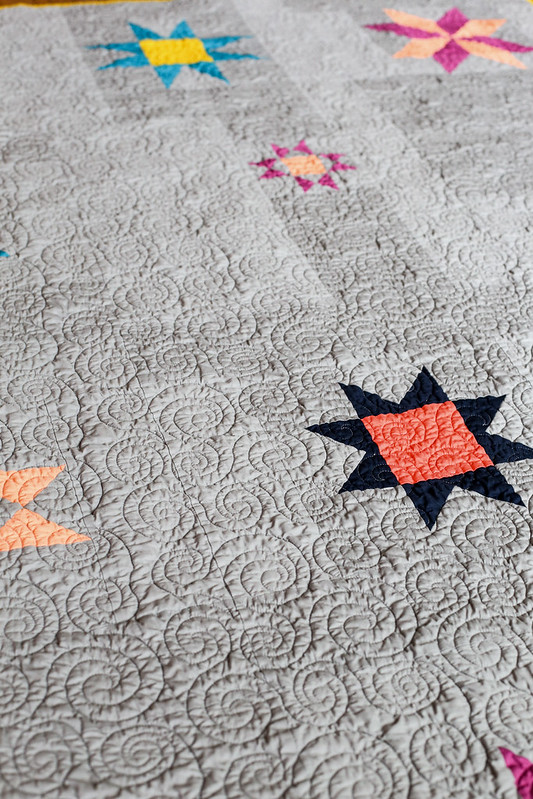
The quilting was done by Melissa of Sew Shabby Quilting. I cannot get enough of swirly quilting!

Solid Shining Stars Sampler Quilt
I used the following Pure Element solids from Art Gallery Fabrics: Nocturnal, Coral Reef, Verve Violet, Apricot Crepe, Empire Yellow, Tile Blue and Ash.

Solid Shining Stars Sampler Quilt
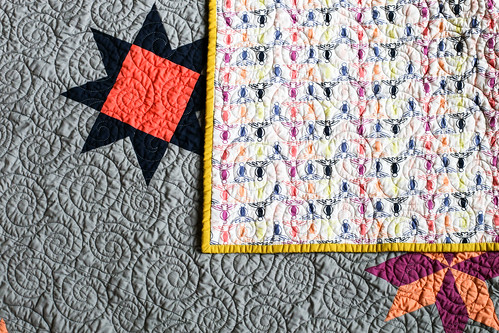
For the backing I used some Luxe in Bloom yardage that I've been hoarding. The colors are almost a perfect match to the front, it's kind of crazy! I bound it in Pure Element Empire Yellow.

Solid Shining Stars Sampler Quilt
It was fun working through the restrictions I set for myself with this quilt. I love sewing up star blocks, and the variety in this quilt help keep the sewing interesting!

Happy Quilting!

I'm Teaching at QuiltCon!

Tuesday, June 16, 2015


I'm excited to share with you all that I will be teaching at QuiltCon in 2016, February 18-21! I have never been to QuiltCon, so I'm looking forward to the experience as well. The workshop catalog went out earlier in the month, and I wanted to share the workshops that I'm teaching! Registration for workshops opens up on June 25th, and you can find the full catalog here.


I'm teaching two full-day workshops, and the first is the Shining Stars Sampler. We'll explore a variety of patchwork techniques throughout the workshop to create six different stars in two sizes each. We'll work towards a throw sized quilt using my Shining Stars Sampler Pattern! I'm currently making a version of this quilt in all solids, totally outside my comfort zone!


My second full-day workshop covers Equilateral Triangles. I'll show you how to cut triangles without a special ruler or template and piece them accurately. We'll also chat about the math behind designing your own quilt and creating a custom template. You can choose a quilt size of your choice, from my Triangularity pattern! I'm hoping to finish my throw size Geometric Bliss version in time to bring!


I'm teaching two half-day workshops, both from my book, Patchwork Essentials: The Half-Square Triangle. The first is called Mastering the Half-Square Triangle. I'll show you three different methods for making HSTs, as well as tips for pressing, trimming, and 1/4" seams. We'll make four quilt blocks from the book!


The second half-day workshop I'm teaching is Creative Half-Square Triangle Piecing. In this workshop we'll explore creative methods for adding a twist to the basic HST. We'll work from my book, Patchwork Essentials: The Half-Square Triangle to make patchwork HST quilt blocks. I had fun stitching up some sample blocks using green/blue/purple prints from my collections.

Hope to see you there! I can't wait to be somewhere warm in the middle of winter! :)

Shining Stars Sampler Quilt Pattern

Thursday, March 13, 2014

Happy Thursday! I have one last pattern to chat with you about today! It's the Shining Stars Sampler Quilt Pattern!

Shining Stars Quilt Pattern by Jeni Baker
Shining Stars Quilt Pattern, a photo by Jeni Baker on Flickr.
This pattern is another that has been long overdue! You might remember last spring, I had a block of the month club by the same name over at Pink Castle Fabrics.  Upon completion of the club in August, I had every intention of releasing the full pattern.  But, it was a very busy time of year, so it just didn't happen.  Now it's here!

This quilt is a lot of fun to make! There are six different star blocks to make, in two different sizes, so that by the end you have twelve blocks! There are loads of different techniques used, including flying geese, half-square triangles, quarter square triangles and more. To me this makes it a great learning project!

The cover quilt features my Color Me Retro collection, a few Art Gallery Fabrics blenders, and Sandstone Pure Element.  It takes very little print fabric, so it's great if you don't have a huge stash to pull from, or want to work from scraps!

The blocks are all sashed out at the end to the same size.  A bit of turning and rearranging and they seem to float on the quilt background!

Shining Stars Quilt Pattern by Jeni Baker
Shining Stars Quilt Pattern, a photo by Jeni Baker on Flickr.
I have been eyeing Melissa Averinos' quilting work ever since she got her longarm.  I knew I had to have her quilt something for me, and when I finished this quilt top, I knew this was the quilt! All that solid space would be perfect for her work.

She did her signature "Melissa Freestyle" pattern, which is just so awesome! It's fluid and crazy, and just cool to look at.  I think it fits really well with the stars! I love the way the star blocks are done in straight lines, it makes them pop out against the other quilting.

Melissa took a bunch of beautiful photos of the quilting, you can see them on her blog!

For the backing and binding I used more green, this time the Green Apple Oval Element. Another favorite. Perhaps I need to start stretching myself and choose another color for bindings! I attached this binding by machine as well.

You can find the PDF version of this pattern in my shop, and the paper copy here! If you're a shop that would like to carry any of these patterns, send me an email or use the form under the Wholesale tab!

Happy Quilting!