
Sewing Level: Intermediate
Materials:
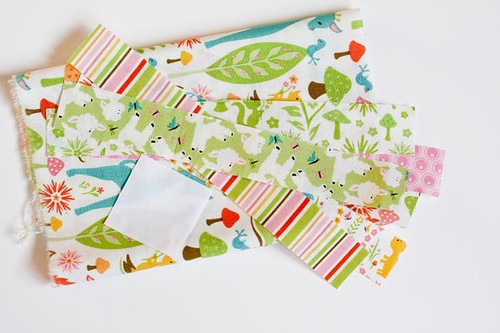
- 1.25"x10" strips of 6 print fabrics
- 2"x2" square solid white fabric
- 7x7" square print fabric
- Pincushion filling of choice (I use crushed walnut shells)
Seam Allowance: 1/4" unless noted
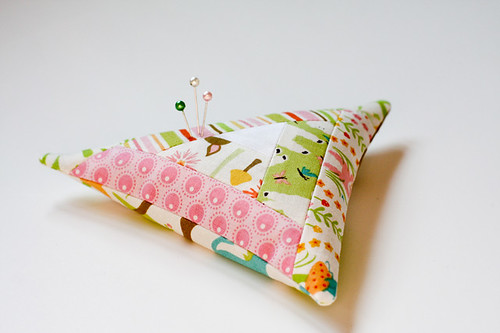
Finished Size: 6" per side
Looking for supplies? Check out my Pattern Supplies and Resources post.
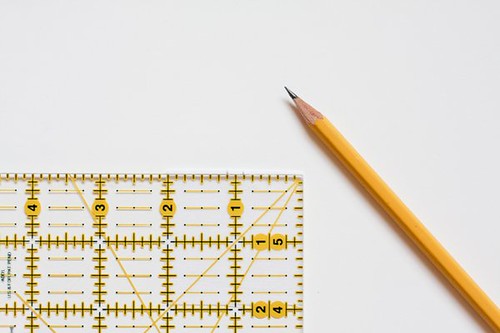
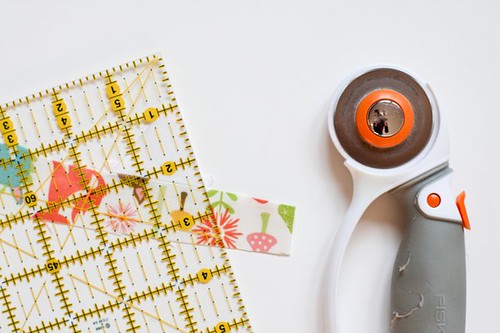
1. Using an acrylic ruler and pencil, mark at 7/8" and 1 1/8" on one side of your 2"x2" white square.
2. Draw a line connecting one mark to the opposite corner.
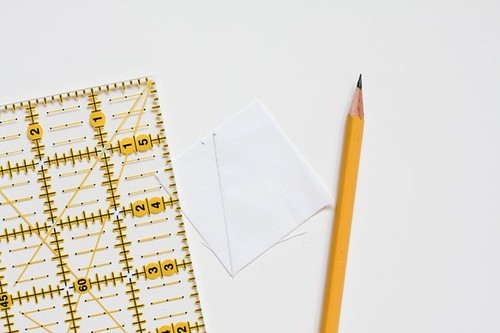
3. Repeat with the other mark, forming a triangle. This gives you an equilateral triangle!
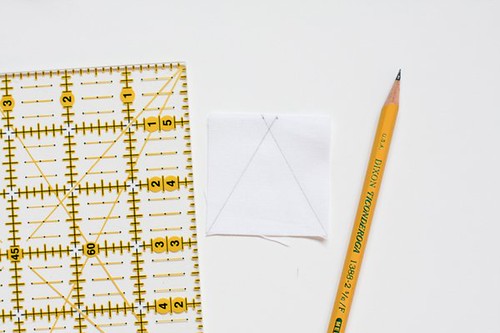
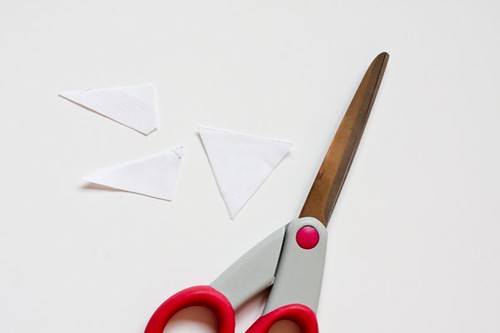
4. Cut along the two lines you just drew. This triangle is the center of your pincushion.
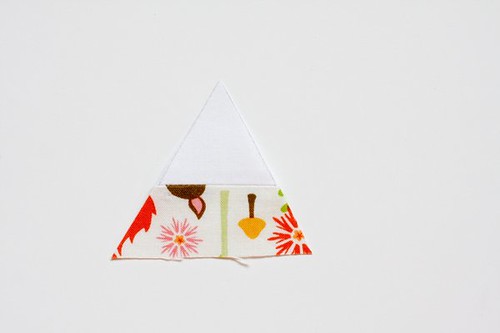
5. Grab one of your 1.25" strips, and line up your center triangle along one long edge, about 1" from the end.
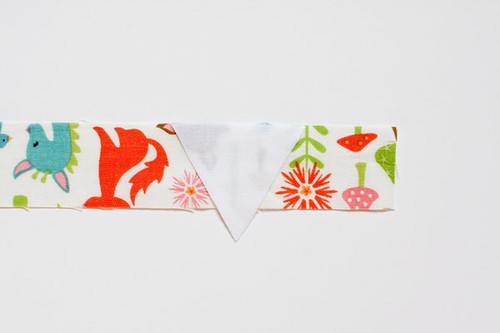
6. Sew the triangle to the strip. Press seam open.
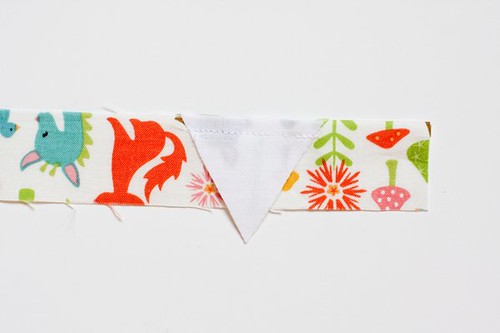
7. Line up your ruler along the edge of the center triangle and trim off the excess print strip.
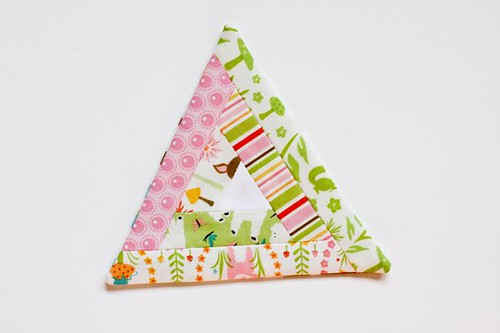
8. Repeat on the other side. You should now have a new triangle made up of the white center and one print.
9. Turn your triangle and place it right sides together on the next strip, about 1" from the end.
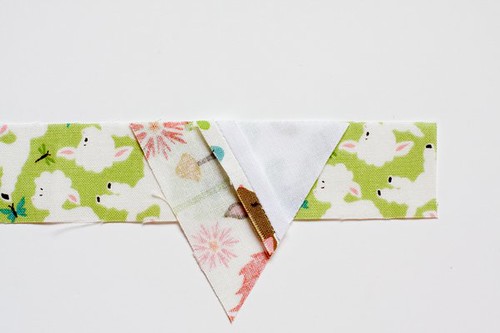
10. Sew together. Press seam open. Trim off excess print strip on both sides.
11. Turn your triangle and place it right sides together on the next strip, about 1" from the end.
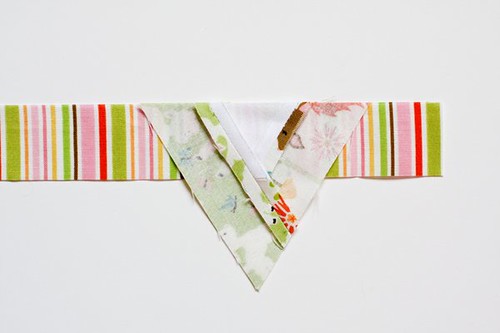
12. Sew together. Press seam open. Trim off excess print strip on both sides.
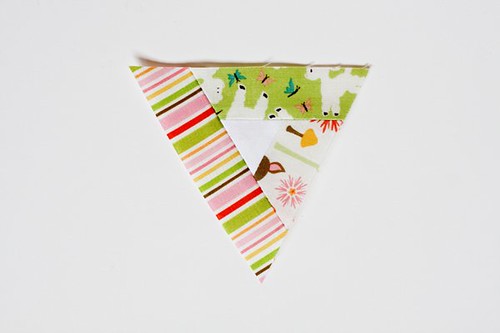
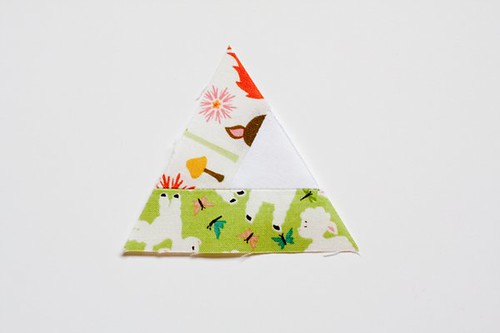
You have now completed one round of strips for your pincushion! Repeat the process to add another round, moving in the same direction.
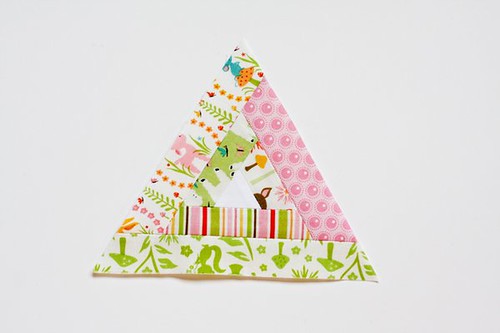
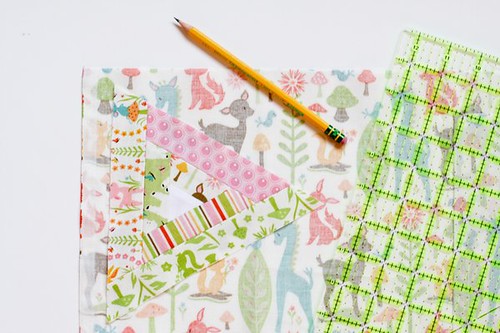
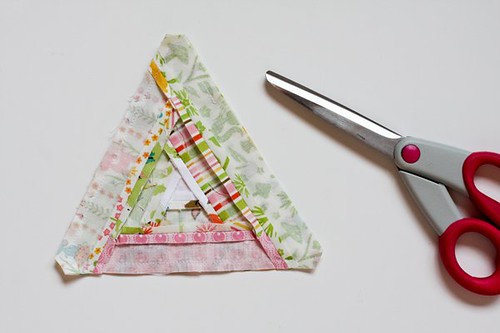
13. Using your pieced triangle as a guide, trace a triangle on your 7"x7" square. Cut along the lines, this will be your pincushion's backing.
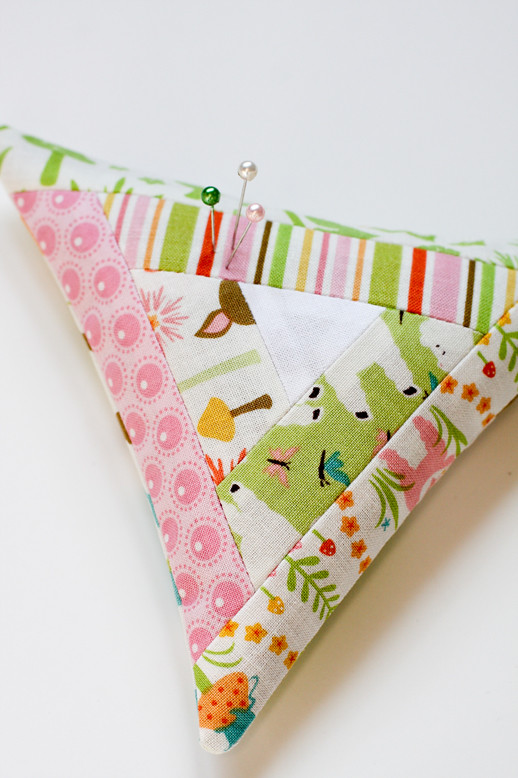
14. Place your pincushion top and backing right sides together. Pin together, making sure to leave an opening for turning. Sew around all three sides, backstitching a few extra times at the start and finish.

15. Carefully trim the corners close to (but not through!) the seam allowance.
16. Turn your pincushion right side out, pushing out the corners gently.
17. Fill with desired material and hand-stitch the opening closed!
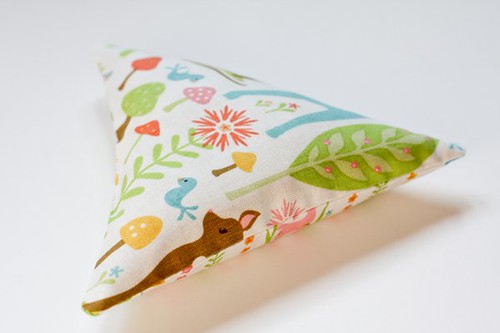
Voila! You're done!
Happy Sewing!
So cute!! I'm scheduled to share my pin cushion in a few weeks. I made mine with their new Chevrons. :)
ReplyDeleteThis is so adorable (love the fabrics)...thanks for the tutorial!!!
ReplyDelete~Terry~
That is just adorable! And I hadn't noticed the dot in that line yet, it's so sweet!
ReplyDeleteYou did it again! I just cut out yet another project bag, and now I find the pincushion. Gotta do that, too.
ReplyDeleteSweet, I think I spot a gap on my shelf of pincushions ;)
ReplyDeletethat pink dot is so cute! perfect little pinnie jeni!
ReplyDeleteVery very cute indeed! Totally adorable. Love it.
ReplyDeleteJust found your blog and am so glad I did. I can see it's going to be one of my favorites.
ReplyDeleteThat is the sweetest little thing!
ReplyDeleteThank you for sharing! I absolutely love pincushions and will be making yours very soon. :)
ReplyDeleteadorable jeni! thanks for the tutorial-this is moving to the top of my pile of to-dos. thanks!
ReplyDeleteJeni coming up with color tutes for us and designs thanx sooooooo much renee
ReplyDeleteThat is so lovely! :)
ReplyDeletewww.quiltworld2.blogspot.com
Hugs, Ulla (from Finland)
Thank you for the tutorial ! Triangular pincushion is very original !
ReplyDeleteYou say you use crushed walnut shells for filling ... I never heard that, is this have a "function" ?
(flolesage at gmail dot com)
The pin cushion is gorgeous. Thanks for the tutorial; it is super easy to understand and follow. These are so pretty, they are going to make great pressies for the ladies I am going away with for a sewing retreat. :)
ReplyDeletelove it :)
ReplyDeleteIt's so tiny and cute, Jeni! I hope you had a fun weekend!
ReplyDeleteThis is so cute, think I have to try this :)
ReplyDeleteI made this pincushion last night and it was my first project on my own :) The tutorial was very well-written and easy to understand, even for a beginner like me! I added my photos to the In Color Order Flickr group today :) My pincushion wasn't perfect by any means but that's all part of learning! I am starting classes in November for sewing and quilting. I am also going to be working on my skills on my own with the help from your tutorials as well as Christina's at the Sometimes Crafter :) You two are a wealth of information! Thank you for all the time you put into the blog, tutorials, and photos!!
ReplyDeleteI just bookmarked this - Perfect little gifty for my next retreat. I am working on a journal cover from V. and Co.'s tutorial for my grandson, turning 7 next month. N
ReplyDeleteI have enough of these made for my retreat pals (usually 12 or so). Since I am not satisfied with the way the corners look when done sharp, I round mine. After sewing the straight sides, I draw around a bobbin and then sew the rounded corners twice with a 1.5 stitch. Makes nice neat corners. N
ReplyDelete