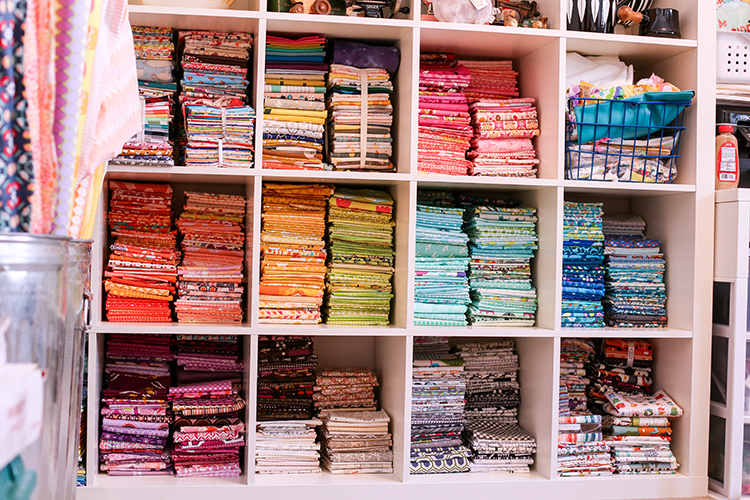
Happy Monday! The last few years I've set myself the goal of using up more fabric than I buy. In order to measure my progress on this goal I keep track of all the fabric that I buy or am given. I also keep track of all the fabric I use up, give away or sell. This is a great way for me to keep an eye on my purchasing, but it's also a great way to remember everything I've made.
I've gotten a lot of questions about how I track and estimate my yardage, so I wanted to put that information in a post for those that are interested. It's not for everyone, and it is a time commitment, but I really enjoy doing it. There are a lot of different ways you could track yardage you use, but I'm going to focus on how I personally do it in this post.
Update: After doing this for years, I've learned so much about myself and my habits. See this blog post for more:
What I've Learned Tracking My Fabric Yardage

Keep in mind, I love math. The methods I use are probably more in depth than most people would need or want to do. So I'm sharing easy methods and then my more complicated methods too. There is no right or wrong way to track yardage. In my opinion the most beneficial thing about tracking is simply the act of tracking and the awareness that it gives you, not the actual numbers.
I love to use an excel spreadsheet to tracking my yardage. I am sharing my spreadsheet in this post here:
New and Improved Stash Tracking Worksheet (with Formulas!)
**
Megan Wenger (
@lifeofmegananne) has put together an even further expanded stash tracking worksheet and has graciously decided to share it with you all! It has added columns for destash and product sales and she added some of the yardage calculators on a seperate sheet. You can download it here:
2024 Net Fabric Zero Challenge Tracker
Not comfortable using spreadsheets? A simple notepad and pen work great too! Or keep a running list in a Word or Notes document.
Important Note: I didn't add up everything in my stash to start with, nor do I want to! I just keep track of the what comes in and what goes out of my stash. So each year I start at 0, and by the end of the year I can see how much yardage went out, came in, and the net result.
Tracking Fabric Coming In

This is the easiest part to track. When you purchase fabric, you usually know how much you've bought. I also track fabric that I'm given, both promotional fabrics or gifts from friends.
If you're purchasing scraps or a destash with partial yardage sometimes it's not quite as clear how much yardage there is. Sometimes I'll lay out the fabric on my cutting mat and just make an educated guess.
Another way to measure yardage is by weight. This isn't completely foolproof because different types of fabric and even quilting cotton made by different manufacturers weighs differently per yard. However, it gives you a good place to start, and we're not aiming for 100% accuracy.

You'll need a small food or postal scale (one like
this* works great), and a yard of quilting cotton to start. Weigh the yard and make a note either in ounces or grams of how much it weighs. I weighed yard cuts from multiple manufacturers and most were between 5-6 oz per yard. I split the difference and use 5.5 oz.
Now when you have scraps or partial yardage of quilting cotton coming in, you can weigh it. To figure out how many yards you have, use this simple math equation:
Weight of scrap fabric ÷ Weight of 1 yard = Yardage of scrap fabric
Example: 2 oz scrap fabric ÷ 5.5 oz = .36 yards
Tracking Fabric Going Out

Personally, I track any and all fabric going out. This includes using it in a project, giving it away, or destashing it. You may choose to count those in separate categories or simply count what you've used, it's up to you. I don't count the fabric as used until I've completely finished the project. This really encourages me to finish things up.
For some projects, it's really easy to figure out how much yardage you've used. Generally speaking, if a project uses up most of a fat quarter, or other even yardage, I'll round up. If you're working from a pattern or tutorial, the materials list is a good place to start to estimate yardage.
When a project uses lots of pieces, or scraps, you could weigh the pieces before sewing. Or you could follow one of the math methods I share below.
If you don't like math or don't want to make things too complicated, go ahead and skip down to the "Other Tips" section of this post! If you'd like to be more exact with your tracking, continue reading.
Calculating Fabric Used

A lot of times what I do (because I love math), is use one of the two methods below for determining how much yardage a project has used. This may be beyond what you are willing to do and that's perfectly fine. An educated guess will get you pretty close. I'll show you the two ways that I estimate yardage based on the size of the pieces used.
Strip Method

The first way I estimate yardage used in a project is to add up the lengths of pieces that are the same (or similar) width and figure out how many 42" (WOF) strips I'd need to cut out all those pieces. So let's take my
Lined Drawstring Bag Tutorial as an example:
Pieces needed: (2) 9"x10.5", (2) 4"x10.5", (2) 12.5"x10.5"
Width of all these pieces is 10.5".
Length of each piece + Length of each piece + Length of each piece = Length of pieces
9" + 4" + 12.5" = 25.5"
We need to multiply that number by 2, because you need two of each piece:
Length of pieces x 2 = Total Length
25.5" x 2 = 51"
So, we need a 51" strip that's 10.5" wide. Let's figure out now how many 42" (width of fabric) strips we need:
Total length needed ÷ Width of fabric = Number of strips needed
51" ÷ 42" = 1.2 strips
We can't have .2 of a strip, so we need to round up our 1.2 to a whole number, in this case to 2 strips.
Now we need to figure out how many inches of fabric that is:
Number of strips needed x Width of strip = Inches of yardage
2 strips x 10.5" = 21" inches of yardage
Inches of yardage ÷ Inches in a yard = Yardage used
21" ÷ 36" inches in a yard = .58 yards used
This method is more accurate than simply using the materials list in the tutorial (which calls for .75 yards), but does include some extra fabric from when we rounded up our strip to 2. For a more exact number, try the Square Inches Method found below.
Square Inches Method

Another way to determine how much yardage you've used is to calculate how many square inches of fabric the pieces make up. This is done by multiplying the length by the width of each piece. You'll also need to determine how many square inches are in a single yard. Let's do those calculations with the
Lined Drawstring Bag Tutorial again:
Pieces needed: (2) 9"x10.5", (2) 4"x10.5", (2) 12.5"x10.5"
(Length x width of each piece) + (Length x width of each piece) + (Length x width of each piece) = Total square inches of pieces
(9" x 10.5") + (4" x 10.5") + (12.5" x 10.5") = 94.5 + 42 + 131.25 = 267.75 square inches
We need to multiply that number by 2, because you need two of each piece:
267.72 x 2 = 535.5 square inches
Let's figure out how many square inches are in a single yard of 42" wide fabric:
Length of 1 yard of fabric x Width of fabric = Square inches in 1 yard
36" x 42" = 1,512 square inches
Now, we can determine how many yards we've used:
Total square inches of pieces ÷ Square inches in 1 yard of fabric = Yardage used
535.5 ÷ 1,512 = .35 yards used
As you can see, this method is more exact than the Strip Method shown above. This method accounts for only the actual fabric used, and not the scraps. It is best for projects without tons of different sized pieces.
Accounting for Extra Wide Fabrics

For all my fabric coming in and out, I base my tracking off of 42" quilting cotton since that's what I use the most. (I personally use 42" instead of 44" because usually only 42" worth is usable after the selvedges) When I purchase or use fabric that is wider than 42", I convert the yardage to 42" wide yardage. I do this by using the square inches method outlined above. Let's look at an example using 58" yardage:
First we need to calculate how many square inches are in 1 yard of 42" wide fabric.
Length of 1 yard of fabric x Width of fabric = Square inches in 1 yard
36" x 42" = 1,512 square inches in 1 yard of 42" wide fabric
Now we need to calculate how many square inches are in 1 yard of 58" wide fabric.
Length of 1 yard of fabric x Width of fabric = Square inches in 1 yard
36" x 58" = 2,088 square inches in 1 yard of 58" wide fabric
To convert my 1 yard of 58" wide fabric to 42" wide yardage, I need to do the following:
Square inches of 1 yard 58" wide fabric ÷ Square inches of 1 yard 42" wide fabric = Amount of 42" wide yardage
2,088 ÷ 1,512 = 1.38 yards
So, 1 yard of 58" wide fabric is equal to 1.38 yards of 42" wide fabric. So each time I bring in or use 58" wide fabric, I will multiply the amount by 1.38 to determine my yardage to enter.
Other Tips

- This doesn't need to be stressful or complicated! If the idea of doing a bunch of math to figure out how much fabric you've used isn't appealing to you, then just make a good guess. This is meant to be helpful and motivating to you, so do what you're comfortable with. No need to overcomplicate it if that doesn't serve you.
- Be consistent. Figure out a method that works for you and stick with it.
- Track as you go. Try not to wait until the end of the month to figure out how much yardage you brought in or used. When you buy or bring in fabric, make a note. When you finish a project or destash, make a note. It's so easy to forget things if you wait! Make a habit of tracking it when it happens.
- Another advantage of tracking as you go is you're constantly checking in with your running yardage total. If I've brought in too much fabric for the month, I can adjust my sewing to try and finish a few things and make up for it. It all depends on what your goals are.
- Find a system that works for you. I find my simple Excel document works really well for me, but that might not be your style. I keep mine in my Dropbox so I can access it on my phone and add to it from anywhere. (Nerd alert!) There's nothing wrong with a pen and a notepad to keep tracking notes. Make it simple and easy for yourself to track. If it's over complicated, you're less likely to stick with it. I use complicated methods because I enjoy doing the calculations, and they don't discourage me from tracking. Know your habits and tailor your tracking to your personality.
- One of the things I do when I track my fabric yardage is round up or down to the nearest 1/8 yard. I don't use 1/3s in any of my tracking because it gives weird rounding. Keeping it to 1/8ths makes it nice and neat. Of course you may choose to round up or down however you please!
- It's okay to make exceptions. Last year, I made an exception for muslin. I didn't track the yardage of muslin I bought, and I didn't track any muslin I used. You could make exceptions for anything, solids, muslin, backings, whatever. I also didn't track any yardage of interfacing, batting, twill or ribbon. Perhaps you're trying to spend less on fabric. In that case you might only track yardage you buy, but not yardage you are given. Set an intention for your tracking and make decisions based on that.
Tracking Yarn Yardage

If you knit, crochet, or do another kind of fiber craft, tracking yarn is much more straightforward than tracking fabric. I exclusively calculate yarn yardage by weight. Most manufacturers give a weight per skein and also a yardage per skein. If the weight isn't listed on the label, a quick google (or Ravelry) search will usually pull it up. Before I start a project I weigh my yarn skein (they're often a little heavier than the stated weight). I can then use the weight to yardage ratio given by the manufacturer to calculate how much yardage I actually have.
Let's use a typical skein of worsted weight yarn as an example:
Stated weight: 100 grams
Stated yardage: 200 yards
Stated yardage ÷ Stated weight = Yardage ratio
200 yards ÷ 100 grams = 2 yards per gram
Actual weight: 105 grams
Actual weight x Yardage ratio = Actual yardage
105 grams x 2 yards per gram = 210 yards
Actual yardage: 210 yards
I don't always calculate the stated vs. actual yardage. Just depends on how exact I feel like being at any given time. Sometimes it's just easier to go by the stated yardage. Best to choose a method and stick with it.

When I finish a project, I simply weigh the leftover yarn and use the yardage ratio to calculate how many yards are leftover:
Leftover weight: 50 grams
Leftover weight x Yardage ratio = Leftover yardage
50 grams x 2 yards per gram = 100 yards
Leftover yardage: 100 yards
Then I subtract the leftover weight from the actual skein weight to figure out how much I used in the project:
Actual skein weight - Leftover weight = Weight used
105 grams - 50 grams = 55 grams
Weight used x Yardage ratio = Yardage used
55 grams x 2 yards per gram = 110 yards used
**If you use Ravelry, you can update your stash listing with the actual
weight and actual yardage of your skein. When you finish a project, enter your used weight in
the "enter totals" on your project and it will calculate the yardage
used for you!

Hopefully this wasn't a complete overload of information, but I wanted to be as throughout as possible. Like I mentioned, there is no right or wrong way to track yardage. You certainly don't need to make it as complicated as I do.
If you're not ready to commit to tracking for an entire year, consider trying it out for a month. It was an eye opening experience for me last year, realizing just how much fabric was coming in. It pushed me to finish projects and sew more in general. I loved doing it, and am looking forward to continuing to track my yardage this year. Overall, tracking made me more thoughtful about how I use my stash, and how I add to it.
Happy Sewing!
*Note: Any links marked with an asterisk in this post are affiliate links. This means if you click through and buy something, I make a small commission, at no extra cost to you.


