

Welcome to the Half-Square Triangle Block of the Month! For each month in 2012, I'll present a quick tutorial for a traditional quilt block using half-square triangles (HST)! Feel free to join in at any time! For past posts see here.
Yay! It's finally time for the reveal of our Half-Square Triangle Block of the Month Quilt! It's been a fun year, let's wrap this puppy up!
Finishing Instructions
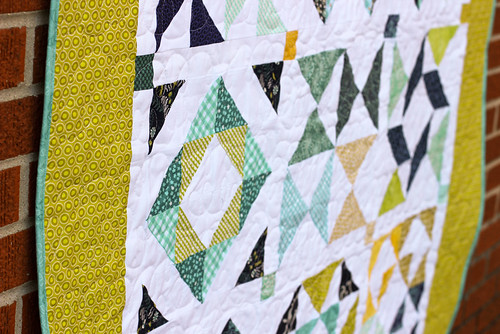
You may of course choose to put your blocks together however you like! I'm provided instructions here to construct your quilt like mine. It features sashing with cornerstones and large borders to give it a bit more size. I choose to quilt mine with my signature free-motion loops! It has now been washed and it's crinkly soft goodness enjoyed! Now, let's finish your quilts!

Materials:
- 2/3 yard of sashing fabric
- Print scraps from your blocks
- 1 yard of border fabric
- 3.5 yards of backing fabric
- 62”x75” piece of batting
- 1/2 yard of binding fabric
Seam Allowances: 1/4" unless noted
Finished Size: 54"x67"
Cutting:
From sashing fabric:
- Cut 11 strips, 2” x WOF
- Subcut strips into 31 rectangles 2”x12.5”
From print fabric scraps:
- Cut 20 squares 2”x2”
From border fabric:
- Cut 6 strips, 6” x WOF
- Subcut 2 strips into rectangles 6”x25.5” (2 total)
- Trim remaining strips into 6”x42” rectangles
1. Press all your completed blocks and trim to 12.5" if needed.
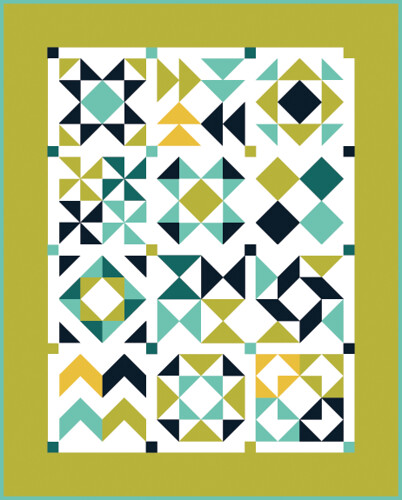
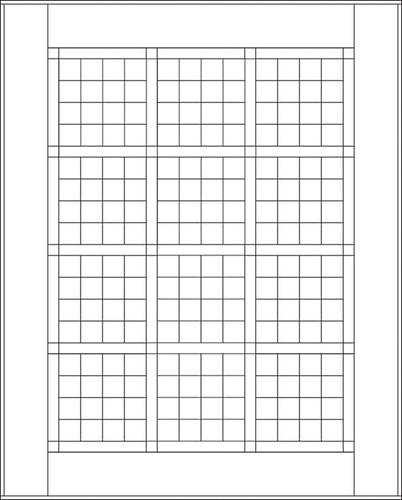
2. Lay your blocks out using the diagram above. There is a blank worksheet here (also seen below) that you can download and fill in with your own unique layout. You’ll have four rows of three blocks each.
3. Sew a 2”x12.5” solid sashing piece to the left side of each block. Press seams towards the sashing.
4. Sew your blocks together in each row, making sure there is a sashing strip between each block. Add an additional 2”x12.5” solid sashing piece to the end of each row. Press seams towards sashing.
5. Construct your horizontal sashing pieces by sewing a 2” print square to one end of each remaining 2”x12.5” solid piece. Press seams towards solid.
6. Sew these pieces together into five strips, each strip containing three solid pieces and four squares. Press seams towards solid.
7. Sew your rows together with a row of blocks between each pieced sashing strip. Press seams open.
8. Now it’s time to add the borders. Take two 6”x42” pieces and sew them to the top and bottom of your pieced top. Press seams open.
9. Take two 6”x42” pieces and sew two 6”x25.5” pieces to the end of each one. Press seams open. Strips should measure 6”x67”. Sew these two strips to either side of your quilt top. Press.
10. To make your backing, cut your yardage in half. Press. Trim off the selvedges and sew your pieces together lengthwise. Press seam open.
11. Baste (tutorial), quilt, and bind (tutorial) as desired. Binding yardage listed is for 2.5" strips, you'll need six.
Voila! You're done! I hope you'll be posting your blocks, finished quilts and projects made from this series in the In Color Order Flickr Group!
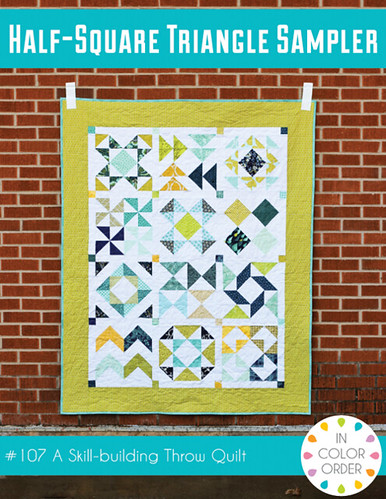
These tutorials will all remain available on the blog, they'll simply move to the tutorials page after the first of the year! I've turned all of the information from our series, including both half-square triangle construction methods, all twelve blocks, and finishing instructions into a PDF pattern, for those that prefer having everything in one place! You can find the Half-Square Triangle Sampler Quilt pattern here.
Want to make extra blocks and a bigger quilt? Use the block patterns in this series and make any of these three free quilt settings:

Over And Above Quilt Setting Tutorial

Blockade Quilt Setting Tutorial

Interlaced Quilt Setting Tutorial
Happy Quilting!
wow! i've been following but working along with this, now I wish I had! love how you laid out the blocks, they really keep the eye moving :) could do with improving my half square triangle sewing too!! a new year's resolution, maybe...
ReplyDeleteI'm so glad you included this lesson. I have all my blocks completed, so now I can get started cutting the sashing fabric. I want to thank you so much for doing this tutorial. I have really enjoyed it and learned a lot. I hope to get the top finished next week. Thanks again!
ReplyDeletecan't wait to finish mine.
ReplyDeleteIt`s just beautiful.I enjoyed reading your tutorial!!
ReplyDeleteIt looks great. I've enjoyed watching this all year.
ReplyDeleteWow!! I've been watching your posts but not sewing along. It's gorgeous! I didn't see that coming. Well done!! I'm working on your Vintage Nine-Patch pattern.
ReplyDeleteBeautiful quilt - love the colour scheme you used for your HST"S!
ReplyDeletegreat quilt. so cohesive and I like the way the small sashing gives the blocks some room to breathe
ReplyDeleteLooks great can't wait to get mine finished up.
ReplyDeleteThat looks absolutely stunning love the colour palette. !
ReplyDeleteBeautiful! Will you be doing another quilt a long in 2013?
ReplyDeleteNot a block of the month, but certainly another quilt along at some point next year! :)
DeleteThat his turned out so pretty! Love the colors and very nice tutorial. Doesn't it feel good to finish and think about what to start next?
ReplyDeleteThis comment has been removed by the author.
ReplyDeleteI got this quilt started ~ really behind and need to catch up.
ReplyDeleteLove how yours turned out ~ beautiful!
I still have the final block to stitch up and will complete the quilt in January ... yours looks gorgeous and very inspiring. Thank you so much for these tutorials, I had never made a quilt block or a HST before starting this, and your instructions made it all so easy. I have enjoyed every step and can't wait to post my finished quilt on the flickr group early next year :)
ReplyDeleteThanks so much!! This has been a great project and I have loved making a block every month. I have become so much better at HST. My blocks are all finished and I will look forward to finishing after Christmas. Merry Christmas!!
ReplyDeleteI really love your quilt! I'm a bit behind on my blocks, but I've really been enjoying this sew-along! I might be able to squeeze in some sewing tomorrow, so let's see when I'll be able to finish mine! Thank you for a great year of HSTs! :-)
ReplyDeleteMy quilt is finished and in the wash right now! Yay! Thank you so much for keeping up with the tutorials for an entire year. I will be posting my finished quilt soon.
ReplyDeleteI also want to let you know that finding your blog this year has really changed my sewing life. I have tried a lot of new things and really enjoy sewing again. Thank you, and I wish you continued blessings in the coming New Year!
Love it! Your color/fabric choices are lovely. I can't wait to make one myself. Thanks so much for sharing how to make this quilt.
ReplyDeleteHappy holidays!
This looks fantastic! I found this series only recently but i'm going to be sure to visit the tutorials at some point in the future. Thanks for sharing
ReplyDeleteI love your finished quilt! I am also using blues and yellows to make my quilt so I hope it turns out as beautiful as yours. Thank you so much for this series!
ReplyDeleteI really enjoyed following along each month. I can't wait to put all my blocks together! I used batiks. Yummy! Thanks for hosting this.
ReplyDeleteThis looks great -- I decided to do double blocks for each month, so I'm a little bit behind, but I'm looking forward to putting the blocks together for a twin-size quilt using this model. Thanks so much for organizing the HST Block of the Month -- it was a lot of fun!
ReplyDeleteOooo, it turned out beautful ;D. Yet another quilt I have to get done. I made it all the way to August, and loved it. I will get it finished!!
ReplyDelete