
Happy Wednesday! Today I have my most recent woodworking project to share! This was a big project for me, despite it's small size, and I'm so excited about how it turned out.

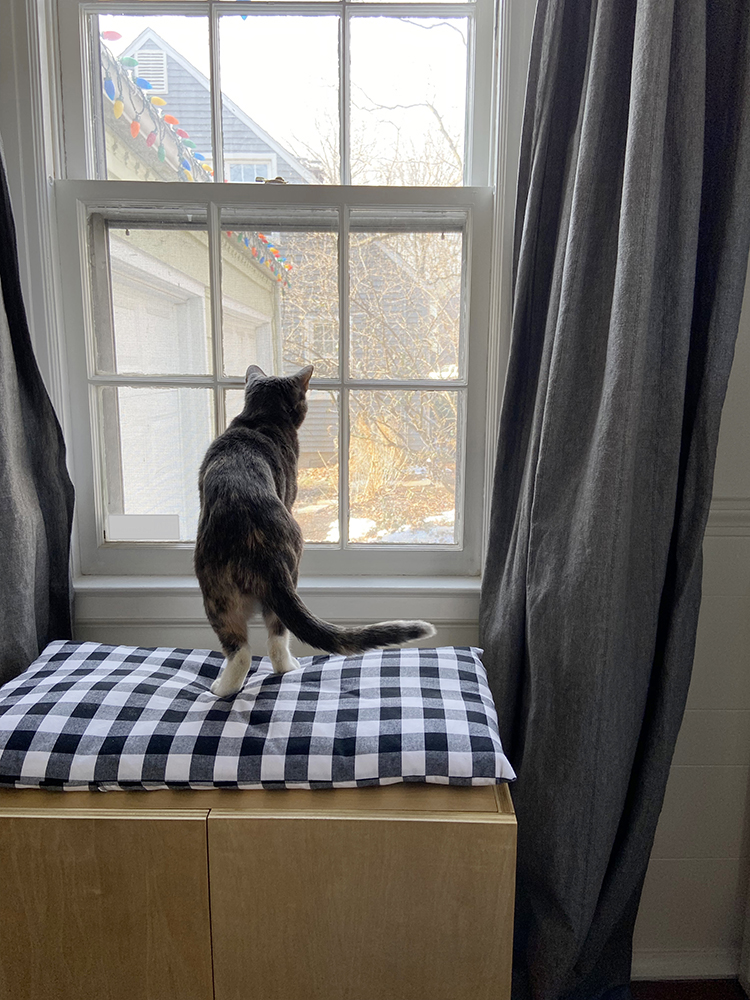
I built a hidden litter box cabinet for Miss Dusty Kitty! Since our basement is unfinished (ie: too many things for her to get into), I knew we'd need to keep her box upstairs. In an effort to keep it more contained and hidden, I decided to build a cabinet for it! My goals for this project were for it to be functional, cute, and to primarily use materials I already had on hand. I'm happy to say I think I acheived all three of those goals!
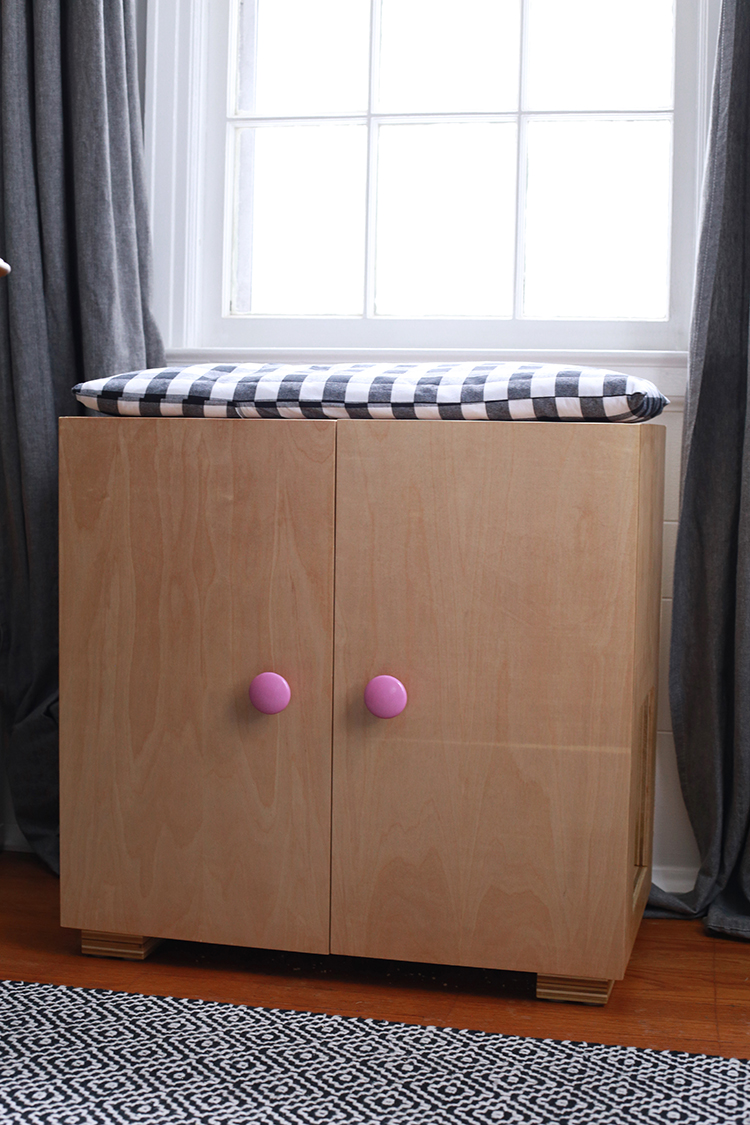
I kept the design really simple, just a straightforward rectangular cabinet. I had most of a 3/4" sheet of plywood in the garage leftover from making our open kitchen shelves a few years ago. I based the size around what I could cut from that plywood, the size of her litter box and the height that our windows are off the ground. I wanted the cabinet to double as a lookout spot for her! To build the cabinet I used pocket hold construction. I use a Kreg pocket hole jig*.
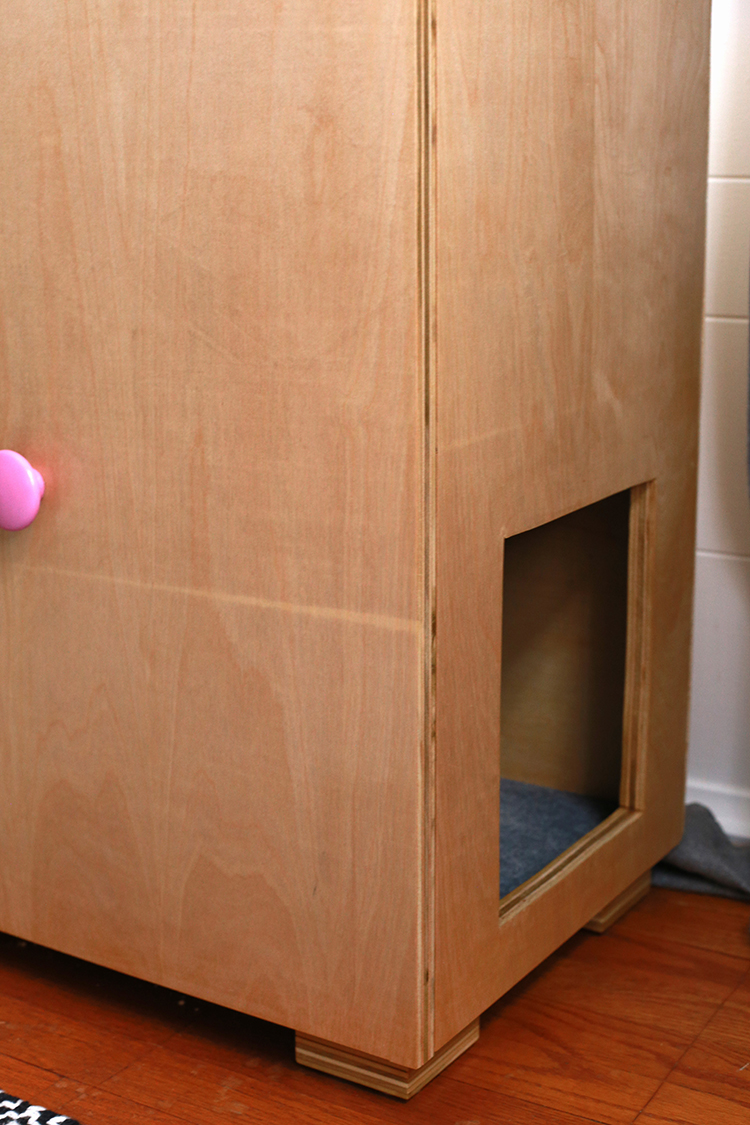
How cute is the little door for her? I probably could have made it a little smaller, but I wanted to be sure she would go in and out! I originally wanted to do a fun shape like an arch or house shaped openeing, but ended up deciding to keep it simple. I'm not the most proficient with a jig saw, so a reactangular opening felt like the way to go.
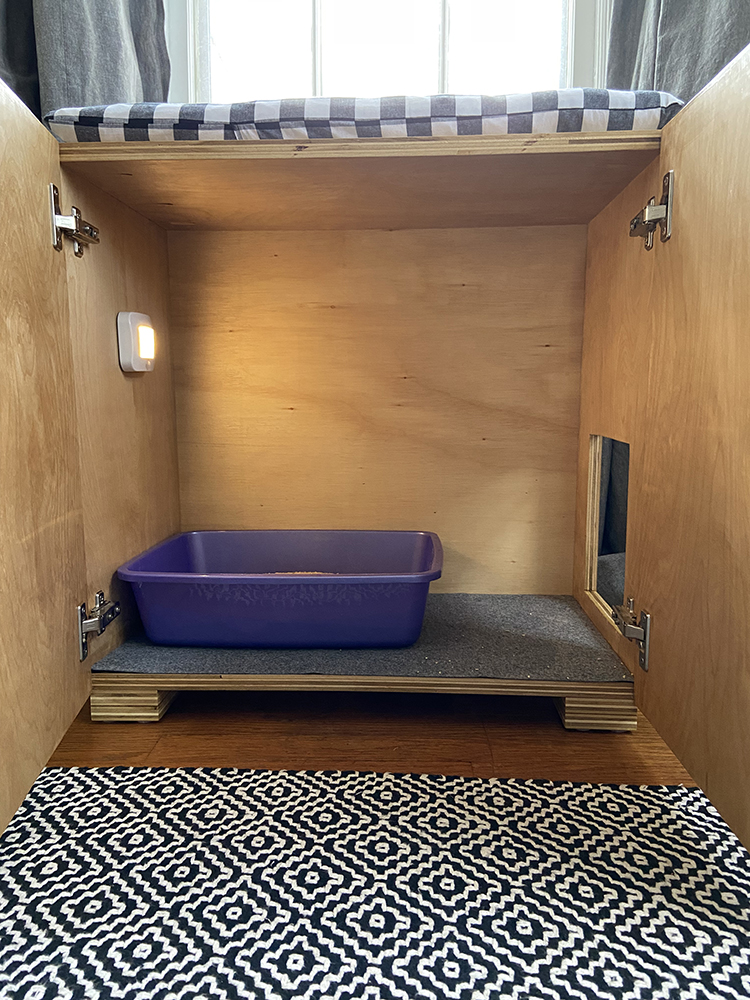
Her litter box fits inside with room to spare. I added a mat and also a motion sensor light. Can you sense how spoiled she is already?? I actually had a small piece of 1/4" plywood on hand that I could use for the back. I don't even remember why I bought it in the first place!
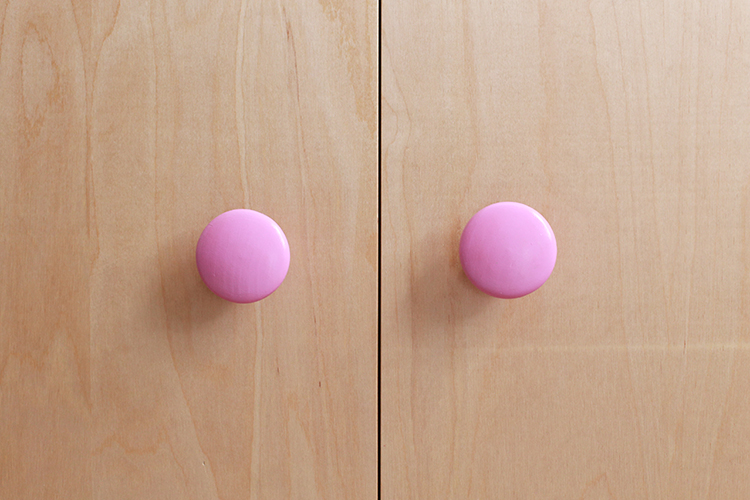
One of the few things I bought for this project were these knobs. I knew I wanted something oversized and these 1 13/16" wooden knobs were just the thing. I painted them this fun purple/pink for a pop of color. It was actually leftover craft paint from Target. I added a couple of layers of Shellac to them when I shellacked the rest of the cabinet.
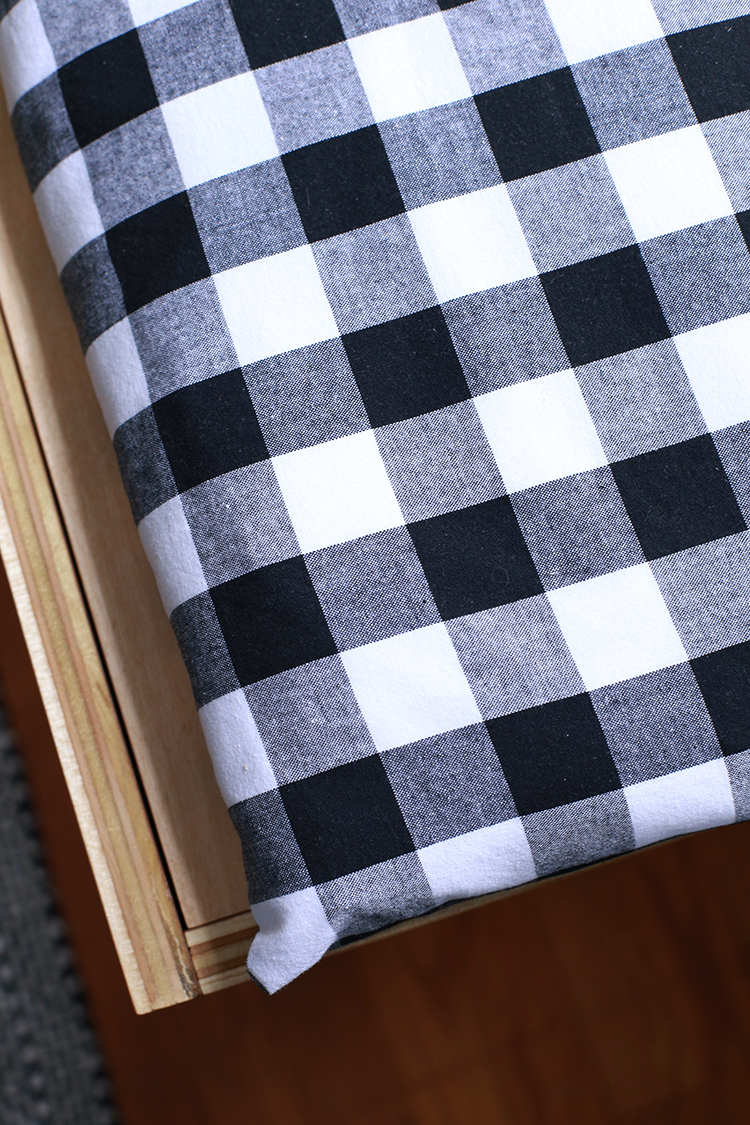
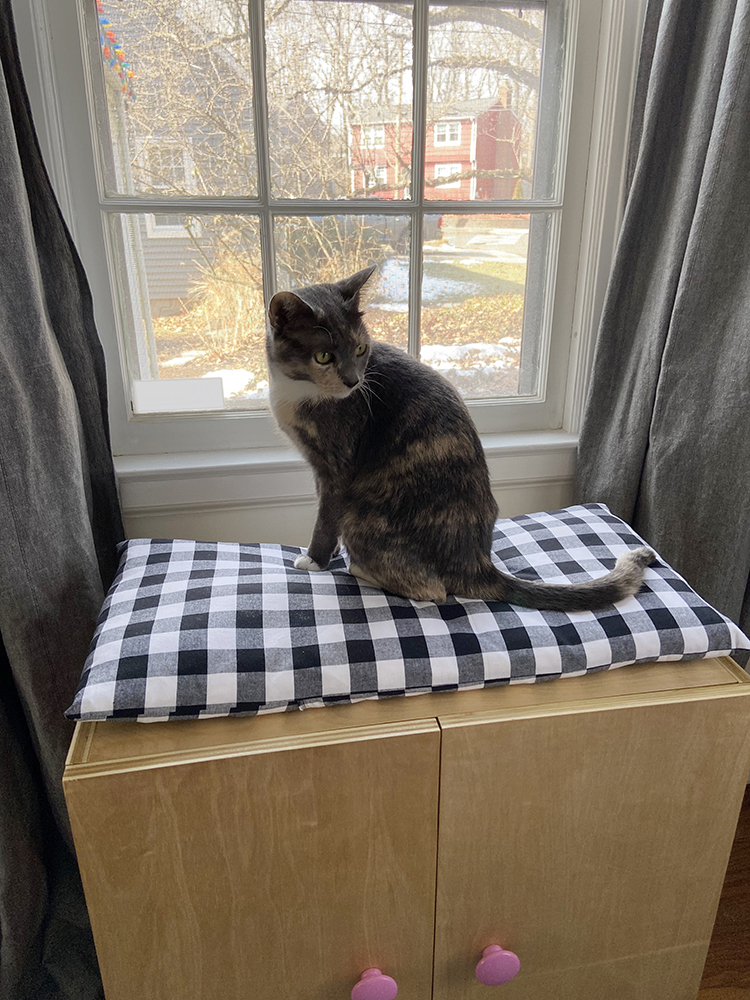
The cushion is the one element that will probably be changed at some point. I had some recycled denim insulation that we received as packing material in a delivery meal kit a few years ago. I saved it and used it along with some batting scraps to make a cushion. I used some carolina gingham* I had in my stash. I made a quick unlined envelope closure cover for it and attached it to the cabinet with some velcro. It is a bit lumpy and undersized. For now, it's fine. I'm hoping to make something more substantial later.
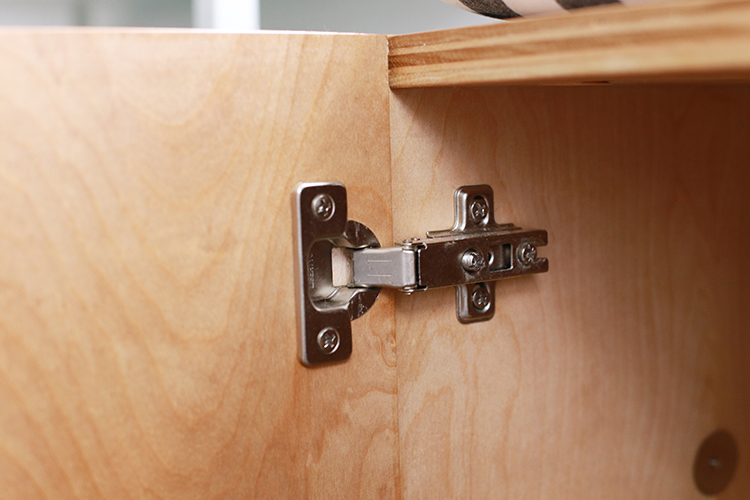
This project was my first time building a cabinet, and my first time installing hinges! I thought I might be biting off more than I could chew by using full overlay hinges, but they were actually really easy to install.
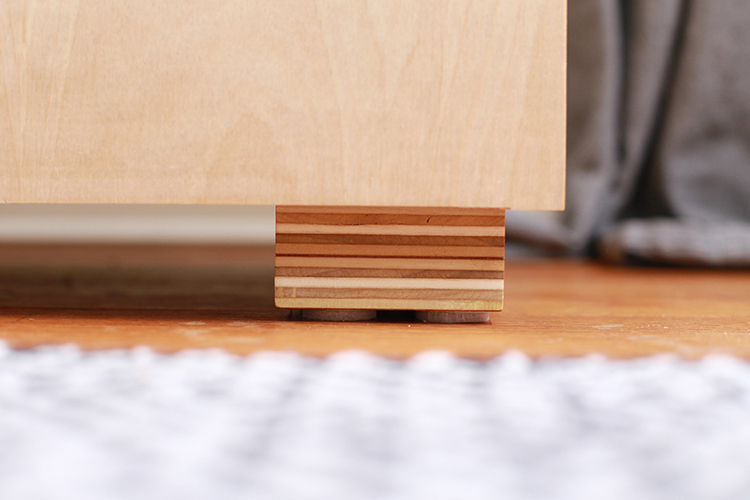
In the spirit of using what I had, I ended up making some simple feet with stacked scraps of plywood. I really wanted some bun feet, but between the feet and the mounting plates, it was going to be more than I wanted to spend. These homemade feet were free! You barely see them anyways, so it felt like a good place to save.
I learned SO much making this project. Every time I build something from wood I feel like I learn a ton. It's still a pretty new medium for me, so that makes sense! This project really boosted my confidence and makes me want to tackle bigger projects. Already dreaming of the next one!
A project like this really scratches the making itch for me. It is a useful project that is customized to my specific needs and wants. It also allowed me to learn new skills and get more practice at woodworking. I'm really happy I made this, and Dusty likes it! She knew exactly how to get inside the cabinet, and she loves to sit on top of it. She has a great view of the driveway, which will be teaming with activity from our driveway garden later this Spring!
Finished Size: 25" tall x 25" wide x 14" deep. Kitty door is 9" tall x 8" wide.
Fabrics:
Carolina gingham.*
Hardware: 1 13/16" wooden knobs, full overlay hinges.
Happy Making!
*Note: Any links marked with an asterisk in this post are affiliate links. This means if you click through and buy something, I make a small commission, at no extra cost to you.
Love this, Jeni! What a great idea - everything contained and looking pretty. Your kitty has a special home.
ReplyDeleteThat’s a great idea!
ReplyDeleteGood job on this very useful project!
ReplyDeleteLooks very well made, an attractive piece of furniture. The feet are a great design element.
ReplyDeleteSuper idea! Unless you have an extremely messy litter tossing cat. You did a great job.
ReplyDeleteLove this! It makes me want to make one of these for my kitty.
ReplyDeleteYou did a terrific job! The feet are a nice design feature - staining and shellacking plywood made for multi colored layers & it looks terrific double up. The whole cabinet is very professional, you should be very proud of yourself!
ReplyDeletewell jeni, you should be proud. what a lovely spot for miss dusty. and yes, she is having a good life and why not! she brings you such joy. congrats again on your woodworking accomplishment. clever lady. (-:
ReplyDeleteThis is something I needed when I had my cats. Nice idea and you did a great job making it.
ReplyDeleteBrilliant job!!!!
ReplyDeleteGreat job!
ReplyDeleteDo you have a project plan I can jse to replicate this for my own cat? I've been looking for something very similar!
ReplyDeleteI don't!
Delete