
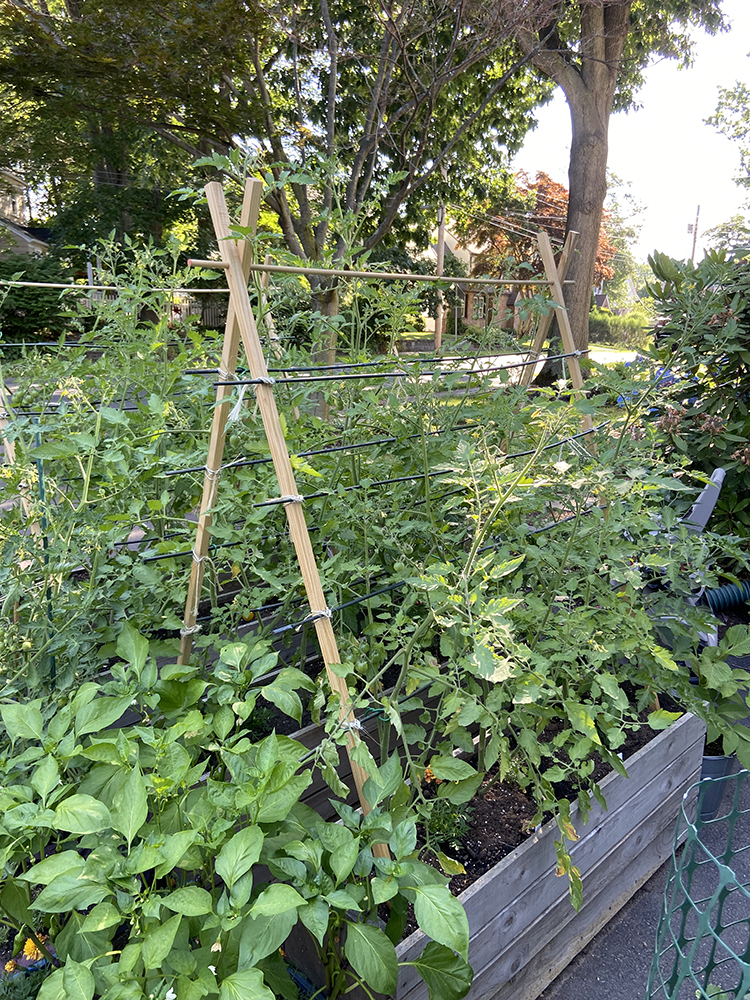
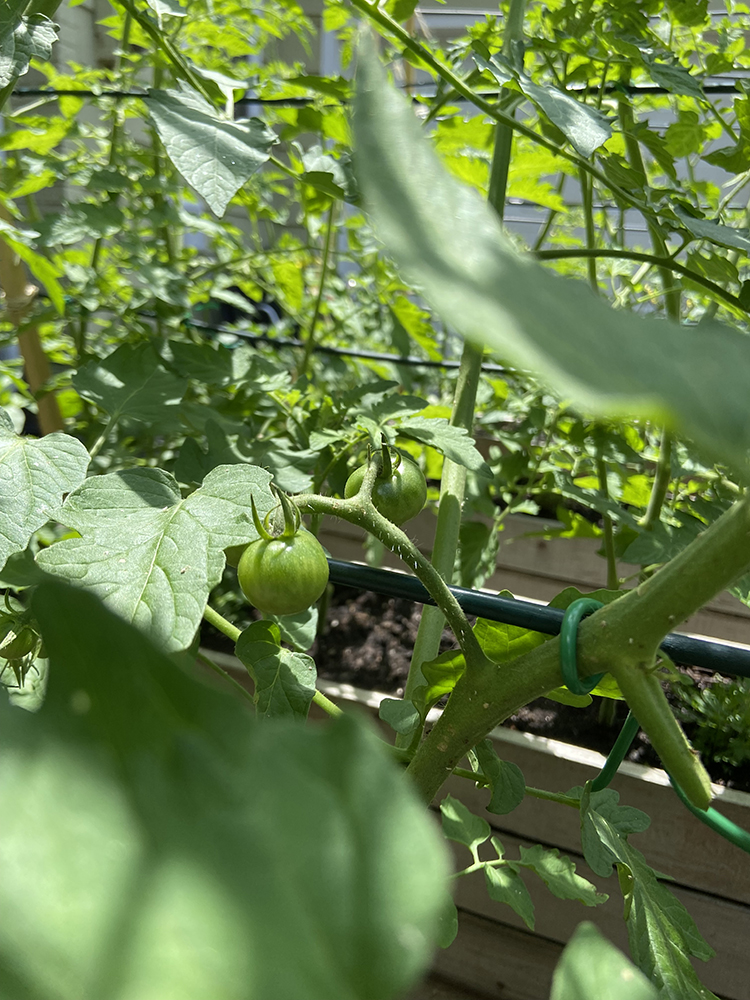
Happy Wednesday! Today I wanted to share a little DIY tutorial for the wooden trellis that I built for my garden this year! These support my indeterminate cherry tomato plants.
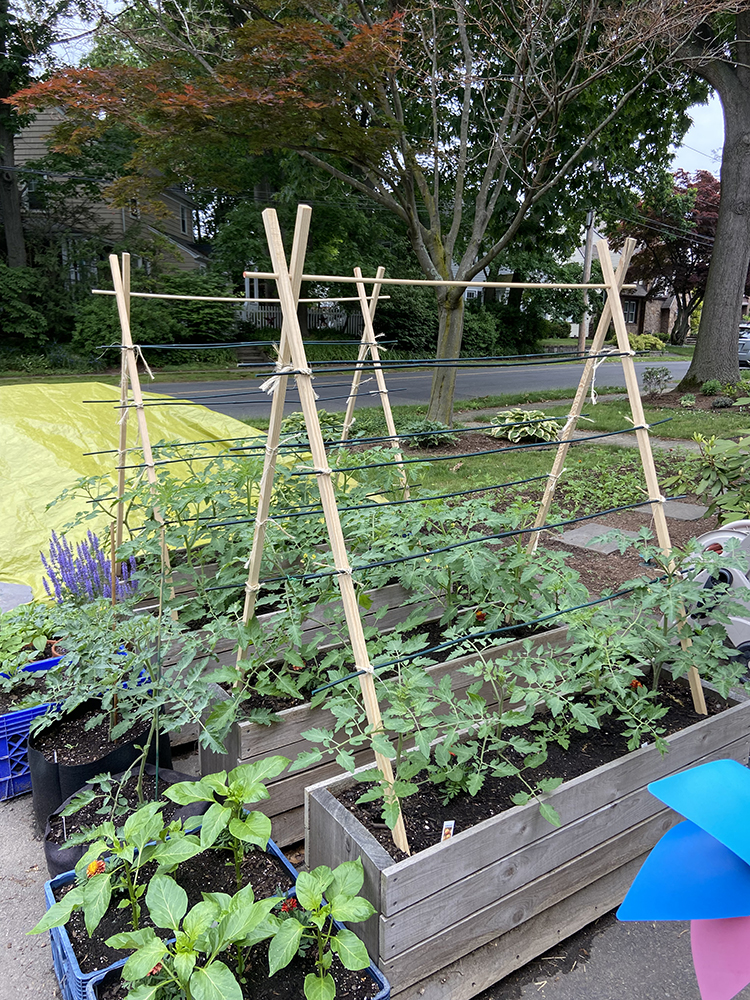
I had a few goals in mind when deciding how I wanted to support my cherry tomatoes this year. I wanted something that was low-budget, strong, easy to store and that had multiple anchor points into the dirt to keep it as stable as possible. I looked at tons of different trellises and just couldn't find anything ready-made that fit what I wanted. Plus, everything I did find was out of my budget. So, time to make something myself! I ended up spending around $20 per trellis which I'm really happy with! Of course it's going to depend on the prices of materials where you live and if you already have some of these supplies on hand.
For off season storage, this trellis folds up flat! I am very excited about that because traditional tomato cages take up a lot of room.

I built my trellises to fit my planter boxes, so feel free to adjust the size to fit your needs. I'm not sure I'd go too much wider without adding additional vertical support, but you could definitely make it shorter or narrower very easily! The depth of the trellis is flexible since the stakes move around the dowel. I have my stakes positioned around 2-2.5' apart. The materials listed below are what you'll need to make one trellis.
Disclaimer: I've only been using these trellises in my garden for about a month! I don't know how they'll perform once they've got fully-grown tomato plants all over them. I also don't know how many seasons they will last. I am hopeful on both those counts, but time will tell! I'll post an update at the end of the season.
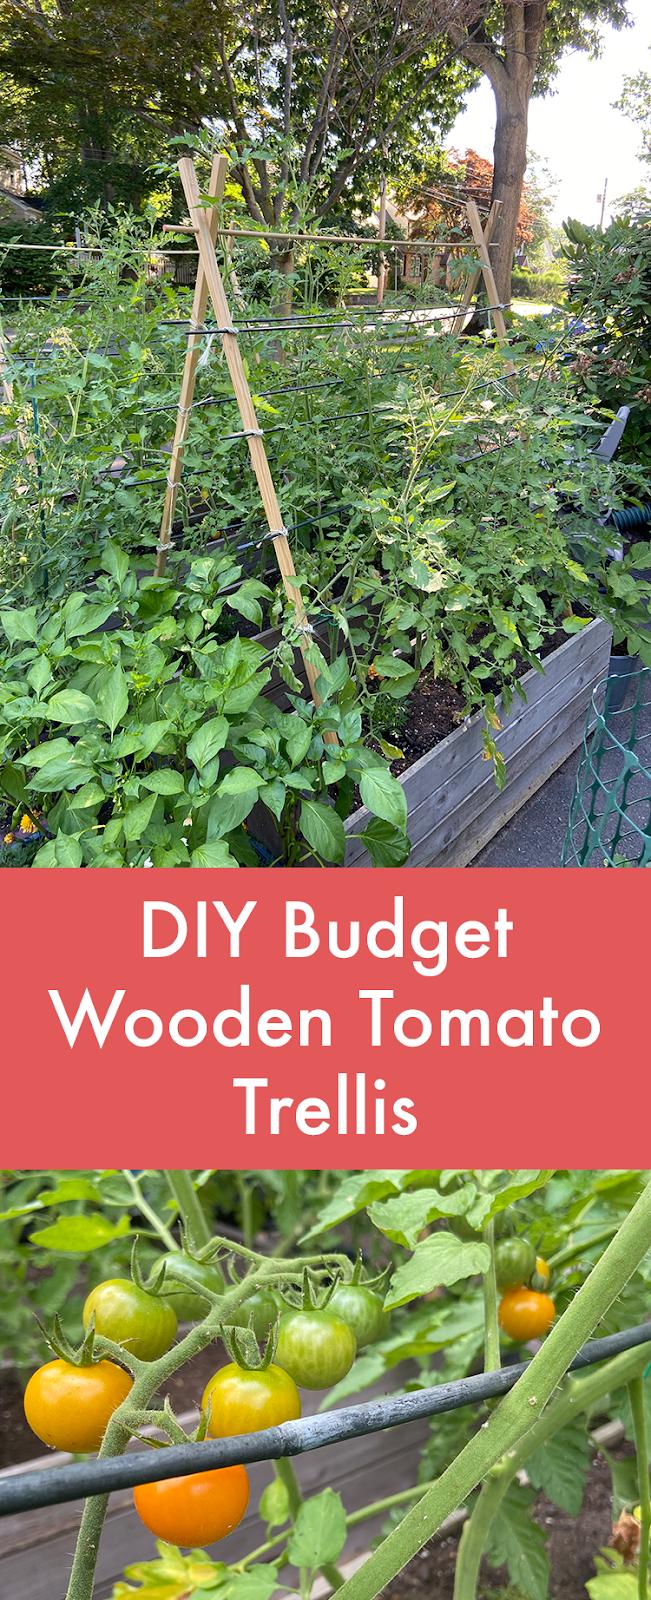
DIY Budget Wooden Tomato Trellis
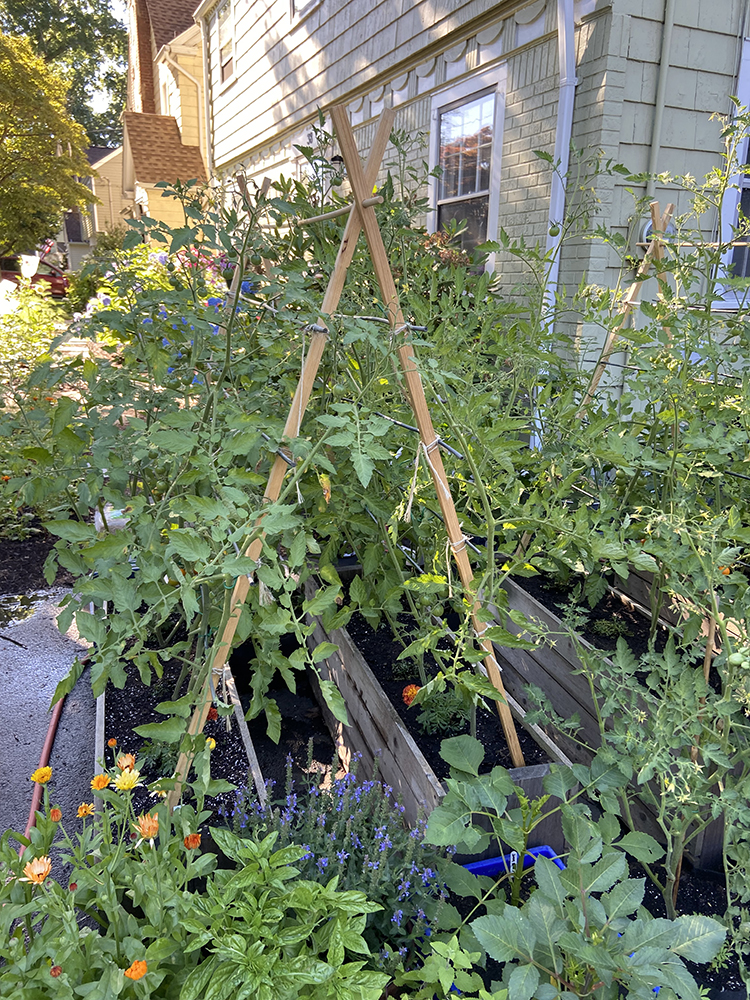
Finished size: Approximately. 4.5' tall, 4' wide, varying depth.
Materials & Tools Needed:
- (4) 5 ft. Wooden stakes*
- (8) 4 ft. Bamboo stakes*
- (1) 3/8" 4ft Wooden dowel
- Twine
- Small galvanized nails (around 1.5" long)
- Hot glue gun (I'm still obsessed with this one*)
- Drill and 7/16" drill bit (or 3/8" drill bit)
- Sandpaper
- Hammer
- Tape Measure
- Pencil
- Dead-blow hammer* (optional)
Instructions:

1. On all four 5 ft. wooden stakes, drill a 7/16" hole through the center of the side of the dowel, 5" from the top flat end (not the pointy end). If you're like me and you only have a 3/8" drill bit on hand, that will work too with a bit of extra work. Secure a small piece of sandpaper to the end of a pencil. Use this to sand the inside of each hole enough so that the dowel will fit snuggly.
2. Lay 2 stakes on the ground so that the hole you drilled in step 1 is facing to the side and the flat side is facing upwards. Measure and make a mark 12.5" from the top, then three marks 7.5" apart below that. See diagram above.
3. Hammer in a small nail at each of the pencil marks. These will act as little shelves for the horizontal bamboo stakes.
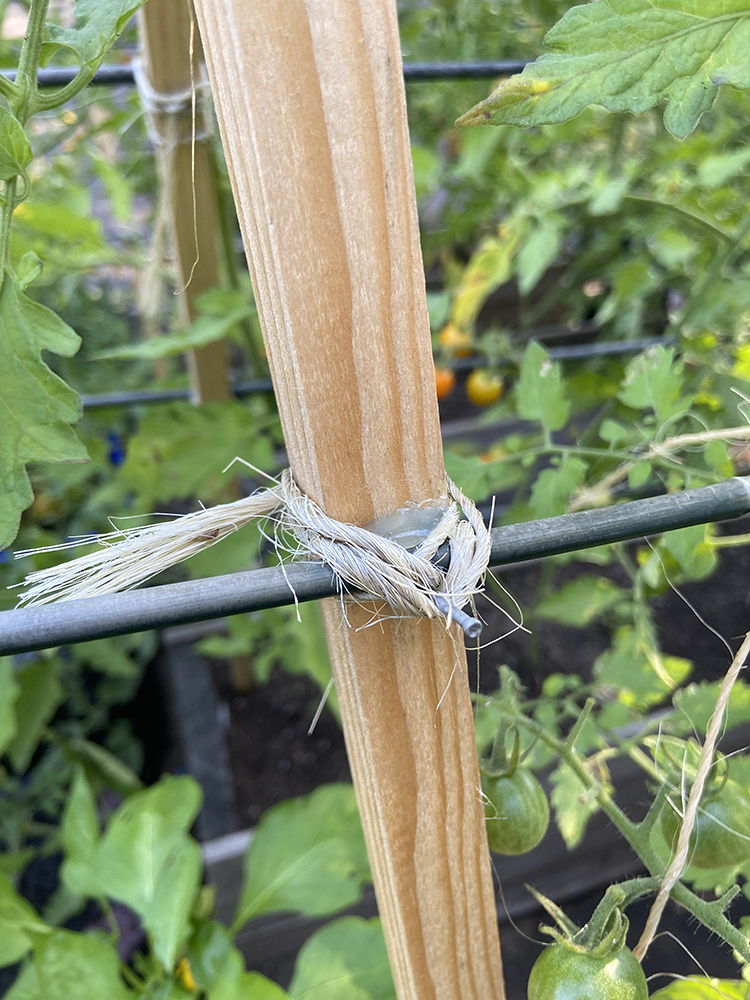
5. Arrange the two stakes around 40" apart from each other. Place a bamboo stake at each nail mark, spanning across the distance between the two wooden stakes. Use a small dot of hot glue to secure the bamboo to the wooden stake.
6. Tie the bamboo to the wooden stake at each intersection with twine for extra security. Now you've completed one trellis panel.
Repeat steps 2-6 for the second trellis panel.
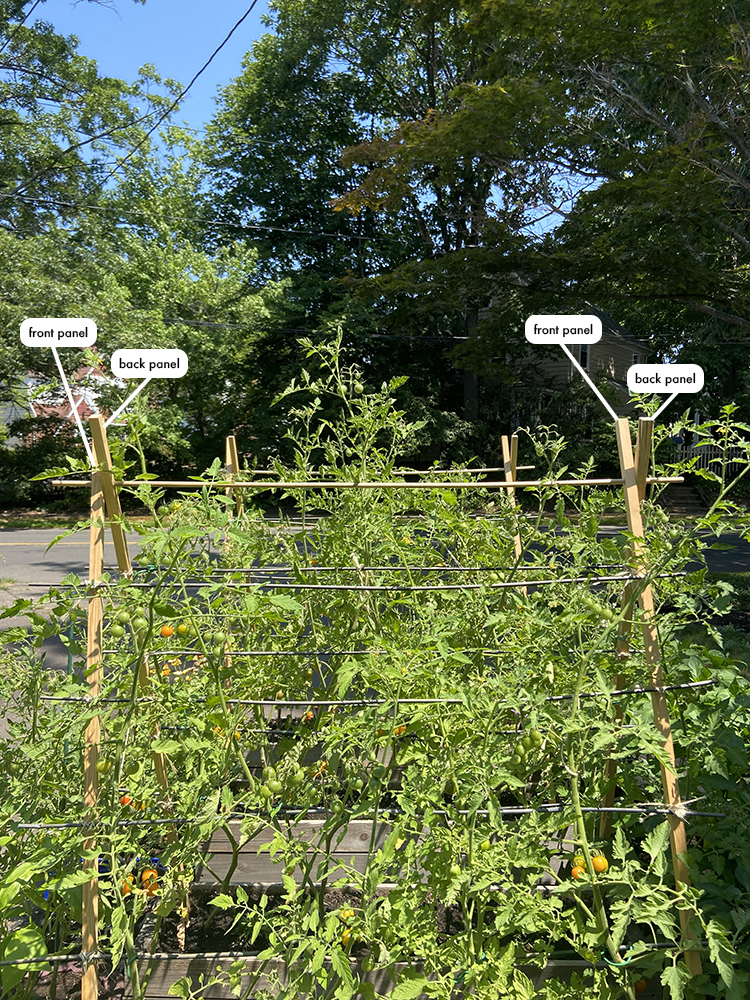
7. Lay one trellis panel upside down on the ground with the bamboo stakes touching the ground (we'll call this the "back panel"). Place the second panel on top of it, with the bamboo stakes facing upwards (we'll call this the "front panel"). You'll end up with the wooden stakes staggered so that the back panel stake is on the outside on one end and the front panel stake is on the outside on the other end.
8. Make sure the holes you drilled in step 1 are aligned and begin gently pushing the 3/8" wooden dowel through the two stakes on one end. It's going to be a tight fit, so you may need to twist the dowel as you go to get it through both holes. Continue pushing the dowel through until you reach the other stakes. Use a dead-blow hammer as necessary to get the dowel all the way through both sets of stakes.
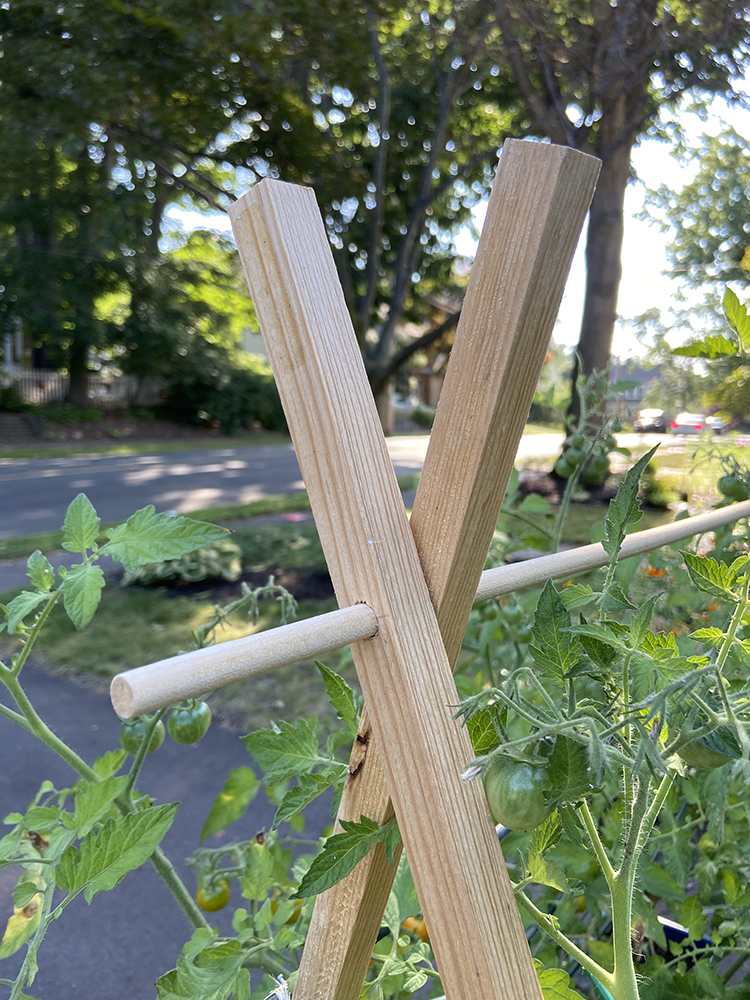
The tight fit will allow you to open and close the trellis so that you can easily store it over the winter. If it's not super tight, you could temporarily secure it with a little hot glue or some twine.
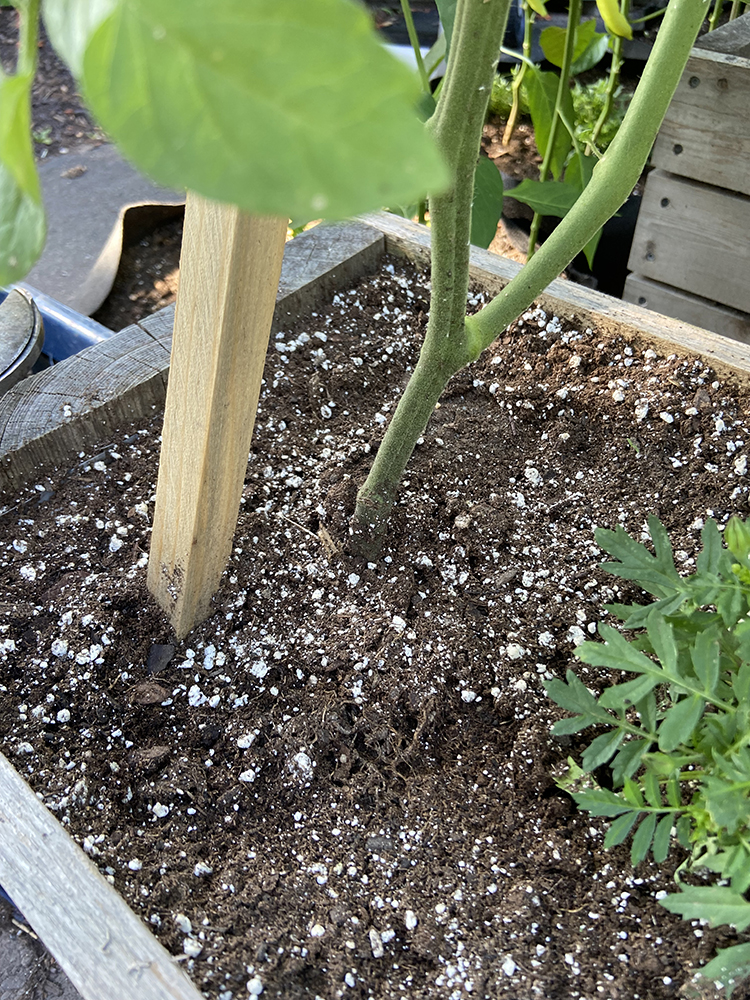
9. To install the trellis simply push the pointed ends of the takes into the ground or planter box.
As your tomato plants grow (or whatever you're growing on the trellis!), weave them through the bamboo stakes and/or use ties to secure them to the stakes.
I hope you've enjoyed this tutorial! I have lots of other tutorials for everything from quilts, pillows, bags, and holiday items to informational series and techniques. Find all my tutorials here: Tutorials. My online shop is filled with patterns for quilts and bags. Find my patterns here: Jeni Baker Patterns
If you make something using one of my tutorials or patterns, I hope you'll tag me @jenib320 and use my hashtag #jenibaker on instagram!
Happy Gardening!
*Note: Any links marked with an asterisk in this post are affiliate links. This means if you click through and buy something, I make a small commission, at no extra cost to you.
Hi! How did the trellis turn out when the plants got bigger? Did they have enough airflow? I'm thinking about doing the same structure this year only I would do it with bamboo panels and a rope to criss-cross between them.
ReplyDeleteIt did great for me all season, no airflow issues!
ReplyDeleteAwesome, thanks!!
ReplyDeleteHi, Love what you"re doing here. Do you have pics? of your progress and near the end of the season? Good btw, I just found a source of tall Bamboo and the woman is giving it away. I am looking forward to doing this in a few weeks. My growing season is decent since I moved from 2.5 hours south. Surprised it makes such a difference . I am about 2 hours from DC. You mentioned using bamboo panels?
ReplyDeleteThanks for sharing.
Did you need to treat the pine to use it in your garden?
ReplyDeleteI didn't, but it will definitely last longer if you do!
Delete