Happy Wednesday! Today I have a finished quilt to share, plus a tutorial for it!

If you’d rather have this tutorial in downloadable form that you can print out (plus other sizes!), check out my
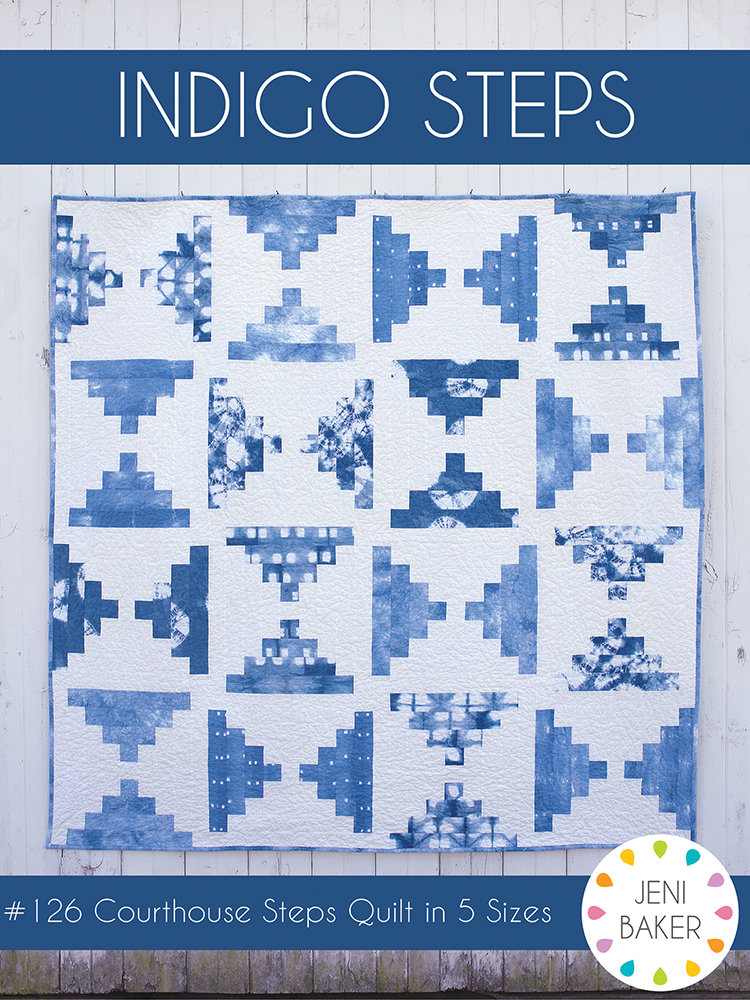
Indigo Steps Quilt Pattern. It features five different quilt sizes including: Baby (36"x36"), Small Throw (54"x72"), Square Throw (72"x72"), Large (72"x90"), Extra Large (90"x108")
Find the pattern in my online shop here: Indigo Steps Quilt Pattern.
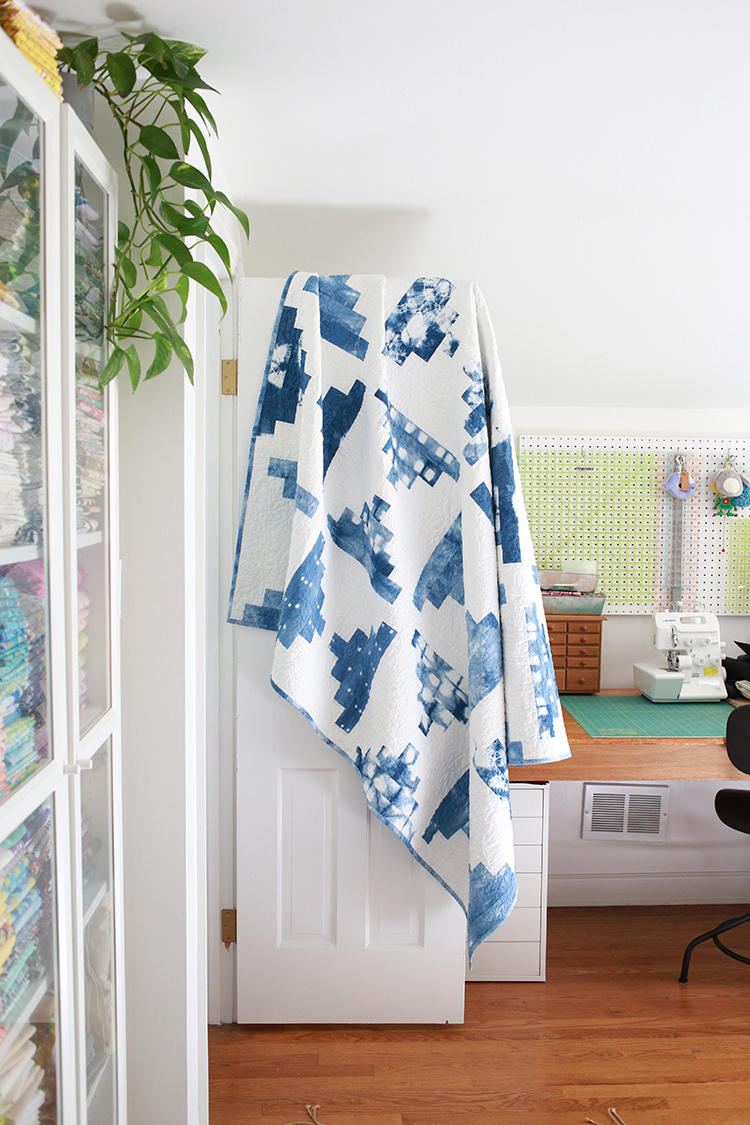
This quilt has been a few years in the making! I've made a few really simple quilts from my hand-dyed indigo fabrics, but I was craving something with a bit more piecing for this quilt. Most of my hand-dyed fabric stash is fat quarters, so I knew I wanted to come up with a design that would take advantage of fat quarters. I ended up choosing 8 different indigo fat quarters for this quilt, and immediately cut them all up into 2.5" strips.
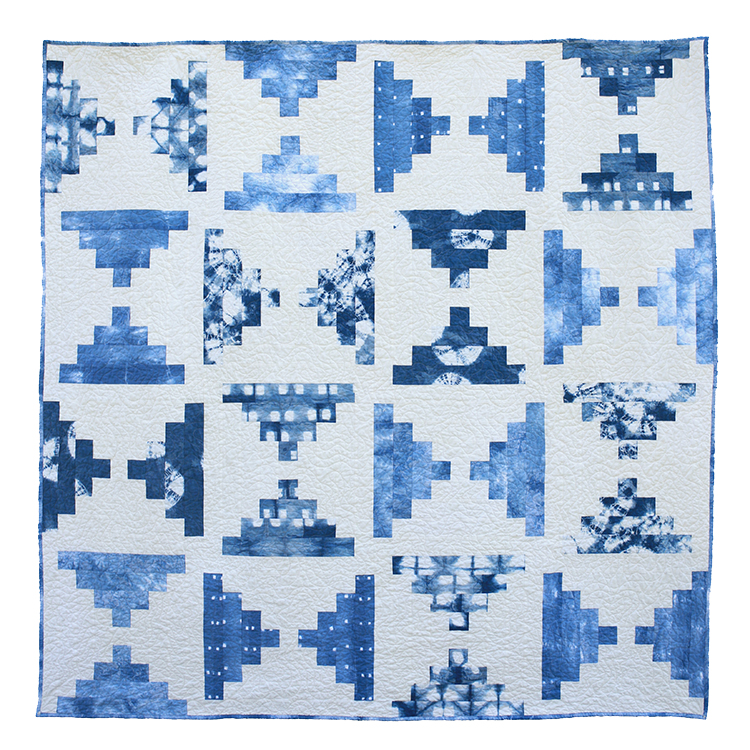
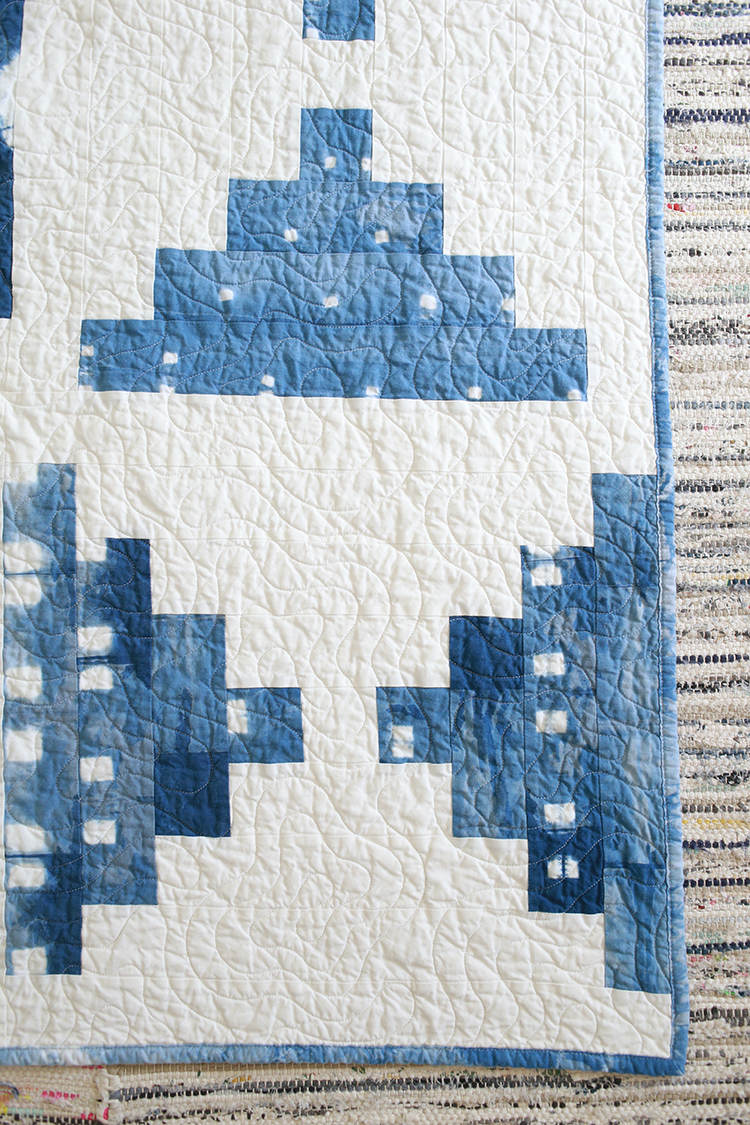
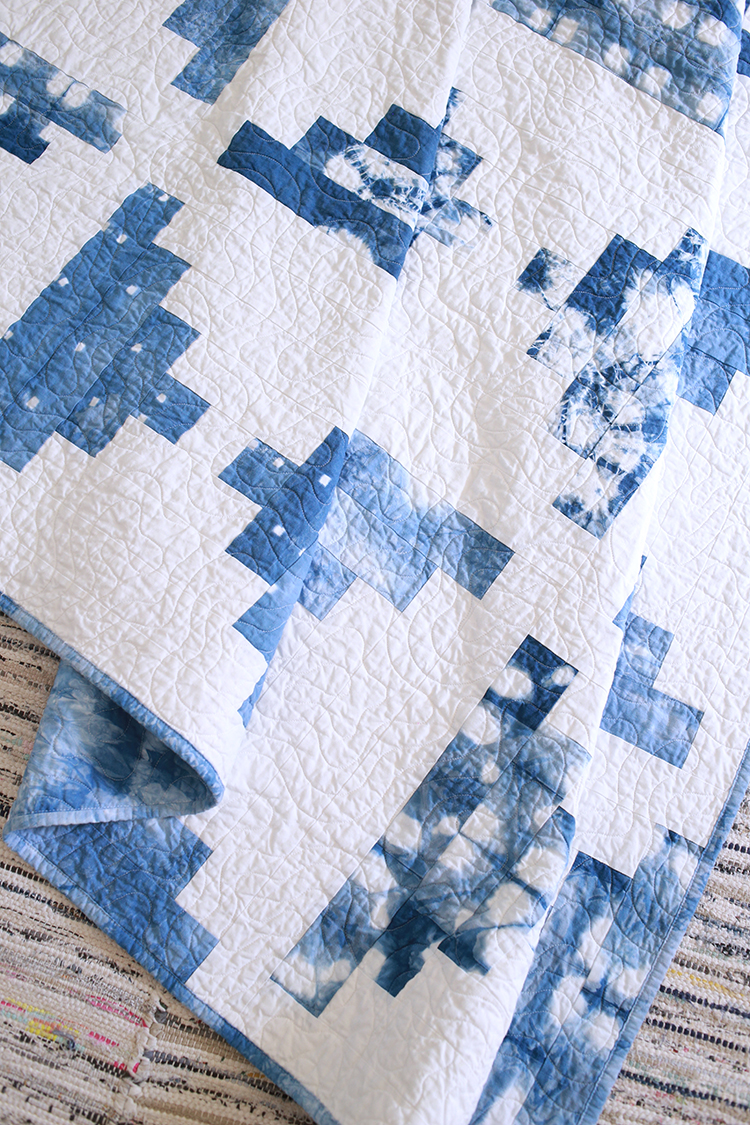
I've never made a courthouse steps quilt before, and I liked the idea of making essentially two color blocks and playing with the arrangement to almost create the look of half-square triangles. Lucky for me, the resulting quilt turned out just as I had envisioned it! I like how even though the fabrics have been cut up, you can still get a sense for the dye pattern within each block.

This entire quilt is made from white
Kona Cotton*. The dyed prints were indigo dyed by me over the course of a few summers. For more information on indigo dyeing, check out my
Indigo Dyeing Tutorial.

The backing is pieced together with some pieces of white fabric and hand dyed pieces. I repurposed a
shower curtain I dyed and made a few years ago. It didn't fit with our new shower here, so I thought it would be more useful to revert it back to fabric!

For the quilting, I sent the quilt to
Melissa Kelley of Sew Shabby Quilting. The quilt design is called Malachite. The quilt is bound up in more indgo fabric!
There are so many ways you could customize this design. I kept my quilt really simple, only using a single print and background fabric for each block. You could use as many or as few fabrics as you want for yours! The tutorial is written to be fat quarter friendly, but I think it would look really good done up in scraps. Or you could take advantage of a couple jelly rolls! I've included a table with all the piece totals if you'd rather cut from scraps or other yardage.
Indigo Courthouse Steps Quilt Tutorial by Jeni Baker
 Sewing Level:
 Beginner Friendly
Finished Size: 72"x72"
Finished Block Size: 18" square
Materials:
- 8 print fat quarters
- 3 yards of background fabric
- 80"x80" quilt batting
- 4 1/2 yards of backing fabric
- 5/8 yard of binding fabric
Cutting:
From each print fat quarter:
Cut (7) 2.5"x21" strips

Using the graphic above for reference, subcut the strips into the following:
- (4) 14.5"x2.5" strips
- (4) 6.5"x2.5" strips
- (4) 10.5"x2.5" strips
- (4) 2.5" squares
From background fabric:
Cut (16) 2.5"xWOF strips:
- Subcut each strip into (2) 18.5"x2.5" strips
Cut (8) 2.5"xWOF strips:
- Subcut each strip into (4) 10.5"x2.5" strips
Cut (16) 2.5"xWOF strips:
- Subcut each strip into (2) 14.5"x2.5" strips and (2) 6.5"x2.5" strips
Cut (1) 2.5"xWOF strip:
- Subcut strip into (16) 2.5" squares
Piece Totals
If you'd rather cut from stash or scraps, here is how many of each piece you'll need to make this quilt!
|
2.5"x2.5" |
6.5"x2.5" |
10.5"x2.5" |
14.5"x2.5" |
18.5"x2.5" |
| Print fabric |
32 |
32 |
32 |
32 |
0 |
| Background fabric |
16 |
32 |
32 |
32 |
32 |
Indigo Courthouse Steps Quilt Instructions:

*Use a 1/4” seam allowance unless otherwise noted.*
Block Construction:
Each block is made from a single print fabric and background fabric. For a scrappy look, feel free to use a mix of prints in each block.

1. Sew a 2.5" print square to both sides of a 2.5" background square. Press seams away from center.
2. Sew a 6.5"x2.5" background strip to both the top and bottom of the center block. Press seams away from center.

3. Sew a 6.5"x2.5" print strip to both sides of the center block. Press seams away from center.
4. Sew a 10.5"x2.5" background strip to both the top and bottom of the center block. Press seams away from center.

5. Sew a 10.5"x2.5" print strip to both sides of the center block. Press seams away from center.
6. Sew a 14.5"x2.5" background strip to both the top and bottom of the center block. Press seams away from center.

7. Sew a 14.5"x2.5" print strip to both sides of the center block. Press seams away from center.
8. Sew an 18.5"x2.5" background strip to both the top and bottom of the center block. Press seams away from center.
Trim block to 18.5" square if necessary. Repeat steps 1-8 to create a total of 16 blocks.
Quilt Top Construction:

1. Arrange blocks into four rows of four blocks each. Sew blocks together in each row. Press seams in one direction, alternating direction every other row. Sew rows together, press seams open. Press top well from the right side.
Quilt Assembly and Finishing:
1. Making Backing: Cut backing yardage in half. Press. Trim off the selvedge and sew your pieces together lengthwise. Press seam open.
2. Basting: Using masking or painter’s tape, tape the backing to a clean, hard surface, right side down. Spread out your batting on top of the backing. Smooth out any wrinkles. Carefully spread out your quilt top on top of the batting, right side up. Pin your top, I like to use curved safety pins, spacing the pins a few inches apart. Make sure that your pins are going through all three layers.
3. Quilting: Quilt as desired, by machine or by hand. Trim away excess batting and backing fabric.
4. Binding: Cut yardage listed for binding into 2.5” strips. Trim off selvedges and sew your strips together to form one long strip, press seams open. Fold in half lengthwise, pressing with your iron as you fold. Attach binding using your preferred method. For a detailed tutorial on attaching your binding to both sides by machine:
Machine Quilt Binding Tutorial.

I hope you've enjoyed this tutorial! I have lots of other tutorials for everything from quilts, pillows, bags, and holiday items to informational series and techniques. Find all my tutorials here:
Tutorials. My online shop is filled with patterns for quilts and bags. Find my patterns here:
Jeni Baker Patterns
Tag me
@jenib320 and use my hashtag
#jenibaker on instagram if you make something from this tutorial!
If you’d rather have this tutorial in downloadable form that you can print out (plus other sizes!), check out my
Indigo Steps Quilt Pattern. It features five different quilt sizes including: Baby (36"x36"), Small Throw (54"x72"), Square Throw (72"x72"), Large (72"x90"), Extra Large (90"x108")
Find the pattern in my online shop here: Indigo Steps Quilt Pattern.
Happy Quilting!
*Note: Any links marked with an asterisk in this post are affiliate links. This means if you click through and buy something, I make a small commission, at no extra cost to you.