

Happy Tuesday! I am happy to share another tutorial featuring Curiosities with you today! As you may know, I love pincushions. I also happen to love half-square triangles (HSTs). So when faced with scraps and a need for a quick and easy project, I put those two loves together and made these fun pincushions! The HSTs are small, but not so small that they’re hard to piece. Just tiny enough to be extra cute!
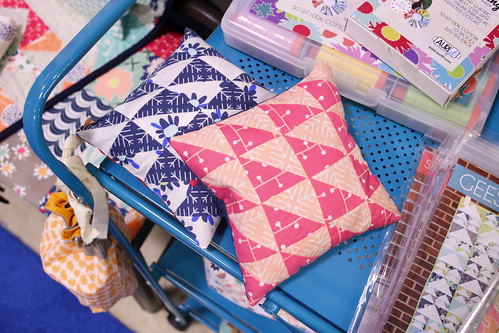
I made two, because why not! The first uses two pink prints from the Sweet Finds colorway. The second uses two prints from the Fresh Encounters color way. I backed both pincushions with coordinating Art Gallery Fabrics Elements. The small prints and small HSTs give these a sweet vintage feel. As usual, I filled my pincushions with crushed walnut shells (lizard litter). You can find it at most pet stores. This also lets them double as pattern weights, bonus!
Sewing Level: Beginner
Materials:
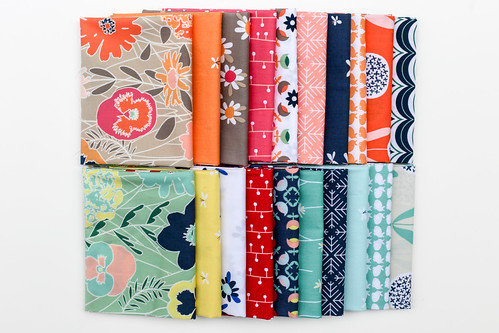
- 2 fat eighths for pincushion top (Fabric A and B)
- 6.5" scrap for pincushion backing
- Coordinating thread
- Marking pen/chalk
- Pincushion filling of choice (I use crushed walnut shells)
- Hand sewing needleLooking for supplies? Check out my Pattern Supplies and Resources post.
Cutting:
From each Fabric A:
Cut (8) 2.5" squares
From each Fabric B:
Cut (8) 2.5" squares
From Backing Fabric:
Cut (1) 6.5" square
Finished Size: 6" square
Instructions:
*Use a 1/4'' seam allowance unless otherwise noted*

1. Make half-square triangles: Using a marking pen, draw a diagonal line across the wrong side of all Fabric A squares. Place one square on top of a Fabric B square right sides together. Sew 1/4” on either side of the marked line. Cut square in half on the line you marked. Press seams open. Repeat with remaining squares. Trim all half-square triangles to 2” square.

2. Arrange half-square triangles in four rows of four as shown in the diagram above. Sew units together in each row. Press seams in one direction, alternating direction every other row. Sew rows together, press seams open.
3. Place pincushion top right sides together with pincushion backing. Sew around all four sides, leaving a small opening in the middle of one side.
4. Turn pincushion right sides out, pushing out the corners with a full pencil or turning tool. Fill pincushion with desired filling. Hand stitch the opening closed.

Voila! You're done!

BONUS: You can make an even tinier version (3" square finished) with just four HSTs like I did for these pincushions! You'll only need two 2.5" squares of each fabric, trim them to 2", and use a 3.5" square for the backing.
If you make something using this pattern, I hope you'll share it in the In Color Order Flickr Group or using the #jenibaker hashtag on Instagram!
Too cute! I will have one or more of these! Thank you!
ReplyDeleteOoh, the first two seem giant after seeing the tiny ones you made! Love them all, and thank you again!!
ReplyDeleteThey look so cute! And they are so your style, HSTs and Curiuosities. Two things you love in one place. I so have to make some :)
ReplyDeleteI love these. Thank you so much for the idea and the tutorial. I just received two mini-charms that would be perfect for these.
ReplyDelete