
I'm excited to share yet another twist on my Lined Drawstring Bag Pattern with you today! I have only made a few garments using knit fabrics, but already I have amassed a sizable amount of scraps. My growing scrap pile and a challenge from Jacey to use knits for non-garment projects were the inspiration for this bag. I simplified my drawstring bag pattern to use only one fabric for the Interior and Exterior Accent, so we've got one less seam there. There are also no gussets on this bag, so that makes it a bit easier as well!

If you haven't worked with knit fabric much, never fear! Since we aren't wearing this bag, we don't need to worry about using any special stitches to keep it stretchy. I did use a ballpoint needle (like these), since it goes through the knit fabric a little easier. I also upped my stitch length a bit, it was around 2.8/3. Just go slow, and use pins (carefully) or clips to keep things in place as you sew. For the ties I recommend using a regular cotton or some twill tape. If you need some extra visuals to get you through making the bags, feel free to refer back to the original tutorial.
My go-to resource for all things knit fabric is The Colette Guide to Sewing Knits.

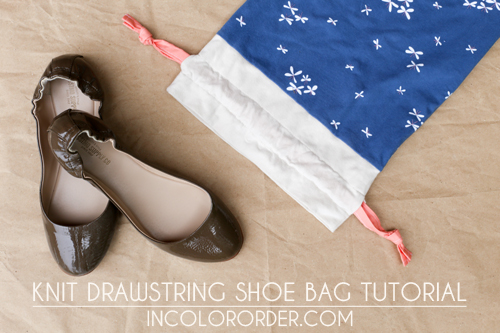
I designed this bag to be the perfect travel shoe bag! It's nice and soft, so it will give your shoes a little extra protection too! I used the Firefly Jar in Dark knit print from Curiosities for the exterior main, the Amaranth solid knit for the interior, and Pure Element Grapefruit for the ties, all from Art Gallery Fabrics.
Sewing Level: Intermediate
Materials:
- 1/3 yard of knit fabric for main exterior
- 1/3 yard of knit fabric for lining
- 1/8 yard of fabric for ties or 2 yards of 1/2" twill tape
- Coordinating thread
- Ballpoint needle
- Marking pen/chalk
Cutting:
From main exterior fabric:
Cut (2) 12.5"x10.5" pieces
From lining fabric:
Cut (2) 19.5"x10.5" pieces
If using fabric for ties:
- Cut (2) 32”x2” strips
If using ribbon for ties:
- Cut (2) 32" pieces
Note: Cutting measurements are given as height x width.
Instructions:
*Use a 1/4'' seam allowance unless otherwise noted*

1. Arrange your pieces as shown in the above diagram: Interior, Exterior Main, Exterior Main, Interior. Be sure to arrange directional prints with the “top” of the print facing out, towards the interior pieces.
2. Sew all your pieces together in this order, creating one long strip. Back stitch when you start and stop. Press your seams open.

3. Fold your sewn strip in half, right sides together, matching the interior ends. Pin along the raw edges, leaving a 3" space at the center of the open end (interior), for turning later.
4. On one side, mark a line 1.25" away from the seam between the interior/exterior pieces. Mark a second line 2.25" away from the seam. Do the same on the other side of the bag. These two smalls sections will be left un-sewn, creating an opening for the drawstrings.

5. Sew along the three open sides, back stitching when you start and stop. Don’t sew between the 1” opening you marked on both sides or the the 3" opening on the end.
6. Turn your piece right sides out, pulling through the opening in the interior. Gently push out the corners. Press the lining opening under 1/4” and stitch closed with a small seam allowance.
7. Nestle the interior into the exterior. Press along the top.
8. Find the 1” opening you left on each side of the bag. Mark a small horizontal line at the top and bottom of the opening. Using your acrylic ruler, extend the lines around the entire bag.

9. Sew all the way around your piece on the lines you marked. Back stitch at the start and finish. You’ll have two stitch lines when you’re done, one above and one below the 1” openings. This is the casing for the drawstrings.
Don't have a free arm on your machine? Try out this technique!

Now it’s time to make your ties. If you’re using ribbon, skip to step 11.
10. Take your fabric strips and fold down 1/4” on each short edge, wrong sides together. Press. Top stitch to secure. Fold in half lengthwise, wrong sides together. Press. Unfold, and fold each raw edge into the crease you just created. Press. Fold in half again and press. Top stitch along the open edge to close with a very small seam allowance. Repeat to create the second tie.
11. Attach a safety pin to one end of your ribbon or fabric tie. Insert the safety pin into one of the side openings.

12. Wiggle it through, passing the other opening, pulling it all the way back around and out the opening where you started.
13. Even out your the ends and tie together in a tight knot. Repeat with the remaining tie, starting at the other side opening.

Voila, you're done! Hope you enjoyed making this bag! If you make something using this pattern, I hope you'll share it in the In Color Order Flickr Group or using the #jenibaker hashtag on Instagram!
If you're a shop interested in carrying Curiosities, it can be ordered through Art Gallery Fabrics. Find your sales rep here, call toll-free (888) 420-5399, or visit artgalleryfabrics.com.
LOVE! Your drawstring bag is my go-to and I have some knit scraps stacking up as well.
ReplyDeleteCute bag, thanks for the tutorial!
ReplyDeleteOur church group has just received a large amount of beautiful knit fabrics. One of our beloved members recently passed away. What a wonderful way to put this fabric to good use! Thank you for the great idea. Joan
ReplyDelete