
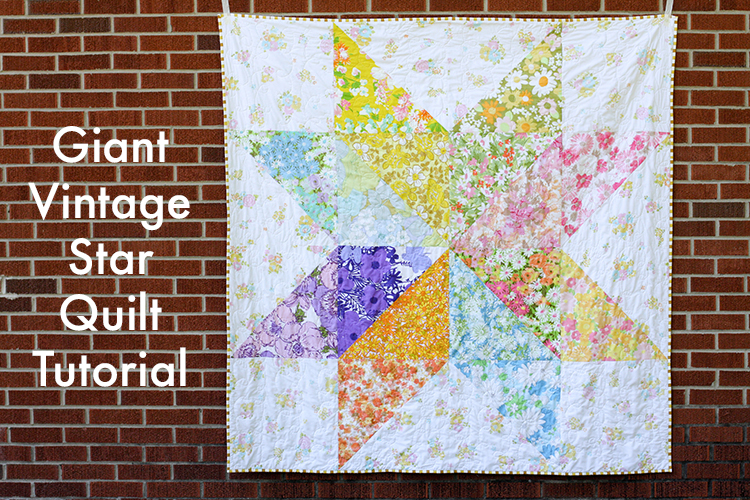
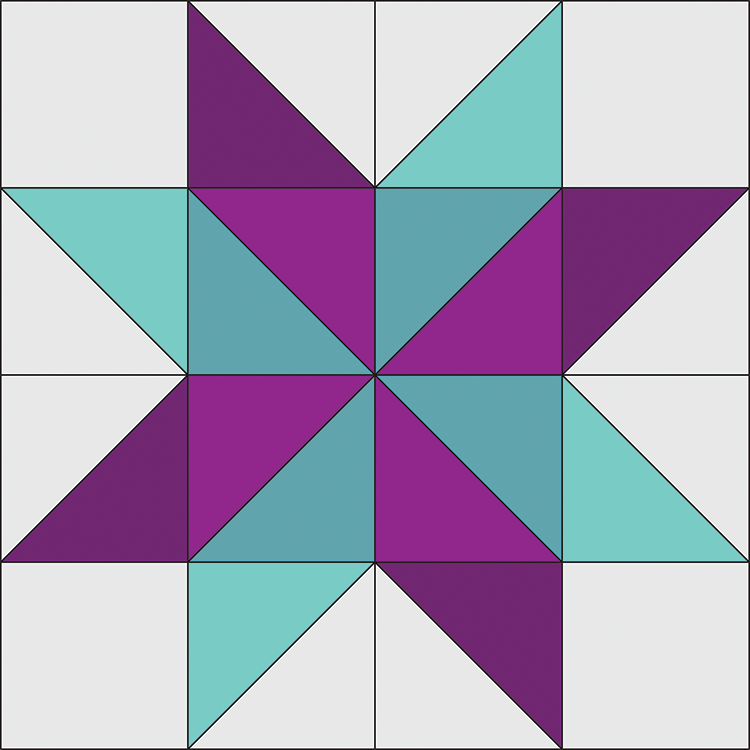
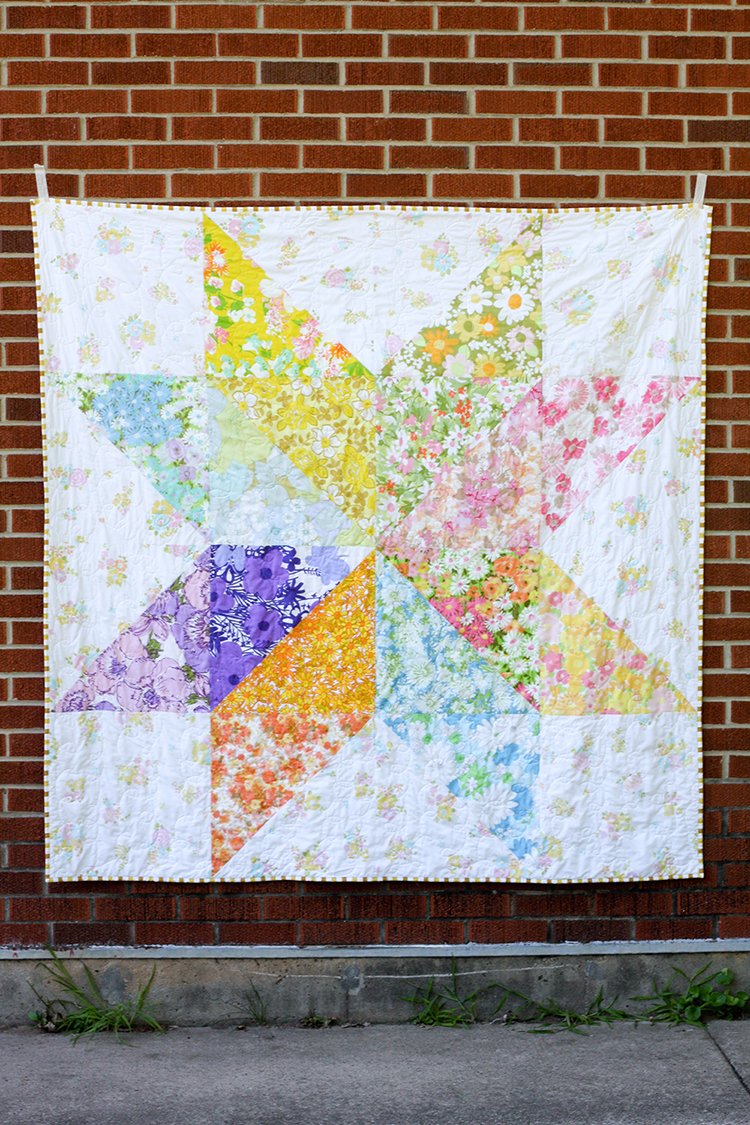
As promised, a tutorial for my Giant Vintage Star Quilt. This quilt takes advantage of a single quilt block, super sized! It takes a traditional block, the Starflower block, and makes for a very modern quilt. Perfect for beginner and advanced quilters alike. For more on my process and the inspiration behind this quilt, see this post: Giant Vintage Star Quilt.

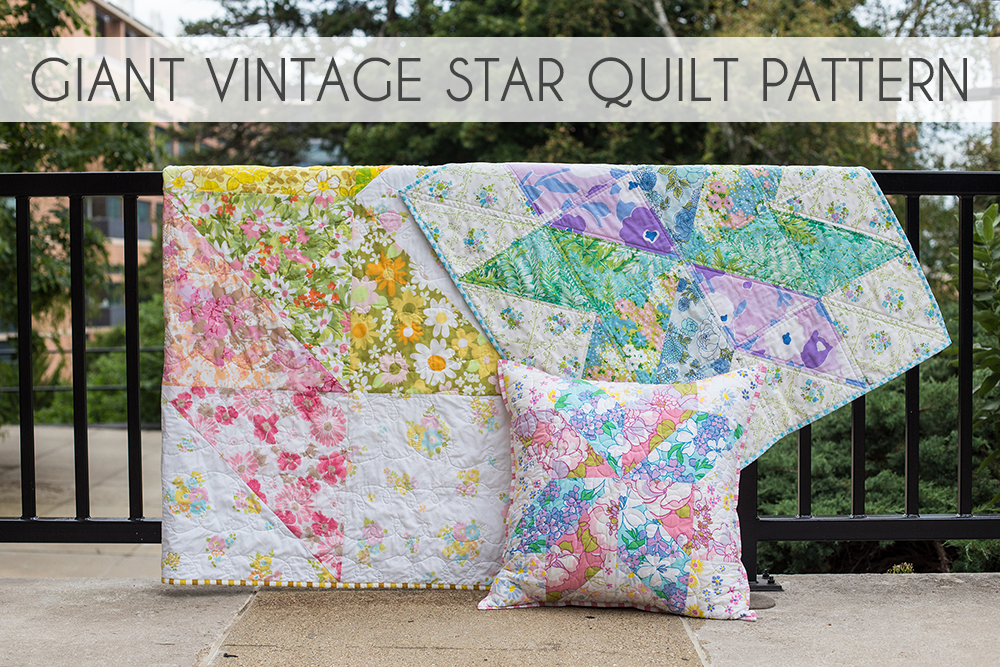
If you'd rather have this tutorial in downloadable/printed form, check out the Giant Vintage Star Quilt Pattern. It features a throw quilt (same size as this tutorial!), baby quilt, and quilted pillow. The yardage for all the different color combinations is broken down to make it easy to customize your quilt!
Find the pattern in my online shop here: Giant Vintage Star Quilt Pattern.
Fabric Shops: If you'd like to teach classes on this design, I ask that you order paper copies of my pattern for each student. You can order patterns wholesale through this form. Please refrain from teaching directly from this tutorial, thanks!
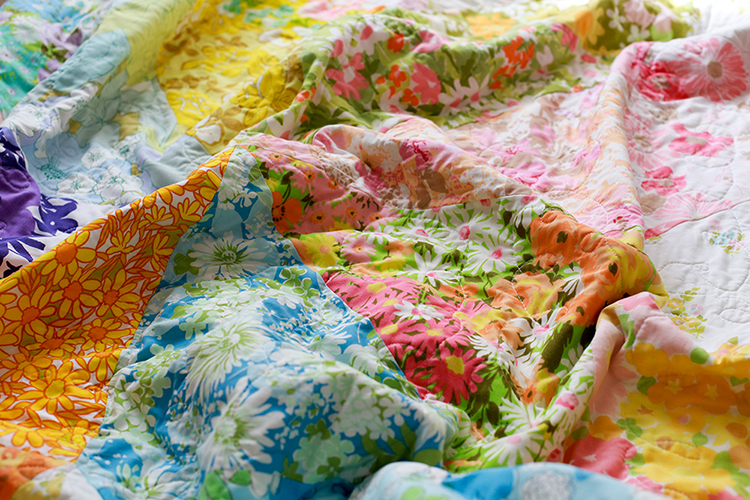
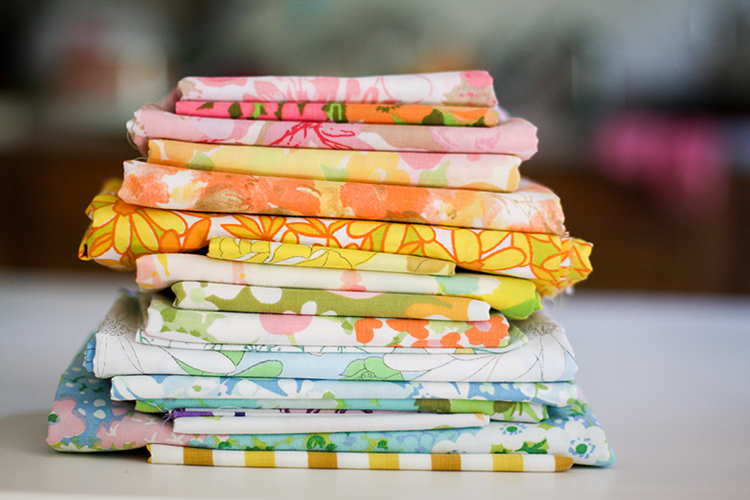
I made my quilt entirely from vintage sheets, but you can use any fabric you'd like to make your quilt! There are lots of shops that sell vintage sheet fat quarters* on Etsy, if you want to make one just like mine! If you'd like to learn more about working with vintage sheets, check out my post: How to Identify, Shop for and Sew with Vintage Sheets
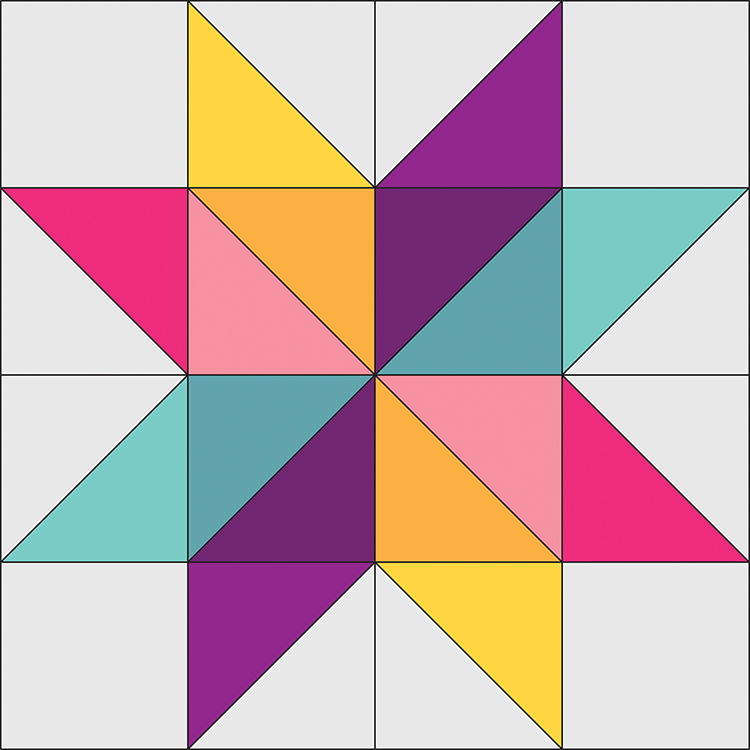
First, you need to decide what kind of color layout you'd like! You may choose to use as few as two colors or as many as eight. You could also use as few as two fabrics or as many as sixteen! I've drawn out a few options here as examples:

This is the layout I used, 8 different colors using 16 different fabrics.
A little less busy, 4 different colors.
And finally, just 2 colors.
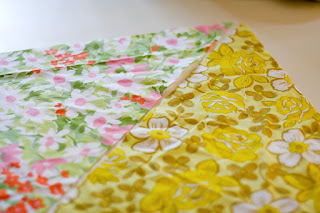
However many colors you decide on, you also need to decide on how many fabrics to use. The traditional starflower block uses a single fabric for each 'petal'. In my quilt I used one color in each petal but two different fabrics. You may choose to do whatever you'd like for your quilt!
Sewing Level: Beginner Friendly
Finished Quilt Size: 68"x68"
Finished Block Size: 17" square
Giant Vintage Star Quilt Materials:
- 8 fat quarters (minimum, use up to 16)
- 2 yards of background fabric
- 76"x76" piece of quilt batting
- 4 1/4 yards of backing fabric (or a Twin bedsheet)
- 1/2 yard of binding fabric
Giant Vintage Star Quilt Cutting:
From each print fat quarter:
- Cut (1) 18" square
From background fabric:
- Cut (4) 18" squares and (4) 17.5" squares
Giant Vintage Star Quilt Instructions:
Use a 1/4" seam allowance unless otherwise noted.
1. Before cutting, you'll want to decide how much variety you want and what kind of color scheme you'd like. That will determine how much fabric you need and how you'll construct your quilt. If you don't mind prints repeating in your quilt, you can use 8 fat quarters. If you don't want any repeats and want more variety like mine, you will need 16 fat quarters, but you'll only be using half of each fat quarter, or you can make two matching quilts.
TIP: It can be helpful when working with large pieces to use spray starch or a starch alternative like Flatter by Soak* to help keep those long seams from getting stretched out. Spray before cutting.
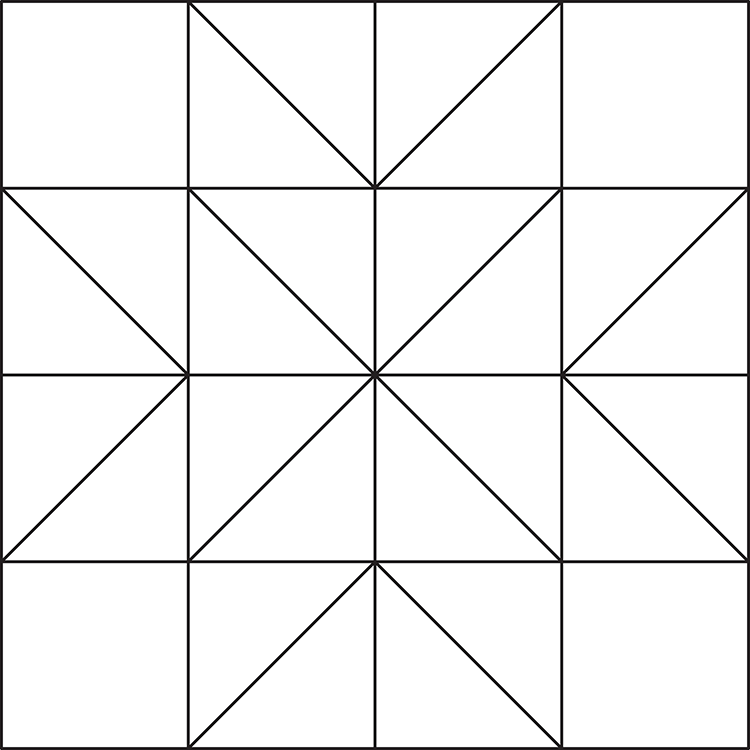
2. Think about how you want to lay out your colors. This will determine which prints you pair up together. I've included this blank quilt diagram that you can print and color in your layout if you'd like!
3a. If you're using 4 or 2 colors AND 8 fat quarters, you'll be constructing your blocks using the traditional half-square triangle (HST) method. You need a total of 8 print + background HSTs and 4 print + print HSTs. So, create 2 pairs of print + print squares, and 4 pairs of print + background squares. You can use my Half-Square Triangle Tutorial if you need help with that!
3b. If you're using 8 colors AND/OR 16 fat quarters, you'll be putting together your half-square triangles a different way. You need to cut your print squares and 18" background squares in half across the diagonal.* You'll end up with a total of 32 print triangles and 8 background triangles. Take half of your print triangles and set them aside for another project, you won't be needing them to create this quilt top. Now, pair up 8 print triangles with your 8 background triangles. Take the remaining 8 print triangles and pair them up with each other. Sew each pair of triangles together to create 12 half-square triangles.
To make that diagonal cut, I temporarily taped a 24" ruler and a 6" ruler end to end with masking tape!
4. Once your half-square triangles are finished and pressed, they may need trimming down to 17.5"
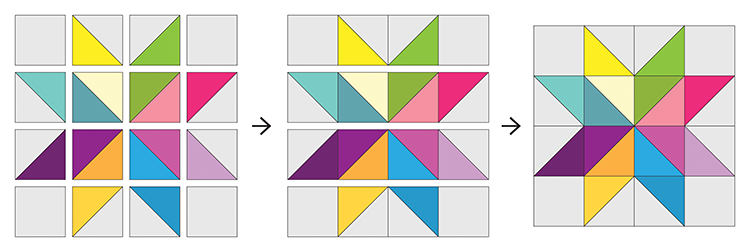
5. Lay out your blocks, arranging your half-square triangle blocks like the diagram above to create the starflower petal shapes. Use the 17.5" background squares in the corners. Sew blocks together in each row. Press seams in one direction, alternating direction every other row. Sew rows together. Press seams open.
6. Making Backing: Cut backing yardage in half. Press. Trim off the selvedge and sew your pieces together lengthwise. Press seam open.
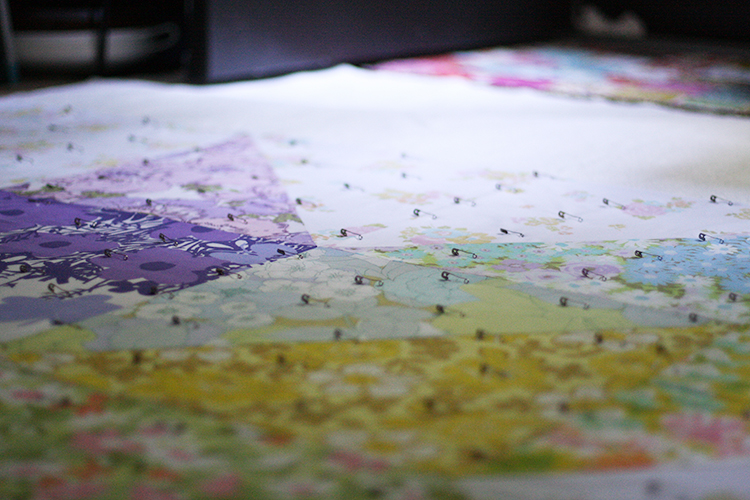
7. Basting: Using masking or painter’s tape, tape the backing to a clean, hard surface, right side down. Spread out your batting on top of the backing. Smooth out any wrinkles. Carefully spread out your quilt top on top of the batting, right side up. Pin your top, I like to use curved safety pins, spacing the pins a few inches apart. Make sure that your pins are going through all three layers.
8. Quilting: Quilt as desired, by machine or by hand. Trim away excess batting and backing fabric.
9. Binding: Cut yardage listed for binding into 2.5” strips. Trim off selvedges and sew your strips together to form one long strip, press seams open. Fold in half lengthwise, pressing with your iron as you fold. Attach binding using your preferred method. For a detailed tutorial on attaching your binding to both sides by machine: Machine Quilt Binding Tutorial.
I hope you've enjoyed this tutorial! I have lots of other tutorials for everything from quilts, pillows, bags, and holiday items to informational series and techniques. Find all my tutorials here: Tutorials. My online shop is filled with patterns for quilts and bags. Find my patterns here: Jeni Baker Patterns
If you make something using one of my tutorials or patterns, I hope you'll tag me @jenib320 and use my hashtag #jenibaker on instagram!

Liberty Lawn Giant Vintage Star Quilt
Looking to experiment more with super sized blocks? Check out the Vast quilt from my book, Patchwork Essentials: The Half-Square Triangle.
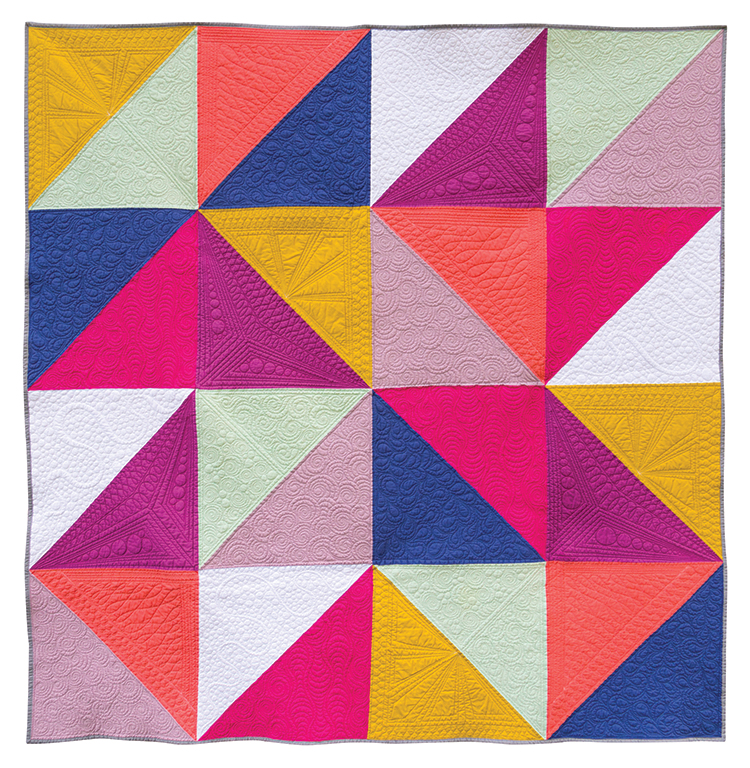
Photo © 2015 Lauren Hunt for Lucky Spool Media.
Happy Quilting!
*Note: Any links marked with an asterisk in this post are affiliate links. This means if you click through and buy something, I make a small commission, at no extra cost to you.
Great tutorial! Love this quilt. I can't wait to make one :)
ReplyDeleteWow this looks fabulous! Thanks so much for the tutorial :-)
ReplyDeleteVery fun! Thank you so much!!
ReplyDeleteI love your different color options. Hmm, I can't wait to go through the stash tonight (and ignore the pile of unfinished-ness!). Thanks for sharing the tutorial!
ReplyDeleteJust magnificent! I love your colour options, the hard part would be deciding which one...
ReplyDeleteI cannot wait to make this. I love it!
ReplyDeleteI am totally making one of these; thank you so much!
ReplyDeleteOh gosh, another "Gotta make one" quilt! I am going to pick my colors/fabrics today and start this within the week! Can't wait, I LOVE this!
ReplyDeleteI can't wait! I just scored a big stack of sheets!
ReplyDeleteI'm so excited to do this! I'm headed to pick out some fabric now!
ReplyDeleteSo beautiful! Love your color/fabric choices. I've never been able to find anything in vintage purple. Love that fabric you've used! Jenn
ReplyDeleteGreat tute, Jeni! LOVE the quilt. I've been dying to make an entire quilt filled with these, and this would actually make a great backing, besides being great on its own.
ReplyDeleteAny ideas how to make this bigger, say 80" or 90" square? Use larger cuts to make larger triangles? Oohhh, or even a border made up of smaller stars!
This is perfect! My bee members made star blocks for me, and I'm going to use your giant star idea for the back!!
ReplyDeleteHow clever! I bet this turned out beautifully
DeleteThank you for sharing this. I'm really excited to give it a go.
ReplyDeleteGreat tutorial - thank you.
ReplyDeleteCan't wait to try this! Thanks!
ReplyDeleteThanks for this! It would be a great design for a quilt back, too.
ReplyDeleteThis is so beautiful!!
ReplyDeleteYAY!!! This is so awesome Jeni! Can't wait to make one!
ReplyDeleteI already brought up all my vintage sheets from the basement and before I cut into them, I wanted to ask-- Will the quilt be the right size for a twin bed?? Not sure what the standard quilt size for a twin bed is. Can't wait to make this!! :o)
ReplyDelete-Jenny
always best to measure the bed so you can have what you want. That way if the mattress is deep, or you want a long drop you have it covered!
DeleteToni
To measure - get in the bed. Using a 120 inch tape measure, put the end over the side about 6", have it travel to you, gently tuck it to you then over your back, and tuck gently then continue to the other side of the bed and over 6". For the length, start at your chin then all the way down to your feet and add 12". This insures you can "wrap" your feet on a cold night. And YES I do use my quilts for sleeping. No religious icons in my house. All my quilts get loved.
DeleteThis is so lovely! What a wonderful idea! Thanks for sharing!
ReplyDeleteI would LOVE a kit for this..even if I have to supply my own background and backing!
ReplyDeleteThank you! I've been thinking about this ever since you posted your picture! I'm ready to begin.
ReplyDeleteYour quilt is lovely Jeni! A friend recently gave me a pile of vintage sheets and now I know what I'll be doing with some of them. Just need to finish up a couple of UFOs before I can start another project. ;)
ReplyDeleteThanks, Jeni. I can't wait to get started!
ReplyDeleteFantastic! Thank you for the tutorial. It looks perfect for snuggling.
ReplyDeleteLove! I might choose a slightly different block style but I love the thought of making a quilt that is one giant block!
ReplyDeleteJenny - Almost! It's the right width, but about 20" too short! You could add a fun border to make it a little longer! :)
ReplyDeleteyay! this is fabulous jeni! :)
ReplyDeleteDon't you still need to cut the large squares into triangles if you're only using 8 FQs? If you make them the traditional way (sewing diagonally between two squares) the colors wouldn't be paired up correctly since you need each print to be with the background and with another print. Maybe I'm just misreading your instructions.....
ReplyDeleteLOVE this and all the options to put it together. Thanks for the tutorial. So each square made up of two HST measures at 17.5" when it is done???
ReplyDeletecjnid AT imaxmail DOT net
I've been looking around for quilt patterns and ideas like this! So traditional and pretty! This is so beautiful! I wish I would have picked this for my first quilt instead of finicky hourglass blocks, eep! This is definitely on my to do list now!
ReplyDeleteThanks so much for sharing :D!
i have a friend that would like a picnic quilt. i'll probably make it bigger than yours, but i had considered making just one giant star in the center. we'll see when i get to it...
ReplyDeleteThis is fabulous. :)
ReplyDeleteI saw this quilt on a blog today and was inspired to make one for myself. Silly me for not reading your tutorial first, but I think I did OK!
ReplyDeletehttp://www.flickr.com/photos/7423291@N04/6100677691/
I'm almost finished with the first of 2 quilt tops I'm making using this tutorial. Yours is GORGEOUS. :)
ReplyDeleteJeni, I know you made this a while ago but I really want to make one for my niece in college. I just have a question on the HST's. Can the quick piecing method (where you sew on either side of the center diagonal line of a square and then cut) be done for these large square? Thanks!
ReplyDeleteThis is so cool. I love it! I especially love how you gave examples of how you can use different numbers of fabric colors. Thanks so much for this tutorial.
ReplyDeleteSo glad I found you...I just want to tell you I became a follower and that I just LOVE your giant star quilt. I will add this to my long list of things I want to make and if I ever get around to it, I will definitely use 16 colors (like you did).
ReplyDeleteThis is a fantastic tutorial. I love it and i would be great for coordinating colors! I do have a question though. How come you press toward the darker fabric instead of pressing the seams open? I notice a lot of people who do both. Which is better?
ReplyDeleteMy email is Laurenlee653@aol.com. Thanks :)
wonderful quilt! I will have to give it a go, plus have some fabrics ready for the spareroom quilt.
ReplyDeleteDo you use a program for quilt drawing, only I draw things out on paper. Kxx
Beautiful! Can't wait to try. Thanks for making this tutorial!!
ReplyDeleteI just found you from AmyLouWho and I'm so excited about your giant star quilt! I was going through my stash the other day and realized that I have several large scale floral and other big prints that would be lost if I cut them up for traditional sized blocks, but they would be perfect for a giant star like yours. Thank you so much for sharing this! I'm bookmarking your directions so I can find this again when I'm finished with the Drunkard's Path quilt I'm working on right now. :-)
ReplyDeleteThanks for sharing! Just what is needed for some foster kids quilts-bright & cheery! Cut some down to 11" blocks for little ones too.
ReplyDeleteOh, I need some advice, please.
ReplyDeleteThe fabrics that I want to use are only 6.65 inches long by 44 inches wide.
So, my squares can only be 6 inches finished. Ick. Is this scenarios viable? thanks,
Dutchie in Henderson, Nevada
sophie9910@aol.com
I just made this quilt top last night and love the results. The tutorial was easy to follow. Thank you for the great instructions and inspiration. -sylvia
ReplyDeletepsjvyp1@verizon.net
I hope you can help me. I love the tutorial and I think I can do it. (I am a new quilter) I want to just use 2 colors and make it for a niece in her school colors. Can you tell me how many yards of each color I need. I am math challenged!! Thank you so very very much GrandmaK
ReplyDeleteI don't know how to put my Email address in I guess I am technically challenged also LOL. I will try again kay.m.adams@gmail.com
ReplyDeleteNice tutorial - thank you! I have made this quilt as a crib quilt with my blocks finishing to 12 1/2 inches, so you can really make them any size you like. It is darling in both pastels and/or brights for baby. Happy sewing!
ReplyDeleteFabulous! Just as soon as I get done with 3 other projects.... I can't wait to make it.
ReplyDeleteI'm making one now in red black and white! It's going great! It's my first quilt ever! THANKS for this great page!
ReplyDeleteI machine stitched the top of my binding on my quilt using your (this) pattern last night. I'm saving the hand-stitching for later in the week when we'll be on a road trip. I love it! Thanks for the tutorial.
ReplyDeleteI have been searching for a pattern to make my 19 yr old artist (daughter) a quilt.. This just won my heart... She will love it! Planning on using bright colors in the colorwheel!
ReplyDeleteLove your tutorial.Thanks
ReplyDeletePieced my top together last night, can't wait to finish it and upload a picture, your going to love it!
ReplyDeletei love the tutorial! i plan to make one out of a layer cake. It'll be smaller, but equally fun! thanks for sharing.
ReplyDeleteJeni, my quilt is finished and I have posted a picture on my flickr page, please take a look at it! Thank you so much for the tutorial. MsSpy (Lisa)
ReplyDeleteI made it, and I love it! It is my first quilt top to complete, Thanks for the pattern and tutorial! I really did cut it out and sew it together in one evening. You can see it here on my blog, www.addictedtoneedleandthread.blogspot.com
ReplyDeleteThis is so lovely! It would be a wonderful backing as well!
ReplyDeleteI made one! My fabric choices weren't the best, but I got the 8 center points to line up, and everything! My first quilt-thing, ever. Thanks for the tutorial!
ReplyDeletehttp://quilted-city.blogspot.ca/
ReplyDeleteBeautiful choice of colors and such a simple and sweet pattern. Nice job.
In step 5 you state "press your blocks toward the darker fabric". Did you mean to say "Press your seams toward the darker fabric"? Just trying to clear up confusion. I thought I knew what you meant, but newbies might not. This looks like a fun project that I am adding to my ever growing bookmarks list. Now I wish I had saved all those patterned sheets I donated to charity over the years. Oh well, I'll have to go back and buy someone else's.
ReplyDeleteMy heart breaks for the Newtown, CN. families. Hug your children close. N
Hi Jeni-- I love this and I"m looking forward to using some special fabric I have. How did you quilt it? Any particular pattern/design?
ReplyDeleteJen
love it. Jen, I could use my retro color pack..
ReplyDeleteWow, I just popped over here after reading today's post about your Aurifil Block, and the latest articles you've been in. Looking forward to seeing if I can get ahold of the UK Magazine (whoops, I jsut saw I can get it digitally, nice eh?) I just love this Giant Vintage Star Quilt! Looks wonderful with the vintage sheets. Really cool to see your color theory too :D
ReplyDeleteI love this Star Quilt. I want to make one. This is perfect with big blocks...
ReplyDeleteStephanie
What I ended up doing is Cutting Fat Quarters in half, I am assuming it means square up your FQ to 18", because a FQ is 18x22. please advise..
ReplyDeleteI've had this tutorial bookmarked for well over a year now and I finally finished making it this week. It's going to be a wedding present for my brother and sister-in-law. I can't wait to give it to them!
ReplyDeleteI have made two of these stars now and have one more to go!
ReplyDeleteHi Jeni, I'm a P&Q tutor in Belfast and would like to ask your permission to teach this quilt top my class? Kind regards, Judith xo
ReplyDeleteThis is totally wicked (that's good if you aren't from England)!!! Love it and thank you so much for this. I'm just about to pin it.
ReplyDeleteHi Jeni! Love this tutorial so much, I finally shared it (and the Warm/Cool quilt along) with my blog readers. I linked back to you. Thanks for your inspiration!
ReplyDeletehttp://littlebitsofeverythingqce.blogspot.com/2013/08/a-few-of-my-favorite-quilty-things.html
Rachel
Awesome pattern! Plus a great stash buster, which is what I'm doing at this point. I want to buy new fabric but can't sanction it with all of my stash that's quickly becoming Vintage LOL Thanks for sharing!
ReplyDeleteThanks, that pattern has saved my desire to make a quilt for each of my two sons girlfriends. This is super cool! Thanks :)
ReplyDeleteI found this while surfing the Internet and it seemed perfect for the 16 fat quarters I had on hand. I'm a beginning quilter and I made a mistake that maybe others missed because they know what they're doing. :) I cut the 17.5 inch background squares in half and I realize now that I should have used the 18 inch squares - like the prints squares. sigh... Maybe you could spell that out in your directions for future beginners. :) ps - great pattern!!
ReplyDeleteI have a basket of fun black and white prints that would be perfect for this. I've been looking for just the right paten to use them on...
ReplyDeleteThis will be great for my large stash of 70s sheets, thank you!
ReplyDeletethe easiest quilt top I've ever made, didn't use any vintage fabrics at all just stuff from my stash, tutorial was so easy to understand, thank you. Start to finish in under 2 hours, might just have to make another
ReplyDeleteLove this pattern! I had been storing my vintage sheets for just the right pattern and when I saw yours, I knew this was it! I have only the top done so far, but have shared with my readers and linked to your blog and tutorial. Thank you for sharing such a simple yet stunning pattern. I have two more cut out. :)
ReplyDeleteThank you!
ReplyDeletethank you Jeni, ... it is sooo cute - and here is my version:
ReplyDeletehttp://zickizick.blogspot.de/2014/11/big-star.html
HUGS Zicki
I saw this block on another blog and it sent me to you. Thank you so much, I LOVE IT!!
ReplyDeleteThis comment has been removed by the author.
ReplyDeleteI love this quilt pattern and have used it several times for various gifts but my favorite one is the one I made for our king size bed. I used the Downton Abbey line and added some borders with smaller stars and it came out so stunning!! Thank you for this wonderful pattern!! Here is a link to my flickr page so you can view the finished product!! https://www.flickr.com/photos/27630053@N08/15520959913/
ReplyDeleteI have found great star tutor via http://preply.com/en
ReplyDeleteThanks so much for sharing your pattern. My grandson just went in to the Navy and would like a quilt instead of what the Navy offers as a blanket. Will see if this one will be soft and homey unlike his other!
ReplyDeleteThe background fabric is too short
ReplyDeleteNeed at least 2 yards
Can't get 8 background squares out of 1 1/2 yards
You're right! My apologies, thank you for catching that.
DeleteThank you for the great tutorial and inspiration! Here's what I fumbled together.
ReplyDeletehttp://i1332.photobucket.com/albums/w606/ericamt82/Mobile%20Uploads/2014-02/Finished%20Quilts/20161221_153902_zps7m5thyzf.jpg
That's really beautiful! The fabrics are really great!
DeleteThis quilt drew me to your blog first! I've made this and have pinned it, but ran out of pins with only half completed. I was wondering how to quilt it? It looks like you have used a free motion design. I think I should practice on a few single squares that can be made into potholders until I get out to the store.
ReplyDeleteI did some simple free motion loops!
DeleteI love that I can show off my big favorite prints. Thanks for this and sorry I didn't see it sooner!
ReplyDelete