
 Happy Wednesday! I'm excited to share my next project made with the new Cricut Maker*. Find my review of this machine from last week here.
This post is sponsored by Cricut*, all opinions, images and text are my own. I've used affiliate links in this post (noted with an *), which means if you click through and buy something, I make a commission, at no extra cost to you.
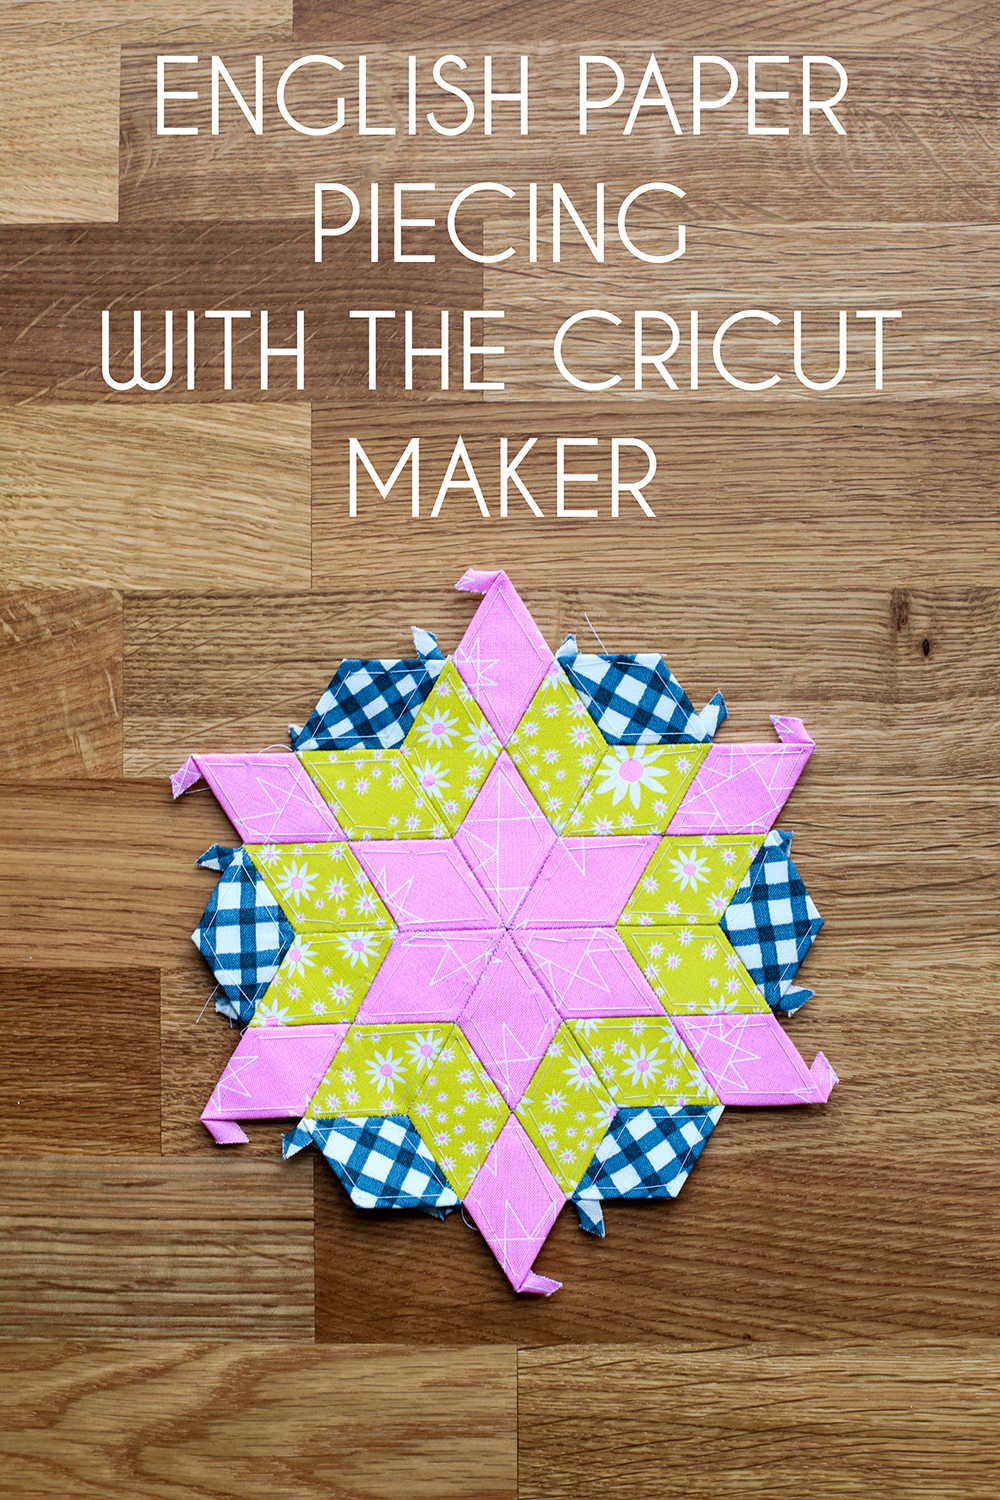
 After spending some time with the machine, I got to thinking how perfect it would be for working on English paper piecing (EPP) projects! I could have the machine cut both the paper templates and cut the fabric pieces to size. I know there are a lot of ready-made paper pieces available now, but I had a lot of fun coming up with my own design to make an iPad case a few years back (see that post here). The downside to making something unique is having to cut out all the pieces. Enter the Cricut Maker*!
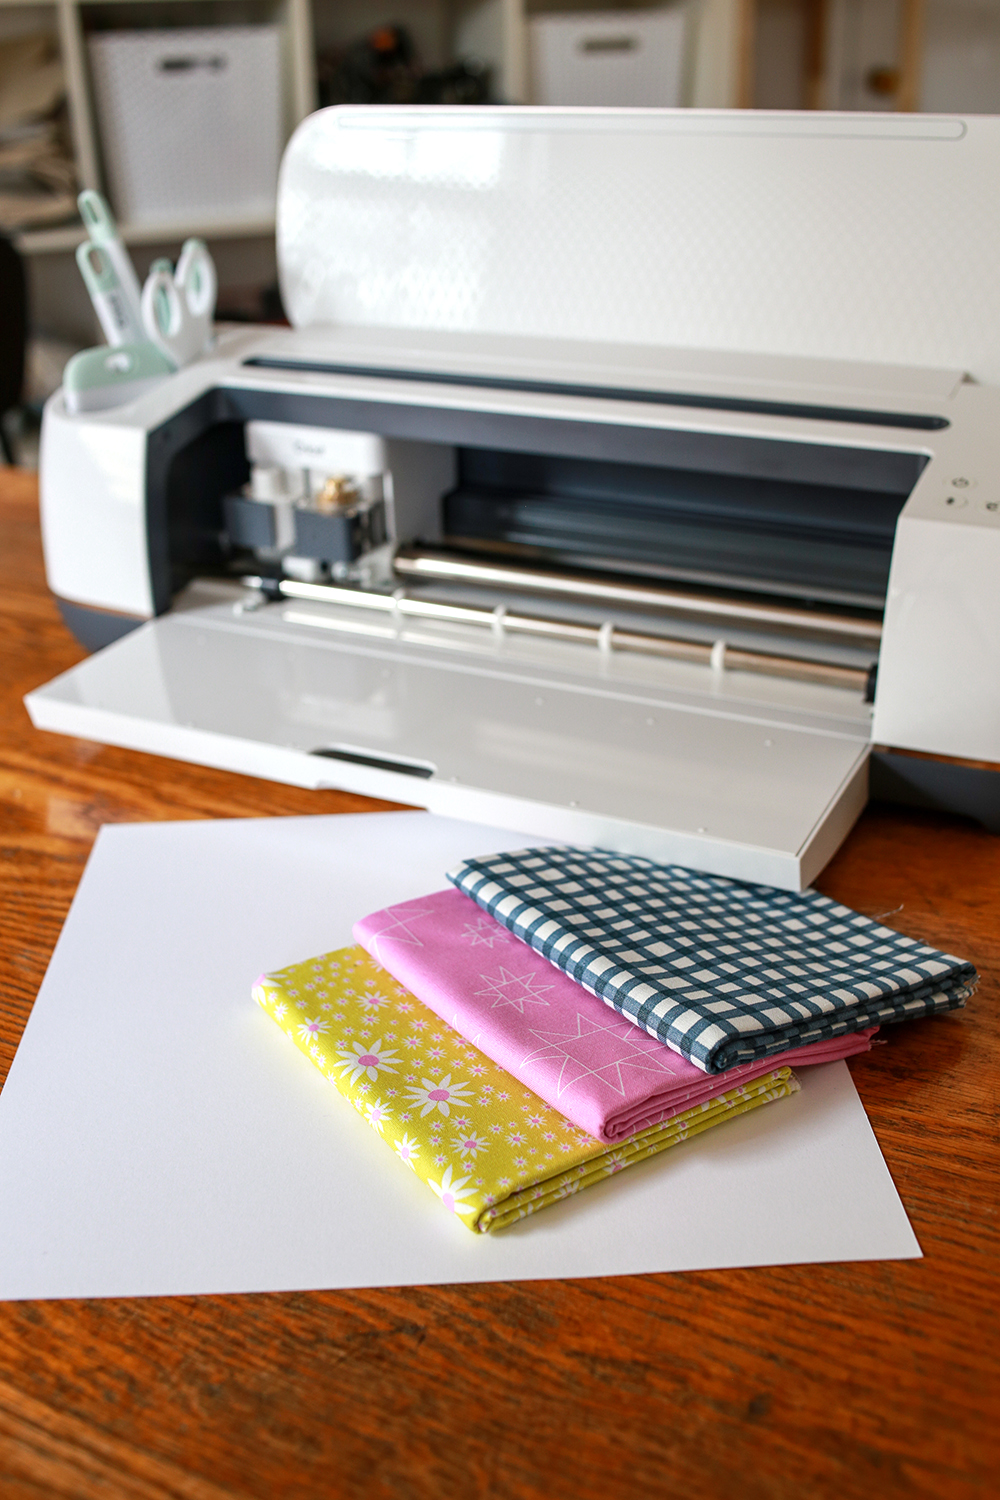
I was glad to finally have an excuse to cut into some prints from Daisy Chain by Annabel Wrigley* for this project.
If you're new to English paper piecing, I highly recommend All Points Patchwork by Diane Gilleland*. It's a great resource, especially if you're interested in designing your own blocks!
Again, I made a video showing how I uploaded the images that I used (available for you to download below), cut the paper pieces and fabric pieces from start to finish.
Materials Needed for EPP Block:
- 3 fat quarters quilting cotton
- Medium-weight cardstock (11"x11" sheet, or two 8.5"x11" sheets)
- Coordinating thread
- Hand stitching needle
1. Download the image files for this project: Paper Diamond Template and Fabric Diamond Template.
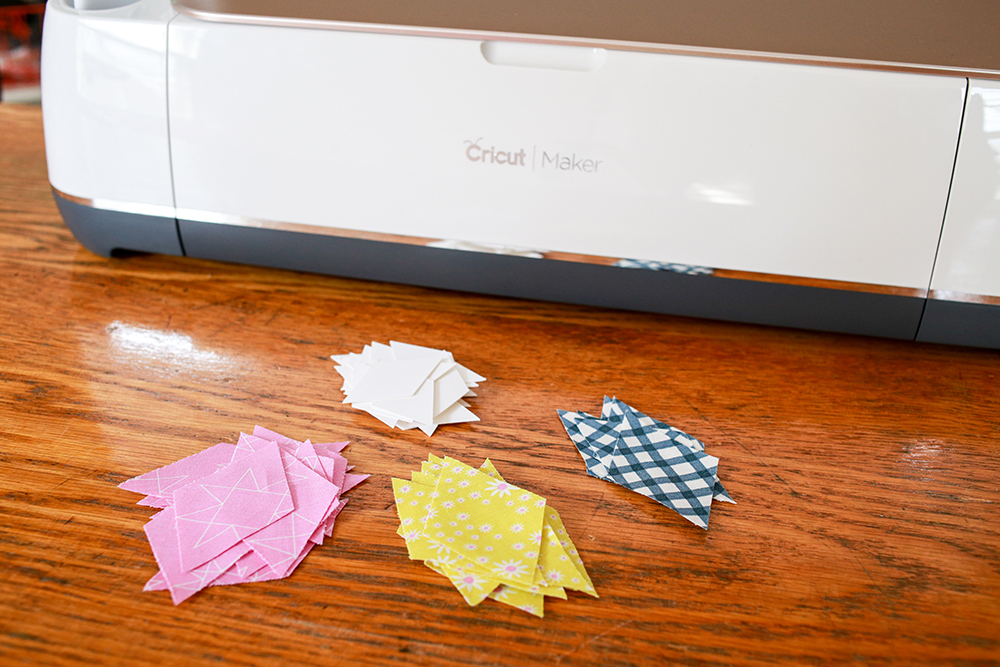
2. Using the Cricut Maker* machine, cut out 30 paper diamonds. From two fabrics, cut 12 diamonds each. From the third fabric, cut 6 diamonds. (Here is the tool set* I was using in the video.)

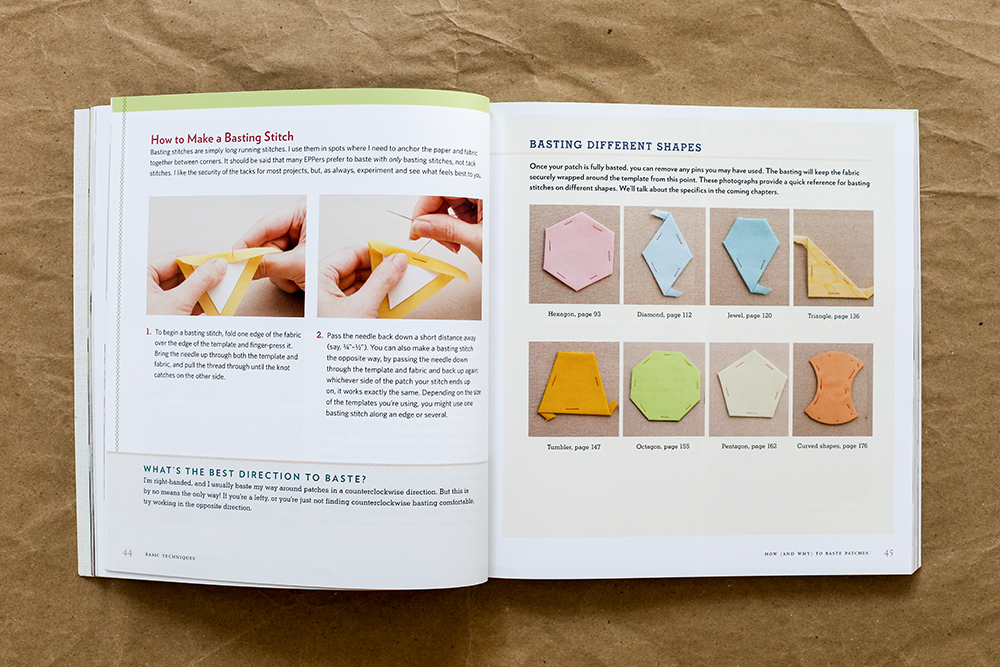
3. Baste diamonds using your preferred method. I hand stitch my fabrics in place, going through the paper. You could also use a glue pen!

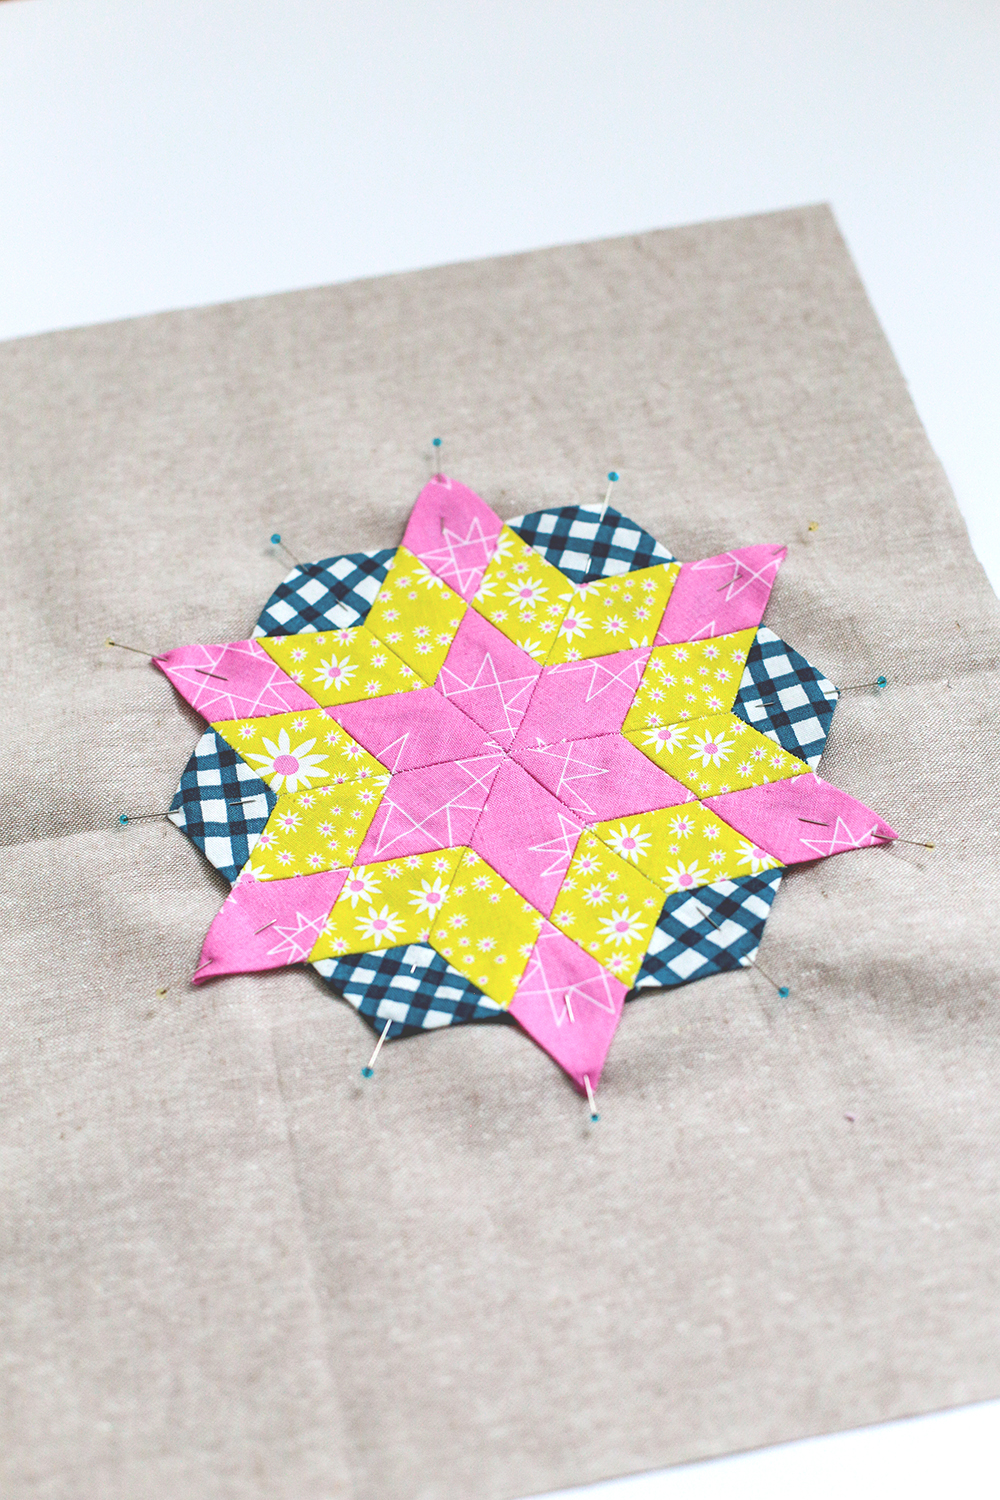
4. Arrange your basted diamonds using the photo above as a guide.
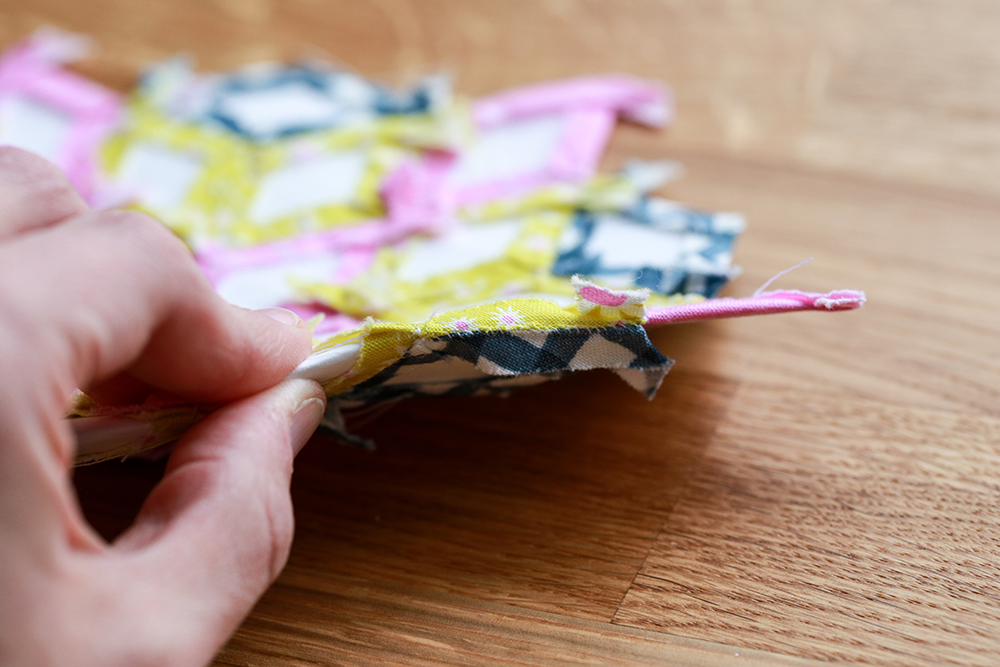
5. Begin hand stitching your diamonds together. I use a simple whip stitch, but feel free to use whatever hand stitch you're comfortable with, just be sure not to stitch through the paper templates.
6. Press block well from both the front and back. Snip basting threads and gently remove papers. Give the block another good press.
7. Make more blocks for an entire quilt (with additional pieces in between motifs for filler, or applique block onto a bag, pillow, or even a dishtowel! My favorite attachment method is a simple top stitch along the outer edges of the block.
Here are a few ideas for what to make with your block:
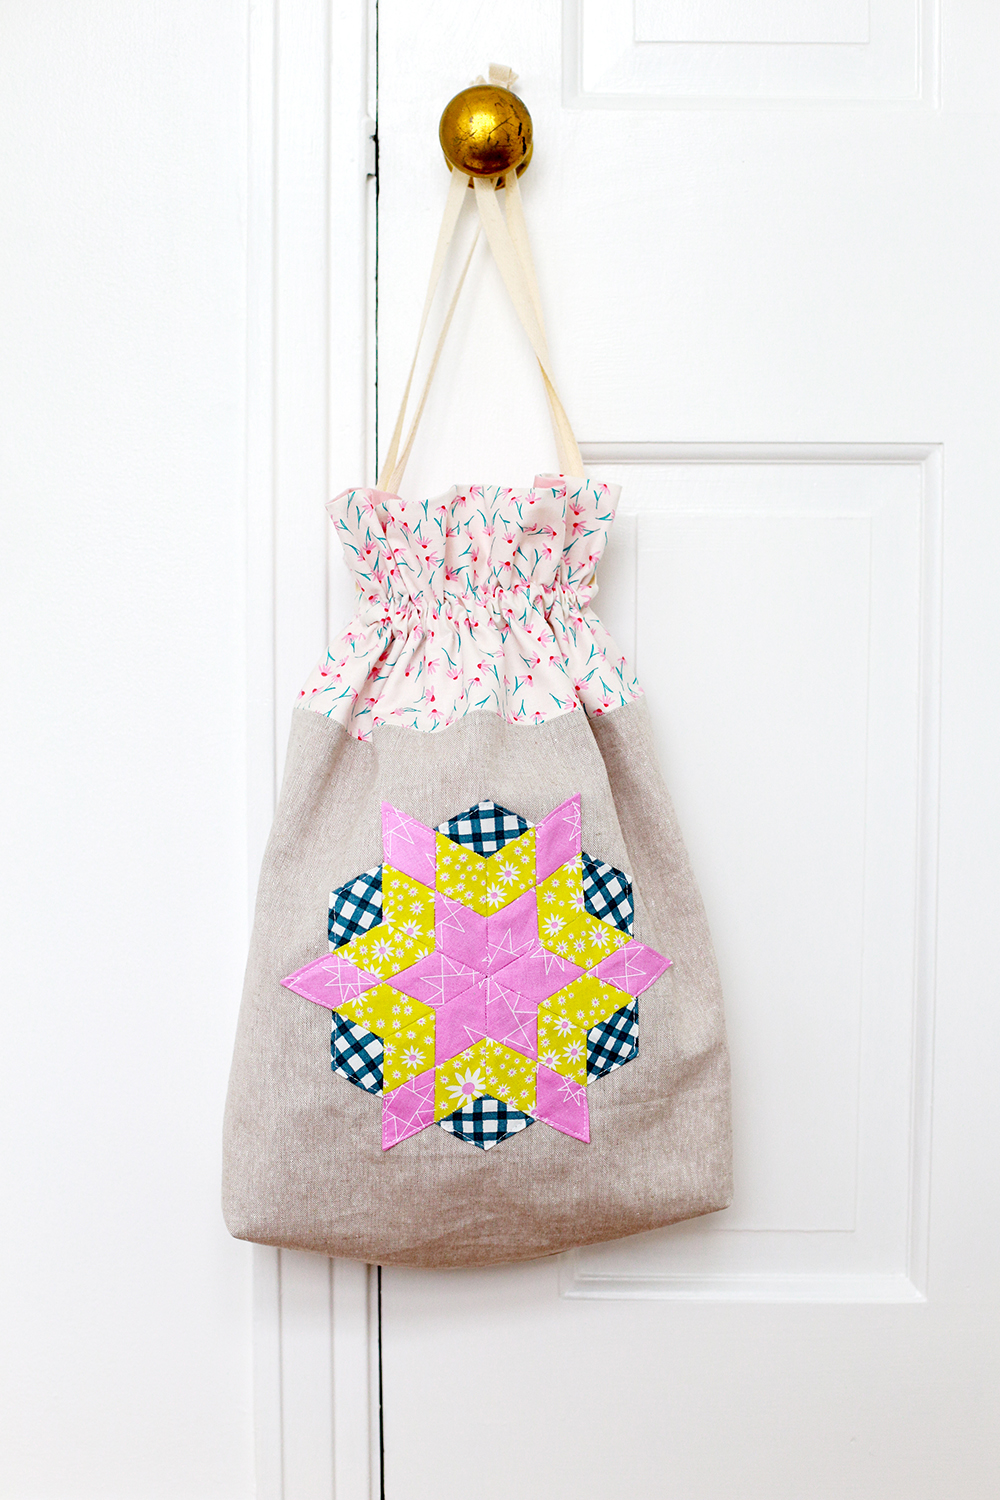
I used my block to spruce up a simple Lined Drawstring Bag! This is the Artist size bag. (pattern)
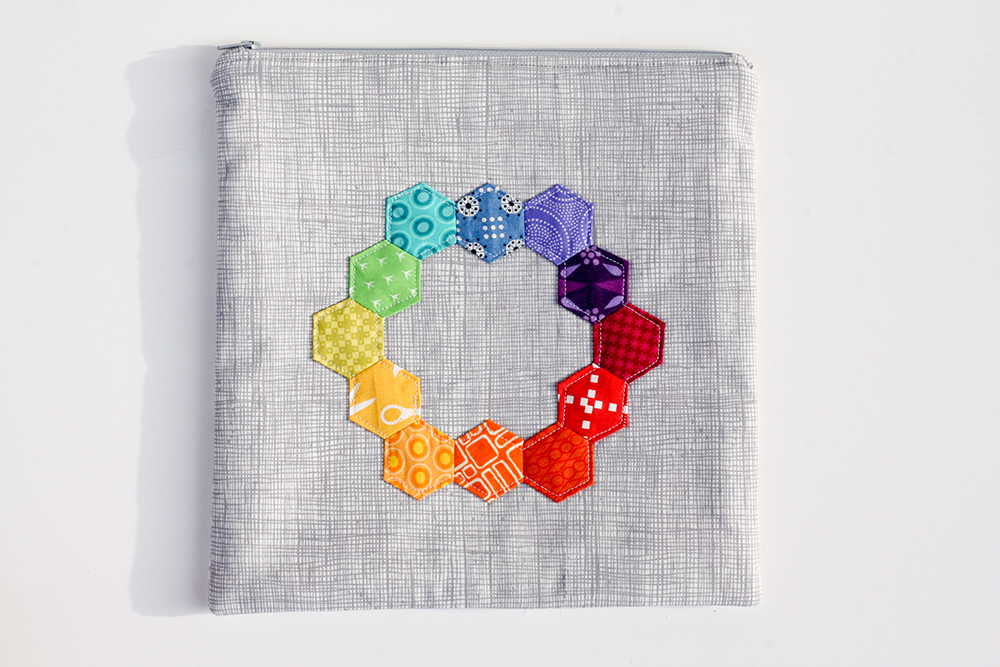
I love using applique blocks on pouches, like this one I use for embroidery projects.
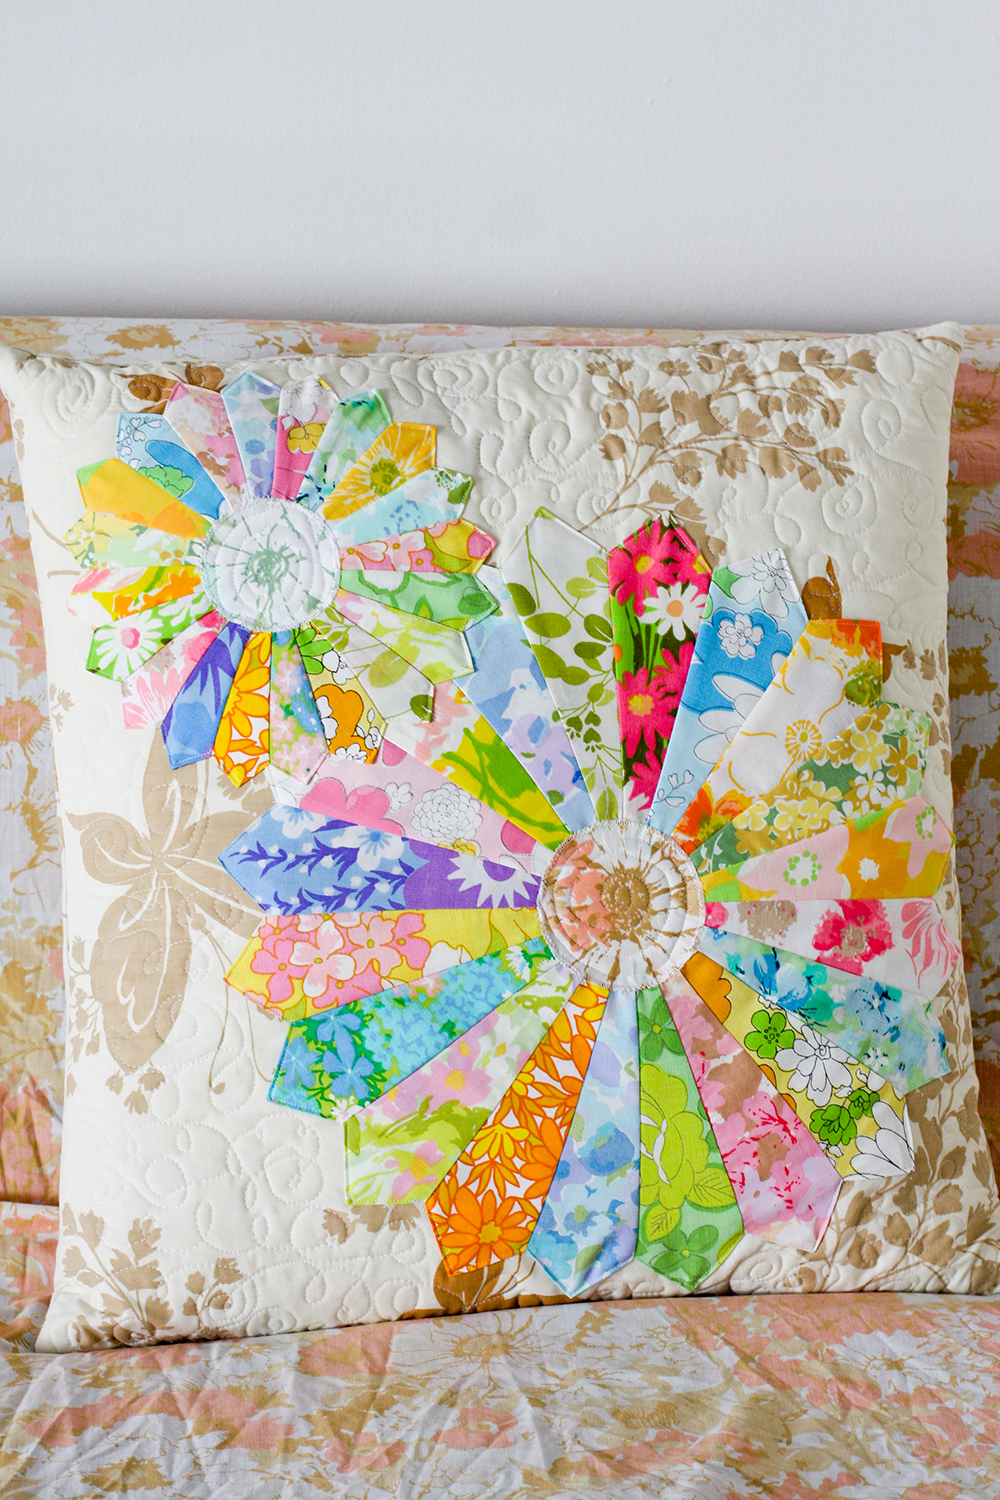
Make a few and stitch them onto a big pillow.
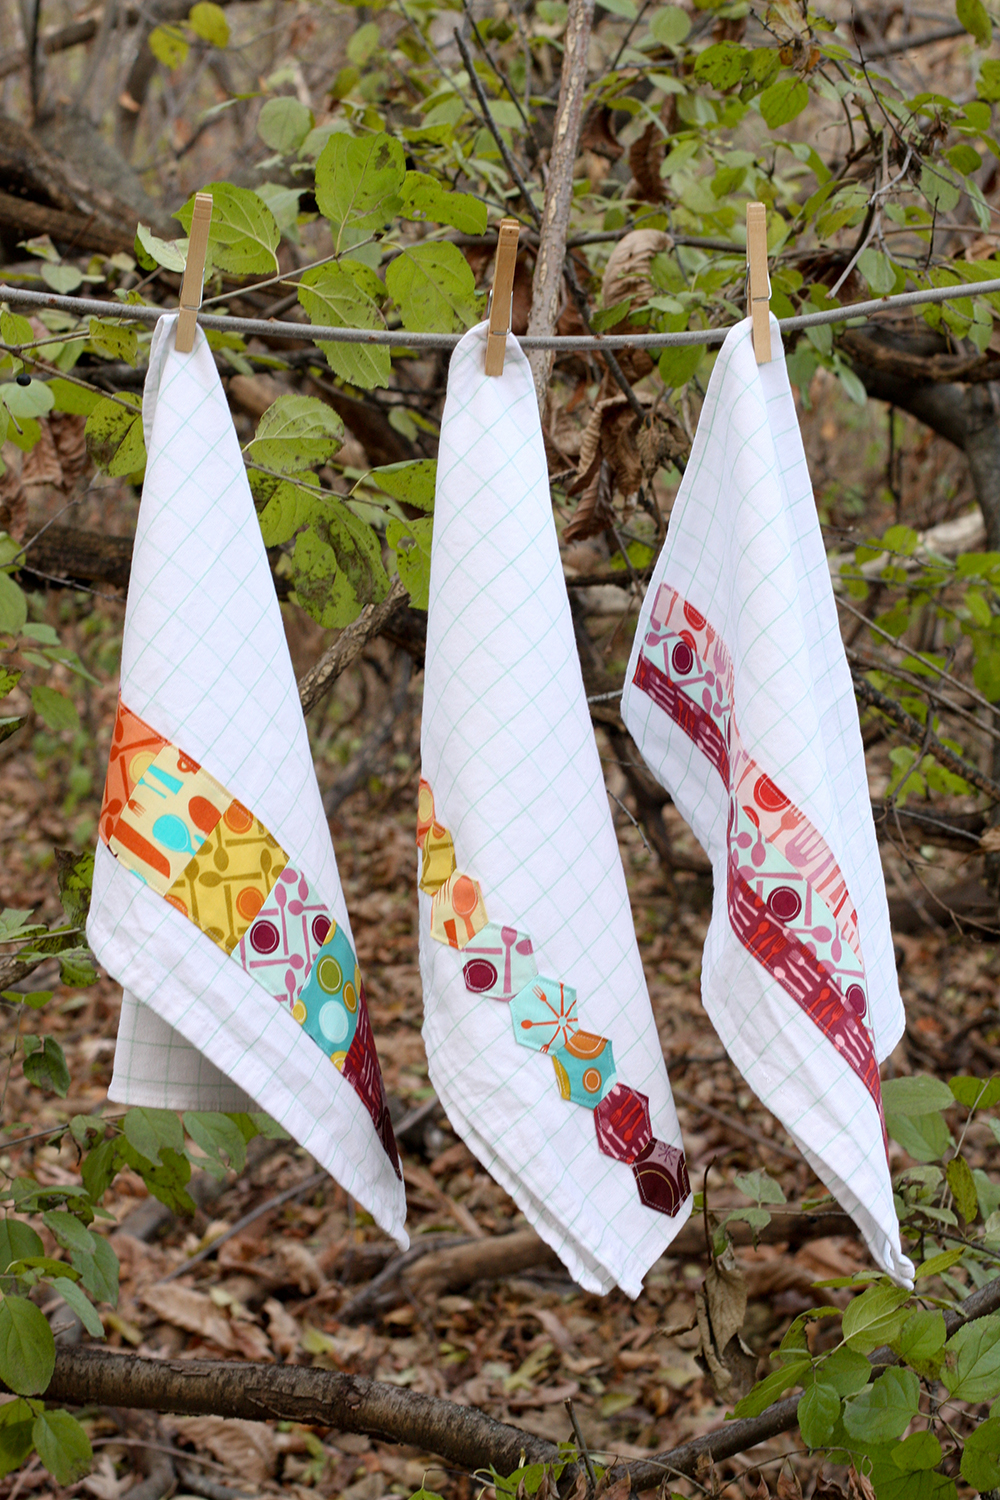
Or, make a bold and colorful dishtowel! (tutorial)
Happy Quilting!
Adorable projects!
ReplyDeleteNice to see how much fun you are having with the Cricut. Love that big pillow.
ReplyDeleteHi Jeni,
ReplyDeleteNow that you are in the tri-state area have you considered teaching a class at Gotham Quilts? It's in midtown Manhattan. It's a vibrant quilt shop. Great fabrics and classes.
We'll see! I'm still settling in to our new area, I haven't decided how much I'll pursue teaching here!
DeleteIt would be a dream come true to take a class with you teaching.
ReplyDeleteYou're too kind! :)
DeleteThis so so awesome, Jeni! I totally need to try this for EPP!
ReplyDeleteI just cut out the files for the template on my Cameo 4 and I replicated across the page and they fit perfectly on 8.5x11" cardstock and perfect. It yielded 24 diamonds per page. I can't thank you enough for sharing the files. Now to get busy going through my scrap fabrics and choose some pretty ones to make some quilt blocks.
ReplyDelete