Moving Forward

Monday, June 29, 2020

I shared this on Instagram earlier today, but I want this list to live permanently here on my blog too. This is how I plan to continue working in the quilting industry going forward:

1. For collaborations and partnerships with brands, I will be evaluating them in a different way. It can no longer be just about whether it's a good fit for me, but also how these companies behave and contribute to our industry. Is the brand committed to providing opportunities for BIPOC? Is the compensation equitable?

2. For teaching/speaking jobs, I'll be considering who the other teachers/speakers are. Is the event accessible and safe for a diverse range of makers? Am I adding something to the conversation or event, or would my spot be better filled by someone else?

3. Shop intentionally. This has been something I've been focusing on in all aspects of my life. I intend to be more selective about where I spend my money in the industry. I'll be focusing my dollars on small business, brands that show good social responsibility, and on products/businesses by BIPOC.

4. Share my experience and knowledge. I don't work on much outside of my pattern business these days, but I have a lot of experience in the industry that I think could be put to better use in service to our community. I'm not sure how exactly this will manifest yet.

5. Highlight your work. I absolutely love seeing your projects and I try to comment on every post I'm tagged in. I intend to make a better effort to share your projects and use my platform to highlight the work of other makers.

6. Speak up. I am a people pleaser at heart, and I generally avoid confrontation. I acknowledge that operating in this way is a result of my privilege. I will continue to speak up for what is right and amplify causes I feel strongly about. I will work to make my feed/blog a safe space. I take comment moderation seriously, and I will continue to. Hate and racism are not welcome in my spaces.

This is an imperfect starting point. My practices will continue to evolve. I hope these small things can contribute to greater change across the craft industry.

May Monthly Report

Tuesday, June 23, 2020


Happy June! Now that June is almost over, it's time to squeeze in May's monthly report. See past reports here.

I took a bit of an intentional break from posting here the last month. I didn't want to distract from the important conversations about racism and police brutality that our country is having right now. You can read more about how I feel in these two Instagram posts: here and here. I will be sharing more on my plans soon, but for now I just want to reiterate, Black Lives Matter.


May was a busy month over here. We planted all the seedlings I'd started this Spring, some as early as February! We did a lot of yard work, and unfortunately I worked myself into a pretty big flare-up of my arthritis that is still lingering. Hoping it goes away soon, but for now I've been sewing downstairs again. It's not so bad, especially now that it's hot. My sewing room is the hottest room in the house during the summer. Now I'm all set up in the dining room and trying to make progress on some projects.


I pulled out my Liberty churn dash blocks again. This is a very long term project and I've already stretched it out over several years. I'm making an entire quilt, but the block pattern (also made in lawn) can be found in my friend Christina's book, Quilting Happiness*.


Michael requested an apron for grilling, so I dug into my garment fabric stash and whipped this one up. It was really fast and he's already been getting a lot of use out of it. I used Essex Linen Yarn Dyed* in Black and some of the webbing that I carry in my online shop. You can find it here: 1" cotton webbing. I used this pattern by Purl Soho: Adjustable Apron Tutorial


I worked on a few small birthday presents this month, including this little mouse dress. I made my Mom a mouse just like this one a couple years ago (see her here), but I thought she could use some more outfits! I drafted this dress from some other doll dresses I have, but I highly recommend the stuffed mouse pattern. It's the Flora Mouse Pattern* by Jackie Michna. They turn out so adorable.

To keep myself accountable for my stash goals, I track my yardage for fabric and yarn each month. Read more about how I track here. Here is how I did in May:

May Fabric
Used up: 1.5 yards
Brought in: 0 yards
Net: -1.5 yards
Year to date: +1 yards

May Yarn
Used up: 0 yards
Brought in: 0 yards
Net: 0 yards
Year to date: 0 yards


Continuing to play around with ice dyeing. I love dyeing cotton flour sack towels. They make good gifts and we love having a cupboard full of them too. Since they're small, they're a good way to experiment. Pretty happy with how this one came out. These are the towels I order.*


How cute is this radish we grew? We're missing our radishes that's for sure. Looking forward to planting more this Fall!


George is living the life as usual. So spoiled rotten, 24/7. He loves that we're home all the time. I think he wouldn't mind if we sheltered in place forever!

Take Care!

*Note: Any links marked with an asterisk in this post are affiliate links. This means if you click through and buy something, I make a small commission, at no extra cost to you.

Tips for Organizing and Storing Fabric Scraps

Friday, May 29, 2020


Happy Friday! Time for another sewing room organization post. If you've missed any of the previous posts in this series, you can find them all here: Sewing Room Organization Series.

This week we're going to focus on tips for organizing and storing fabric scraps! Scraps were the #1 topic that was submitted on my instagram post kicking off this series. It makes sense, most of us are constantly making new scraps! Left unorganized, they can get out of control really fast! So having a good system that works for you and your needs is an important part of having an organized sewing space. Let's get started!

Evaluate Your Needs

Before diving into reorganizing your scraps, I'd like you to ask yourself a few questions about your scrap situation:

- What types of scraps do you use most? (strips, 2.5" squares, 5" squares etc.)

- What kind of scrap projects do you make? (completely scrappy or more curated color scheme)

- What is your current scrap storage solution? What about it is or isn't working for you?

Now that you have a bit of a feel for your specific situation, let's get to organizing!

What Size Scraps to Keep

It's important to start by defining what a scrap means to you. This is very specific to each individual, depending on what types of projects you sew and what kind of piecing you enjoy. Also, how much space you have to store scraps! If you often find yourself working with little pieces and doing small scale piecework, you'll probably want to hold onto even the smallest scraps. If you're not interested in doing that, only save scraps the size that you think you'll actually use. Holding onto super small scraps you won't sew with will only clutter up your space!

For larger pieces, if a piece is around a fat eighth (9"x21"), I usually keep it folded in my stash. If it's a scrap that I still have yardage of, I'll often tuck it into the middle of the yardage. Or you could designate a storage bin for super tiny scraps and also for larger pieces that could be big enough for a zip pouch or other small project.

There isn't a right or wrong size to keep or toss. Figure out what works best for you!

What to Do with Scraps You Don't Want

There are a lot of things you can do with unwanted scraps, aside from throwing them away. Here are a few ideas:
- Use as stuffing for a pillow, pincushion or softie
- Give to a friend (or trade!)
- Sell them (I find a gallon ziploc bags full go fast!)
- Donate to your local library/school/community group/neighbors
- Bring to a retreat or your local quilt guild to share

Organizing Scraps

Here are just a few of the many different ways you could choose to keep your scraps organized. I'd recommend considering how you use your scraps when deciding how to organize them.

By Color
Keep scraps separated into color groups.

By Print
Keep scraps organized by print type. Ex: stripes, dots, blenders, solids, focal prints, novelty, holiday, etc.

By Size
Keep scraps organized by size. Ex: strips, small squares, large squares, etc.

By Designer/Collection
Keep scraps from specific designers or collections separated.

By Project
Keep scraps from individual projects organized together

By Fabric Type
Keep scraps organized by fabric type. Ex: Quilting cotton, linen, canvas, garment fabric, etc.


Personally, I use a combination of these organizing styles. First, I have my scraps separated by type. So all my linen/canvas scraps are together, garment fabric scraps and then quilting cotton scraps. Within my quilting cotton scraps, I have those organized by color. I also have two other small collections of scraps separated: Liberty Lawn scraps and extra special novelty fabric scraps. I don't often work with all the colors or fabrics at once, so for me it makes the most sense to have my scraps organized by color.

Scrap Storage Ideas

Just like for WIPs, I'm a huge fan of drawer units for scrap storage too. Basically anything that has separate compartments for the different scrap groups will work! The number of compartments you need will depend on how many scraps you have and how you've decided to organize them. Most of my scraps are organized in these drawers from The Container Store (Tall Opaque Modular Stackable Drawer*). They were an investment, but they've held up really well over the last four years and survived a thousand mile move unscathed.


Previously I used these inexpensive drawer units* that you can find at Target or Walmart, they worked great too!


Bins, boxes, and baskets work great for storing scraps too, and can easily be stored on a bookshelf or other storage unit. something opaque would be nice and hidden in a shared space!


If you don't have a lot of room for drawers or baskets, you could keep your scraps separated with ziploc bags. I organized and stored my scraps this way for many years when I was in a smaller space! I found it to work well and the bags lasted a really long time so you don't have too feel too guilty about the extra plastic. You could also use paper envelopes for a plastic-free option.

Scrap Processing

As I mentioned in the post on keeping your tabletop clutter free, I keep a big bin on the floor near my machine for tossing scraps as I cut. This really helps keep my sewing room cleaner, and it means I can tackle that bin all at once instead of constantly needing to put scraps away. I highly recommend using some kind of temporary storage location for scraps you're making. It's especially handy if you process your scraps before storing them. This will depend on how you use scraps and how you have them organized. If you are storing your scraps by size, you may choose to cut your scraps into those specific sizes before putting them away. So if you have a running stash of 2.5" strips or 5" squares, you can process your scraps into those sizes first.

I don't currently do much to my scraps before putting them away. I'll sometimes trim off little werid cuts from cutting curves or something, but not too much beyond that. I'd love to implement a bit of this into my process though. I love the idea of slowly cutting out a whole quilt worth of strips or squares from my scraps as I create them!

Scrap Project Ideas

I thought it would be fun to end by sharing a few scrap friendly projects:

Long Scrappy Pincushion Tutorial


Tiny Foundation Pieced Lined Drawstring Bag ( LDB Expansion Pattern)


HST Zipper Pouch + FOB Tutorial


Snack Size Pincushion Pattern


Warm Cool Quilt Tutorial


I hope this post has been helpful! I'd love to hear your your tips and tricks for keeping your scraps organized. Or your favorite ways to use up scraps! Don't forget, there is no wrong way! We all have different needs and preferences, these are just a few of the methods I've used to stay more organized.

Happy Sewing!

*Note: Any links marked with an asterisk in this post are affiliate links. This means if you click through and buy something, I make a small commission, at no extra cost to you.

DIY Fabric Grow Bags

Wednesday, May 13, 2020


Happy Wednesday! I have a quick little tutorial to share with you today!

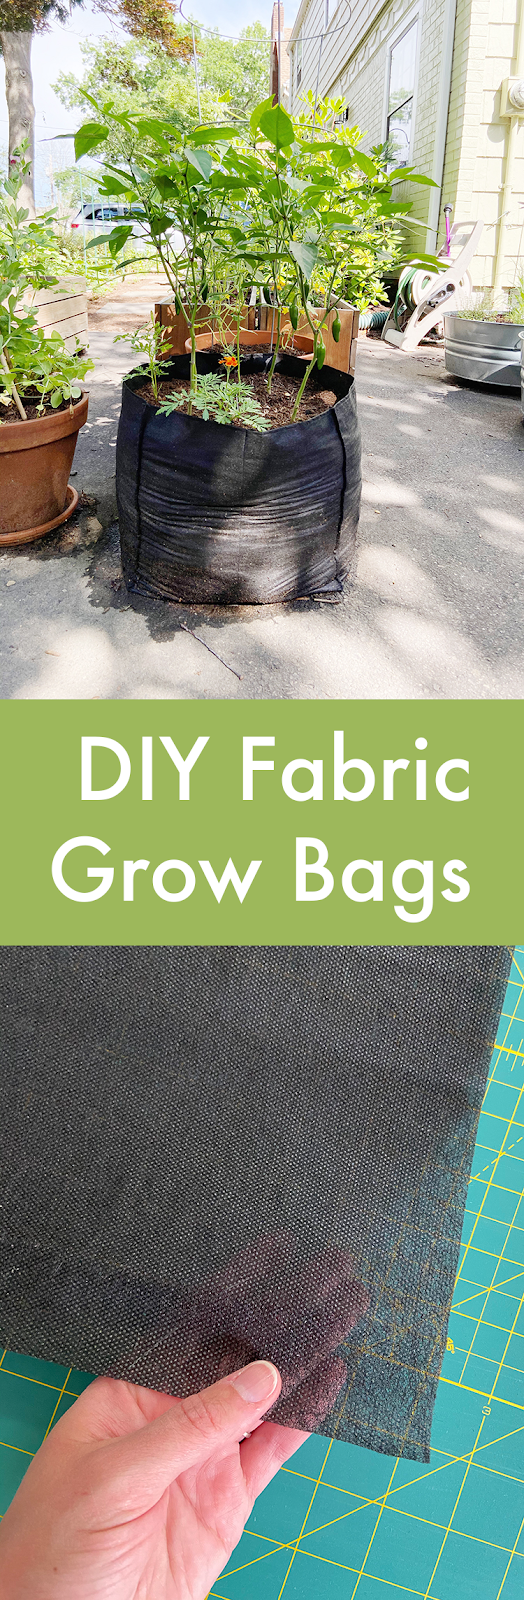
Over the weekend I set about making some DIY grow bags. I've seen grow bags at my local nursery before, but never really thought too much about them. Fast forward to the current COVID situation and I decided I wanted to make some with supplies I already had on hand to expand our planting opportunities. Ordinarily I would run to the store for some more terra cotta pots, but we're trying to avoid any unessential trips right now. I remembered we had a partial roll of weed barrier landscape fabric* leftover from a previous project and decided to try making some myself. I ended up making four and they came together really fast!


I've never used grow bags before, so I can't comment on how well they work, but I'm excited to give them a try! It was either bags or nothing for me, and I already had the fabric so it seemed like a good risk to take. I will update this post at the end of the season with my thoughts on using them! I plan on filling mine with onions and leeks. Excited to grow more veg this year.

In the meantime, I got a lot of questions about how I made mine, so I thought I would share a few quick instructions and information on how to make other sizes.


*2023 Update* - I have a brand new grow bag tutorial to share: DIY Felt Grow Bags. I tested out two different felts during the 2022 growing season and found one that worked great, held up over the winter, is easy to find AND is affordable! I think this is the best version, I highly recommend checking it out.

*2022 Update* - Unfortunately the cotton canvas was a big fail! It started to disintgrate within a month or so of planting, which was a real bummer! I do want to continue to experiment with other fabrics though, so I will probably try something else this season! Will report back if I do.

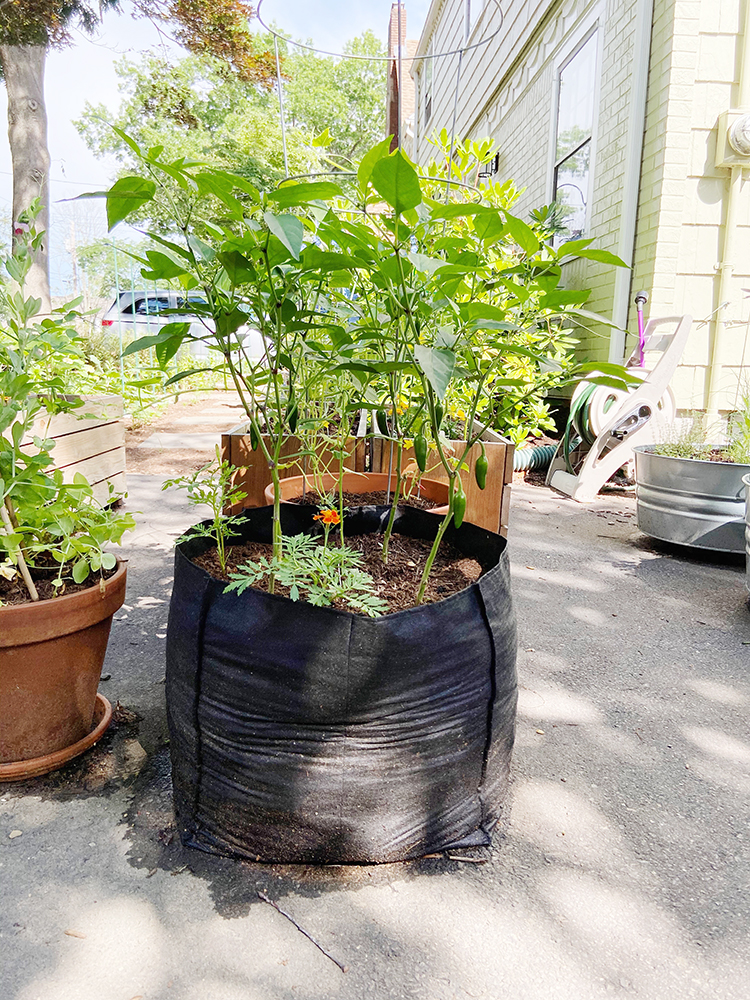
*2021 Update* - These bags worked great for our peppers all season long! They loved the extra heat from the black fabric and they drained nicely. I think the breathability of this thin fabric really suited the peppers. They sat directly on our asphalt driveway, so the very bottom stayed pretty wet. Because of this they did rip when we went to pick them up at the end of the season. 2020 was all about using what I had on hand to make it work, so I don't regret using the fabric that I did.

Now that we know how well we like grow bags, this year I plan to make them a little differently. Most commercially available grow bags are made from felt or other non-woven fabric, but it's pretty pricey. So, I am going to try using cotton canvas, in the hopes that it will last multiple seasons but still breath nicely. An added bonus is that it's a natural fiber, so I feel good about using it for growing food! I am also going to make really simple "trivets" out of wood for the bags to sit on. I think these changes will help with the overall durability. Will update here at the end of the season with the results!


The landscape fabric I used is the kind that's really thin and doesn't feel too plastic-y. It should still allow for the dirt to breathe and for water to drain. I wrote the instructions to double up the layers to provide extra durability. If your fabric is thicker, you could just cut two 32"x24" pieces and turn the top edges under.

Finished size: Approximately 16" wide, 16" tall, 16" deep
(The finished size is not exact because it doesn't account for the seam allowance. Plus once it is filled with dirt it stretches some.)

Materials: 
- 64" of 4' wide landscape fabric*
- Polyester thread (or heavy duty thread)

Cutting:
Cut fabric into (2) 32"x48" rectangles.

Instructions:
Use 1/2" seam allowances unless otherwise noted.


1. Fold rectangles in half so that they measure 32"x24". Top stitch along the fold on each piece to secure in place. You may choose to baste the other three sides if you want.


2. Cut 8" squares out of the two bottom corners on each piece.


3. Place pieces together, lining up all four edges. Secure in place with pins. Sew around three sides, leaving the top folded edge open.


4. Pull the top and bottom layers of one corner apart, pinch together so that the side seam lines up with the bottom seam. Pin and sew across with a 1/2” seam allowance. Repeat with other corner. Turn right side out.

If you need extra help understanding this step, I have a photo and video tutorial of this technique here: Simple Steps to Great Looking Gussets


5. Optional: Add tucks to each corner for extra shaping. Use each bottom corner as a guide. I have a video tutorial of this process here: Using Tucks to Add Structure to Your Bag

To make other size grow bags:
This simple math formula works for square shaped bags. Decide what size square you'd like the height and width of the bag to be. Let's use 12" as an example.

Multiply the square size by 2 to get the width of the fabric pieces to cut:
12" x 2 = 24" 

Multiply the square size by 1.5, then double it to get the height of the fabric pieces to cut:
12" x 1.5 = 18", 18" x 2 = 36" 

The corner square cut out is half the square size: 12" / 2 = 6" 

So, you'll cut 2 pieces 24"x36", and cut 6" squares from the bottom corners. Resulting grow bag will be around 12" tall, 12" wide and 12" deep. Actual finished size will be a bit smaller because of the seam allowance.

I hope you've enjoyed this tutorial! I have lots of other tutorials for everything from quilts, pillows, bags, and holiday items to informational series and techniques. Find all my tutorials here: Tutorials. My online shop is filled with patterns for quilts and bags. Find my patterns here: Jeni Baker Patterns

If you make something using one of my tutorials or patterns, I hope you'll tag me @jenib320 and use my hashtag #jenibaker on instagram!


Happy Gardening!

*Note: Any links marked with an asterisk in this post are affiliate links. This means if you click through and buy something, I make a small commission, at no extra cost to you.