

Happy Wednesday! I have a quick little tutorial to share with you today!
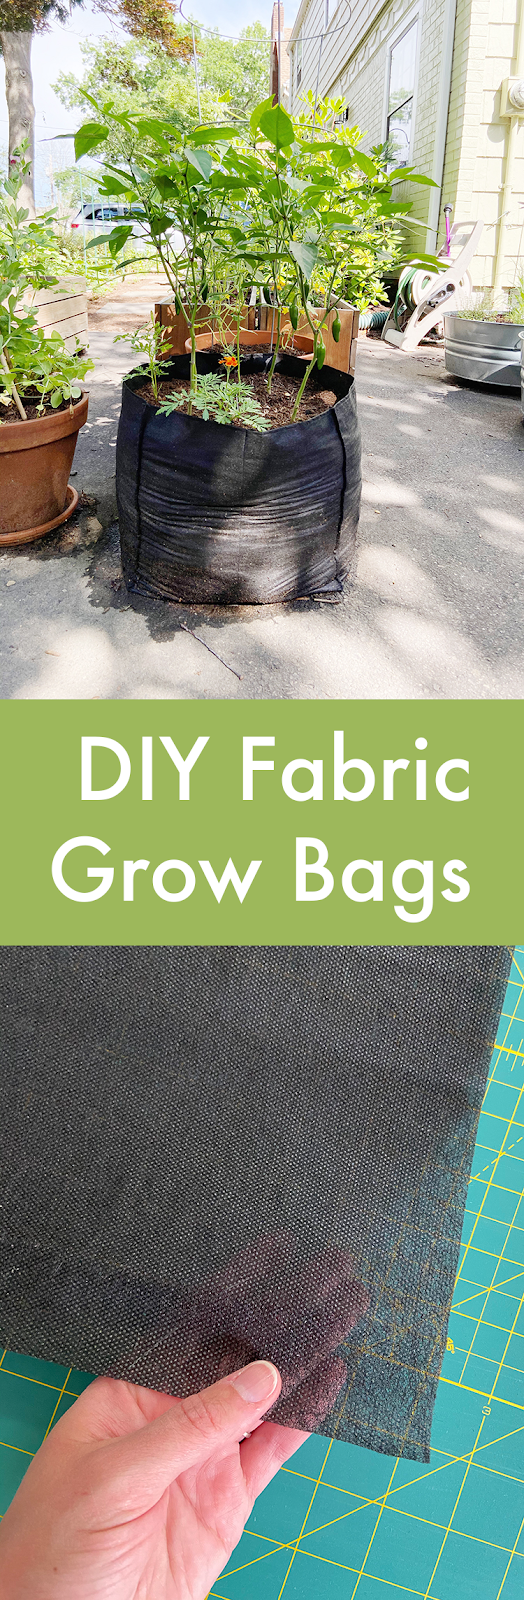
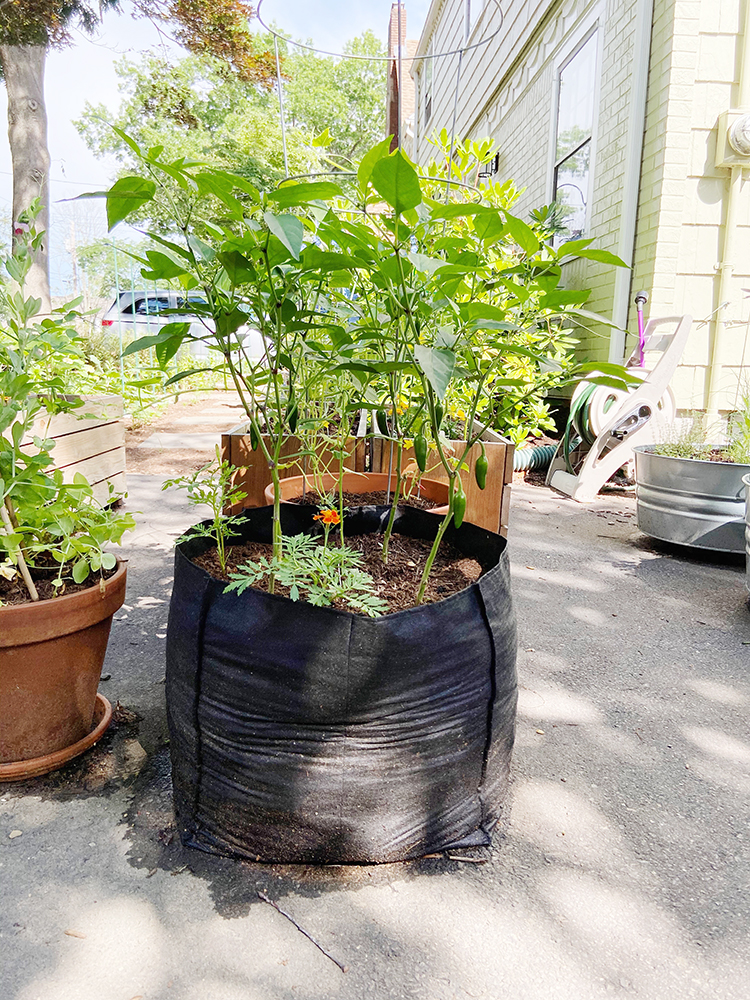
Over the weekend I set about making some DIY grow bags. I've seen grow bags at my local nursery before, but never really thought too much about them. Fast forward to the current COVID situation and I decided I wanted to make some with supplies I already had on hand to expand our planting opportunities. Ordinarily I would run to the store for some more terra cotta pots, but we're trying to avoid any unessential trips right now. I remembered we had a partial roll of weed barrier landscape fabric* leftover from a previous project and decided to try making some myself. I ended up making four and they came together really fast!

I've never used grow bags before, so I can't comment on how well they work, but I'm excited to give them a try! It was either bags or nothing for me, and I already had the fabric so it seemed like a good risk to take. I will update this post at the end of the season with my thoughts on using them! I plan on filling mine with onions and leeks. Excited to grow more veg this year.
In the meantime, I got a lot of questions about how I made mine, so I thought I would share a few quick instructions and information on how to make other sizes.
*2023 Update* - I have a brand new grow bag tutorial to share: DIY Felt Grow Bags. I tested out two different felts during the 2022 growing season and found one that worked great, held up over the winter, is easy to find AND is affordable! I think this is the best version, I highly recommend checking it out.
*2022 Update* - Unfortunately the cotton canvas was a big fail! It started to disintgrate within a month or so of planting, which was a real bummer! I do want to continue to experiment with other fabrics though, so I will probably try something else this season! Will report back if I do.
*2021 Update* - These bags worked great for our peppers all season long! They loved the extra heat from the black fabric and they drained nicely. I think the breathability of this thin fabric really suited the peppers. They sat directly on our asphalt driveway, so the very bottom stayed pretty wet. Because of this they did rip when we went to pick them up at the end of the season. 2020 was all about using what I had on hand to make it work, so I don't regret using the fabric that I did.
Now that we know how well we like grow bags, this year I plan to make them a little differently. Most commercially available grow bags are made from felt or other non-woven fabric, but it's pretty pricey. So, I am going to try using cotton canvas, in the hopes that it will last multiple seasons but still breath nicely. An added bonus is that it's a natural fiber, so I feel good about using it for growing food! I am also going to make really simple "trivets" out of wood for the bags to sit on. I think these changes will help with the overall durability. Will update here at the end of the season with the results!

The landscape fabric I used is the kind that's really thin and doesn't feel too plastic-y. It should still allow for the dirt to breathe and for water to drain. I wrote the instructions to double up the layers to provide extra durability. If your fabric is thicker, you could just cut two 32"x24" pieces and turn the top edges under.
Finished size: Approximately 16" wide, 16" tall, 16" deep
(The finished size is not exact because it doesn't account for the seam allowance. Plus once it is filled with dirt it stretches some.)
Materials:
- 64" of 4' wide landscape fabric*
- Polyester thread (or heavy duty thread)
Cutting:
Cut fabric into (2) 32"x48" rectangles.
Instructions:
Use 1/2" seam allowances unless otherwise noted.

1. Fold rectangles in half so that they measure 32"x24". Top stitch along the fold on each piece to secure in place. You may choose to baste the other three sides if you want.

2. Cut 8" squares out of the two bottom corners on each piece.

3. Place pieces together, lining up all four edges. Secure in place with pins. Sew around three sides, leaving the top folded edge open.

4. Pull the top and bottom layers of one corner apart, pinch together so that the side seam lines up with the bottom seam. Pin and sew across with a 1/2” seam allowance. Repeat with other corner. Turn right side out.
If you need extra help understanding this step, I have a photo and video tutorial of this technique here: Simple Steps to Great Looking Gussets

5. Optional: Add tucks to each corner for extra shaping. Use each bottom corner as a guide. I have a video tutorial of this process here: Using Tucks to Add Structure to Your Bag
To make other size grow bags:
This simple math formula works for square shaped bags. Decide what size square you'd like the height and width of the bag to be. Let's use 12" as an example.
Multiply the square size by 2 to get the width of the fabric pieces to cut:
12" x 2 = 24"
Multiply the square size by 1.5, then double it to get the height of the fabric pieces to cut:
12" x 1.5 = 18", 18" x 2 = 36"
The corner square cut out is half the square size: 12" / 2 = 6"
So, you'll cut 2 pieces 24"x36", and cut 6" squares from the bottom corners. Resulting grow bag will be around 12" tall, 12" wide and 12" deep. Actual finished size will be a bit smaller because of the seam allowance.
I hope you've enjoyed this tutorial! I have lots of other tutorials for everything from quilts, pillows, bags, and holiday items to informational series and techniques. Find all my tutorials here: Tutorials. My online shop is filled with patterns for quilts and bags. Find my patterns here: Jeni Baker Patterns
If you make something using one of my tutorials or patterns, I hope you'll tag me @jenib320 and use my hashtag #jenibaker on instagram!
Happy Gardening!
*Note: Any links marked with an asterisk in this post are affiliate links. This means if you click through and buy something, I make a small commission, at no extra cost to you.
This is a fabulous idea. Thanks for sharing.
ReplyDeleteWhat a fabulous idea! I am going to have to try this.
ReplyDeleteSewn on machine? What kind of needle did you use?
ReplyDeleteYes, sewn on a machine! Just a regular needle, I think I have an 80/12 in right now.
DeleteThank you Jenni that was going to be a question. Where
Deletewould be the cheapest option to buy this stuff in Auckland or anywhere to buy it please?
I have no idea! I live in US so I only know where to buy it in the US.
DeleteThanks for sharing this tutorial with us. SEW much better than plastic pots!
ReplyDeleteInteresting, I've never seen these before, but I live in a small townhouse so there's not a lot of growing. When I first saw the picture, I thought of those re-usable grocery bags that are a lightweight perforated fabric. Curious how the landscaping material compares?
ReplyDeleteI think it would be pretty similar! Might be a bit thicker than the landscape fabric.
DeleteVery Cool! Thanks!
ReplyDelete-Jean
❤
I am excited to see how this works out in your garden. I know for sure you will not get any naughty wild bunnies nibbling your plants. I finally learned to make little fenced in gardens with chicken wire. These grow bags are a great idea.
ReplyDeleteWhat a fun idea - talk about using what you have on hand - this looks like it will work really well. I am curious to hear an update later on in the season!
ReplyDeleteGood idea! I'm enthusiastic about any sensible ways to increase our self-sufficiency. Thank you, Jeni!
ReplyDeleteNice idea. Will have to try this out.
ReplyDeleteLove,love, love this idea. I don't have landscape fabric will try making out of other strong fabric I have on hand.
ReplyDeleteHI. I just made a couple grow bags that are round but I am going to use your pattern to copy Ikea Skubb boxes! With Covid they are closed and the click and collect is so busy. You just saved me time and money! Thanks
ReplyDeleteWe have grown potatoes in bags for about 5 years. We love the results - altho we laugh at ourselves about how much the soil costs to fill the bags. Still worth it for the "sport". This year we're trying carrots, too. Commercial bags are expensive so I'm excited to try this idea because we want more every year. Thankyou.
ReplyDeleteThis is great
ReplyDeleteGreat job. Difference is night and day from a plastic pot. I grow raspberries, squash,etc. Once filled with soul and water be careful when moving. To avoid rips. Thanks for the ideas. Will repair my commercial grow bags with landscape fabric
ReplyDeleteThank you so much for your idea, I'd like to make it for my home gardening!
ReplyDeleteDid they hold up?! Would you change anything? I’m thinking of making a few...
ReplyDeleteThey held up great during the season, but the bottoms ripped when we emptied them this Fall. I'll be updating the post soon. I'll probably just use a heavier weight fabric to make new ones, our peppers absolutely loved them!
DeleteI have landscape fabric - but I don’t want the bottoms to fall out. Do you think if I double (or even quadruple) the fabric they will hold up?
ReplyDeleteI'm really not sure! I've only made them one season, so I haven't experimented with adding more layers. I don't think it would hurt. I also think elevating them off the ground would help too.
DeleteThank you!! 🥰
DeleteWhat are Pop cans, is it soda cans?
ReplyDeleteYes, soda cans.
DeleteWhy not line bags with heavy plastic bag. Put a few holes in plastic to reduce soil loss.
ReplyDeleteYou could do that, but you'd lose all the breathability of the fabric. Personally I want the extra airflow and water drainage for my plants!
DeleteI believe the grow bags are made out of felt. The felt costs as much as buying premade bags so I just bought the bags on Amazon. They are a game changer.
ReplyDeleteYes, most ready-made grow bags are made from felt.
DeleteWhere did you buy canvas for this year's bags? I thought canvas was pretty expensive. I will be waiting to see how this year's bags do, but I will definitely be making some for next year's growing season.
ReplyDeleteI bought my canvas from Joann Fabrics. It was $10/yd regular price. With sales/coupon I ended up getting it for around $7 a yard!
DeleteWhere to get the fabric to make pots?
ReplyDeleteMaybe drop cloths that painters use would be cheaper
ReplyDeleteTHNKS
ReplyDeleteHow did the canvas bags work for a growing season? I have some material I inherited from my late aunt and I was considering this option.
ReplyDeleteThe canvas did not hold up well, unfortunately. I would not recommend using it for grow bags!
DeleteI am very surprised that cotton canvas did not hold. I was going to make one (from a canvas I bought on sale so so cheap $3/metre) but then I saw your article. Maybe your bag was too big so with so much soil it was so heavy? I will try maybe place it on a plastic saucer an maybe make it 10 gallon which is about 16"Diameter x 12" High. What do you think.
ReplyDeleteMy canvas one was around that size, and it fell apart in around a month. You're of course welcome to try though!
DeleteMay I ask where did it fall apart? Did the fabric tear in the centre at the bottom or at the seam? Hopefully that would help me. Thank you.
DeleteThe fabric actually just started to disintegrate, around the sides. It wasn't concentrated to the bottom or any of the seams.
DeleteI've made about 60 grow bags from single layer landscape material and they've lasted 2-3 seasons. The bottoms hold up but the sides developed small holes and tears. In that batch I also used polyester upholstery fabric and they've held up well even though some of the handles failed due to loosely woven or cotton blend scrap fabric.. The commercially made felt bags held up about the same as the upholstery ones but some had tears that I mended with cheap craft felt - 2 layers thick. Rather than throw away those old bags I just put one inside the other for double goodness :) and the more recent additions to the bag collection are all sewn double like the Empress of Dirt suggests.
ReplyDeleteWhat a wonder post, thank you for sharing all your info💕💕🌱🌱🪴
ReplyDelete